September 24, 2016 at 16:05
Configuring D-link DSR routers to work with 3CX
- Tutorial
 IT specialists systematically contact us with questions related to configuring border network devices (routers and firewalls) to work with 3CX. Particularly often, problems arise with administrators who have not previously worked with VoIP technologies. For example, the NAT module of the router can create problems when registering 3CX on VoIP providers, problems connecting remote telephones, as well as one-way audibility, or complete lack of sound.
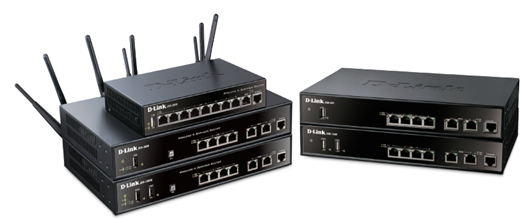
 In this article we will consider the configuration of network equipment on a series of routers D-link DSR– 150/250 / 250N / 500 / 500N / 1000 / 1000N. D-link DSR routers are selected due to a very affordable price (from $ 100), a simple interface and the presence of special functions that are responsible for working with VoIP traffic. In addition, they support OpenVPN technology., which is also supported by some SIP phones (for example, Yealink, however, phones can be delivered to the Russian market with firmware without OpenVPN). OpenVPN allows you to connect remote phones to the local network via a VPN tunnel. This will provide excellent connection security and encryption of VoIP traffic.
Another advantage of DSR routers is the ability to reserve an Internet channel. This is very useful if you have connected SIP trunks. If one Internet channel crashes, the router will automatically switch to the backup channel and all trunks will be automatically connected again. Such redundancy is difficult to provide for conventional analog lines.
The screenshots in the article correspond to the model DSR-250N, Hardware version: A1, Firmware Version: 1.09B32_WW (international) .
1. Go to the router at 192.168.10.1 with the username / password admin / admin and update the firmware from the Taiwanese or Russian site D-link (firmware for Russia has some encryption restrictions).
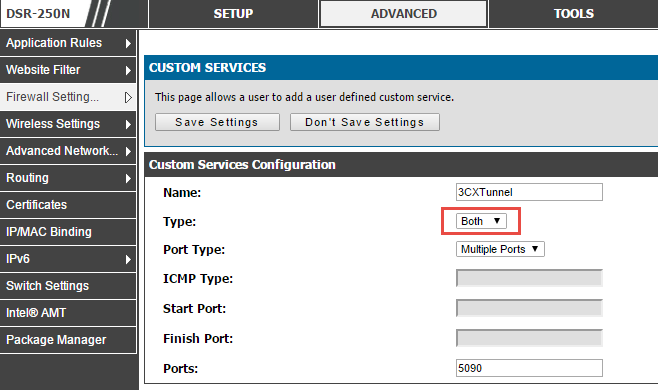
2. In the Advanced - Firewall Settings - Custom Services section, create the services that are required for 3CX. Further they are used in the rules of the firewall and traffic prioritization.
Create a SIP service (alarm). Service port 5060, UDP protocol. Then the RTP service (voice stream) 9000-9255. UDP protocol. Then the 3CX Tunnel service is 5090. The TCP / UDP protocol. and 3CX web service. Port 5001 (or 443) HTTPS. TCP protocol.



As a result, the service table will look like this. 3. After creating the services, you can proceed to creating firewall rules in the Advanced - Firewall Settings - Firewall Rules section . Rules must comply with 3CX recommendations . The first rule publishes the SIP 5060 port of the 3CX server ( 192.168.0.2) for the external address ( 62.64.127.43) , which is the address of our SIP operator. Thus, incoming SIP traffic is allowed only for the SIP operator and is denied for all other addresses. You protect 3CX from telephone hackers trying to connect to the system and make calls at your expense.


The second rule will publish RTP ports in the same way, however, for all nodes on the Internet. Rules for 3CX Tunnel and web services are created similarly. As a result, the firewall rule table will look like this. 4. In the Advanced - Firewall Settings - ALG’s section , verify that SIP ALG is turned off. 5. We use the interesting function of the D-link DSR router - prioritization of VoIP traffic through the WAN port. When traffic passes from / to the 3CX server, this traffic will be given the highest priority, and other Internet traffic will not affect the operation of VoIP. In the Advanced - Advanced Network - Traffic Management - Bandwith Profiles section, enable prioritization and create 3CXVoIPIn and 3CXVoIPOut profiles


that assign outgoing and incoming traffic the highest priority. As a result, the profile table will look like this. 6. Next, in the section Advanced - Advanced Network - Traffic Management - Traffic Selectors, we add descriptions of all types of traffic that need to be “accelerated”. The traffic coming from / to the IP address of the 3CX server will be prioritized - 192.168.0.2 . To reduce the volume of the article, I will provide only a description for the 3CXSIP service . For other 3CX services, the procedure is similar. As a result, the traffic prioritization page will look like this. 7. If you are using Split DNS, recommended for installing 3CX v15


, you can use the DNS server of the router to specify the FQDN of the server. Go to Setup - Network Settings - Lan Setup Configuration and specify the server FQDN. In addition, you can also specify the DHCP option 66 IP address here. By starting the 3CX TFTP server on the server, you can automatically configure outdated Cisco phones . This completes the configuration of the D-Link DSR router to work with 3CX.