Xiaomi Aqara Switch rework from ZigBee to Z-Wave

I decided to try integrating the switches in my home Z-Wave automation with ZigBee. For experiments, I purchased an inexpensive ZigBee battery-operated switch Xiaomi Aqara Smart Switch. It looks beautiful, plastic of the highest quality, very pleasant, a key switch with a spring mechanism, which gives a full tactile feedback.
The switch planned to use in the following scenarios:
- With a single click on / off the night light
- with a long hold dim nightlight
- when pressed twice turn on / off the LED backlight
But testing has shown that the Xiaomi Aqara Smart Switch only responds to a single tap. And when I tried to pause and hold the key for 5 seconds, it was reset to factory settings . In this form, the Aqara Smart Switch turned out to be useless for me and I decided to make a Z-Wave switch with all the functions I needed in its case.
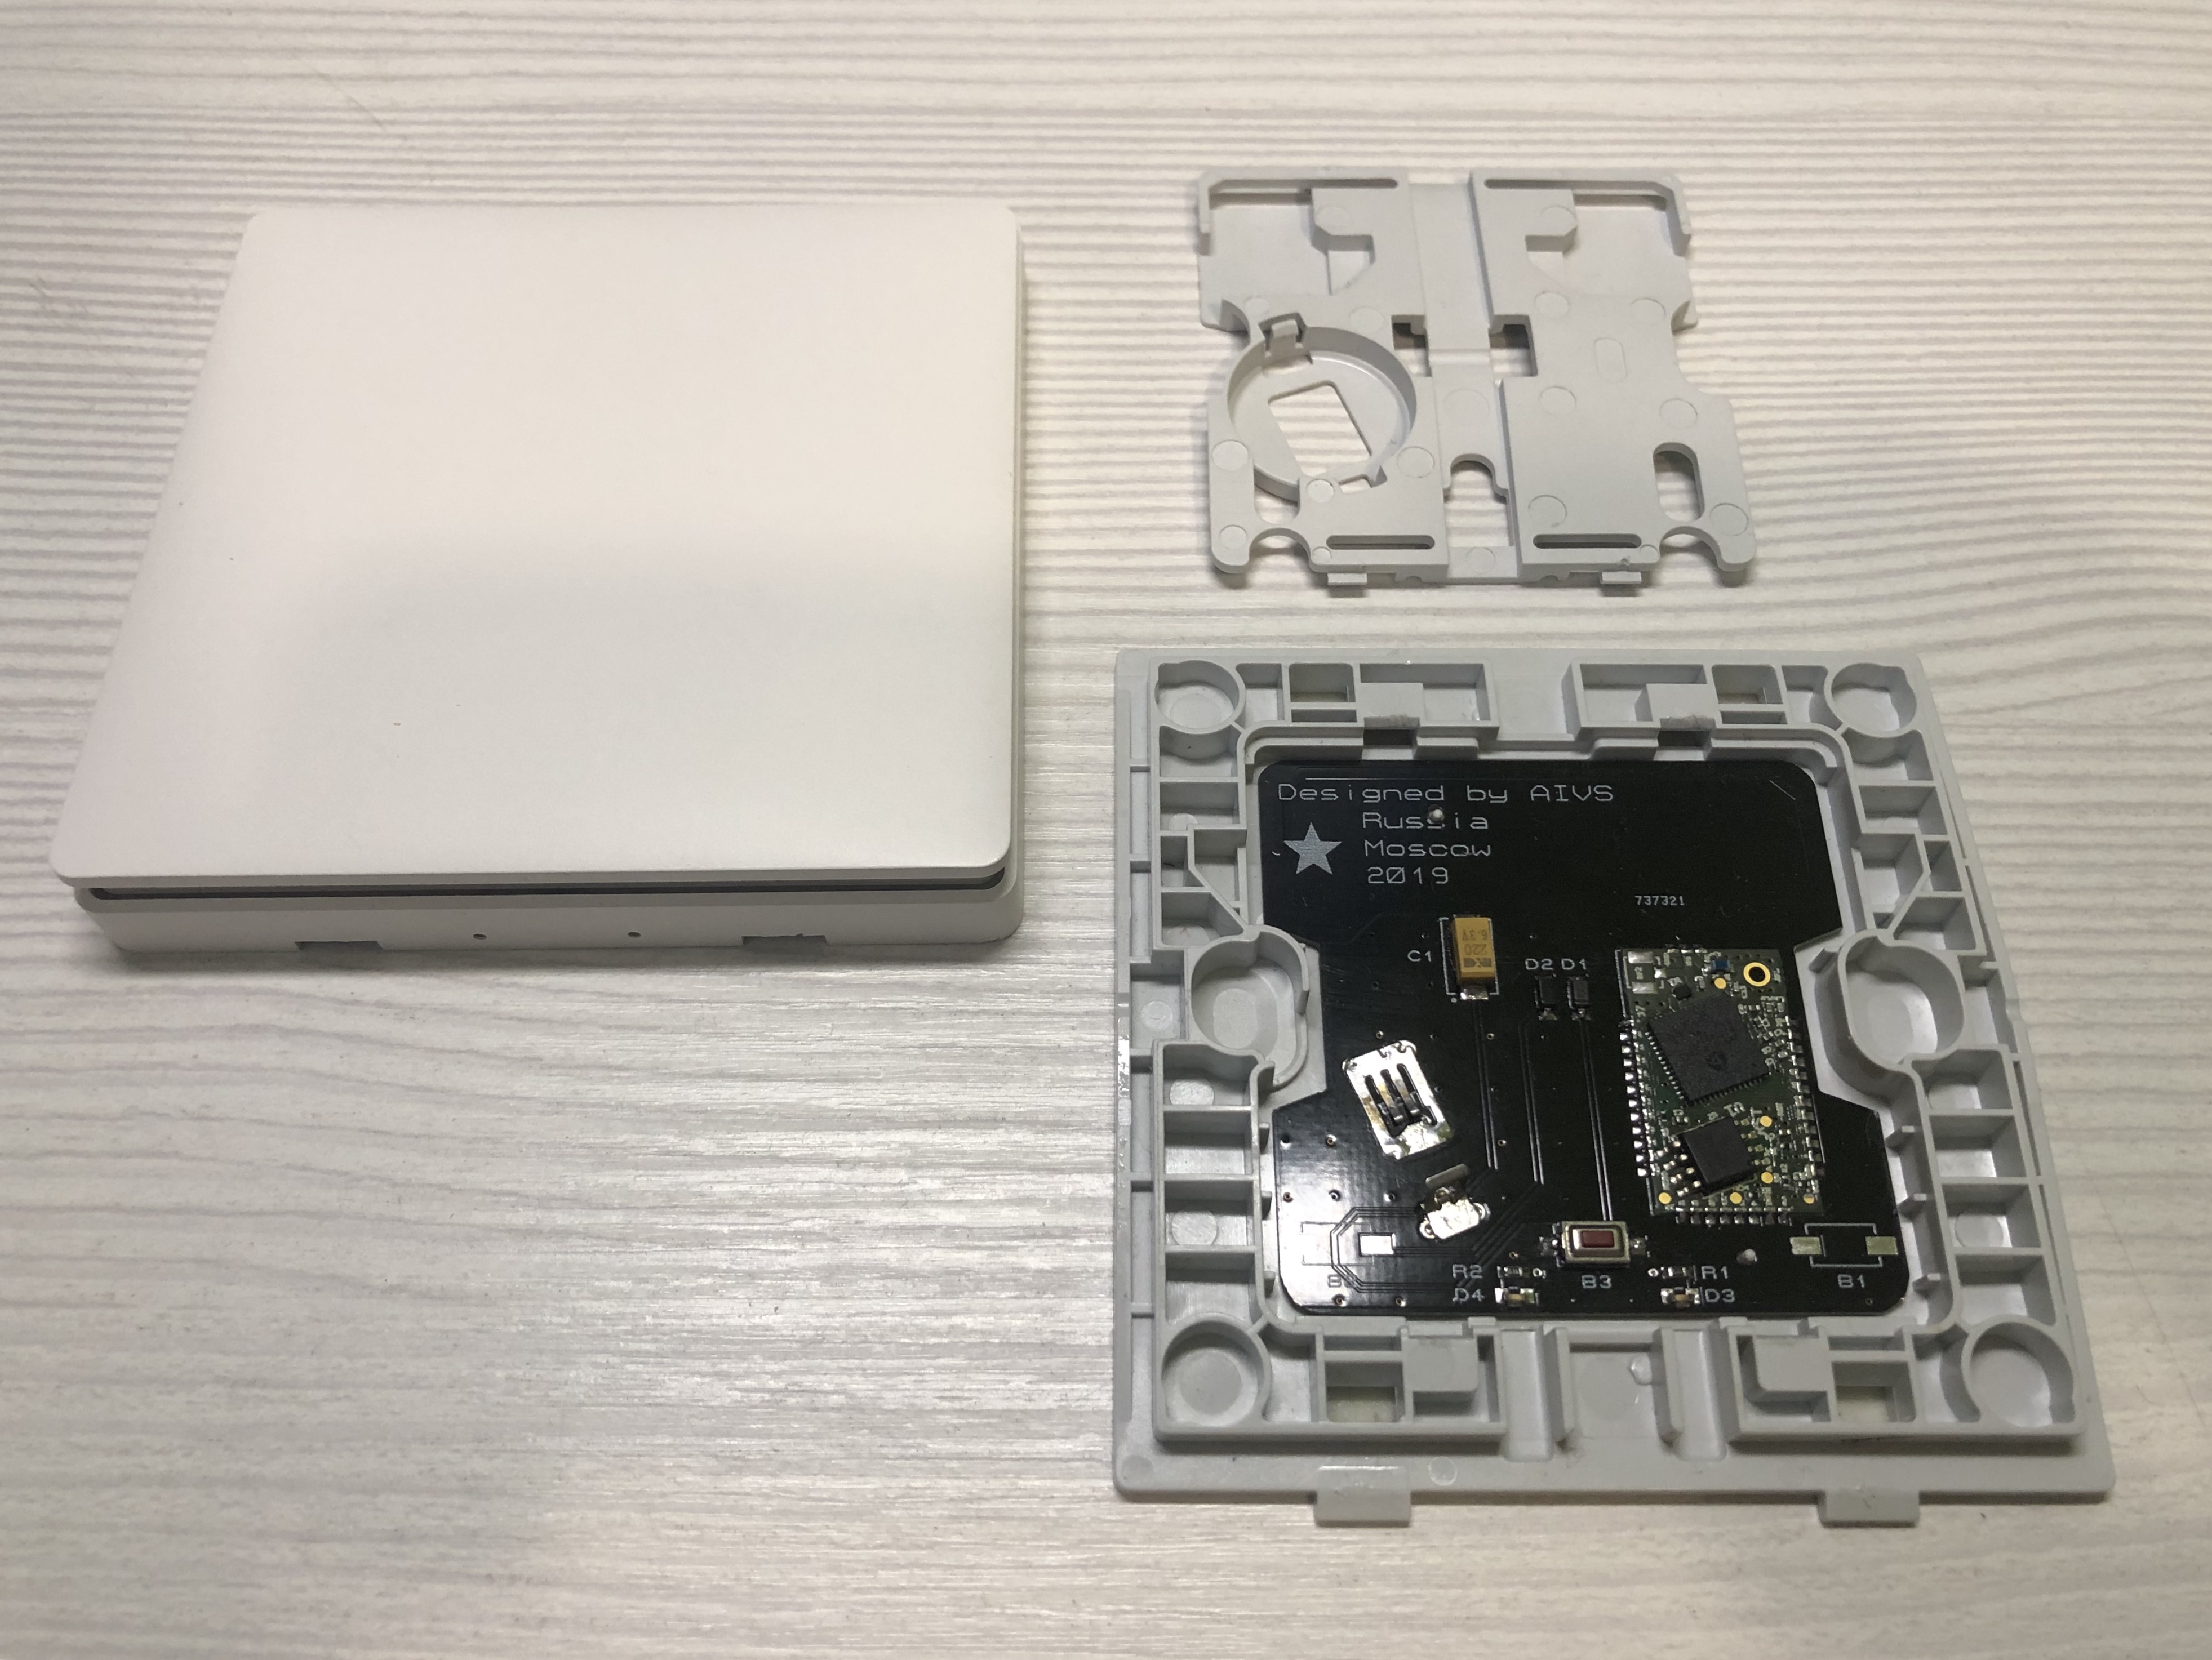
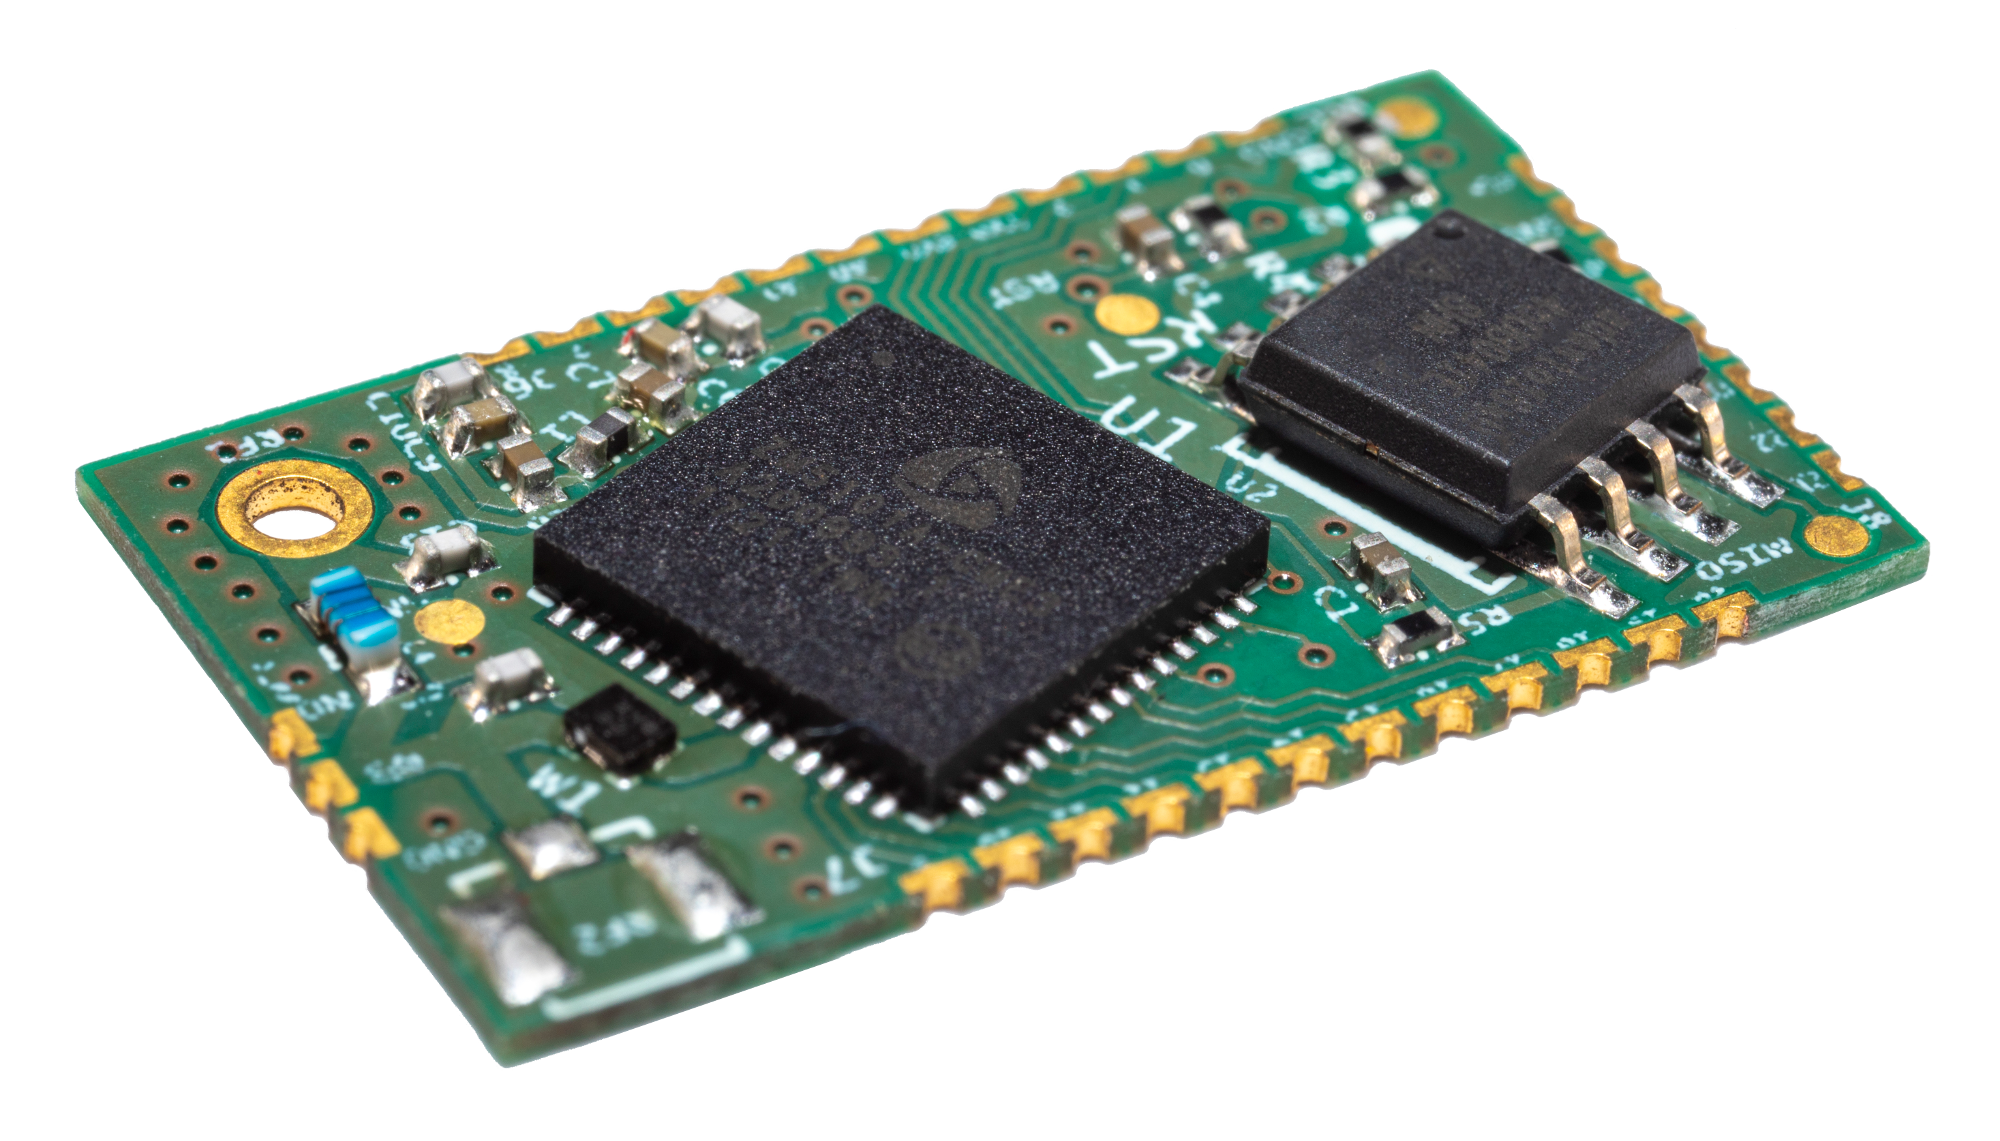 The basis of the Z-Wave switch is the Z-Uno Module - a small board on which, only the Z-Wave chip and memory, is programmed from the Arduino environment via USB. The module with a size of 25x15x1.9 mm provides access to all the pins of the Z-Wave chip. The module has a U.FL connector for connecting the antenna, or you can simply solder the 86 mm wire. This is the same Z-Uno for device manufacturers only.
I recently made several different Z-Wave switches, all looking for the perfect solution:
- Development of a touch battery Z-Wave switch with luminous buttons
- Switch Gira + Z-Wave. 4-button radio switch based on Z-Uno
- Touch radio switch on batteries. Livolo + z-uno
- Alteration of the push-button radio switch to touch
The development of the circuit breaker board did not take long. But in the course of work had to solve several problems.
Initially, I manufactured a 1.6 mm PCB test board, soldering a Z-Uno with a height of 1.9 mm onto it, it turned out that the design does not pass in height, I had to use 1 mm PCB, the same as on the original Xiaomi board.
Making the fixture for the CR2032 battery turned out to be problematic, so I removed it from the original board, and also used the tantalum capacitor 220mF from the original board.
Xiaomi also has a version with two buttons, so I made a universal charge. I got much less components for soldering than Xiaomi, the entire binding of the Z-Wave chip is already on the module. By experience, I solder the buttons without flux, so that I do not wash them later, otherwise after washing the board, the buttons quickly stop working.
The production of boards ordered in seeedstudio, came out 1000r with delivery for 10 pcs., As usual very pleased with the quality, the color is black gloss.

Circuitry, as from the first lesson on the Arduino - a pair of buttons and LEDs.
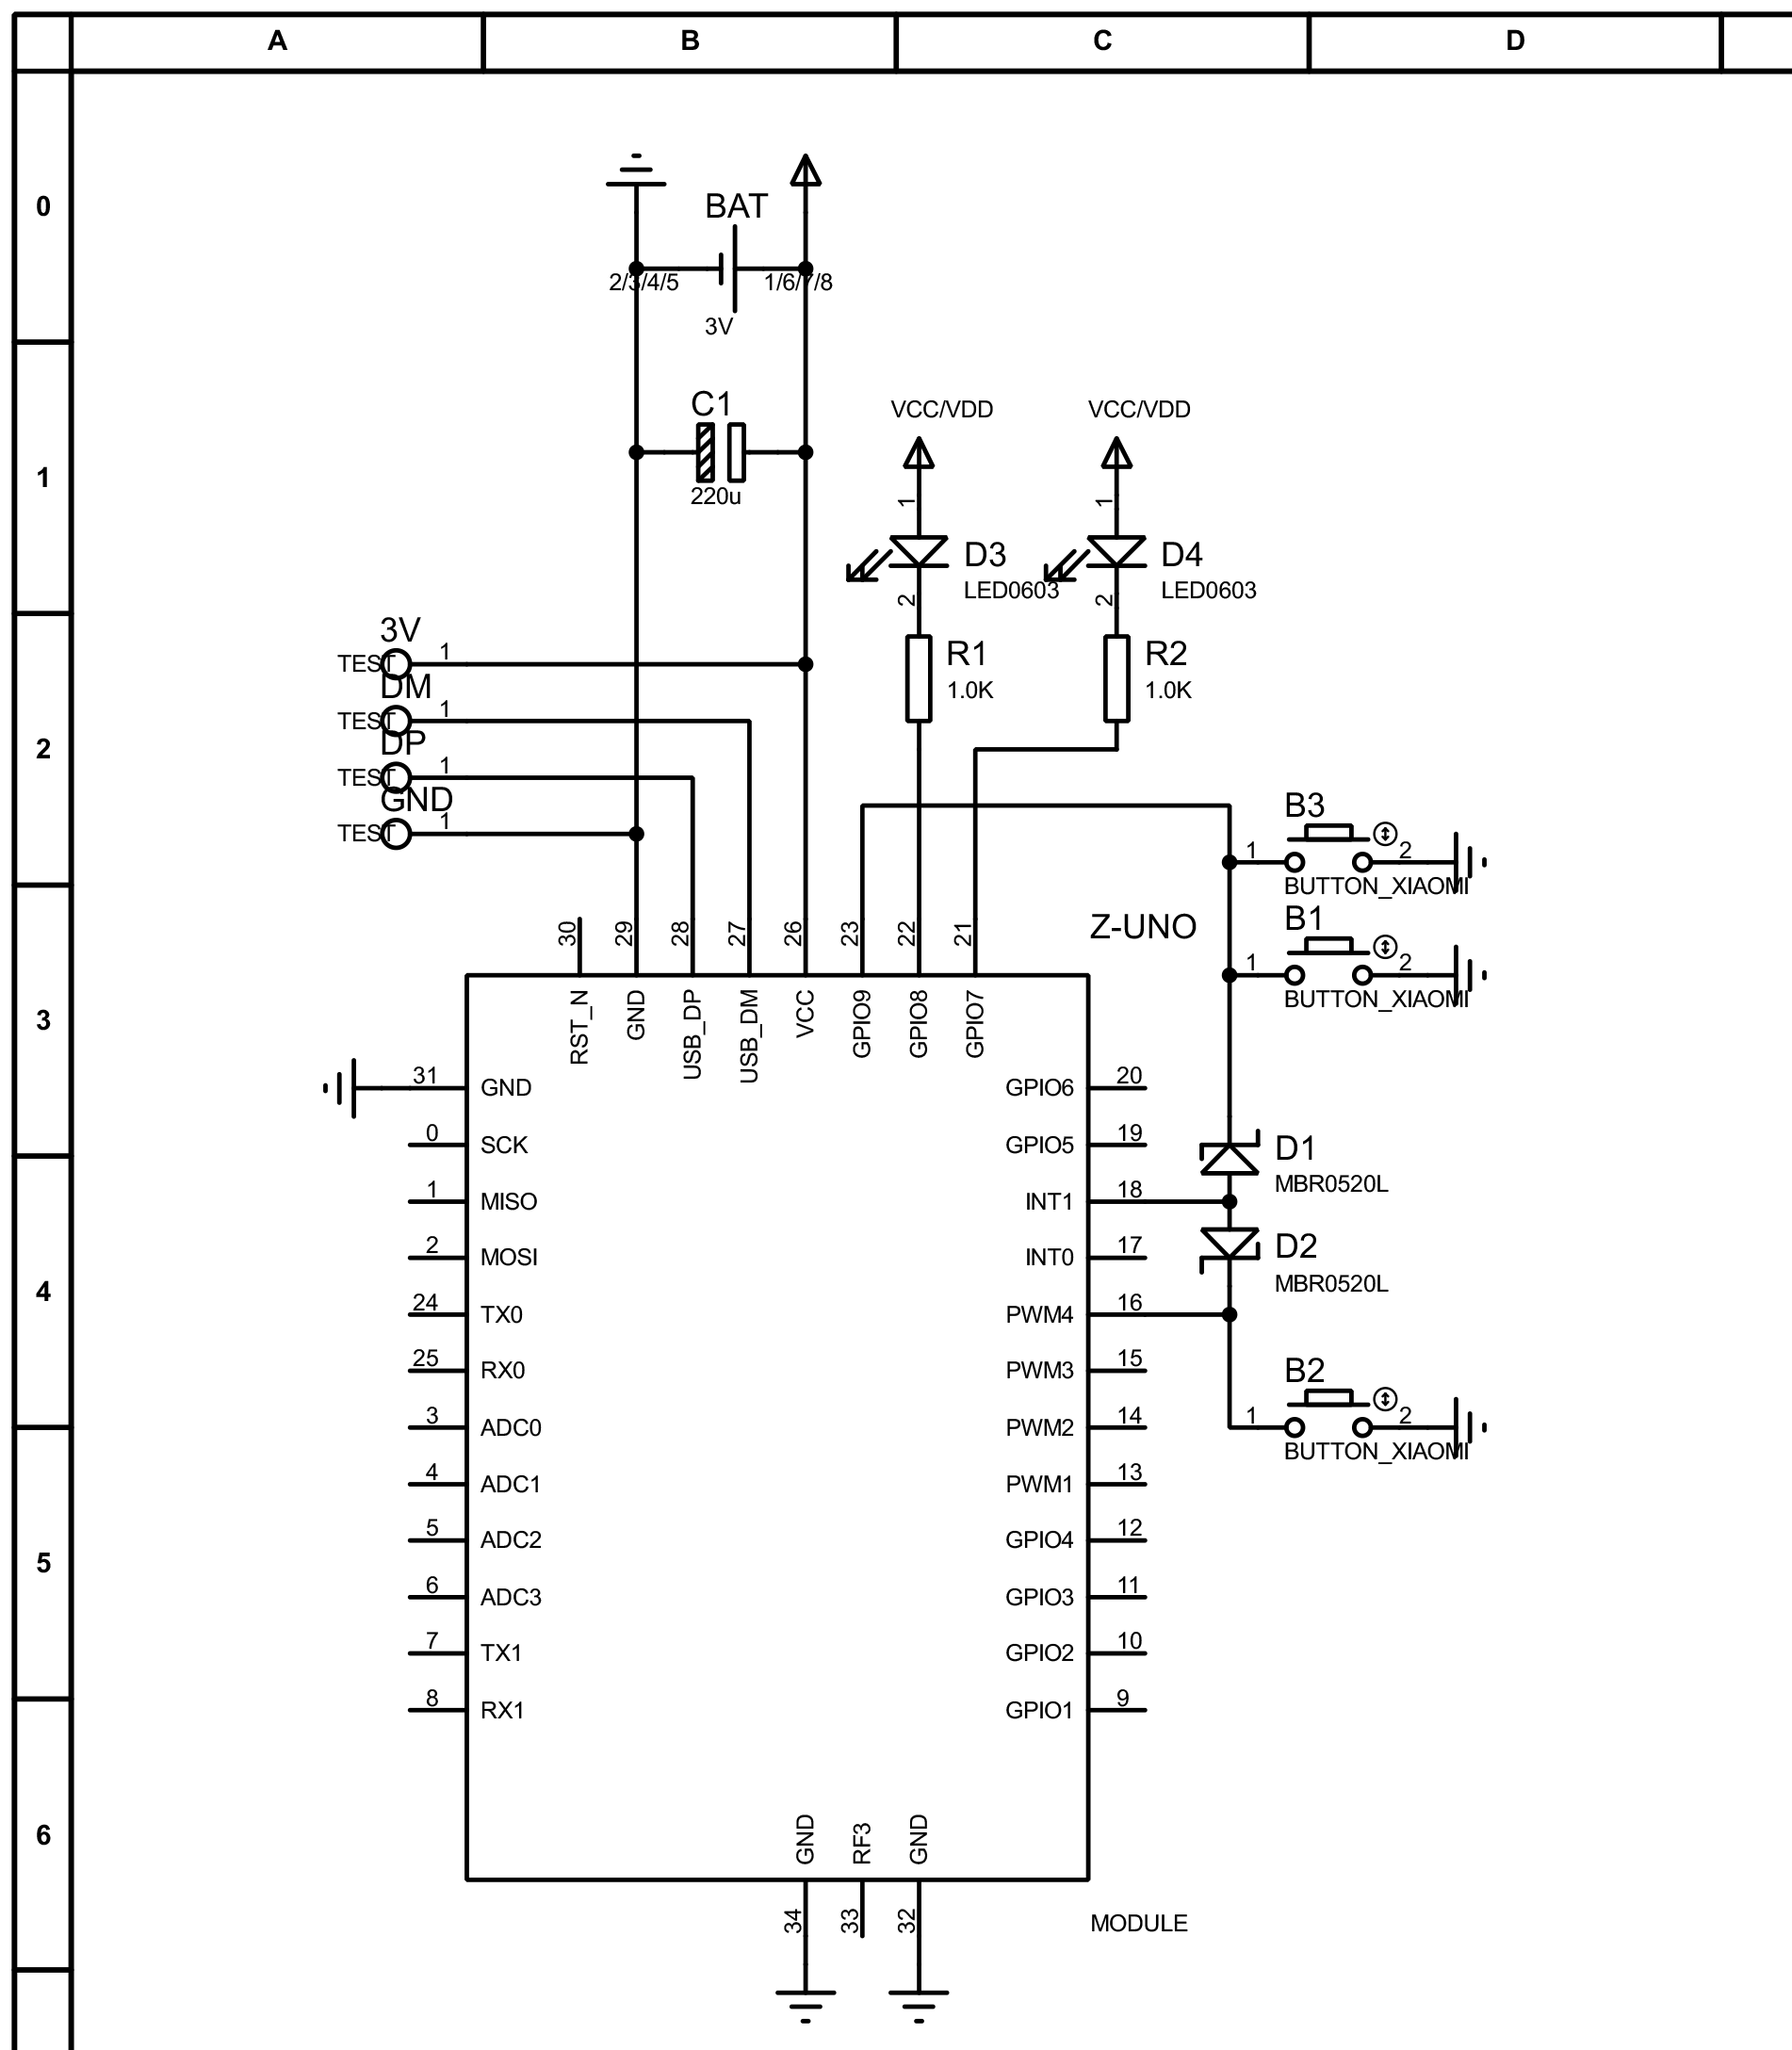
For Z-Uno there is a convenient library for working with buttons, short presses, long and double clicks are supported. Triple click is a system combination, used to add a device to the Z-Wave controller and send an information packet.
When any button is pressed, the ground closes on the INT 18 through the diodes and Z-Uno wakes up, then the buttons are polled.
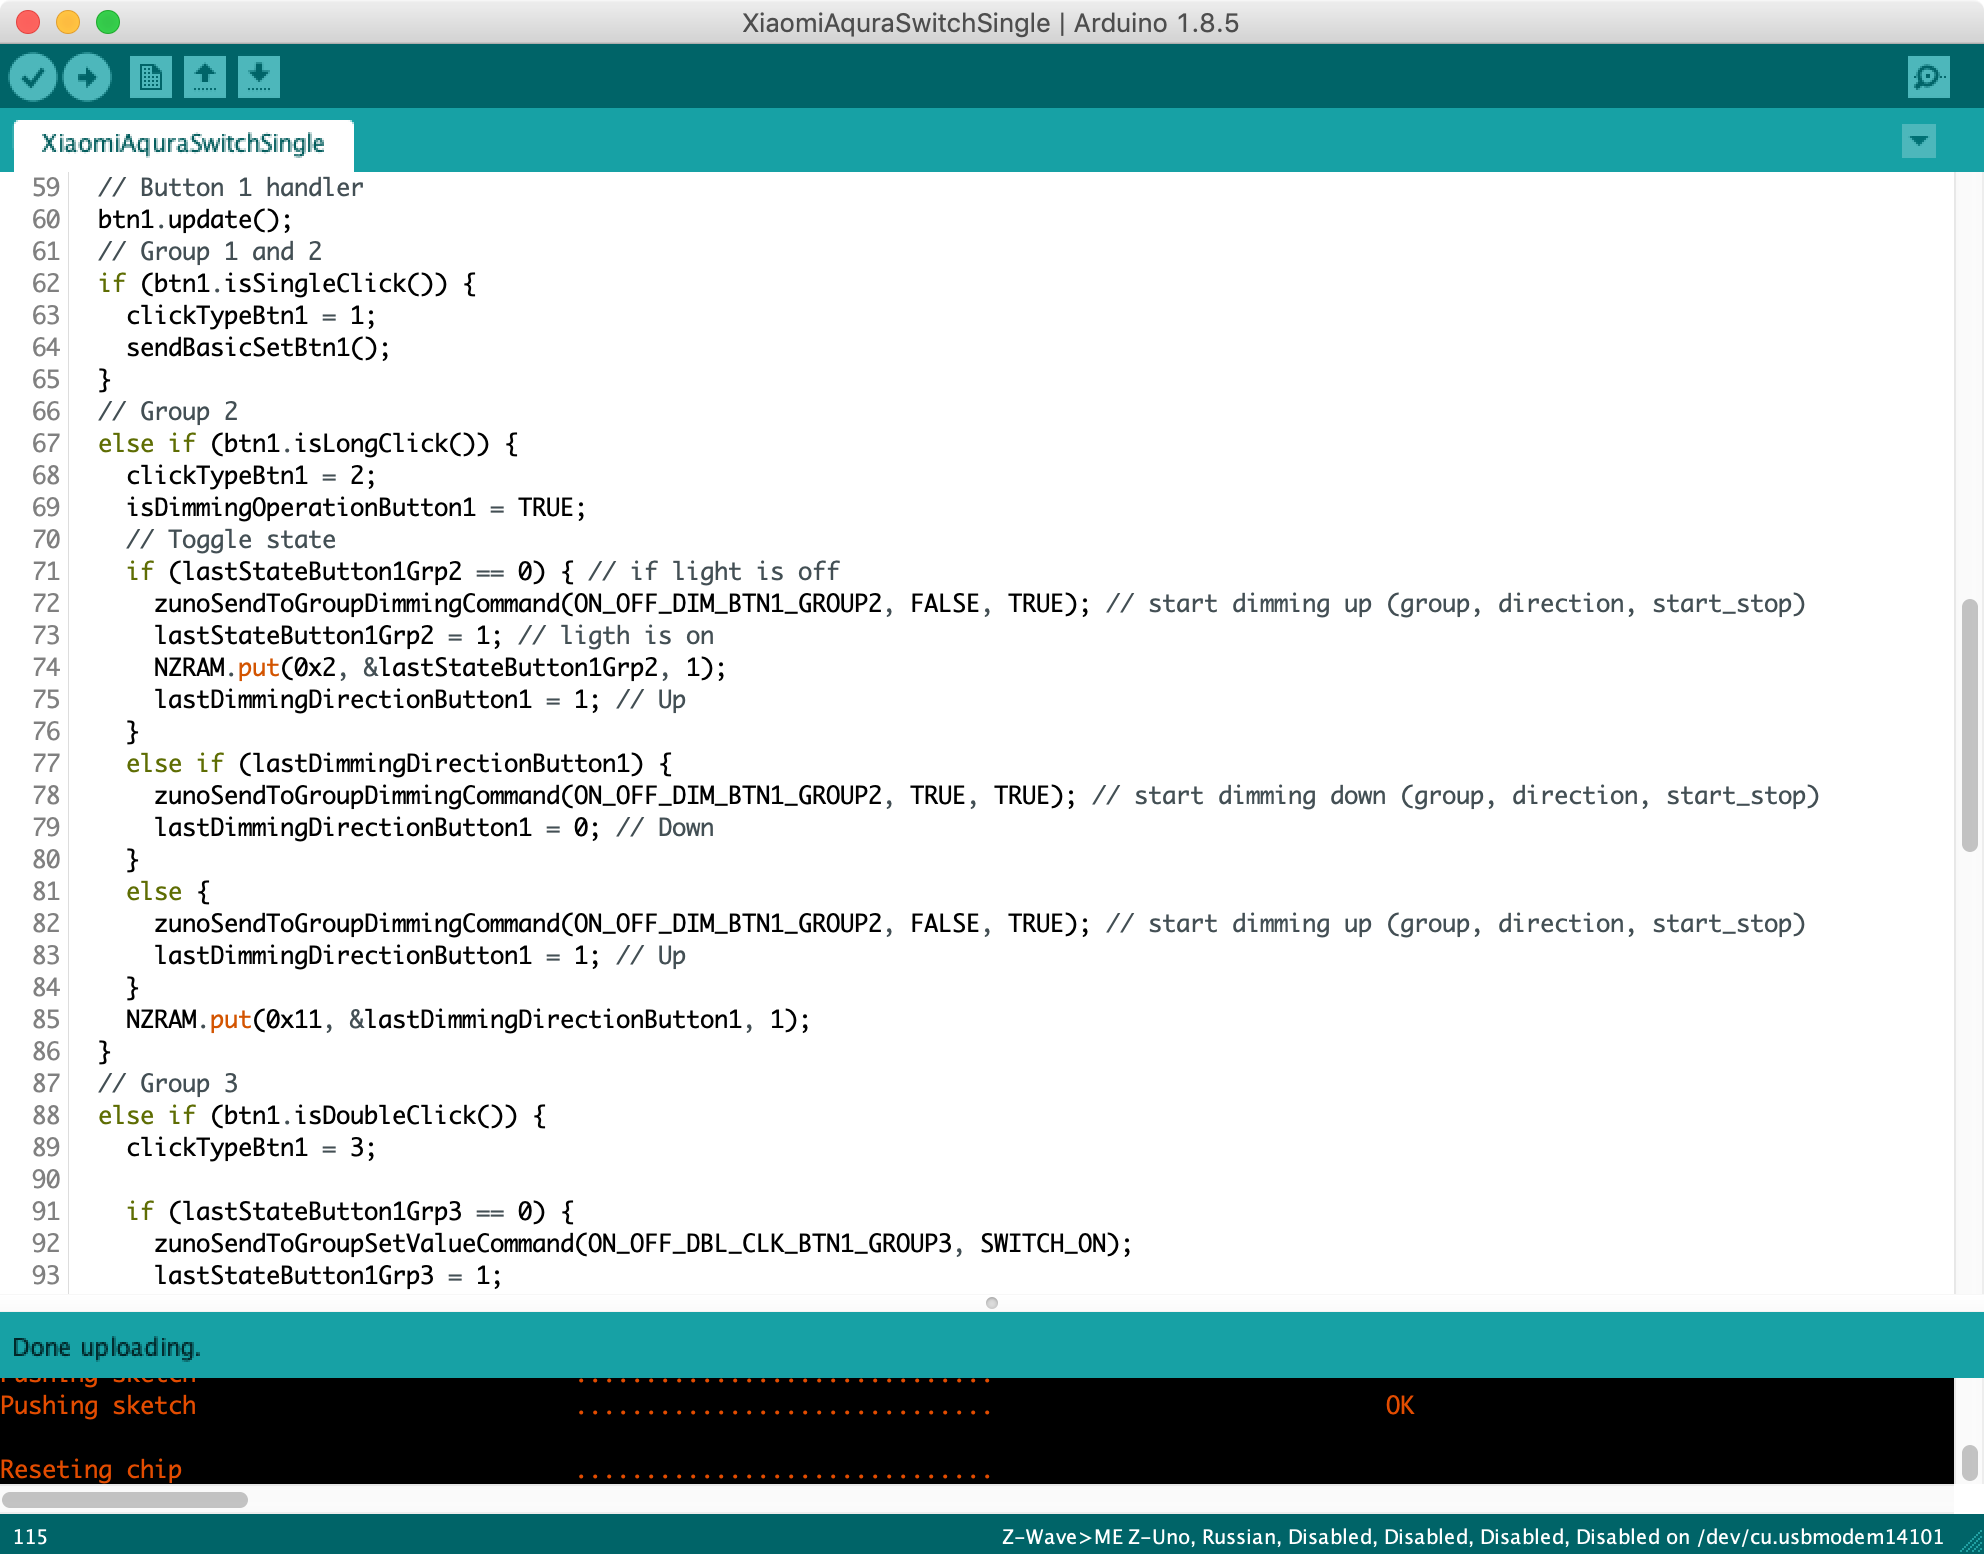
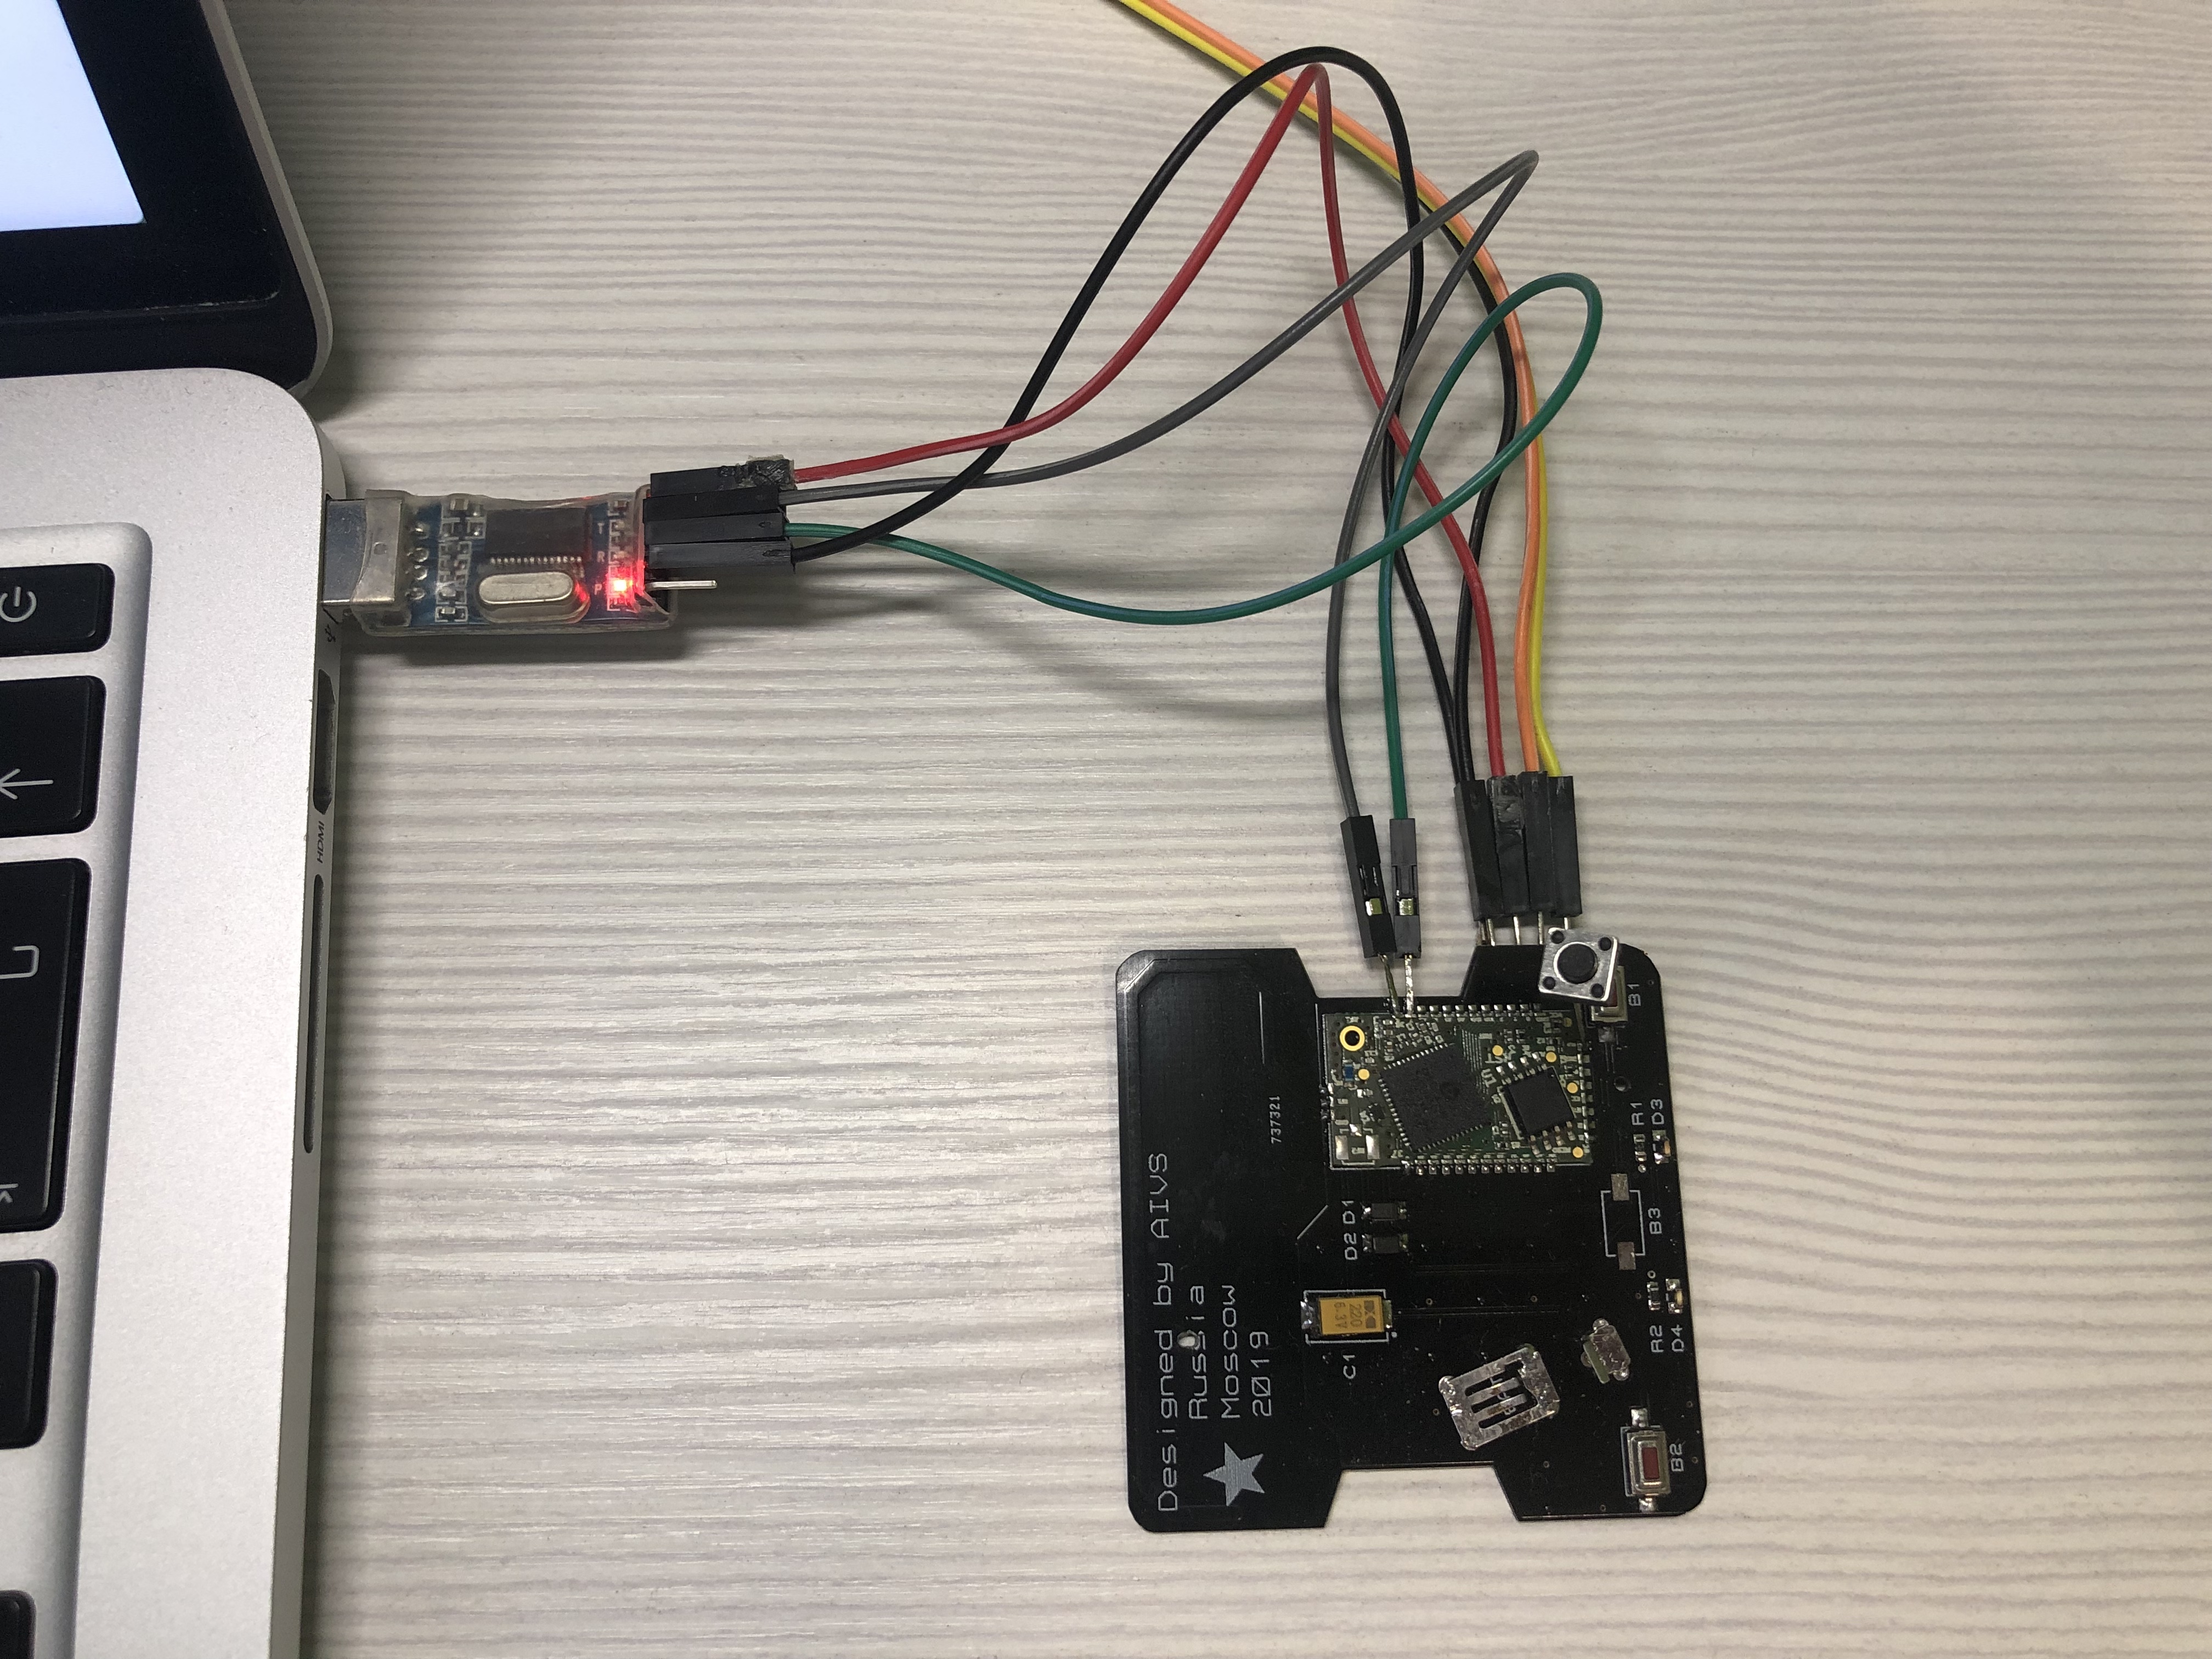
The sketch is poured via USB, for this, on the back of the board I provided GND, 3V, DM, DP points. Additionally, you need the RESET button to put Z-Uno into programming mode. Debugging can be done on the UART, they are in Z-Uno 2, both are iron.
As I planned, I implemented 3 device management scenarios, the configuration is performed using the Z-Wave RaZberry controller. There are 4 groups of associations. The first group to send to the battery charge controller. The second group for devices controlled only by short taps, i.e. can only turn on / off. The third group for dimmable devices, I have a nightlight in it. The fourth group for devices managed by double clicks, in it I will put the LED backlight.

The finished board goes great in the case, like a native one. The CR2032 battery should last about a year of work, but practice will show that you may have to optimize something else. I really like the design of the switch, I will assemble another version with two keys.
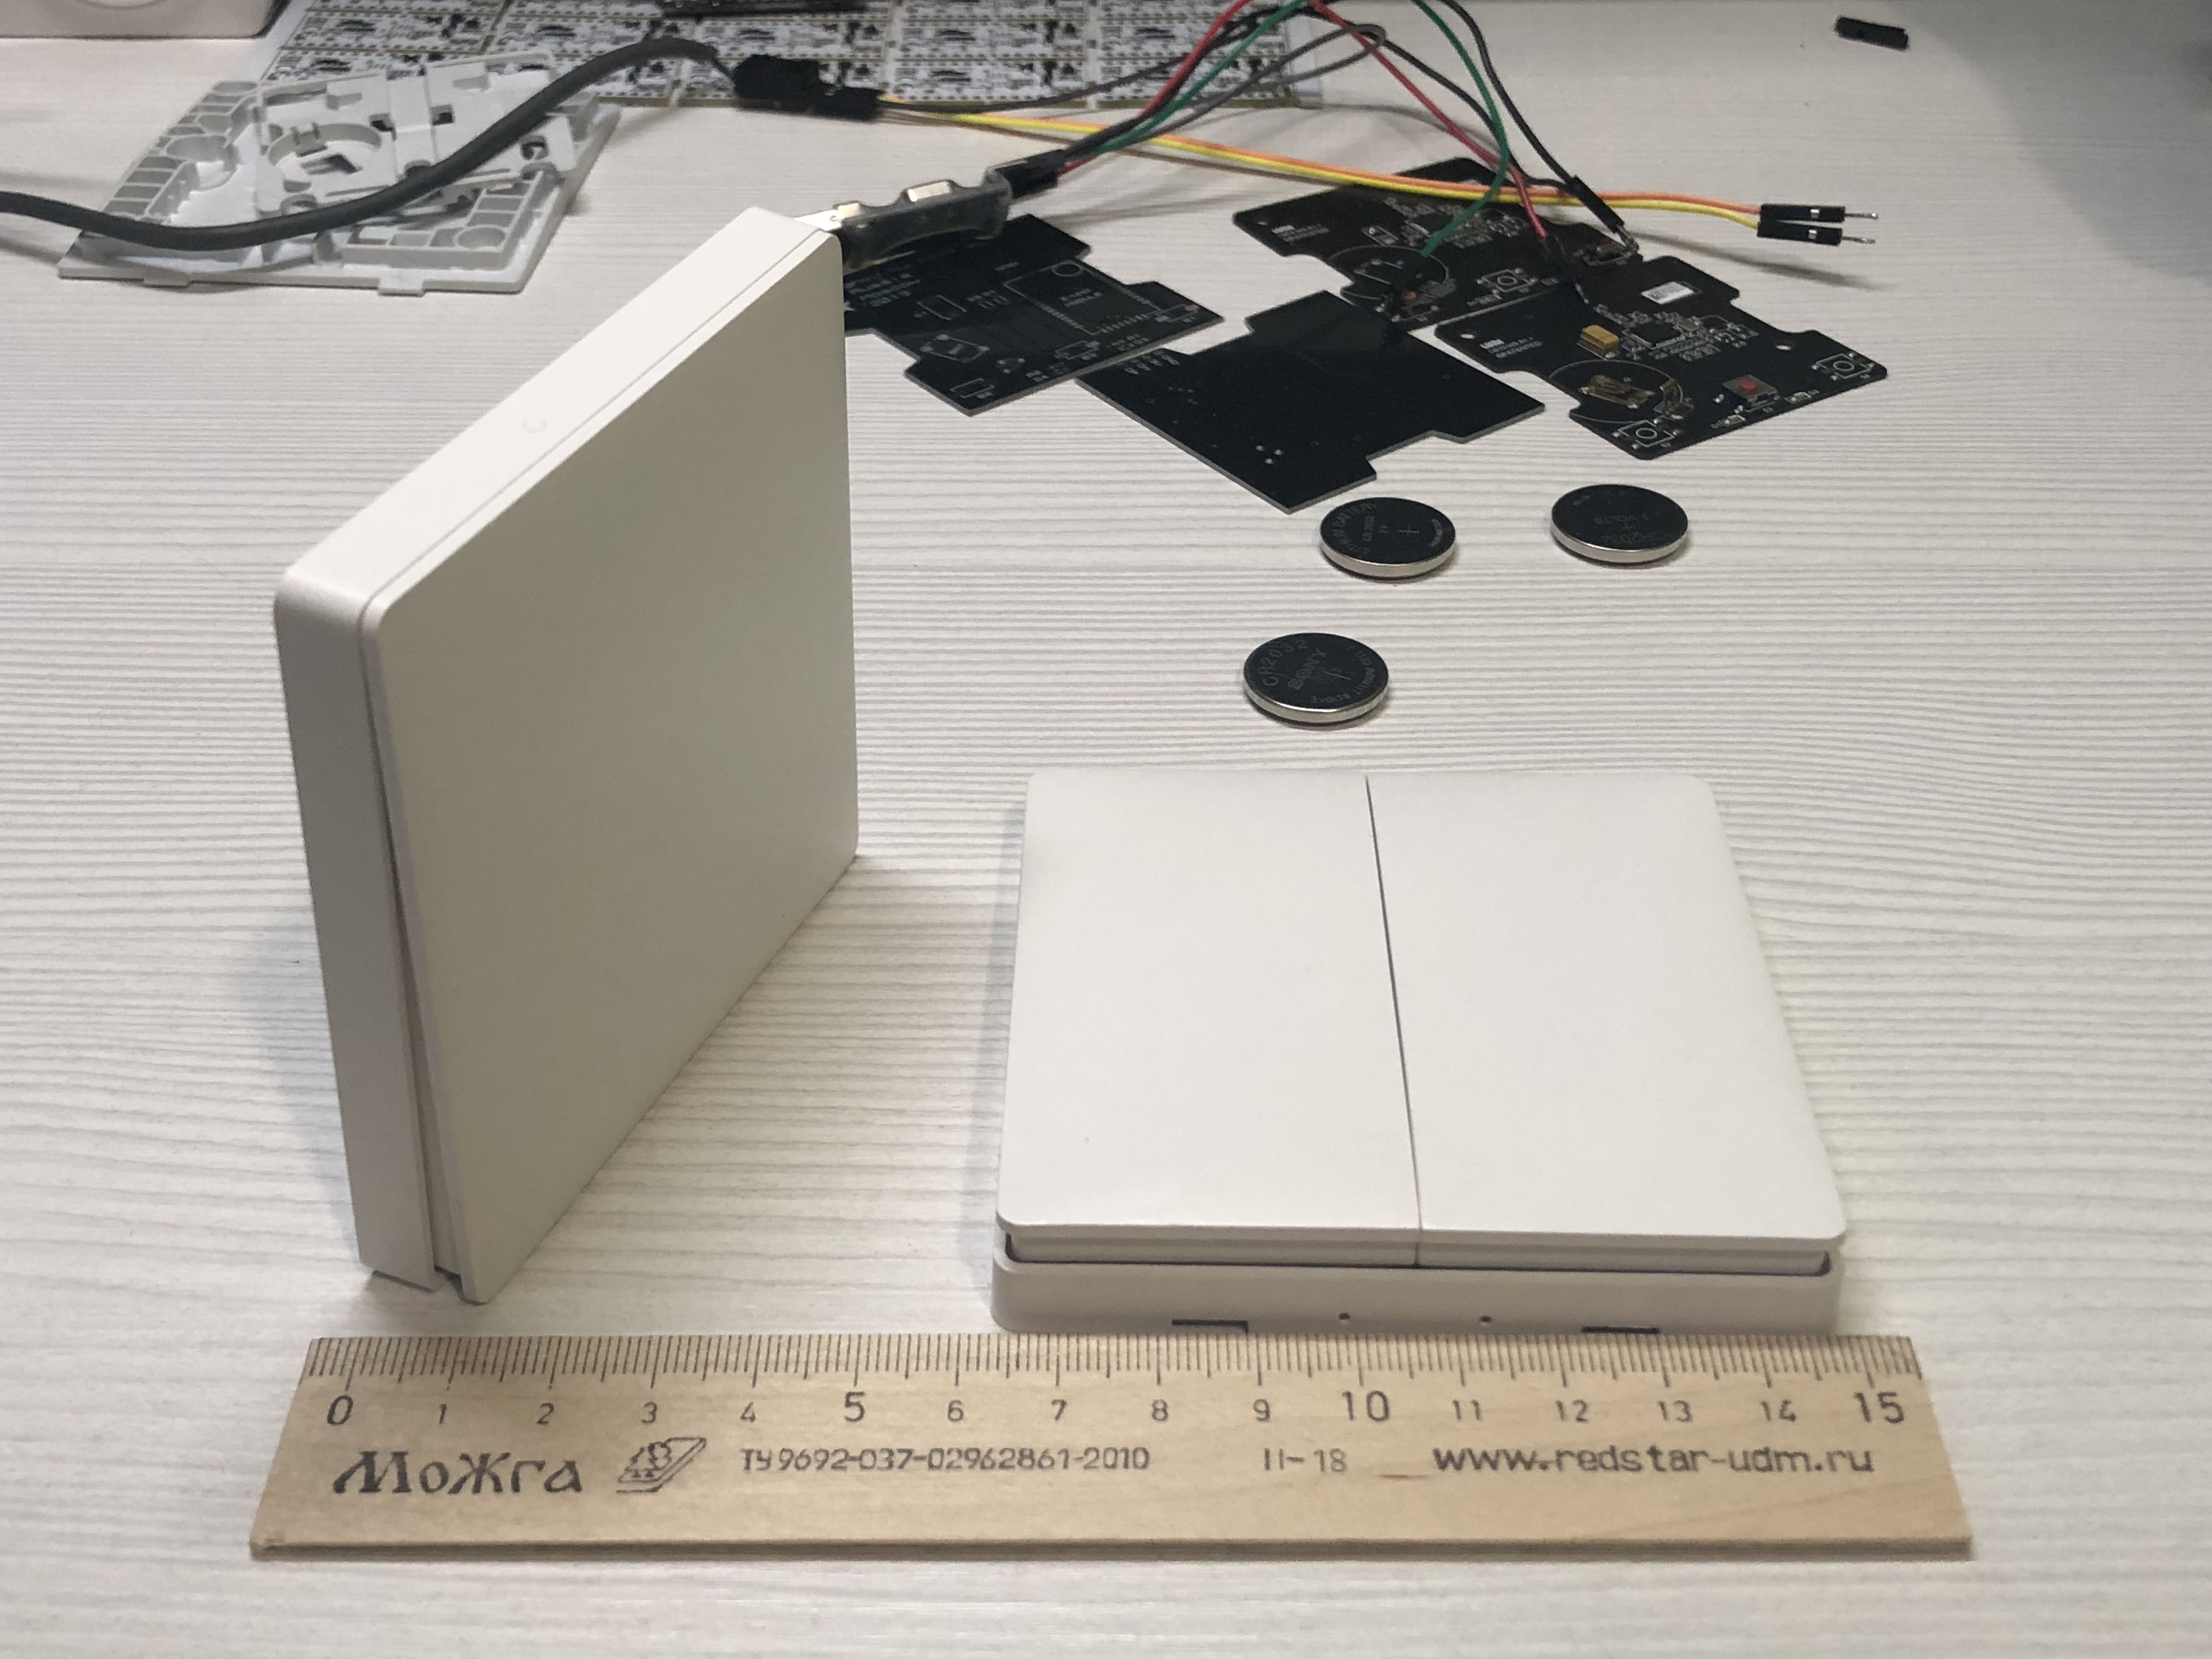
The price of the question was: 2500r (Z-Uno) + 1000r (Xiaomi Aqara Smart Switch) + 100r (1 board) = 3600r. The pleasure from the development process is priceless!