Creating minimap on Unity
- Transfer
Hello. I present to you the translation of an article from a blog on Unity development - The Knights of Unity . It will discuss the creation of a minimap. I also implemented what is described in the article and put it on Bitbucket .
What is required to create a minimap in a game on Unity? You will probably be surprised, but it is easier than you think and does not even require programming skills! Next, I will try to explain step by step how to do this.
Minimaps (or radars) are designed to display information about what surrounds us. First of all, the minimap should be centered on the main character. Then, instead of real models, you need to use readable notation on it, since minimap is often quite small, and the player may not recognize the information that the minimap is trying to provide.
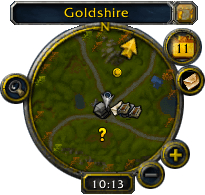
Most minimaps are circles, and we will try to create the same. Also on it you can often find additional buttons and labels. We will also try to create them.
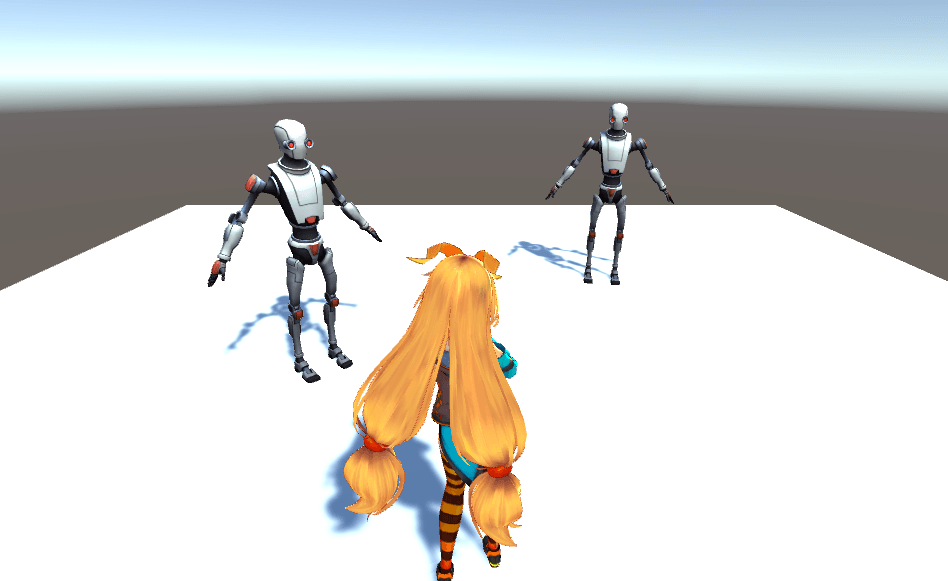
Let's start by adding something to the scene. I created a scene with Unity-chan (she will be a player) and two robots (which will be opponents).
Type of game
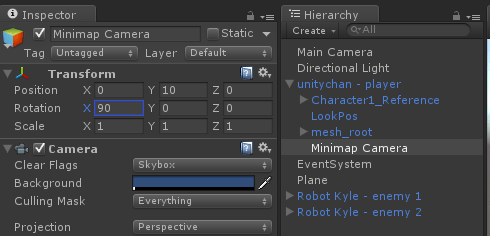
Now add a second camera. Just select the main menu item GameObject -> Camera and rename the created camera as Minimap Camera . Now make this camera a child of Unity-chan (this will allow the camera to follow it) and raise it 10 units above the head of Unity-chan , while turning down.
Setting up the minimap camera
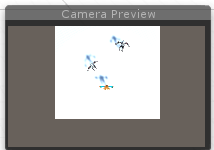
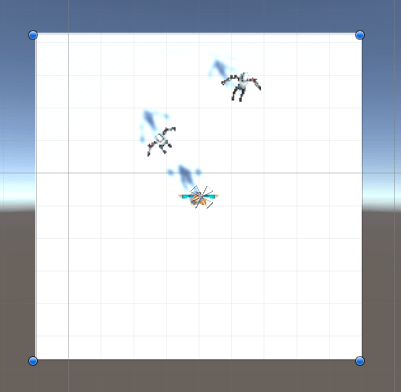
To get a good result, set the Transform component position to 0, 10, 0 and rotation to 90, 0, 0 . The camera should show something like this:
Good, but this is not a minimap yet. If you start the scene now, the camera image will simply be displayed on the screen. We must tell the game that we want to present the minimap as a UI element.
To do this, we need a Render Texture . You can easily create it by selecting the Assets -> Create -> Render Texture main menu item . Create and rename as Minimap Render Texture .

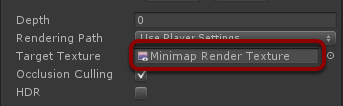
Now select the Minimap Camera and assign in the inspector the Target Texture field the previously created Minimap Render Texture .
If you try to run the scene, you will notice that the image from the Minimap Camera is nowhere to be seen . The image is now hidden in the created Minimap Render Texture .
Let's now create a Canvas to add UI elements to it. Select the menu item GameObject -> UI -> Canvas and Canvas will appear on the scene.

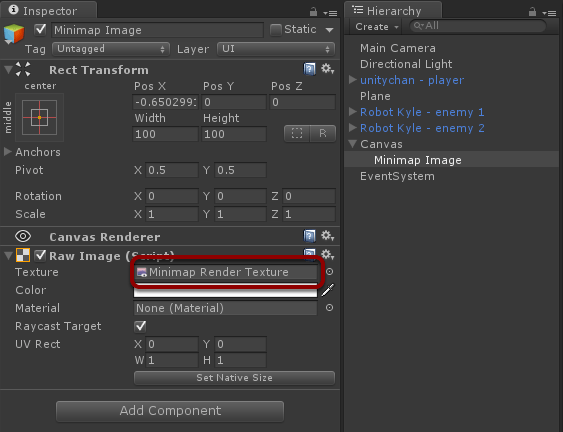
You need to add a Raw Image object to the Canvas to use the Render Texture with it . Select the menu item GameObject -> UI -> Raw Image , rename the created object as Minimap Image and assign our Minimap Render Texture in the inspector to the Texture field .
As a result, we have a UI element that displays the image from the Minimap Camera !
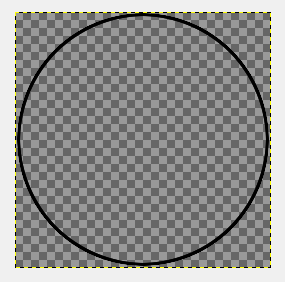
Let's make it in the form of a circle. For this purpose, I prepared a simple texture mask:
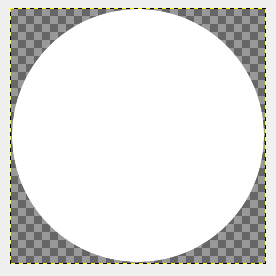
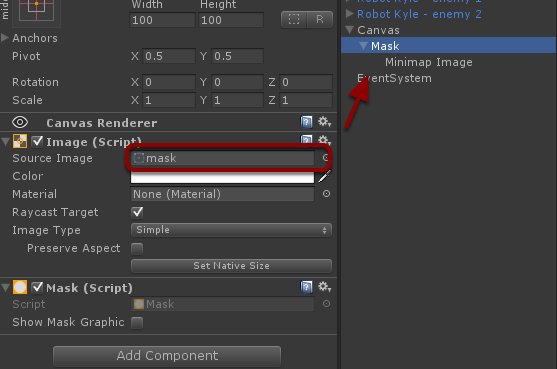
Create a new Image UI element , add the Mask component to it , in the inspector set the Source Image field to our mask texture and make the Minimap Image object child of the Mask (hint: disable Mipmaps for the mask texture for a better visual effect).
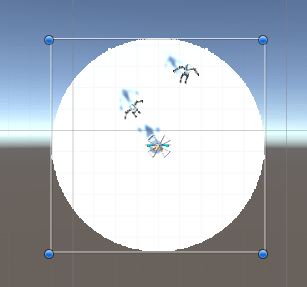
After these actions, our minimap will look like this:
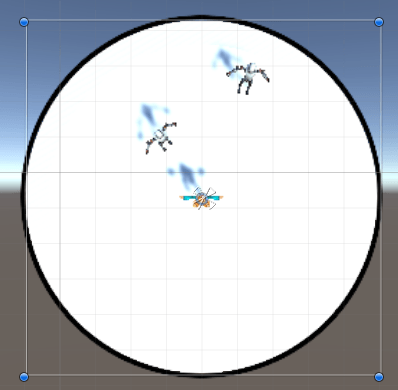
A white minimap on a white background does not look very good. Let's add an image with an outline on top of it:
To make it easier to move this whole construct, I grouped it into a separate empty object, naming it Minimap .
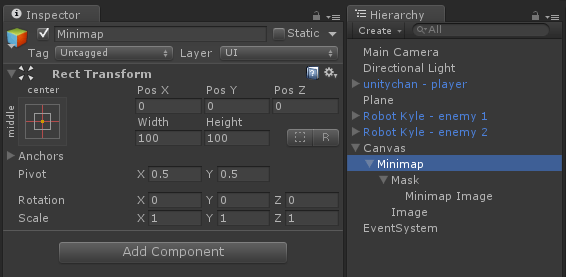
Finally, let's move the created minimap to the upper right corner of the screen.

It looks good, isn't it? But this is still a fake minimap - this is a camera that displays the game from above. If you are familiar with layers, then you probably guess what I will do next!
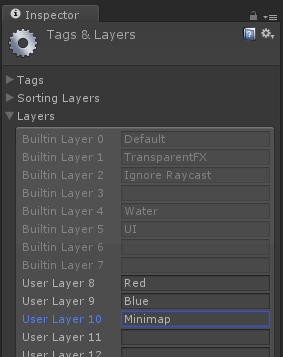
We need at least one extra layer. Go to the menu Edit -> Project Settings -> Tags and Layers and add a new Minimap layer .
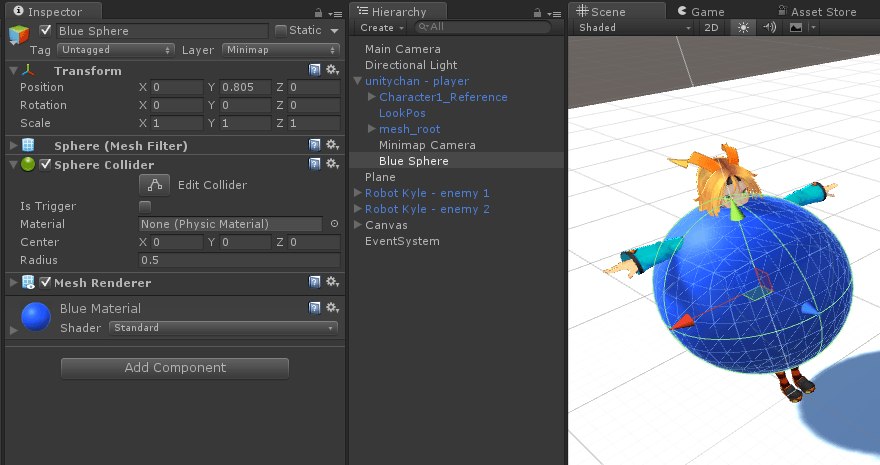
Now create three spheres. One blue, located at the position where Unity-chan is standing. The best way would be to make the sphere a child of Unity-chan. Make sure the sphere layer is set to Minimap .
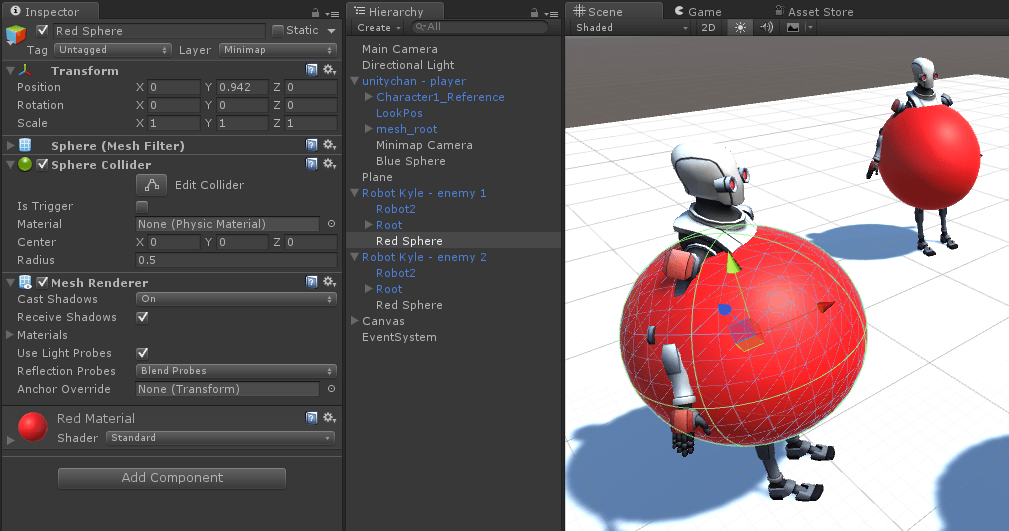
Do similar actions with robots, only use red ones instead of blue spheres.
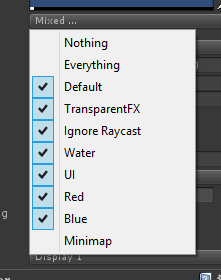
Now the best part! Select the Main Camera and make sure its Culling Mask property does not contain the Minimap layer selected .
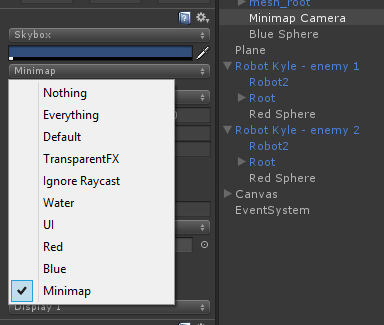
Now select the Minimap Camera and do the opposite with it. Leave only the Minimap layer selected and disable all others.
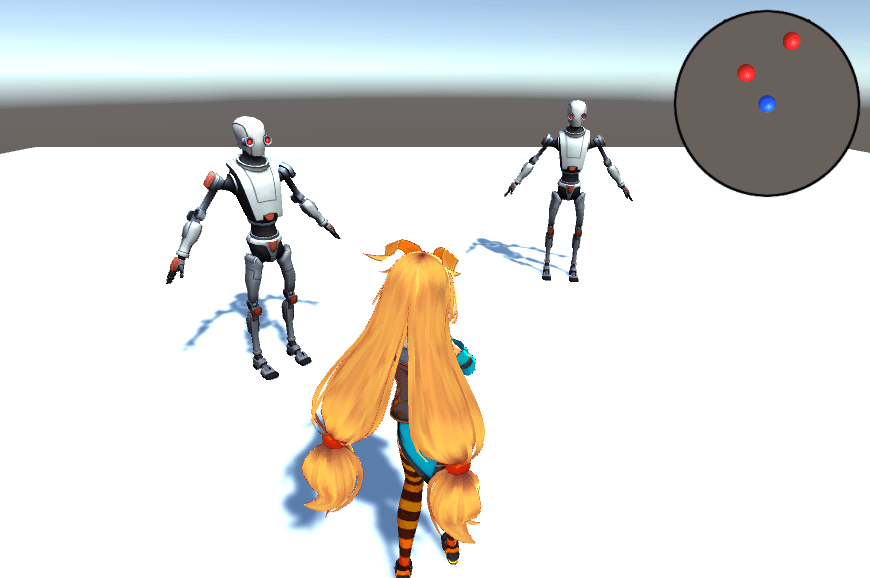
Now you see something that looks like a real minimap!
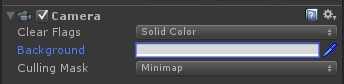
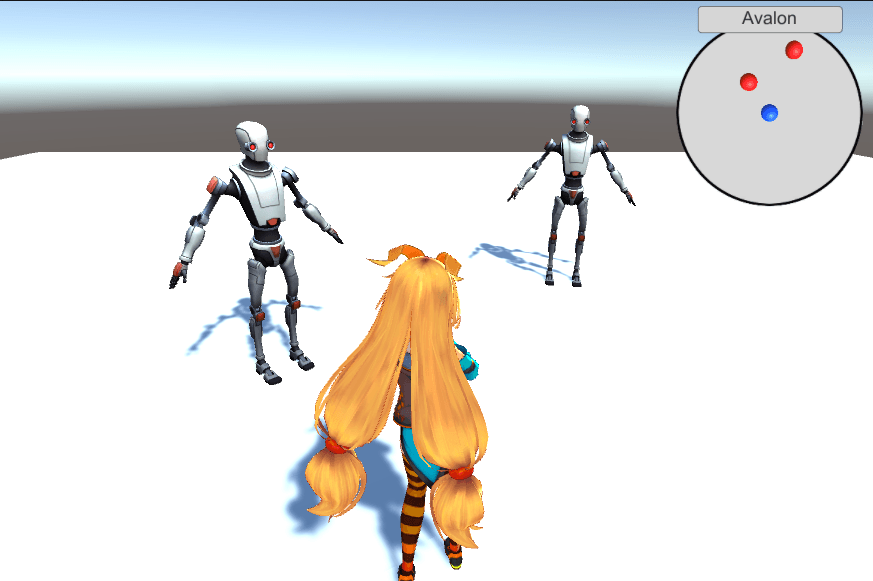
You might want to make a few adjustments. First of all, let's change the color camera clipping Minimap Camera to a light gray and set the properties Clear Flags like the Solid the Color , the background to the minimap better contrast with the blue and red spheres.
Now you can add any other UI elements to the minimap. For example, I added text. And here is the end result!
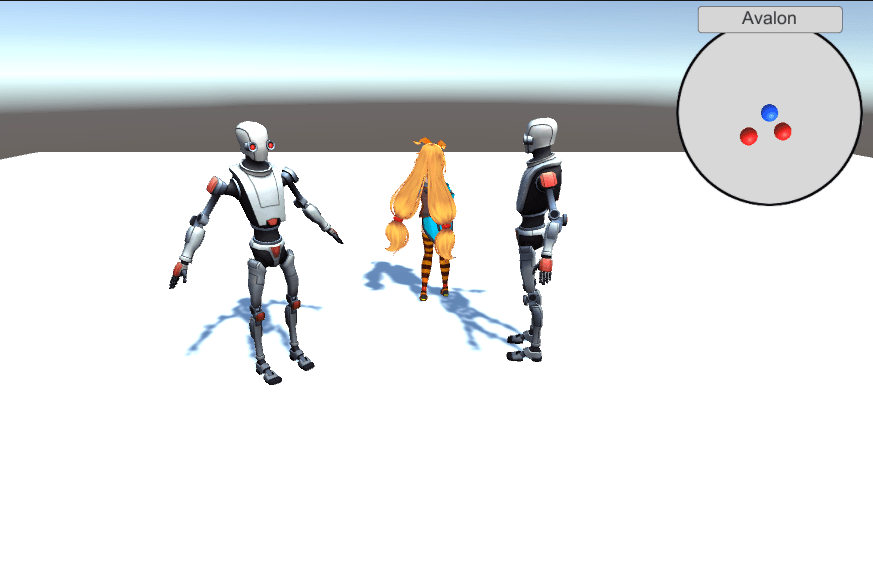
The minimap is designed to immediately update its position when moving the character. If one of the robots also moves, this will also be displayed.
And this is the end of the minimap lesson!
What is required to create a minimap in a game on Unity? You will probably be surprised, but it is easier than you think and does not even require programming skills! Next, I will try to explain step by step how to do this.
Key minimap ideas
Minimaps (or radars) are designed to display information about what surrounds us. First of all, the minimap should be centered on the main character. Then, instead of real models, you need to use readable notation on it, since minimap is often quite small, and the player may not recognize the information that the minimap is trying to provide.
Most minimaps are circles, and we will try to create the same. Also on it you can often find additional buttons and labels. We will also try to create them.
Scene preparation
Let's start by adding something to the scene. I created a scene with Unity-chan (she will be a player) and two robots (which will be opponents).
Type of game
Now add a second camera. Just select the main menu item GameObject -> Camera and rename the created camera as Minimap Camera . Now make this camera a child of Unity-chan (this will allow the camera to follow it) and raise it 10 units above the head of Unity-chan , while turning down.
Setting up the minimap camera
To get a good result, set the Transform component position to 0, 10, 0 and rotation to 90, 0, 0 . The camera should show something like this:
Good, but this is not a minimap yet. If you start the scene now, the camera image will simply be displayed on the screen. We must tell the game that we want to present the minimap as a UI element.
Mapping to UI Element
To do this, we need a Render Texture . You can easily create it by selecting the Assets -> Create -> Render Texture main menu item . Create and rename as Minimap Render Texture .
Now select the Minimap Camera and assign in the inspector the Target Texture field the previously created Minimap Render Texture .
If you try to run the scene, you will notice that the image from the Minimap Camera is nowhere to be seen . The image is now hidden in the created Minimap Render Texture .
Let's now create a Canvas to add UI elements to it. Select the menu item GameObject -> UI -> Canvas and Canvas will appear on the scene.
You need to add a Raw Image object to the Canvas to use the Render Texture with it . Select the menu item GameObject -> UI -> Raw Image , rename the created object as Minimap Image and assign our Minimap Render Texture in the inspector to the Texture field .
As a result, we have a UI element that displays the image from the Minimap Camera !
Let's make it in the form of a circle. For this purpose, I prepared a simple texture mask:
Create a new Image UI element , add the Mask component to it , in the inspector set the Source Image field to our mask texture and make the Minimap Image object child of the Mask (hint: disable Mipmaps for the mask texture for a better visual effect).
After these actions, our minimap will look like this:
A white minimap on a white background does not look very good. Let's add an image with an outline on top of it:
To make it easier to move this whole construct, I grouped it into a separate empty object, naming it Minimap .
Finally, let's move the created minimap to the upper right corner of the screen.
It looks good, isn't it? But this is still a fake minimap - this is a camera that displays the game from above. If you are familiar with layers, then you probably guess what I will do next!
Having fun with the layers
We need at least one extra layer. Go to the menu Edit -> Project Settings -> Tags and Layers and add a new Minimap layer .
Now create three spheres. One blue, located at the position where Unity-chan is standing. The best way would be to make the sphere a child of Unity-chan. Make sure the sphere layer is set to Minimap .
Do similar actions with robots, only use red ones instead of blue spheres.
Now the best part! Select the Main Camera and make sure its Culling Mask property does not contain the Minimap layer selected .
Now select the Minimap Camera and do the opposite with it. Leave only the Minimap layer selected and disable all others.
Now you see something that looks like a real minimap!
Finishing touches
You might want to make a few adjustments. First of all, let's change the color camera clipping Minimap Camera to a light gray and set the properties Clear Flags like the Solid the Color , the background to the minimap better contrast with the blue and red spheres.
Now you can add any other UI elements to the minimap. For example, I added text. And here is the end result!
The minimap is designed to immediately update its position when moving the character. If one of the robots also moves, this will also be displayed.
And this is the end of the minimap lesson!