May 24, 2016 at 00:37
Manual installation of Windows 7/8 / 8.1 / 10 in a system with the GRUB2 bootloader
Surely almost every user of Linux OS and Windows OS, and I mean precisely those who, for a number of reasons, have both systems installed, the question arose from time to time: “Is it possible, damn it, to come up with a way, using Which could install these systems in any order? Without spoiling the bootloader settings? ”After all, if we install Windows first and then Linux, everything is fine - a Linux bootloader (for example GRUB) usually picks up bootmgr. If put in the reverse order then alas. Even using GPT + EFI. In the case of EFI, there is no danger of rewriting MBR, but there is one nuance that I personally don’t like - the Windows installer in EFI mode does not overwrite the disk sectors with its code, but redefines NVRAM by slipping the path to its bootloader there. So the GBUB functionality still has to be restored. There are no options in the settings of the regular installer to customize the bootloader installation process. But what if ... don't use the standard installer ?! Well, or almost never use ...

And there is such a way. And it is based on the Windows installation technology that we have in its distributions starting with the "seven". The method works for the case of Windows versions 7/8 / 8.1 / 10, as in the case of the MBR + BIOS of the system, so in the case of EFI + GPT. You can install the system both in the HDD section and on the VHD. At the same time, we need the installer functionality in general to run the setup program for the BCD repository of the bootloader configuration. Instead of the installation disc, you can use WinPE-based bootable media. If the bcdedit.exe and BootICE utilities had a * nix alternative, the entire process of deploying the system could be done in general under Linux.
Suppose you have a computer with the GRUB2 bootloader installed on the HDD and a free partition formatted in NTFS. We will install Windows 7 Ultimate SP1. This will require:
The fact is that the seven does not want to be installed in EFI mode from a DVD. That does not want it. In addition, on the installation media, we need additional utilities that need to be put there, and in the case of a flash drive it is somewhat easier than in the case of a DVD.
We mount the installation image with Windows, let's say it lies with us in / home / $ USER / install with the name win7-setup.iso We insert the USB flash drive into the USB port. Suppose she got the device name / dev / sdb . Let's mark it up in MBR format. Create one single partition on the USB flash drive. After which we format it in FAT Copy the contents of the Windows distribution kit to a USB flash drive Copy the configs of the EFI bootloader to a higher level
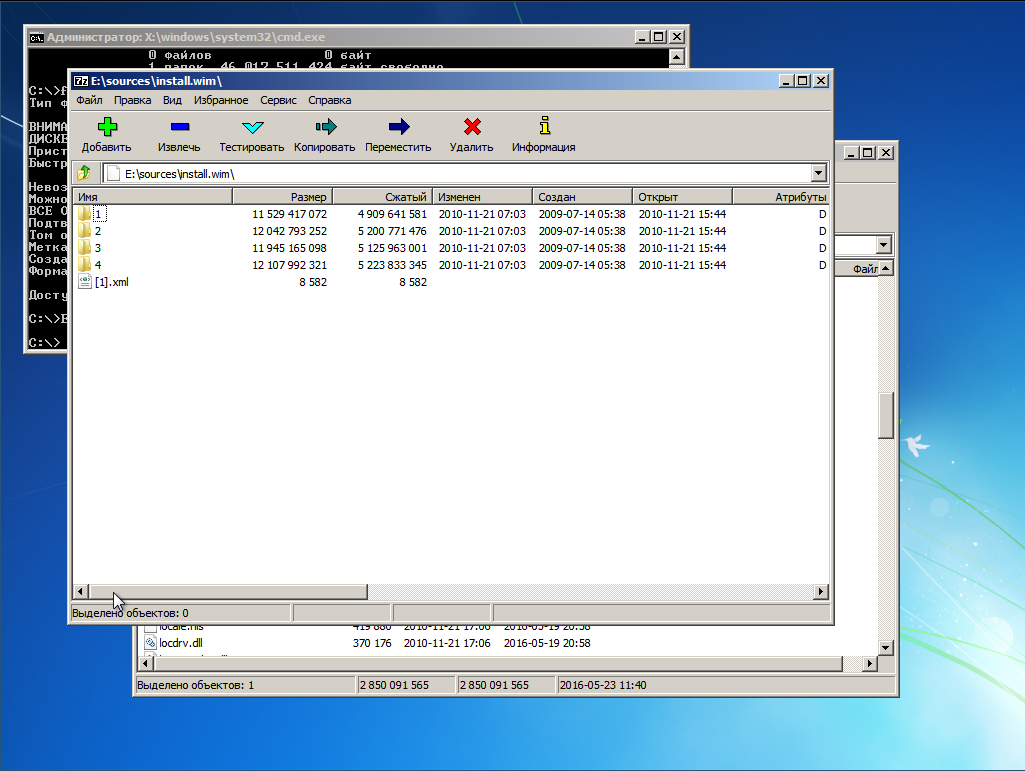
Now we need the EFI Windows bootloader. It will have to be scratched from the distribution. This is easily done using the 7-zip archiver, which is available in the extra / p7zip repository . All the contents of the Windows distribution kit is compressed into a wim-format image located on the installation DVD in the source / install.wim file . Usually this image has the following structure.
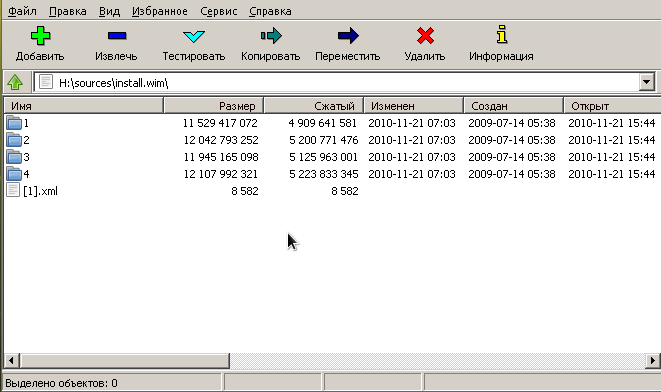
In directories with names in the form of numbers 1-4 are different editions of Windows. To select the one you need to look inside the file with the name [1] .xml. Unpack it in / tmp and look using some browser, because it looks awful in a text editor, but I didn’t have a special xml editor. Each edition of Windows is described by the structure of the form where the EDITIONID node
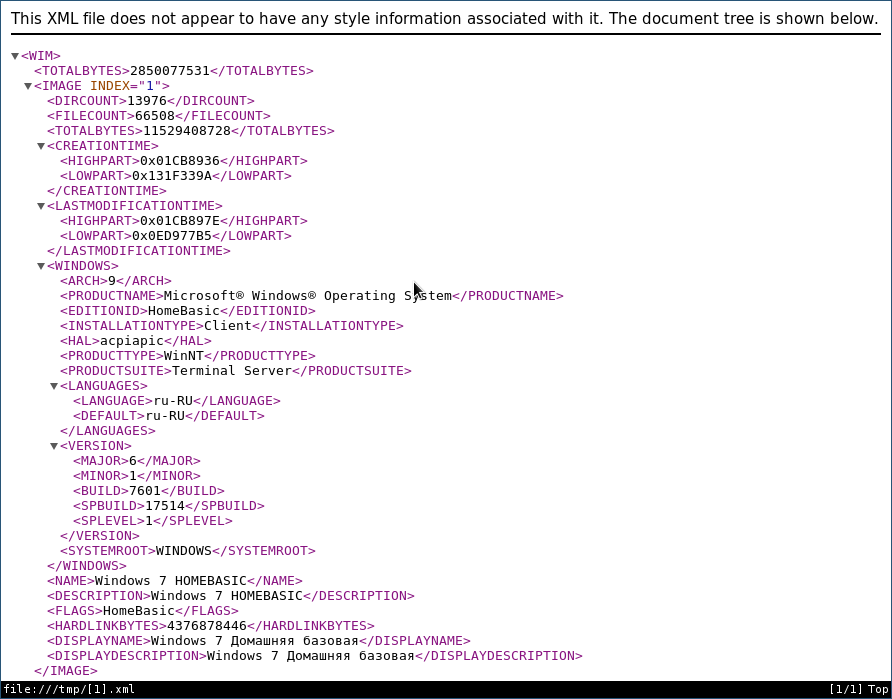
points to the editors. The INDEX parameter is just the directory number in which the desired edition is lying. So, I need Ultimate, and this is index 4. Accordingly, we pick out the bootloader from there Oka, now transfer the resulting file to the Order flash drive , now we have a bootable flash drive for installing Windows. Now we will add to it the necessary utilities for installation - the vindos version of the 7-zip archiver and the BootICE utility. Download the archiver from the official site and unpack it on a flash drive into the utils directory. There we also put bootice Uh , that's all, unmount the flash drive
Reboot. If you have a system with EFI and removable drives are in the boot priority, then the computer will boot into the Windows installation automatically. If the same GRUB menu appears, it’s okay, press “C” and type exit in the console. You will be thrown out in the EFI menu, where we select the boot from the USB flash drive. If your system is with BIOS, then it’s a little more complicated, because we did not bother with setting up the MBR on a USB flash drive. Then in the GRUB console we give the ls command - a list of all disks and partitions appears. We find our flash drive, it will be displayed in the form (hdX, msdosY), where X, Y are the number of the disk and partition, respectively. Now we drive in the command console. The installation of the Windows installer will begin. It will load, but we don’t need it - we will do everything with our hands. To make it clear what's what, some theory has to be considered
Starting with the seven, installing Windows consists of the following steps
This is the standard way. We have already marked the disk. And we do not need automatic installation of the bootloader - we will install it manually. Partitioning a disk must meet the following requirements
Thus, before unpacking the system, we must make sure that the above requirements are met. After we unzip the entire system file and install the bootloader, the system will reboot. After the reboot, the Sysprep utility will start, among other things, setting up the equipment and checking the system configuration. So, if in EFI mode Sysprep does not find the bootloader and its configuration in the EFI section along the EFI / microsof / boot path, and in the BIOS system the \ Boot and bootmgr directory will be in the inactive section, then Sysprep will fail with the sysprep generalize error , and the log located at \ Windows \ Panther \ sysperr.log will spit out something similar to
and no dancing with a tambourine will help us anymore. Windows requires that the loader lies in the boot partition and period. In the case of the BIOS, we just make the NTFS partition in which the Windows is active, and put the bootloader there too. We will still load with the help of GRUB, but it doesn’t care which partition will be active. In the case of EFI, the loader will have to be placed next to GRUB in the EFI partition.
So, we will decide where we want to put Windows. You can put it in an NTFS partition, or you can put it in a VHD-drive. That's how you want it. I will show the process with an example of an EFI virtual machine with the following markup. There is no Linux on this disk, only GRUB is installed in the EFI partition. If we put the system directly in the NTFS partition, we boot from the USB flash drive, wait for the installer to launch, and press Shift + F10 to call the console. We start the diskpart utility and look at the list of connected volumes. We see that the USB flash drive (8 GB in volume) is connected as a C: drive, and the installation section is not mounted at all. The mess. We do this. Now the order, the drive on which we will install the Windows, became the C: drive, the flash drive the E: drive, and the EFI partition the F: drive.

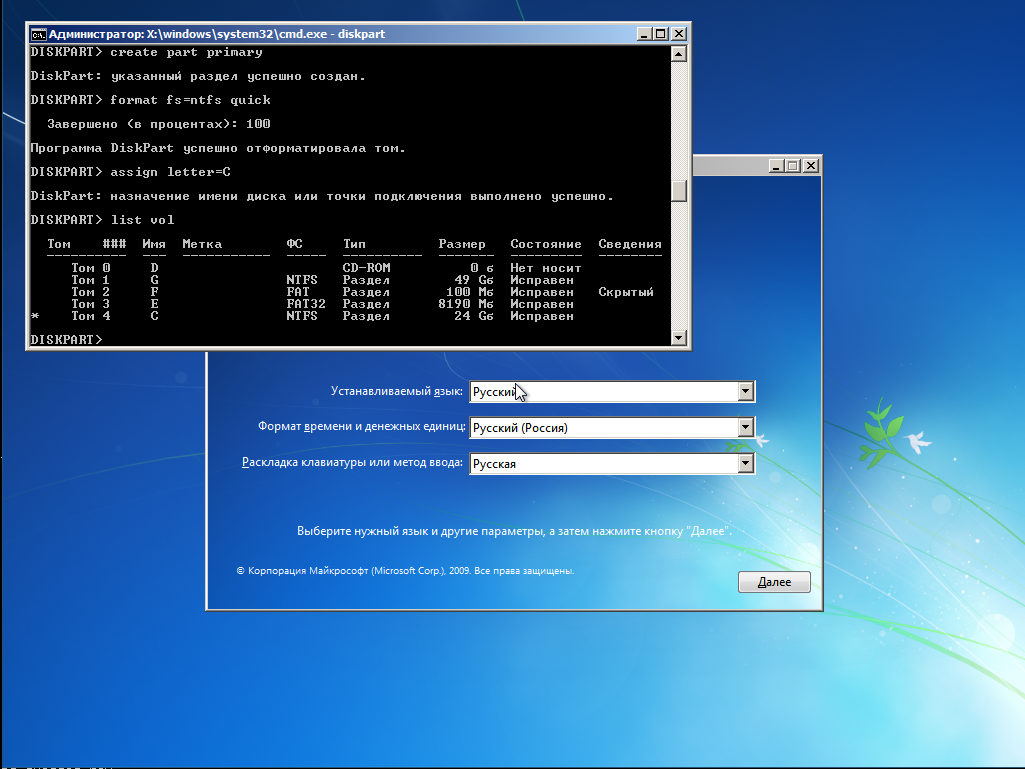
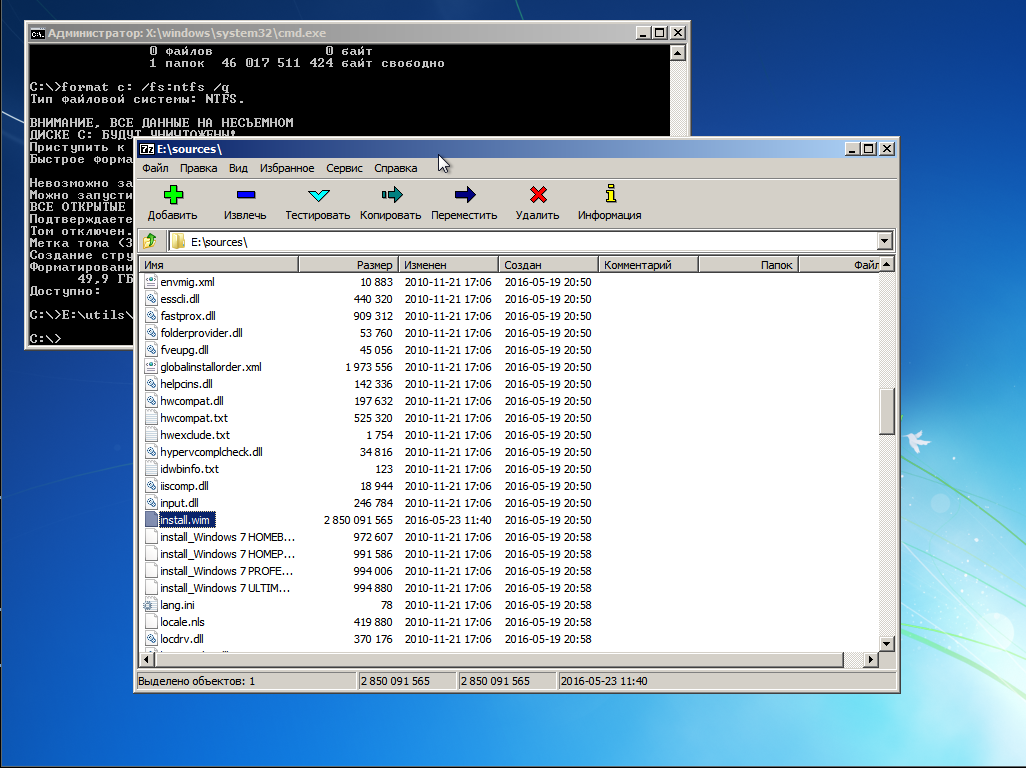
If we want to put the system on VHD, then we do this. For order, create a directory with images. Create a virtual disk, create GPT markup and NTFS partition on it and mount it to C: EFI-partition mount to F: We get such a picture Very important! We make sure that the EFI partition is formatted exactly in FAT, and not in FAT32. Otherwise, Sysprep will not forgive us this error. If your computer already has Linux, then the settings will be correct. Now we unpack the distribution kit onto drive C: The 7-zip archiver GUI will open. In it, open the E: \ sources directory, find the install.wim file there. Right-click on this file to call up the context menu and go to 7-zip -> Open archive. The contents of the image will appear.
We climb into folder 4 - there lies Ultimate
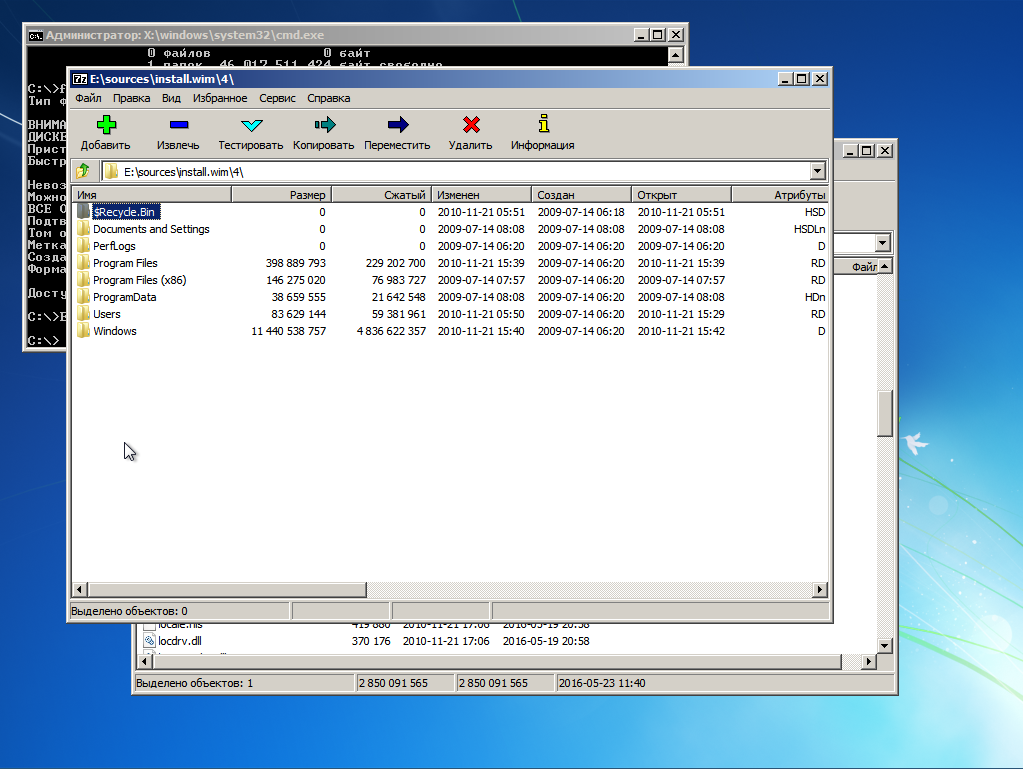
Select all Ctrl + A and press the button “Extract”. A window will appear where we will be asked to indicate the unpacking path. We
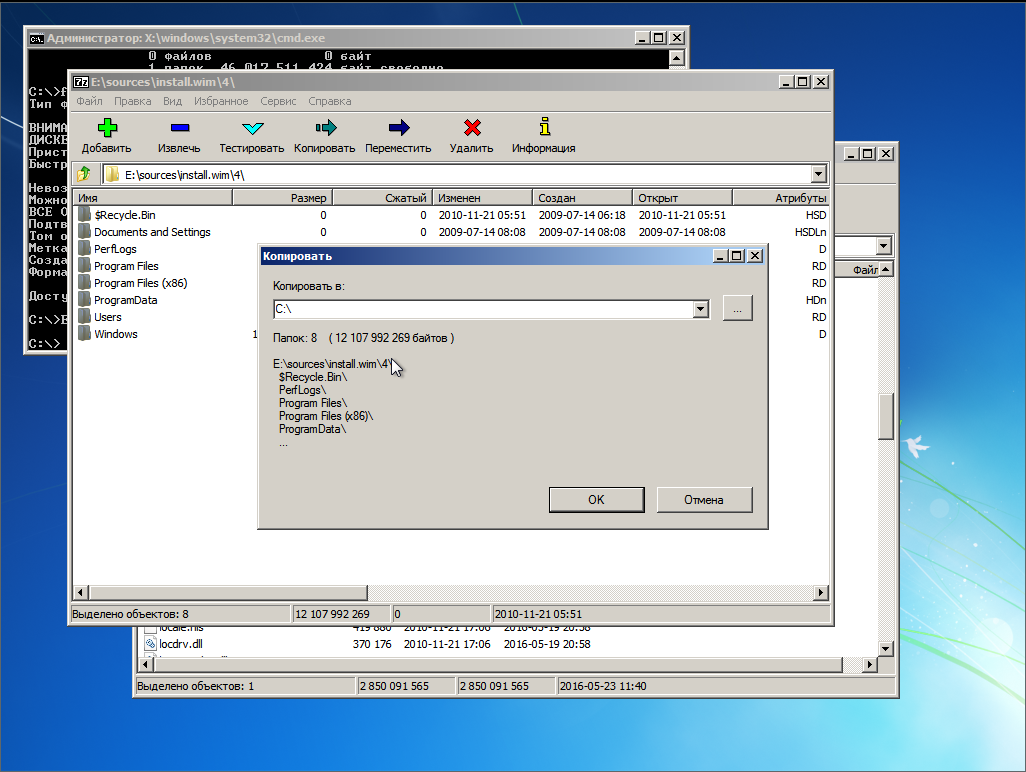
indicate the root of the C: drive and click OK.
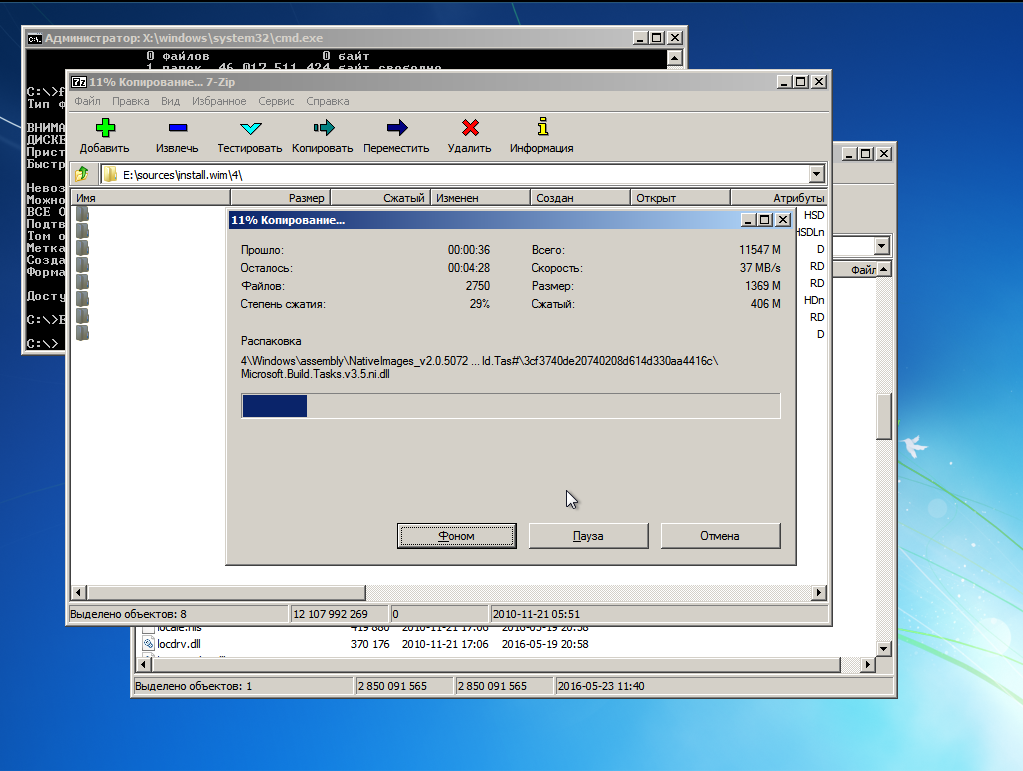
Well, now, as they say: "Sit back and ..."
So, after some waiting time, the unpacking is over. And here, here in this place, Windows usually makes a trouble, namely it spoils the MBR or reconfigures the NVRAM. But we will not let her do this - we will install the bootloader manually.
In the case of EFI, go to the EFI partition mounted to F: and create the necessary paths and copy the bootloader files. Great, the bootloader is copied. Now configure it. Open the file F: \ EFI \ Microsoft \ Boot \ BCD. In case of installation on a partition, its parameters are set as follows. If we installed the system on VHD, then the settings will be so Important! The name of the secondary bootloader for the EFI system is winload.efi , for the BIOS system it is winload.exe .
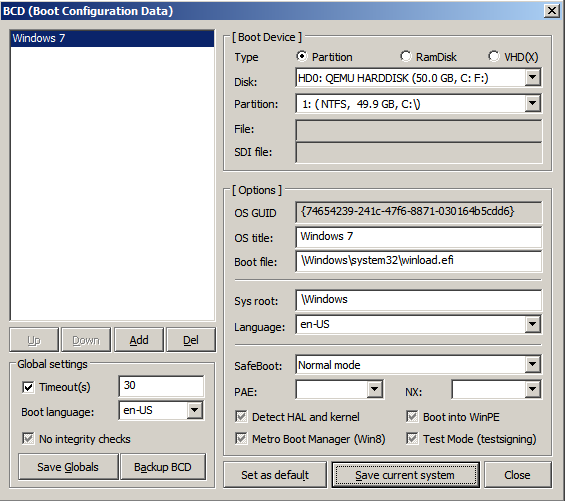

In case we install the BIOS, the bootloader installation will look like this Important! The partition mounted to C: (where the bootloader is located) must be active! Make sure before rebooting! The setup is done exactly the same using BootICE. Well, sort of everything. Close all the windows and go to reboot. A flash drive can be pulled out of a computer.
GRUB we have not configured the item for Windows in the menu yet. As soon as the GRUB menu appears, click "C". In the console, type X, Y - respectively, the disk and the partition where the bootloader lies. This is the case with EFI. In the case of the BIOS, we do this X, Y - drive and partition with NTFS. Where the Windows is unpacked and its loader lies. In EFI mode, instead of the Windows logo, I saw a black screen, because I did not find bootres.dll in the distribution library, which should be placed in the EFI \ Mictosoft \ Boot \ Resourses folder. In the case of the BIOS, everything is in order - the familiar logo of the "seven". And then in both cases we will see it

This works sysprep. The screen will blink for 57% - the video card is configured. And if we did everything right, then the inscription “Application of system parameters” will hang for a rather long time, then the system will inform that the installation will continue after rebooting. If we messed up somewhere with installing the bootloader - the wrong EFI partition or inactive NTFS, then there will be an error :( But we are great and we will succeed, and after the next reboot, we will see it
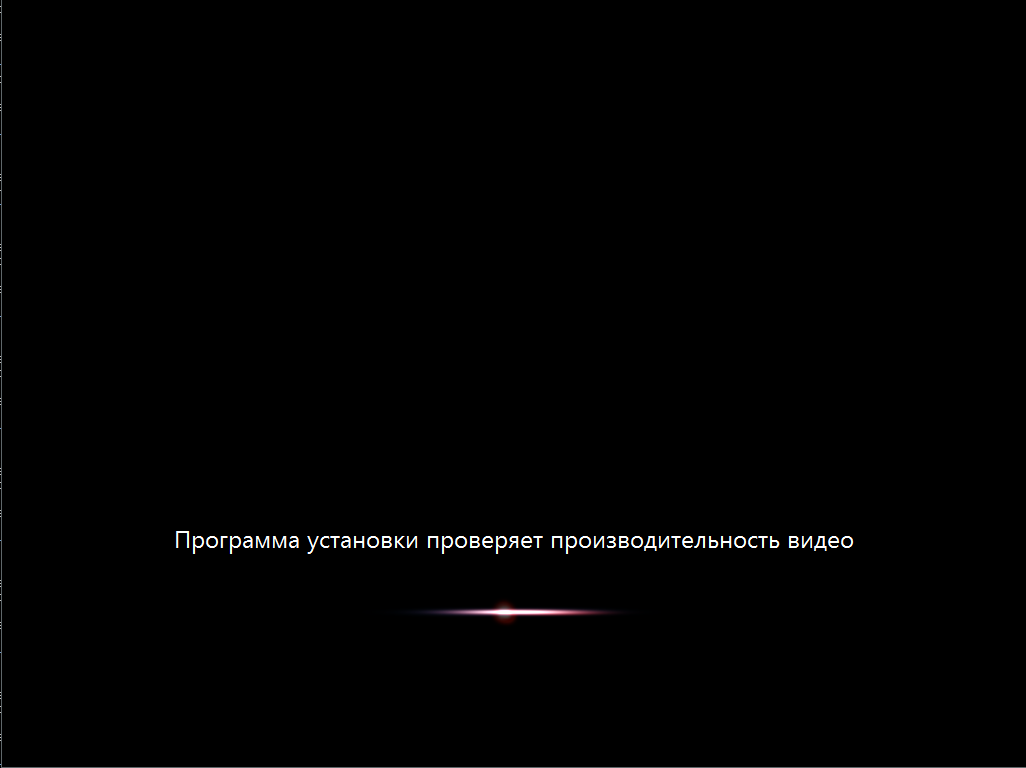
and then, finally, here it

goes. , standard installation.
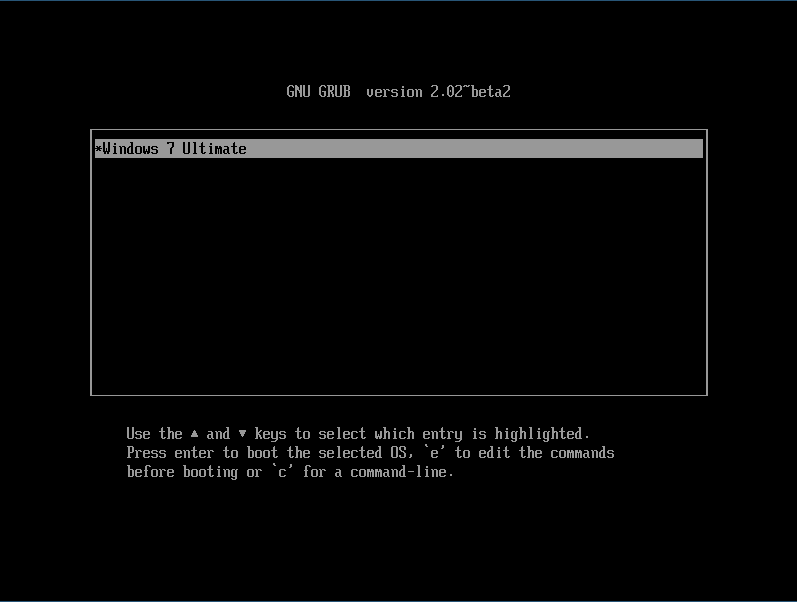
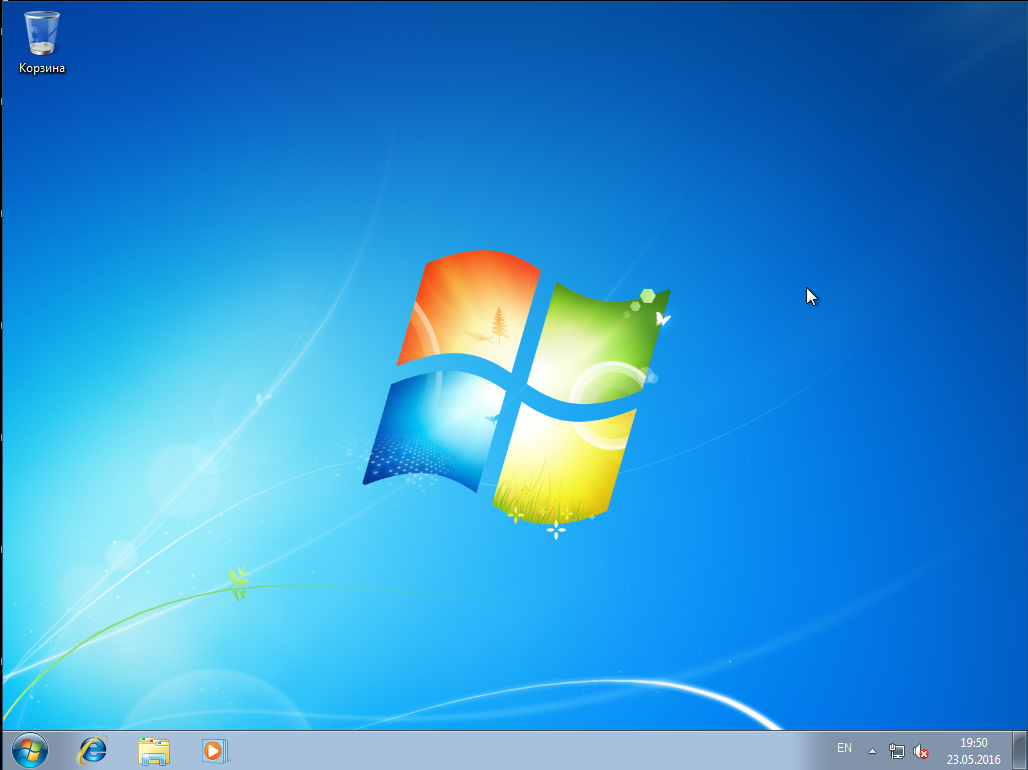
We noticed that each time we load the system from the GRUB console by hand. This is very good - it means neither MBR nor NVRAM are overwritten by insidious Microsoft. It is time to boot into arch and add a new item to the GRUB menu in the case of EFI. Or in the case of BIOS. We apply the GRUB settings and reboot and see the system in the boot menu item, after selecting which we get loaded Windows
Anticipating the anger of professional win-admins, I will say right away - I know about DISM . It was the information about this system that led me to the described solution. The goal was one - to find out how many features Windows itself needs to install Windows.
It turned out that - to install Windows, its environment is needed only for one thing - setting up BCD storage. All. The rest can be done from any other operating system environment.
If you write an analogue of bcdedit.exe for Linux, then you can install Windows from a Linux Live media.
And there is such a way. And it is based on the Windows installation technology that we have in its distributions starting with the "seven". The method works for the case of Windows versions 7/8 / 8.1 / 10, as in the case of the MBR + BIOS of the system, so in the case of EFI + GPT. You can install the system both in the HDD section and on the VHD. At the same time, we need the installer functionality in general to run the setup program for the BCD repository of the bootloader configuration. Instead of the installation disc, you can use WinPE-based bootable media. If the bcdedit.exe and BootICE utilities had a * nix alternative, the entire process of deploying the system could be done in general under Linux.
Suppose you have a computer with the GRUB2 bootloader installed on the HDD and a free partition formatted in NTFS. We will install Windows 7 Ultimate SP1. This will require:
- Windows installation disk
- Pure flash drive>> 4 Gb
- 7-zip archiver of the corresponding bit depth
- BootICE utility, desirable, but completely optional, you can get by with bcdedit.exe, included in the Windows distribution
1. Create a bootable USB flash drive
The fact is that the seven does not want to be installed in EFI mode from a DVD. That does not want it. In addition, on the installation media, we need additional utilities that need to be put there, and in the case of a flash drive it is somewhat easier than in the case of a DVD.
We mount the installation image with Windows, let's say it lies with us in / home / $ USER / install with the name win7-setup.iso We insert the USB flash drive into the USB port. Suppose she got the device name / dev / sdb . Let's mark it up in MBR format. Create one single partition on the USB flash drive. After which we format it in FAT Copy the contents of the Windows distribution kit to a USB flash drive Copy the configs of the EFI bootloader to a higher level
$ mkdir ~/iso

$ sudo mount -t udf ~/install/win7-setup.iso ~/iso
$ sudo fdisk /dev/sdb
$ sudo mkfs.vfat /dev/sdb1
$ mkdir /tmp/flash

$ sudo mount /dev/sdb1 /tmp/flash -o uid=1000,gid=100,fmask=113,dmask=002

$ cp -rv ~/iso/* /tmp/flash/
$ cp -rv ~/tmp/flash/efi/microsoft/* ~/tmp/flash/efi/
Now we need the EFI Windows bootloader. It will have to be scratched from the distribution. This is easily done using the 7-zip archiver, which is available in the extra / p7zip repository . All the contents of the Windows distribution kit is compressed into a wim-format image located on the installation DVD in the source / install.wim file . Usually this image has the following structure.
In directories with names in the form of numbers 1-4 are different editions of Windows. To select the one you need to look inside the file with the name [1] .xml. Unpack it in / tmp and look using some browser, because it looks awful in a text editor, but I didn’t have a special xml editor. Each edition of Windows is described by the structure of the form where the EDITIONID node
$ cd /tmp

$ 7z e ~/iso/sources/install.wim \[1\].xml
points to the editors. The INDEX parameter is just the directory number in which the desired edition is lying. So, I need Ultimate, and this is index 4. Accordingly, we pick out the bootloader from there Oka, now transfer the resulting file to the Order flash drive , now we have a bootable flash drive for installing Windows. Now we will add to it the necessary utilities for installation - the vindos version of the 7-zip archiver and the BootICE utility. Download the archiver from the official site and unpack it on a flash drive into the utils directory. There we also put bootice Uh , that's all, unmount the flash drive
$ 7z e ~/iso/sources/install.wim 4/Windows/Boot/EFI/bootmgfw.efi
$ mv bootmgfwm.efi /tmp/flash/efi/boot/bootx64.efi
$ mkdir -p /tmp/flash/utils/7-Zip/

$ cd /tmp/flash/utils/7-Zip/

$ 7z x ~/downloads/7z1602-x64.exe
$ cp ~/install/BOOTICEx64.exe /tmp/flash/utils
$ cd ~

$ sudo umount /tmp/flash/
Reboot. If you have a system with EFI and removable drives are in the boot priority, then the computer will boot into the Windows installation automatically. If the same GRUB menu appears, it’s okay, press “C” and type exit in the console. You will be thrown out in the EFI menu, where we select the boot from the USB flash drive. If your system is with BIOS, then it’s a little more complicated, because we did not bother with setting up the MBR on a USB flash drive. Then in the GRUB console we give the ls command - a list of all disks and partitions appears. We find our flash drive, it will be displayed in the form (hdX, msdosY), where X, Y are the number of the disk and partition, respectively. Now we drive in the command console. The installation of the Windows installer will begin. It will load, but we don’t need it - we will do everything with our hands. To make it clear what's what, some theory has to be considered
grub> set root=hdX,Y

grub> ntldr /bootmgr

grub> boot
2. About deploying Windows from a WIM image and the moody character of Sysprep
Starting with the seven, installing Windows consists of the following steps
- Partitioning the disk in accordance with the architecture of the equipment initialization system. If the BIOS - the installer partitions the disk in the MBR. If there is an active EFI, the markup will be GPT.
- Unpacking the install.wim image to the selected partition
- Bootloader installation and reboot
- Initialization of equipment. Reboot
- Localization, key entry, end of system configuration
This is the standard way. We have already marked the disk. And we do not need automatic installation of the bootloader - we will install it manually. Partitioning a disk must meet the following requirements
- If the system with EFI on the disk must be present FAT-partition with type 0xEF. If we already have Linux installed with an EFI bootloader, then this section already exists.
- If the system is with BIOS, then the partition in which the bootloader is located, and this is our NTFS partition, must be active . It is very important! Why, will be explained below.
Thus, before unpacking the system, we must make sure that the above requirements are met. After we unzip the entire system file and install the bootloader, the system will reboot. After the reboot, the Sysprep utility will start, among other things, setting up the equipment and checking the system configuration. So, if in EFI mode Sysprep does not find the bootloader and its configuration in the EFI section along the EFI / microsof / boot path, and in the BIOS system the \ Boot and bootmgr directory will be in the inactive section, then Sysprep will fail with the sysprep generalize error , and the log located at \ Windows \ Panther \ sysperr.log will spit out something similar to
2015-03-11 16:55:42, Error [0x0e00b3] TOOL Sysprep_Specialize_Bcd: There was an error opening the system store. Status=[0xC0000098]

2015-03-11 16:55:42, Error [0x0f0082] SYSPRP LaunchDll:Failure occurred while executing 'c:\Windows\System32\spbcd.dll,Sysprep_Specialize_Bcd', returned error code 1006

2015-03-11 16:55:42, Error [0x060435] IBS Callback_Specialize: An error occurred while either deciding if we need to specialize or while specializing; dwRet = 0x3ee
and no dancing with a tambourine will help us anymore. Windows requires that the loader lies in the boot partition and period. In the case of the BIOS, we just make the NTFS partition in which the Windows is active, and put the bootloader there too. We will still load with the help of GRUB, but it doesn’t care which partition will be active. In the case of EFI, the loader will have to be placed next to GRUB in the EFI partition.
3. Unpacking the system
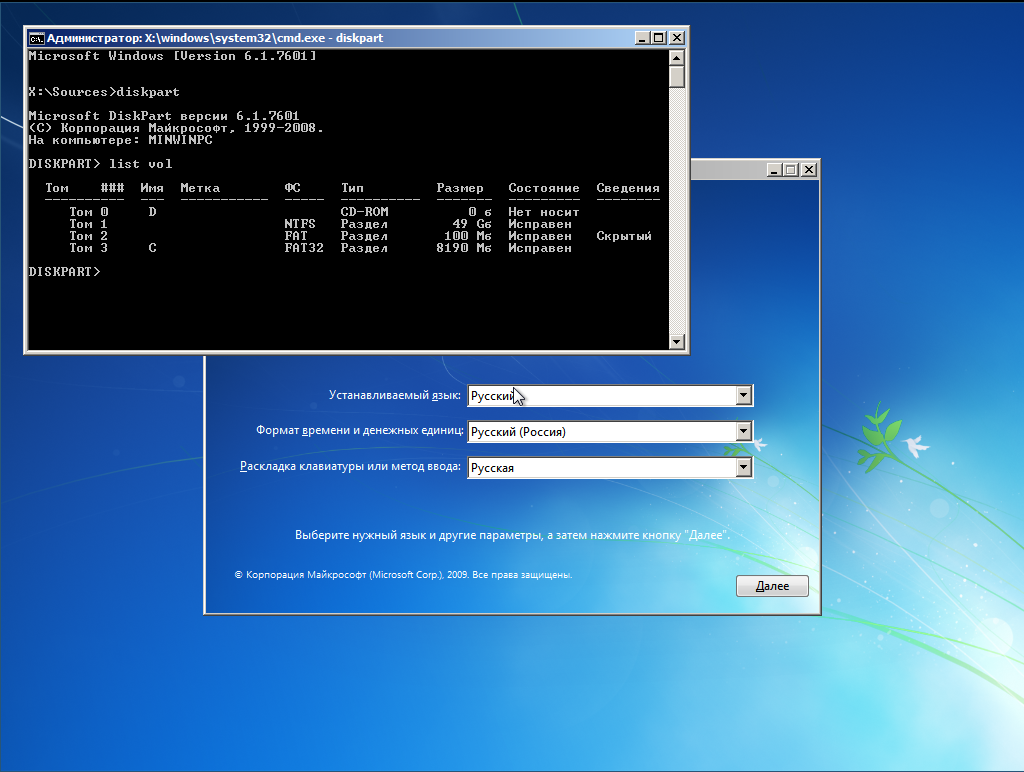
So, we will decide where we want to put Windows. You can put it in an NTFS partition, or you can put it in a VHD-drive. That's how you want it. I will show the process with an example of an EFI virtual machine with the following markup. There is no Linux on this disk, only GRUB is installed in the EFI partition. If we put the system directly in the NTFS partition, we boot from the USB flash drive, wait for the installer to launch, and press Shift + F10 to call the console. We start the diskpart utility and look at the list of connected volumes. We see that the USB flash drive (8 GB in volume) is connected as a C: drive, and the installation section is not mounted at all. The mess. We do this. Now the order, the drive on which we will install the Windows, became the C: drive, the flash drive the E: drive, and the EFI partition the F: drive.
The protective MBR's 0xEE partition is oversized! Auto-repairing.


Partition table scan:

 MBR: protective

 BSD: not present

 APM: not present

 GPT: present


Found valid GPT with protective MBR; using GPT.


Command (? for help): p

Disk /dev/loop1: 104857600 sectors, 50.0 GiB

Logical sector size: 512 bytes

Disk identifier (GUID): 0D217C93-6699-435A-9BBB-61DFAA6F30B7

Partition table holds up to 128 entries

First usable sector is 34, last usable sector is 104857566

Partitions will be aligned on 2048-sector boundaries

Total free space is 4029 sectors (2.0 MiB)


Number Start (sector) End (sector) Size Code Name

 1 2048 206847 100.0 MiB EF00 EFI system partition

 2 206848 104855551 49.9 GiB 0700 Basic data partition
X:\sources> diskpart

DISKPART> list vol
DISKPART> sel vol 3

DISKPART> remove

DISKPART> assign letter=E

DISKPART> sel vol 1

DISKPART> assign letter=C

DISKPART> list vol

DISKPART> sel vol 2

DISKPART> assign letter=F
If we want to put the system on VHD, then we do this. For order, create a directory with images. Create a virtual disk, create GPT markup and NTFS partition on it and mount it to C: EFI-partition mount to F: We get such a picture Very important! We make sure that the EFI partition is formatted exactly in FAT, and not in FAT32. Otherwise, Sysprep will not forgive us this error. If your computer already has Linux, then the settings will be correct. Now we unpack the distribution kit onto drive C: The 7-zip archiver GUI will open. In it, open the E: \ sources directory, find the install.wim file there. Right-click on this file to call up the context menu and go to 7-zip -> Open archive. The contents of the image will appear.
DISKPART> sel vol 3

DISKPART> remove

DISKPART> assign letter=E

DISKPART> sel vol 1

DISKPART> assign letter=G

DISKPART> exit
X:\sources> md G:\vhd

X:\sources> diskpart
DISKPART> create vdisk file="G:\vhd\win7.vhd" maximum=25600 type=fixed

DISKPART> attach vdisk

DISKPART> clean

DISKPART> convert gpt

DISKPART> create part primary

DISKPART> format fs=ntfs quick

DISKPART> assign letter=C
DISKPART> sel vol 2

DISKPART> assign letter=F
X:\sources> E:

E:\> utils\7-Zip\7zFM.exe
We climb into folder 4 - there lies Ultimate
Select all Ctrl + A and press the button “Extract”. A window will appear where we will be asked to indicate the unpacking path. We
indicate the root of the C: drive and click OK.
Well, now, as they say: "Sit back and ..."
4. Install and configure the bootloader
So, after some waiting time, the unpacking is over. And here, here in this place, Windows usually makes a trouble, namely it spoils the MBR or reconfigures the NVRAM. But we will not let her do this - we will install the bootloader manually.
In the case of EFI, go to the EFI partition mounted to F: and create the necessary paths and copy the bootloader files. Great, the bootloader is copied. Now configure it. Open the file F: \ EFI \ Microsoft \ Boot \ BCD. In case of installation on a partition, its parameters are set as follows. If we installed the system on VHD, then the settings will be so Important! The name of the secondary bootloader for the EFI system is winload.efi , for the BIOS system it is winload.exe .
E:\> F:

F:\> mkdir EFI\microsoft\boot

F:\> xcopy C:\Windows\Boot\EFI\* F:\EFI\microsoft\boot /s /e

F:\> mkdir EFI\microsoft\boot\Fonts

F:\> xcopy C:\Windows\Boot\Fonts\* F:\EFI\microsoft\boot\Fonts\ /s /e

F:\> copy C:\Windows\System32\config\BCD-Template F:\EFI\microsoft\boot\BCD
F:\> E:\utils\BOOTICEx64.exe
In case we install the BIOS, the bootloader installation will look like this Important! The partition mounted to C: (where the bootloader is located) must be active! Make sure before rebooting! The setup is done exactly the same using BootICE. Well, sort of everything. Close all the windows and go to reboot. A flash drive can be pulled out of a computer.
F:\> mkdir C:\Boot

F:\> xcopy C:\Windows\Boot\PCAT\* C:\Boot /s /e

F:\> mkdir C:\Boot\Fonts

F:\> xcopy C:\Windows\Boot\Fonts\* C:\Boot\Fonts /s /e

F:\> copy C:\Boot\bootmgr C:\bootmgr

F:\> copy C:\Windows\System32\config\BCD-Template C:\Boot\BCD
5. Cross our fingers and offer prayers to you, O Great and Terrible Sysprep ...!
GRUB we have not configured the item for Windows in the menu yet. As soon as the GRUB menu appears, click "C". In the console, type X, Y - respectively, the disk and the partition where the bootloader lies. This is the case with EFI. In the case of the BIOS, we do this X, Y - drive and partition with NTFS. Where the Windows is unpacked and its loader lies. In EFI mode, instead of the Windows logo, I saw a black screen, because I did not find bootres.dll in the distribution library, which should be placed in the EFI \ Mictosoft \ Boot \ Resourses folder. In the case of the BIOS, everything is in order - the familiar logo of the "seven". And then in both cases we will see it
grub> set root=hdX,Y

grub> chainloader /EFI/Microsoft/Boot/bootmgfw.efi

grub> boot
grub> set root=hdX,Y

grub> ntldr /bootmgr

grub> boot
This works sysprep. The screen will blink for 57% - the video card is configured. And if we did everything right, then the inscription “Application of system parameters” will hang for a rather long time, then the system will inform that the installation will continue after rebooting. If we messed up somewhere with installing the bootloader - the wrong EFI partition or inactive NTFS, then there will be an error :( But we are great and we will succeed, and after the next reboot, we will see it
and then, finally, here it
goes. , standard installation.
6. Configure GRUB
We noticed that each time we load the system from the GRUB console by hand. This is very good - it means neither MBR nor NVRAM are overwritten by insidious Microsoft. It is time to boot into arch and add a new item to the GRUB menu in the case of EFI. Or in the case of BIOS. We apply the GRUB settings and reboot and see the system in the boot menu item, after selecting which we get loaded Windows
menuentry 'Windows 7 Ultimate SP1 (EFI)' {


set root=hdX,Y

 chainloader /EFI/Microsoft/Boot/bootmgfw.efi

}
menuentry 'Windows 7 Ultimate SP1' {


set root=hdX,Y

 ntldr /bootmgr

}
Conclusion
Anticipating the anger of professional win-admins, I will say right away - I know about DISM . It was the information about this system that led me to the described solution. The goal was one - to find out how many features Windows itself needs to install Windows.
It turned out that - to install Windows, its environment is needed only for one thing - setting up BCD storage. All. The rest can be done from any other operating system environment.
If you write an analogue of bcdedit.exe for Linux, then you can install Windows from a Linux Live media.