April 12, 2016 at 17:14
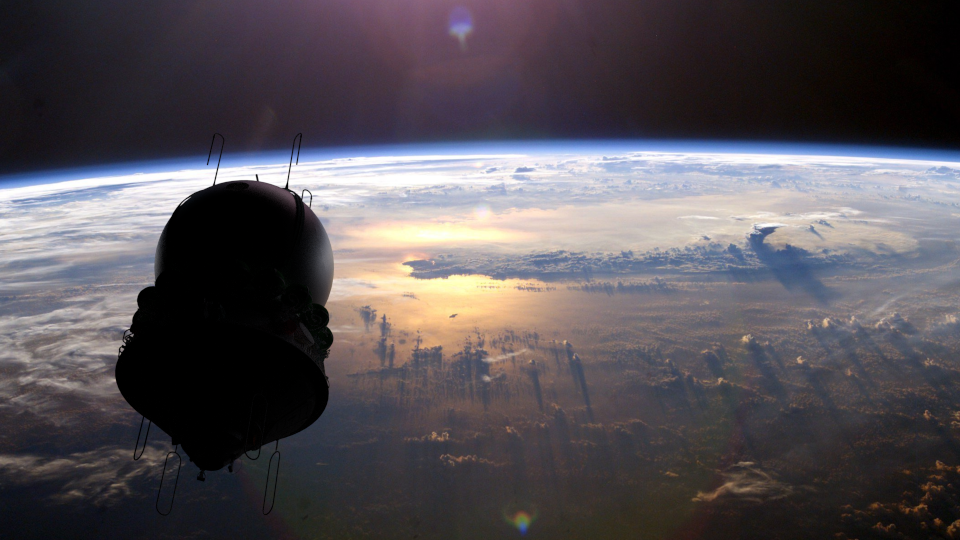
Vostok-1 spacecraft in 3D - render in Blender
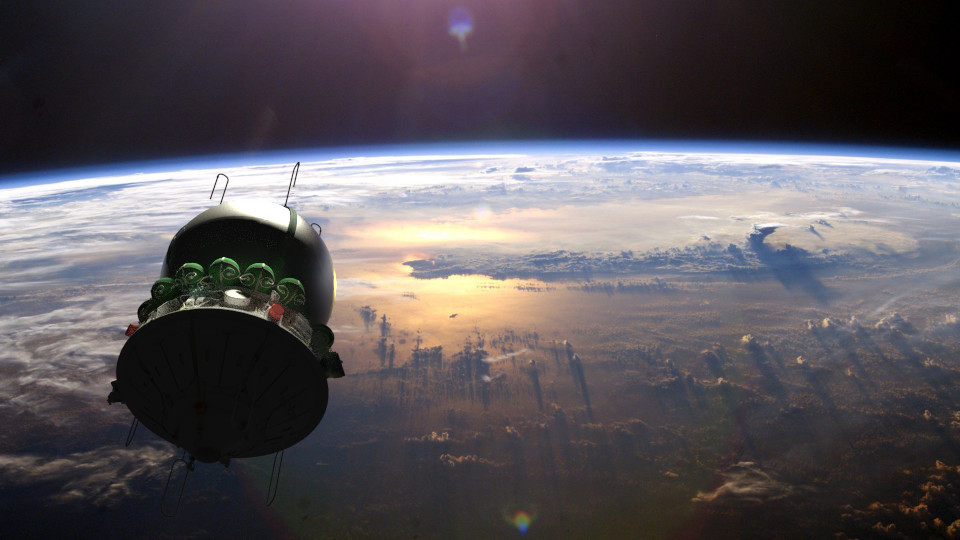
Robotics is interesting in that it is a synthesis of many areas - programming, design, mathematics, physics, and there is also modeling. That year, by the day of Cosmonautics, we did a little post about modeling the Vostok-1 spacecraft using OpenSCAD, this time we will continue the tradition and try in practice Blender. The skill of modeling will not be superfluous.
Blender is a cross-platform, free system for 3D modeling (+ animation), and it is also possible to “render” models in it.
Creating 3D models, especially spaceships, is not an easy task, and it can take months. But we will use the ready-made 3D models of the Vostok-1 ship (we will tell you where they are) and create a simple 3D scene.
Models of the ship Vostok-1
First, let’s talk about the source of the models - they are posted on github - their author Victor Slavutinsky - created them for the FlightGear flight simulator, many thanks for his work.
Install Blender
There shouldn't be any problems with installing Blender, the distribution kit for your OS is downloaded from the official page - it is unpacked, and it starts.
Import AC3D into Blender
Model files for FlightGear in AC3D format (* .ac) - we need to import them into Blender. There is a Blender-AC3D plugin for this .
Installing plugins is to copy the folder to the plugins folder, I needed to copy the io_scene_ac3d folder to my blender-2.76b-linux-glibc211-x86_64 / 2.76 / scripts / addons / folder in my distribution kit. After that, you need to activate the plugin, for this (after restarting Blender) we select the menu “File” - “User Preferences ...” - on the “Addons” tab in the search field we type ac3d - and our plugin is displayed, put “gooseberry” opposite it - from this moment the plugin becomes available (if we want it to always be connected - click on the “Save User Setting” button).
Now we can import the models in * .ac format - select "File - Import - AC3D".
Models Vostok-1
Models are located in the Models folder , in the corresponding (talking) sub-folders:
Controlhandle
Effects
Exhausts
Gashandle
Illuminators
Leftpanel
LeftSwitchPanel
Mainpanel
Parachutes
Rightpanel
RightSwitchPanel
Seat
Spacecraft
Vzor
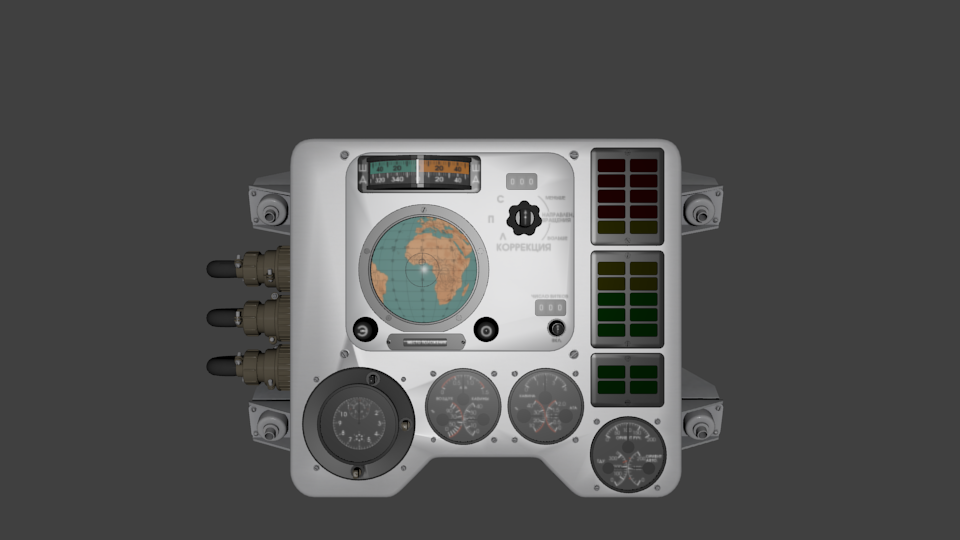
For example, this is the result of rendering the LeftPanel / Vostok-1-Left-Panel.ac file in Blender:
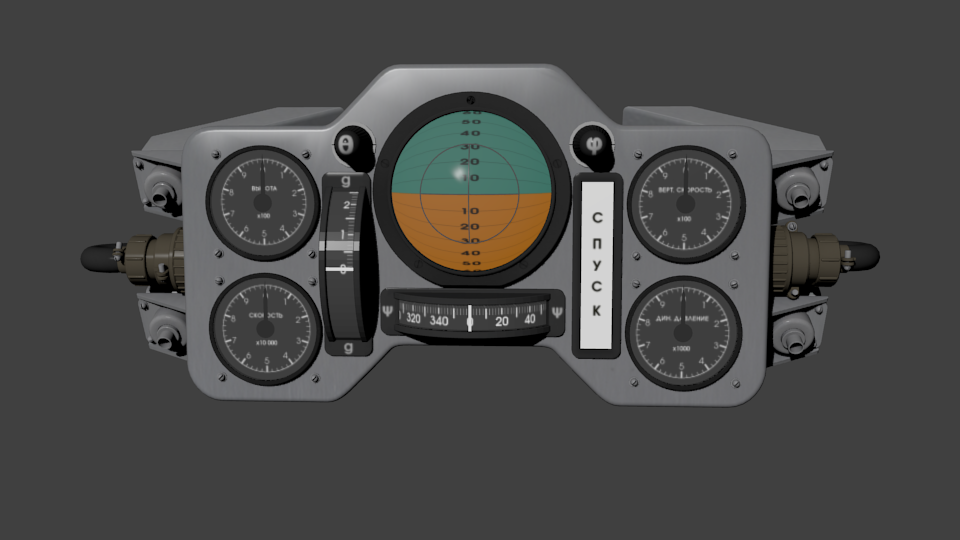
Or MainPanel / Vostok-1-Main-Panel.ac:
There Vostok-1 was completely simulated, from the rocket to the descent vehicle and the astronaut’s cabin .
Over time, to simplify the work, all files will be converted to Blender format, and Vostok-1-blender will be placed here .
Scene
The test scene that was used to render our picture is uploaded to github (file Vostok-1-scene.blend), and after opening it you will see
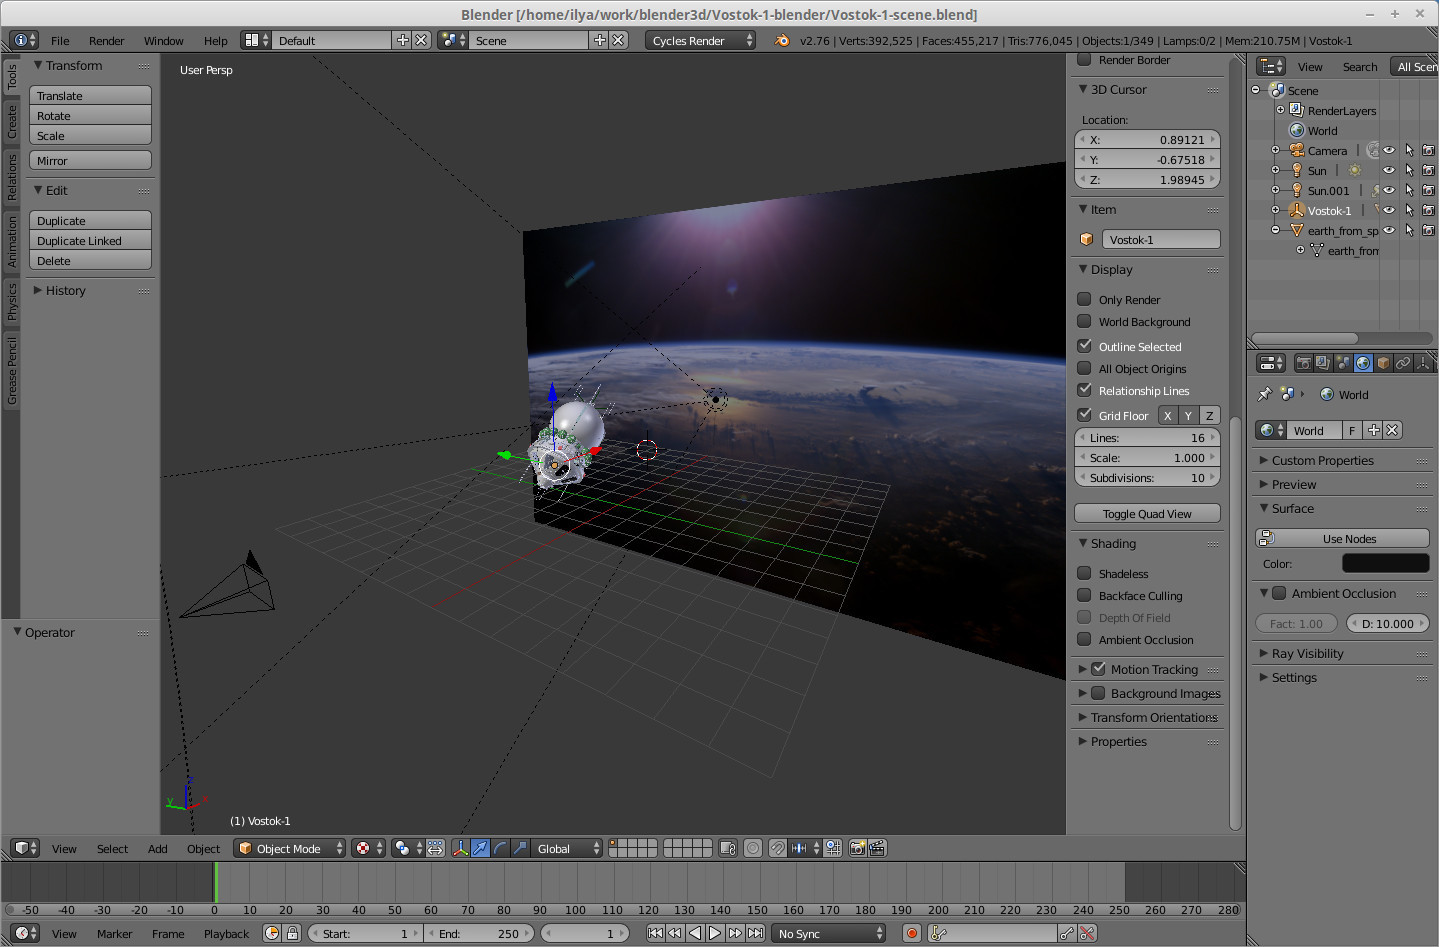
Process of creation
To create a scene, you need 3 elements:
- 3d object
- background picture
- lighting
The 3d object of our Vostok-1 spacecraft can be taken immediately in the Blender format (the Vostok-1.blend file is in the same place ). The background image was imported using the “Import Images as Planes” plugin (by default it is off, you need to find it in the Add-ons list and activate it). The corresponding function appears:
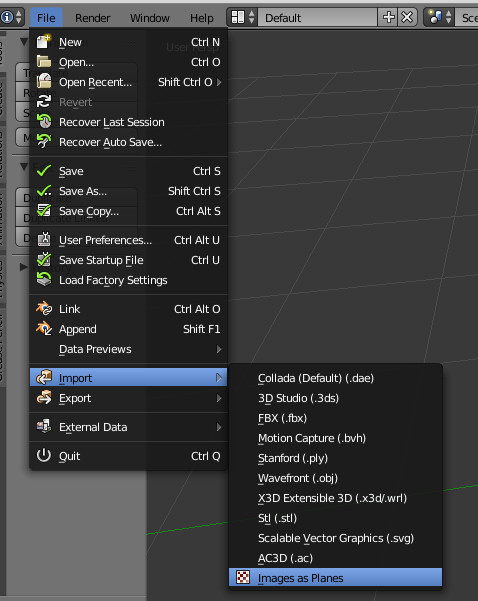
In this case, the picture becomes an object “panel” with which it is convenient to work and place on a 3D scene.
Basic operations
We will briefly touch on the basic actions when working with scenes in Blender (for beginners).
Firstly, this is orientation in space - for this, the middle mouse button is pressed, and the viewpoint moves.
Work with objects: selecting an object - the right mouse button (but everyone is advised to remake it to the left).
With the selected object - you can perform actions:
- moving [G]
- rotation [R]
- scaling [S]
As a rule, this is done through the keyboard - the corresponding keys are pressed - and the model goes into resp. mode. You can specify data for moving, rotating - immediately on the keyboard by selecting resp. axis (x, y, z).
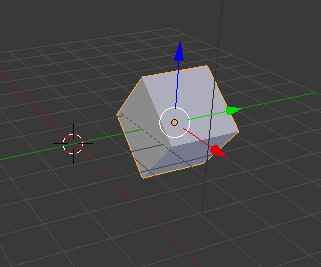
For example, if you open the scene by default, a cube will be selected there right away (this can be seen at the bottom left, where the axes are visible by the way), and by pressing the keyboard, successively the following keys “gy 3 Enter” - we will shift it along the Y axis by 3 cells. And this ry 45 Enter combination will rotate it around the y axis by 45 degrees:
Next, a convenient function is to work in the coordinates of the object - to do this, double-click on the axis name - the axis will be highlighted visually, either in the global coordinate system or local , for example, rotate around the z axis (cube) by 45 degrees: "rzz 45 Enter":

View Plans
Using the keys on the right digital panel, you can switch views - 0,1,2,3 ...
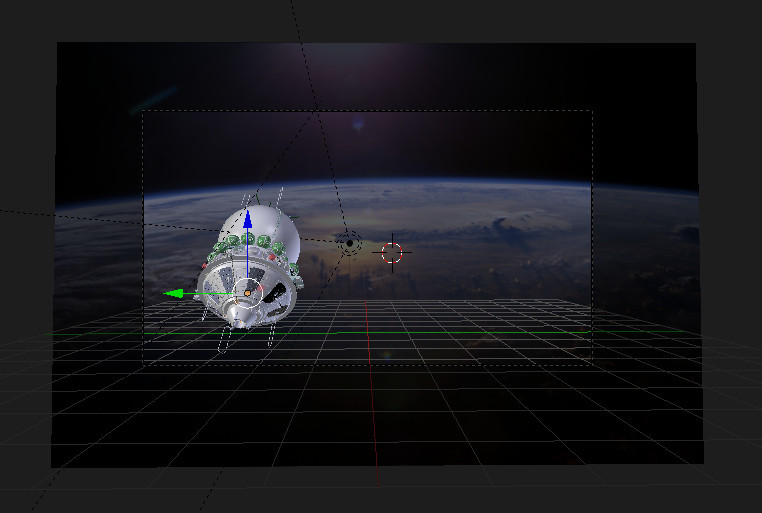
0 - this is the view from the camera, what will be rendered (the frame shows the scene area that will be captured):
Render
To start the rendering - press the F12 key - Blender will begin to draw the scene using Cycles Render . Esc is a stop. F3 - saving the result (picture).
The quality of rendering depends on the number of Samples - the more there are - the more realistic the scene will be, but the longer the rendering will take.
This key element is configured in the Render block - this is the “Camera” icon - on the right side of the toolbar:
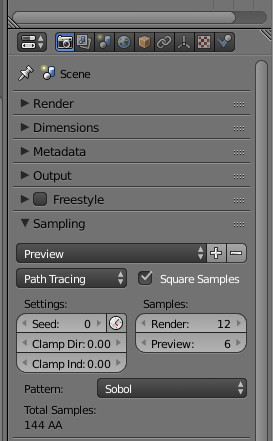
it’s possible to select “Preview” or “Final” from the drop-down list, or manually set the value “Samples Render” - I rendered it at 200. For quality results - increase value.
Items
All the elements on the stage constitute a hierarchy, and it can be seen in the upper right window:

We see that we have:
- Camera - using the camera we get a picture
- Sun is a source of lighting - which will create the effect of the Sun on our 3D model
- Sun.001 is a light source - which creates the effect of light reflection from the Earth
- Vostok-1 is the parent object for our Vostok-1 ship model
- earth_from_space - a panel with a texture picture of the Earth - to get the effect of being in space
Lighting
The main source of light in our scene is the Sun. To change the parameters, select this element in the hierarchy of elements and click on the "Sun" icon on the toolbar:

Here you can change - the size of the "Sun" - "Size" - the smaller - the smaller the angular size of the light source. And also Strength - determines the strength of the light.
By changing these parameters, you can change the level of lighting of the model by the Sun.
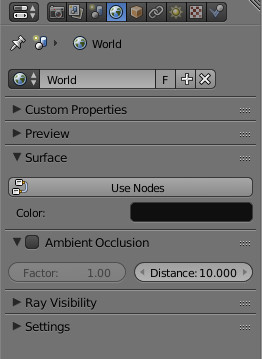
We also have background lighting, this is configured on the “World” tab (Earth icon):
And clicking on Color:
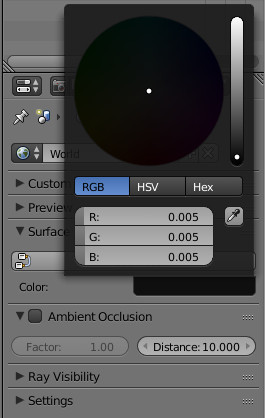
we see that in our example the background lighting is set at - 0.005
3D model rotation
To work with the model - we select the Vostok-1 element on the hierarchy of elements, and we can move or rotate (for example, to change a different angle of incidence of light), we do this using keyboard commands: “R”, then the axis - (“x”, “ y "," z ") - around which we want to rotate (press twice - if this is the axis relative to the object) - and then moving the mouse - we can immediately see the changes -" Enter "- to confirm the changes or" Esc "to cancel.
Experiments
Of course, this is just a simple scene, but even here you can vary different parameters and see what happens.
Thanks.
Once again, I would like to express my gratitude to Victor Slavutinsky for his titanic work on 3D modeling Vostok-1. Thanks also to Mikhail Shablin- that supported me in this endeavor, and took the time to my questions.
More
Of course - this is only a small part of Blender's capabilities, animation, working with textures, working with video, sound, etc. are not considered.
Russian-language resources for self-study of Blender:
- Blender 2.7+ Fundamentals Course
- Video courses “3D-cartoon from scratch” (Arthur Shamshadinov and Co)
- a Russian-language (original, non-translated) book on Blender was published: “A. Prakhov Tutorial Blender 2.7 "