An introduction to model transformation (or the transformation that creates the transformation that the model creates)
Tutorial
Today we will write the transformation that creates the transformation. Personally, this reminds me of Christopher Nolan's “Beginning,” where people had dreams in dreams.
This is the 7th article in the model-oriented development cycle. For six months now, I’ve been trying to write an article with a serious example of model-driven development. But each time, understanding that you first need to talk about technologies in general, to sort out some very simple example. So this time, I just wanted to start the article with “Hello World”, but in the end this simple example grew into a hefty article.
Introduction
In previous articles, we looked at models, metamodels, model editors, text and graphic notations. It is time to move from statics to dynamics. Today we will introduce you to several model conversion tools.
Query / View / Transformation (QVT)
QVT is a family of domain-specific languages that describe model transformations. The OMG QVT specification describes three languages:
QVT Core (QVTc) is a declarative model conversion language. For example, there are UML and ER models. With QVT Core you can “say” that classes in UML models correspond to entities in ER models, class properties in UML models correspond to attributes in ER models, etc. Having described such a mapping, you can convert some UML models into ER models or, conversely, ER models in a UML model - a bi-directional mapping.
QVT Relations (QVTr) is about the same as QVT Core, only with syntactic sugar, which allows you to write conversions more compactly.
QVT Operational (QVTo) - unlike the two previous languages, this one is already imperative and allows you to describe only unidirectional model transformations.
For QVTc and QVTr, there is also an Eclipse implementation . It is planned that by the release of Eclipse Neon it can be used. But while it is not very working, therefore, in this article we will not dwell on it.
It is very important to note that QVTo transforms can be run not only in Eclipse, but also in stand-alone Java applications. For example, our conversions work fine on the web server side.
You can think of QVT as an add-on to OCL . You can use the operators in QVT to navigate: “.” and "->". You can use the standard OCL library.
ATL Transformation Language (ATL)
ATL is a hybrid (declaratively imperative) model conversion language that emerged in parallel with QVT. It is very similar to QVT in many ways, but there are also differences.
To start the conversion, you have to write ANT scripts.
Pros:
Eclipse OCL , which is used in QVT, although good, but relatively heavy. ATL as a whole looks more nimble than QVTo.
Support for refining conversions. If you need to make small changes to an existing model, rather than create a new one, then ATL is more convenient. Theoretically, QVT can also write such transformations, but almost everything is complicated.
Support for higher order transformations. ATL allows you to work with ATL-transformations as with models. Those. using it, you can convert the ATL transform to something or, conversely, form an ATL transform from something. Theoretically, QVT should allow this, but in practice, everything is not so simple.
Henshin
Henshin is also a model transformation language. But unlike QVT and ATL, it’s visual, not textual. It is based on category theory. Models are considered as graphs that can be transformed using the methods of double codecart square (double pushout - DPO) or single codecart square (single pushout - SPO).
Honestly, this is an insanely interesting topic, and in one of the following articles we will probably return to category theory.
Henshin allows you to run conversions on Apache Giraph, which allows you to convert very large models. Although I have never done this, I mainly use QVTo.
Separately, it is worth noting XSLT. When it comes to transformation, many recall it. I myself in the early 2000s, at the dawn of the emergence of XSLT, wrote on it and a PHP engine for the site. It braked fiercely and demanded some unthinkable at that time amount of RAM. But this is not the point, the technology is not bad, I still write some simple transformations on XSLT.
The first problem with XSLT is that it is focused on the conversion of XML documents. Of course, you can serialize the model as an XML document and feed it XSLT. Moreover, there is even a corresponding OMG XMI specification(hereinafter will be an example of an XMI file). But firstly, there are different ways to put the model in an XML file. For example, attributes can be serialized as XML attributes or XML elements. Such variability greatly complicates XSLT transformations. Secondly, a model is a graph, not a tree, usually in models it is full of horizontal connections, including intermodel ones. Searching for desired objects using such links is just hellish. And if you recall more profiles and stereotypes in UML models, then this is already the 9th circle of hell.
The second problem with XSLT is the XML syntax; it is simply not convenient.
Finally, there are things in normal model conversion tools that XSLT creators have never even dreamed of. For example, the conversion log and delayed link resolution in QVTo, which I will mention in passing later (in the Debugging section).
If my arguments are not convincing enough, then in the section “We are writing a transformation that will write“ Hello World-transformation ”for us, there’s just an example of a model in XMI format. The following is the ATL conversion that generates such a model. Imagine what a similar XSLT transformation would look like.
By the way, the Eclipse Modeling Framework allows you to link XML schemas and Ecore metamodels. This allows you to convert almost arbitrary XML files to Ecore models and vice versa. Which, in turn, allows the use of QVTo, ATL, and other tools for converting XML documents. Perhaps we will consider such an example in one of the following articles.
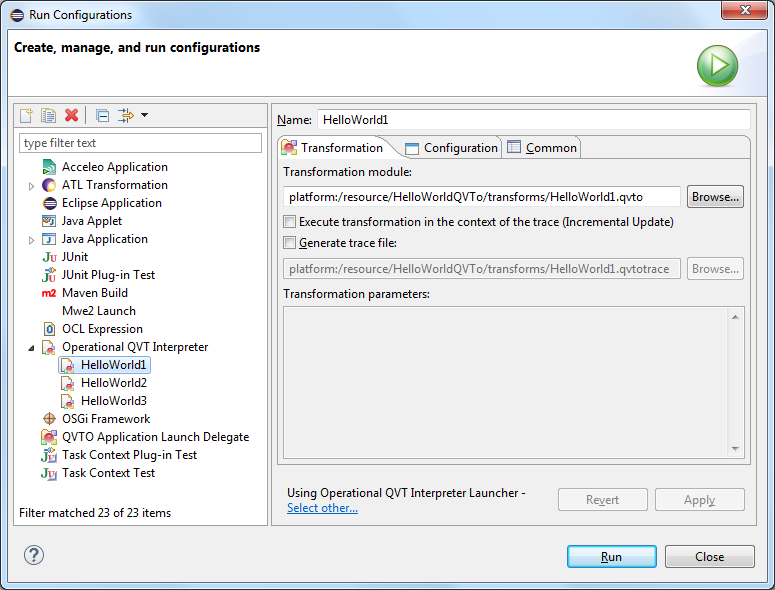
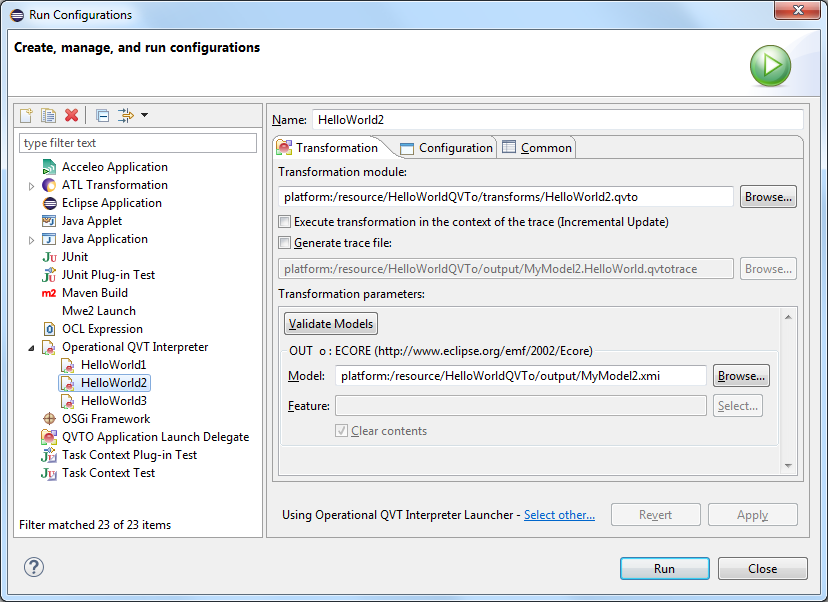
Create a configuration to start the conversion (Run -> Run Configurations ...) and run it:
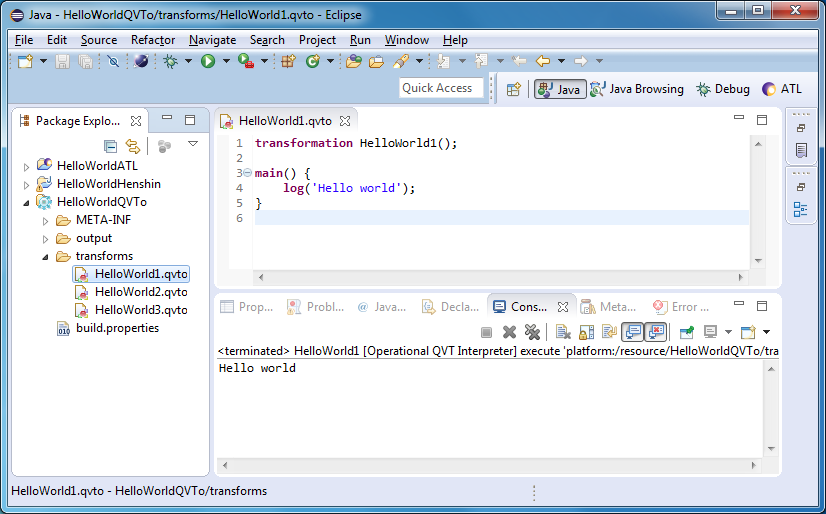
You should see something like this:
We write a model-oriented "Hello world"
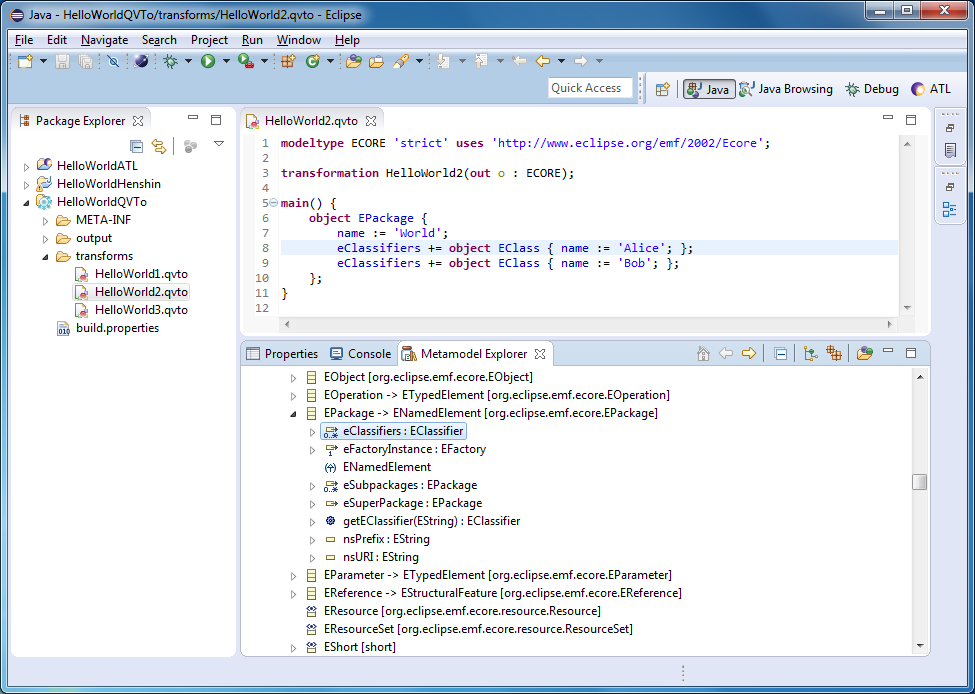
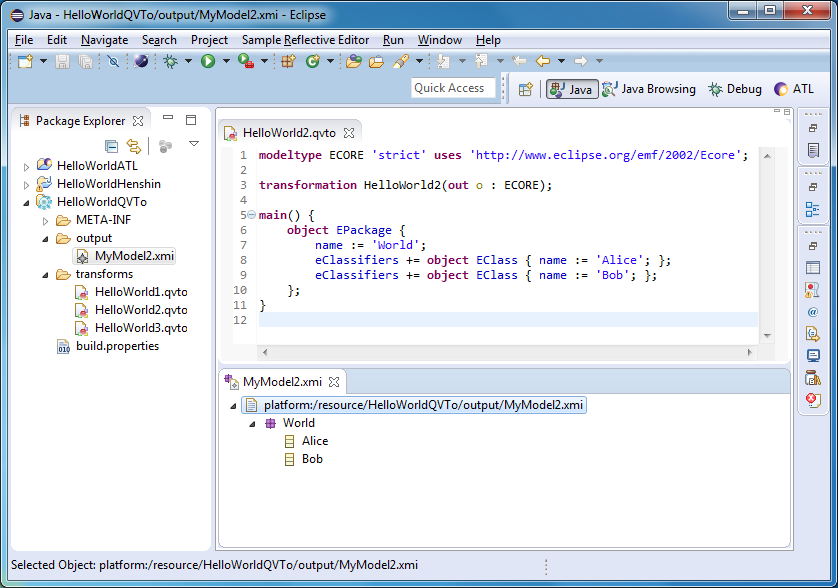
For a truly model-oriented “Hello world” we need a test model, but in previous articles we have already created enough models. Stop wasting time on this, let QVTo create it yourself:
modeltype ECORE 'strict' uses 'http://www.eclipse.org/emf/2002/Ecore';
transformation HelloWorld2(out o : ECORE);
main() {
    object EPackage {
        name := 'World';
        eClassifiers += object EClass { name := 'Alice'; };
        eClassifiers += object EClass { name := 'Bob'; };
    };
}
First (using the modeltype operator), you must specify the metamodel of the model being created. Then, in the third line, we indicate that the transformation has one output model. And finally, add some code to the main statement.
Intuitively, the transformation creates a World package with two classes (Alice and Bob).
If you click via Ctrl on the name of the class or property, then open the metamodel in which they are defined. You will also find next to a hundred or two different metamodels:
Note
Hereinafter, I will not describe the syntax of the language in too much detail. You can get to know him in the specification or in this presentation . In the next article, we will look at QVTo in more detail.
In the configuration, to start the conversion, you must specify the file in which the generated model will be saved:
After starting, you will receive the following model:
We write Truly model-oriented "Hello world"
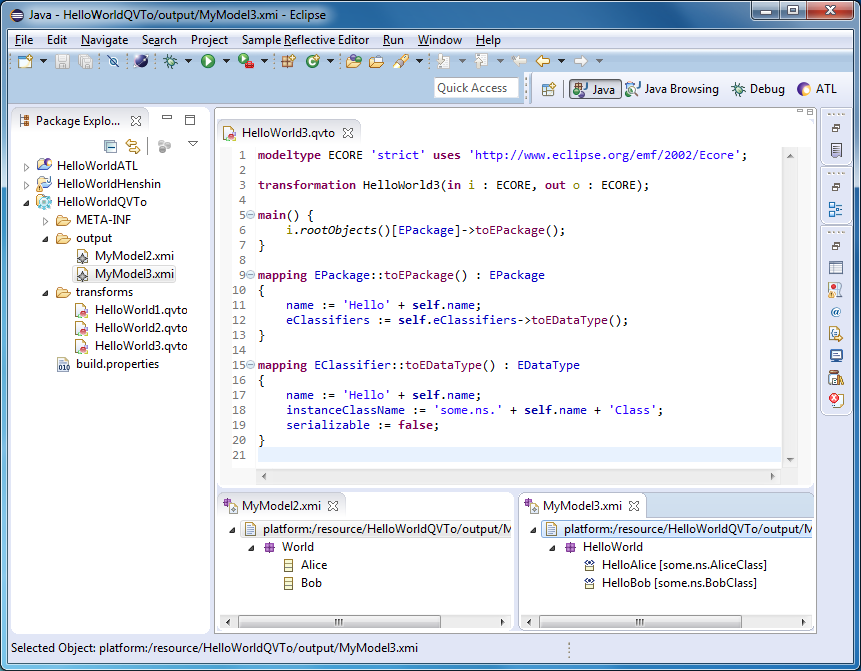
Now we will transform the test model into a new model. In the 3rd line, indicate that the transformation has not only an output, but also an input Ecore-model. And add some code:
The essence of the transformation is as follows. We look for all root packages in the input model and convert them to packages too, but others. We add the prefix “Hello” to the name, and convert all classifiers into data types. Data type names will also start with the “Hello” prefix, well, and, before the heap, we’ll set a couple more properties.
Create a configuration for starting this conversion. Do not forget to specify the previously created model as the input, and for the output model, specify some new file name.
After starting, you should get something like this:
Debugging
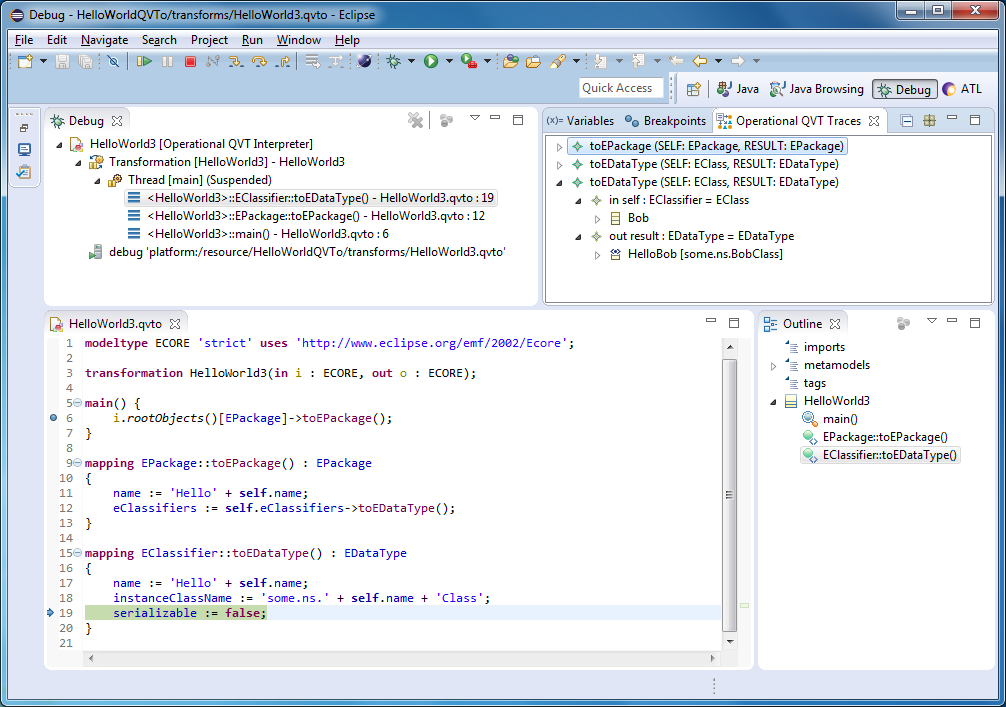
Eclipse QVTo has a transform debugger that, in addition to the usual things, shows the input and output objects of all mappings. The fact is that the QVTo engine keeps a detailed log of the model conversion (in the figure on the top right). And this is necessary not only for debugging. Firstly, when the same objects are displayed again, the result will be taken from this log (cache). This, by the way, allows you to convert models incrementally. Secondly, in the code, you can explicitly access the log using the resolve operation. And with late resolve, you can refer to journal entries that are not there yet! The magazine is one of the key features of QVTo.
ATL Transformation Language
Rewrite Truly model-oriented "Hello world"
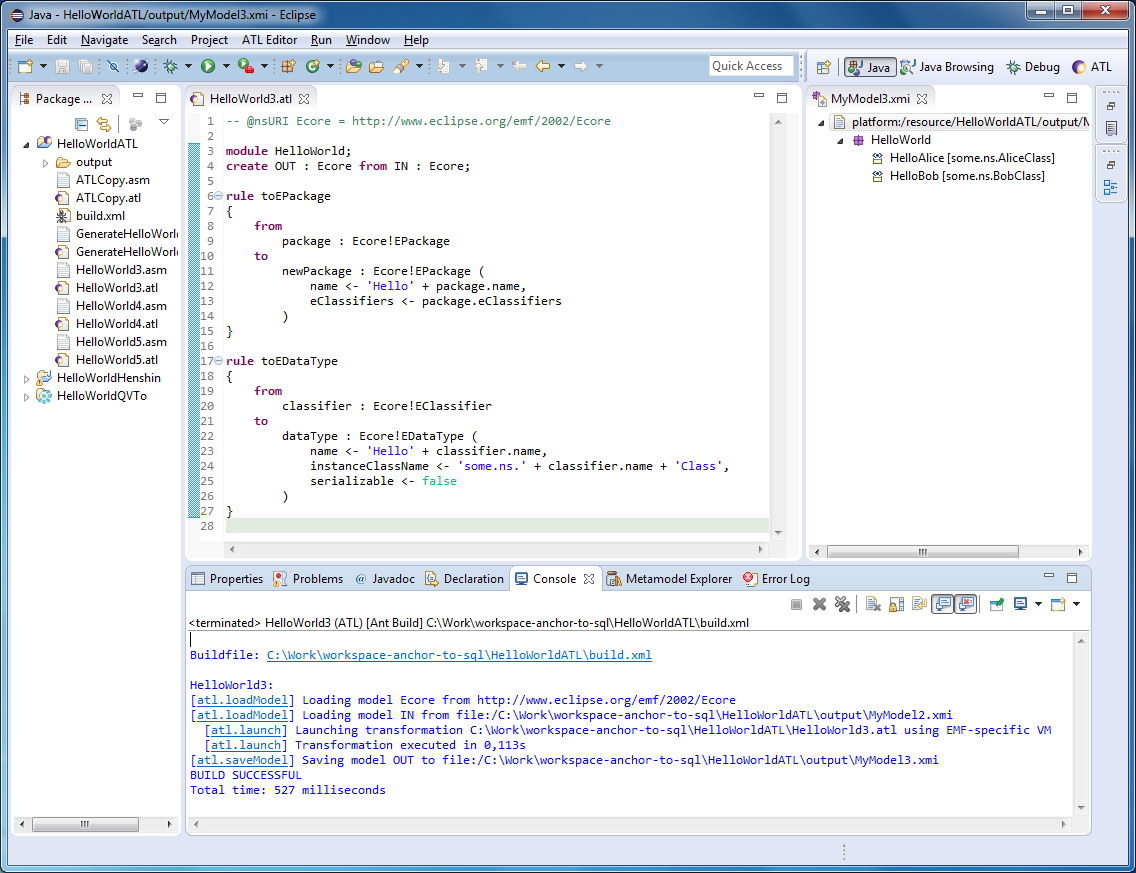
Now we rewrite the last conversion in ATL. Create a new project (File -> New -> Other ... -> ATL Project). Create a new transformation (File -> New -> Other ... -> ATL File). It can be seen that ATL is very similar to QVTo:
-- @nsURI Ecore = http://www.eclipse.org/emf/2002/Ecore
module HelloWorld3;
create OUT : Ecore from IN : Ecore;
rule toEPackage
{
    from
        package : Ecore!EPackage
    to
        newPackage : Ecore!EPackage (
            name <- 'Hello' + package.name,
            eClassifiers <- package.eClassifiers
        )
}
rule toEDataType
{
    from
        classifier : Ecore!EClassifier
    to
        dataType : Ecore!EDataType (
            name <- 'Hello' + classifier.name,
            instanceClassName <- 'some.ns.' + classifier.name + 'Class',
            serializable <- false
        )
}
In the first line of the annotation, we indicated the metamodel used. However, for autocompletion to work in the editor, you may need to rediscover it.
creation of ATL and, frankly, this can be seen in the syntax :) From their Caml, I also double in my eyes. An excellent office, but there is a feeling that their languages are different from other languages as well as French is different from English. The letters seem to be similar, but something is wrong.
After saving the conversion, the asm file should appear in the project. This is the same conversion, but in a form designed to run on an ATL virtual machine.
Note
Sometimes it happens that you change something in a transformation, but it works the same way. In this case, delete the asm file and if it does not automatically recreate, then something is wrong with the conversion. For example, I used the drop operator in the conversion, which is supported only in the new version of the ATL compiler, which must be explicitly enabled using a special directive. At the same time, I did not get any errors, and the asm-file just was not silently regenerated.
You can start this conversion using Run -> Run Configurations ... However, this method has some limitations, so we will write an ANT script to run right away.
Create a build.xml file in the project with the following contents:
The test input model can be taken from the QVTo project.
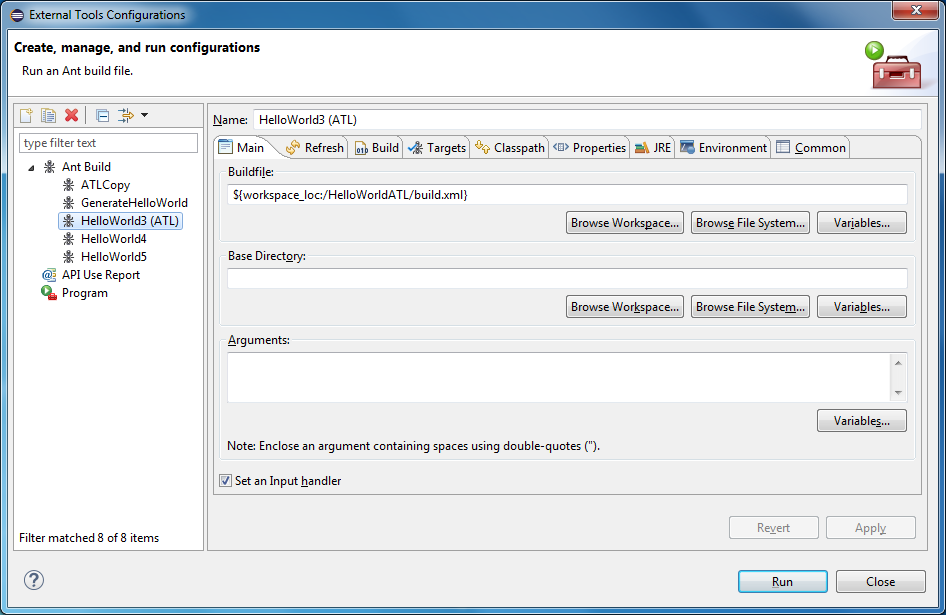
Create the configuration to run (Run -> External Tools -> External Tools Configurations ...).
Specify the path to build.xml.
On the Targets tab, check HelloWorld3.
And, most importantly, on the JRE tab, select “Run in the same JRE as the workspace”, otherwise you will get the error “The name is undefined”.
After starting, you should see something like this:
Writing a refinement transformation
Sometimes you need to make small changes to an existing model, rather than create a new one. Let's write a transformation that removes Bob from the model, and welcomes the rest:
-- @atlcompiler atl2010
-- @nsURI Ecore = http://www.eclipse.org/emf/2002/Ecore
module HelloWorld4;
create OUT : Ecore refining IN : Ecore;
rule sayHello
{
    from
        s : Ecore!ENamedElement (s.name <> 'Bob')
    to
        t : Ecore!ENamedElement (
            name <- 'Hello' + s.name
        )
}
rule killBob
{
    from
        s : Ecore!ENamedElement (s.name = 'Bob')
    to
        drop
}
The script to run.
The model is saved in a separate file, however, in structure, it repeats the original model with the exception of the changes described in the conversion.
We are writing a transformation that will write “Hello World” transformation for us
I think the time has come for a little brain removal. The transformations that create or change models for us have already been written. It remains to write a transformation that the transformation will write for us.
The fact is that transformations themselves are models. To verify this, we write a small transformation that personally greets Alice and Bob:
-- @nsURI Ecore = http://www.eclipse.org/emf/2002/Ecore
module HelloWorld5;
create OUT : Ecore from IN : Ecore;
rule SayHelloToAlice {
    from
        classifier : Ecore!EClassifier (
            classifier.name = 'Alice'
        )
    to
        datatype : Ecore!EDataType (
            name <- 'Hello' + classifier.name
        )
}
rule SayHelloToBob {
    from
        classifier : Ecore!EClassifier (
            classifier.name = 'Bob'
        )
    to
        datatype : Ecore!EDataType (
            name <- 'Hello' + classifier.name
        )
}
Use this script to save the conversion in XMI format.
Unfortunately, because of one ATF bugfix in the ANT script, you have to write some dubious path to ATL.ecore. And the resulting XMI file cannot be opened in the normal tree model editor, because the namespaces www.eclipse.org/gmt/2005/ATL and www.eclipse.org/gmt/2005/OCL are not registered in Eclipse. This can be fixed, but we will not be distracted, for the purposes of the article this is not important. The main thing is that you can see that the ATL transform can be represented as a model.
Now we write a transformation that generates a similar model (i.e., generates a transformation that personally greets each class in a certain model):
-- @nsURI Ecore = http://www.eclipse.org/emf/2002/Ecore
-- @path  ATL = platform:/plugin/org.eclipse.m2m.atl.common/org/eclipse/m2m/atl/common/resources/ATL.ecore
module GenerateHelloWorld;
create OUT : ATL from IN : Ecore;
rule EPackageToModule {
    from
        package : Ecore!EPackage
    to
        _module : ATL!Module (
            name <- 'HelloWorld5',
            inModels <- thisModule.createEcoreModel('IN'),
            outModels <- thisModule.createEcoreModel('OUT'),
            elements <- package.eClassifiers
        )
}
rule EClassifierToRule {
    from
        classifier : Ecore!EClassifier
    to
        _rule : ATL!MatchedRule (
            name <- 'SayHelloTo' + classifier.name,
            inPattern <- _in,
            outPattern <- _out
        ),
        -- InPattern
        _in : ATL!InPattern (
            elements <- inElement,
            filter <- inFilter
        ),
        inElement : ATL!SimpleInPatternElement (
            varName <- 'classifier',
            type <- thisModule.createEcoreModelElement('EClassifier')
        ),
        inFilter : ATL!"OCL::OperatorCallExp" (
            operationName <- '=',
            source <- thisModule.createAttributeCallExp(inElement, 'name'),
            arguments <- thisModule.createStringExp(classifier.name)
        ),
        -- OutPattern
        _out : ATL!OutPattern (
            elements <- outElement
        ),
        outElement : ATL!SimpleOutPatternElement (
            varName <- 'datatype',
            type <- thisModule.createEcoreModelElement('EDataType'),
            bindings <- nameBinding
        ),
        nameBinding : ATL!Binding (
            propertyName <- 'name',
            value <- helloPrefixOperatorExp
        ),
        helloPrefixOperatorExp : ATL!"OCL::OperatorCallExp" (
            operationName <- '+',
            source <- thisModule.createStringExp('Hello'),
            arguments <- thisModule.createAttributeCallExp(inElement, 'name')
        )
}
lazy rule createEcoreModel {
    from
        name : String
    to
        model : ATL!OclModel (
            name <- name,
            metamodel <- ecoreMM
        ),
        ecoreMM : ATL!OclModel (
            name <- 'Ecore'
        )
}
lazy rule createEcoreModelElement {
    from
        name : String
    to
        element : ATL!"OCL::OclModelElement" (
               model <- model,
            name <- name
        ),
        model : ATL!OclModel (
            name <- 'Ecore'
        )
}
lazy rule createAttributeCallExp {
    from
        var : ATL!SimpleInPatternElement,
        name : String
    to
        expr : ATL!"OCL::NavigationOrAttributeCallExp" (
            name <- name,
            source <- variableExp
        ),
        variableExp : ATL!"OCL::VariableExp" (
            referredVariable <- var
        )
}
lazy rule createStringExp {
    from
        str : String
    to
        expr : ATL!"OCL::StringExp" (
            stringSymbol <- str
        )
}
Imagine what a similar XSLT transformation would look like.
The script to run.
After starting the conversion, you will get the conversion from which we started this subsection (with the SayHelloToAlice and SayHelloToBob rules).
We are writing a transformation that will write a transformation that will write a transformation ...
Joke. It is hard to imagine why this might be needed.
Henshin
To recover a bit after the creepy ATL syntax, let's draw a transformation with the mouse.
Create a new project: regular or Java (File -> New -> Other ... -> Java Project).
Create a Henshin diagram, the creation wizard will also offer you to create a model. By the way, in an article about Sirius, we learned how to create such diagram editors.
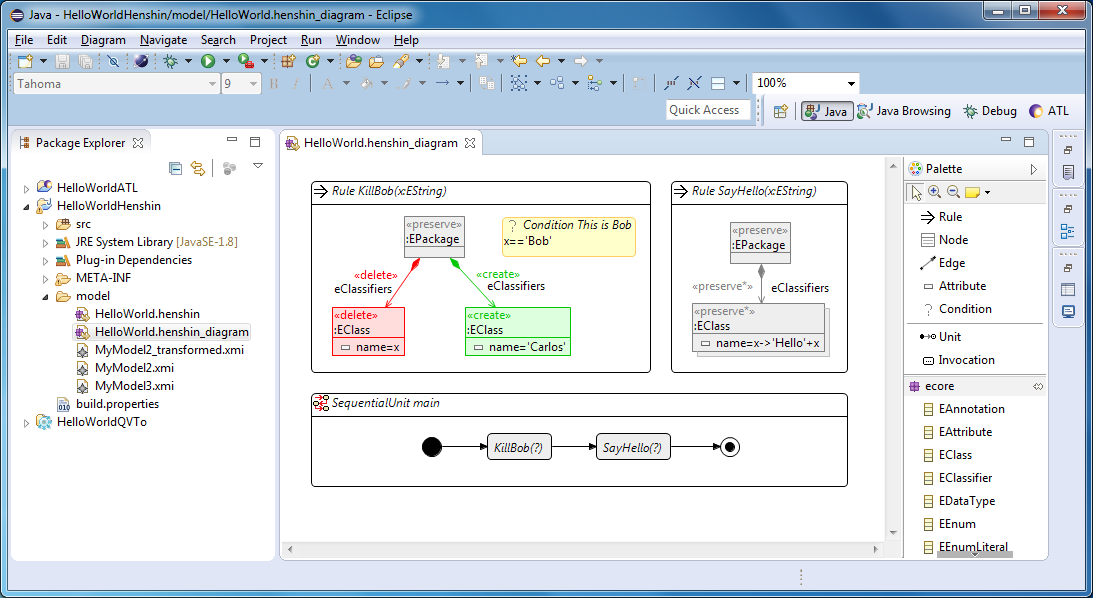
Create this transformation:
The meaning should be intuitive. First we kill Bob and introduce Carlos. Then we welcome the survivors.
Note
Honestly, you need to get used to the chart editor. For example, if you cannot change the order of the rules in the Sequential Unit, then you can change it in the tree editor of the model.
On the left in the project tree, call the context menu of the henshin file. And select Henshin -> Apply Transformation. You can run both individual rules and modules.
As a model, you can specify a test model that QVTo transformation has kindly generated for us earlier. Please note that the wizard offers to compare models after conversion.
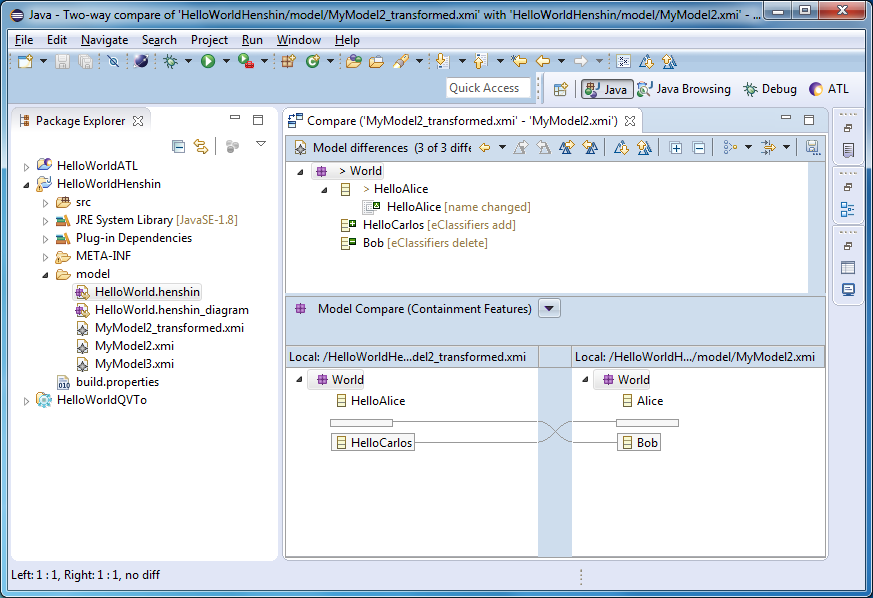
If everything is fine, then after the launch you will see something similar:
As you can see, the renaming of Alice, the murder of Bob and the introduction of Carlos into the model did not go unnoticed.
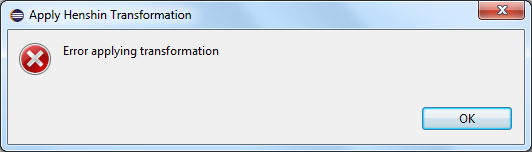
But, most likely, you will see something like this:
If this happens, then to figure out the cause of the error, you will have to start the conversion manually using a similar class:
HelloWorldHenshin.Main
package HelloWorldHenshin;
import org.eclipse.emf.henshin.interpreter.EGraph;
import org.eclipse.emf.henshin.interpreter.Engine;
import org.eclipse.emf.henshin.interpreter.UnitApplication;
import org.eclipse.emf.henshin.interpreter.impl.EGraphImpl;
import org.eclipse.emf.henshin.interpreter.impl.EngineImpl;
import org.eclipse.emf.henshin.interpreter.impl.UnitApplicationImpl;
import org.eclipse.emf.henshin.model.Module;
import org.eclipse.emf.henshin.model.resource.HenshinResourceSet;
public class Main {
    public static void main(String[] args) {
        HenshinResourceSet resourceSet = new HenshinResourceSet("model");
        Module module = resourceSet.getModule("HelloWorld.henshin", false);
        EGraph graph = new EGraphImpl(resourceSet.getResource("MyModel2.xmi"));
        Engine engine = new EngineImpl();
        UnitApplication app = new UnitApplicationImpl(engine);
        app.setEGraph(graph);
        app.setUnit(module.getUnit("main"));
        if (!app.execute(null)) {
            throw new RuntimeException("Execution error");
        }
        resourceSet.saveEObject(graph.getRoots().get(0), "MyModel3.xmi");
    }
}
In this case, there is a chance to see a more meaningful error message.