Unity The Blacksmith Demo
- Transfer
Hello! We promised to publish assets, unique tools and shaders from The Blacksmith project . No sooner said than done.

Firstly, you can download the demo project in an exe file.
For your convenience, we have divided all assets, tools, and shaders into two packages: The Blacksmith - Characters (Characters) and The Blacksmith - Environments (Environment).
Below is more detailed information about each package, as well as arguments in favor of choosing a particular technology. We want this project not only to demonstrate the capabilities of Unity 5, but also bring you immediate practical benefits.
Ahead of the question that we often hear after the release of demo materials, we will answer right away: you can absolutely freely use these resources, even in commercial projects. At the same time, the provisions of the standard Asset Store license remain in force. We will be glad if this release is useful to you and will contribute to the success of your project.
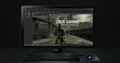
EXE-file
You can control the video playback using the simple interface:
• Use the slider to fast forward / rewind.
• To stop or resume playing a video, press the Play / Pause button or click the mouse outside the UI.
• To look around by slightly changing the viewing angle, press the pause and move the cursor.
• To turn off the audio, press the Mute button.
You can choose one of the predefined quality settings:
• Low - recommended for weak devices.
• Medium - Recommended for high-end mid-range laptops and desktops. On a laptop with a Quad Core i7 processor (2.5 GHz) and a GeForce GT 750M graphics card, the video plays in 720p at 30fps.
• High - Recommended for most desktops. On a computer with a Core i7 4770 processor and a GeForce GTX 760 graphics card, the video plays in 1080p at 30fps.
• Very high — Recommended for PCs with a GTX 760 or higher.
Depending on the platform, loading a project may take more than 30 seconds.
THE BLACKSMITH PACKAGE - CHARACTERS
This package includes:
• model of a blacksmith;
• antagonist model;
• hair shader;
• wrinkle cards;
• unique character shadows;
• planar reflections.
Download the Blacksmith - Characters package here.
Blacksmith and antagonist.
Character models in the project are presented separately.
We converted the skin of the antagonist, which was used in the video, to a more universal one. Now you can safely add it to any environment and start experimenting. But keep in mind that for good animation you still have to work on it. As an example, we added two animations to the project: idle (inaction) and walk (walking).

In this package you will also find the main character - the blacksmith. His skin is much more complicated than that of the antagonist, so we left everything as it is, so as not to waste time in vain. We remind you: you can absolutely freely use this original 3D model in your projects.

Despite the fact that we used some textures in lower resolution (2K), the package contains original full-size 4K-textures for both characters.
The authors of the models and textures for the characters are Jonas Tornqvist and Sergey Samuilov.
Hair rendering
To make the hair look realistic, we needed a characteristic anisotropic lighting, so we decided to make a separate shader for the hair. In addition, we added a component to it that calculates the ambient occlusion value separately for the hair, and set up multi-pass rendering to avoid sorting errors of overlapping transparent polygons.
The hair shader and accompanying sample scene can be downloaded from the Asset Store. Detailed information on its use and configuration is contained in the readme-file.
Wrinkle cards
To make the facial expressions of the antagonist more realistic, we added wrinkle-based wrinkle maps to the draft. Our unique component defines the blends with the greatest influence and compiles the normal and shadow maps at the pre-renderer stage accordingly. Then, the received data is imported into the standard shader, replacing the normal and shadow maps assigned in the material.
A separate package with wrinkle cards can be downloaded on the Asset Store , and more information can be found here.
Unique character shadows
We tried to ensure that in all shots with close-ups the characters had soft shadows in high resolution. But at the same time, the quality of the shadows of the environment should not have suffered. To solve this problem, we added the ability to configure a unique shadow map for a group of objects to the project.
A pack of character shadows can also be downloaded on the Asset Store , and more information can be found here.
Planar reflections
At first glance, the planar reflections in The Blacksmith’s video are no different from ordinary reflections on the surface of the water. But everything is not so simple: after rendering, the reflected images are minimized at all mip-levels of the reflecting texture. Due to convolution, the closer to the reflective surface, the sharper the image becomes. Thus, we create the effect of ray tracing. The resulting unique textures replace the cubic texture of reflections in the standard shader. In this case, the smoothness of the material determines the selection of mip-levels. As a result, by switching the corresponding parameter with the keyword, the modified standard shader selects reflections from dynamic textures instead of cubic ones.
THE BLACKSMITH PACKAGE - ENVIRONMENTS
This package includes:
• a forge;
• environment;
• atmospheric dispersion;
• PaintJob tool (drawing vegetation on any surface);
• vegetation system;
• MaskyMix shader;
• modified standard shader;
• tonemapping.
To switch between the first-person view and the animated camera, press the C key. You can switch between the lighting modes using the V key.
You can download The Blacksmith - Environments package here (note: it's quite large).
Forge
Here is the interior of the smithy:

The game kind of forge of package The Blacksmith - Environments
Setting
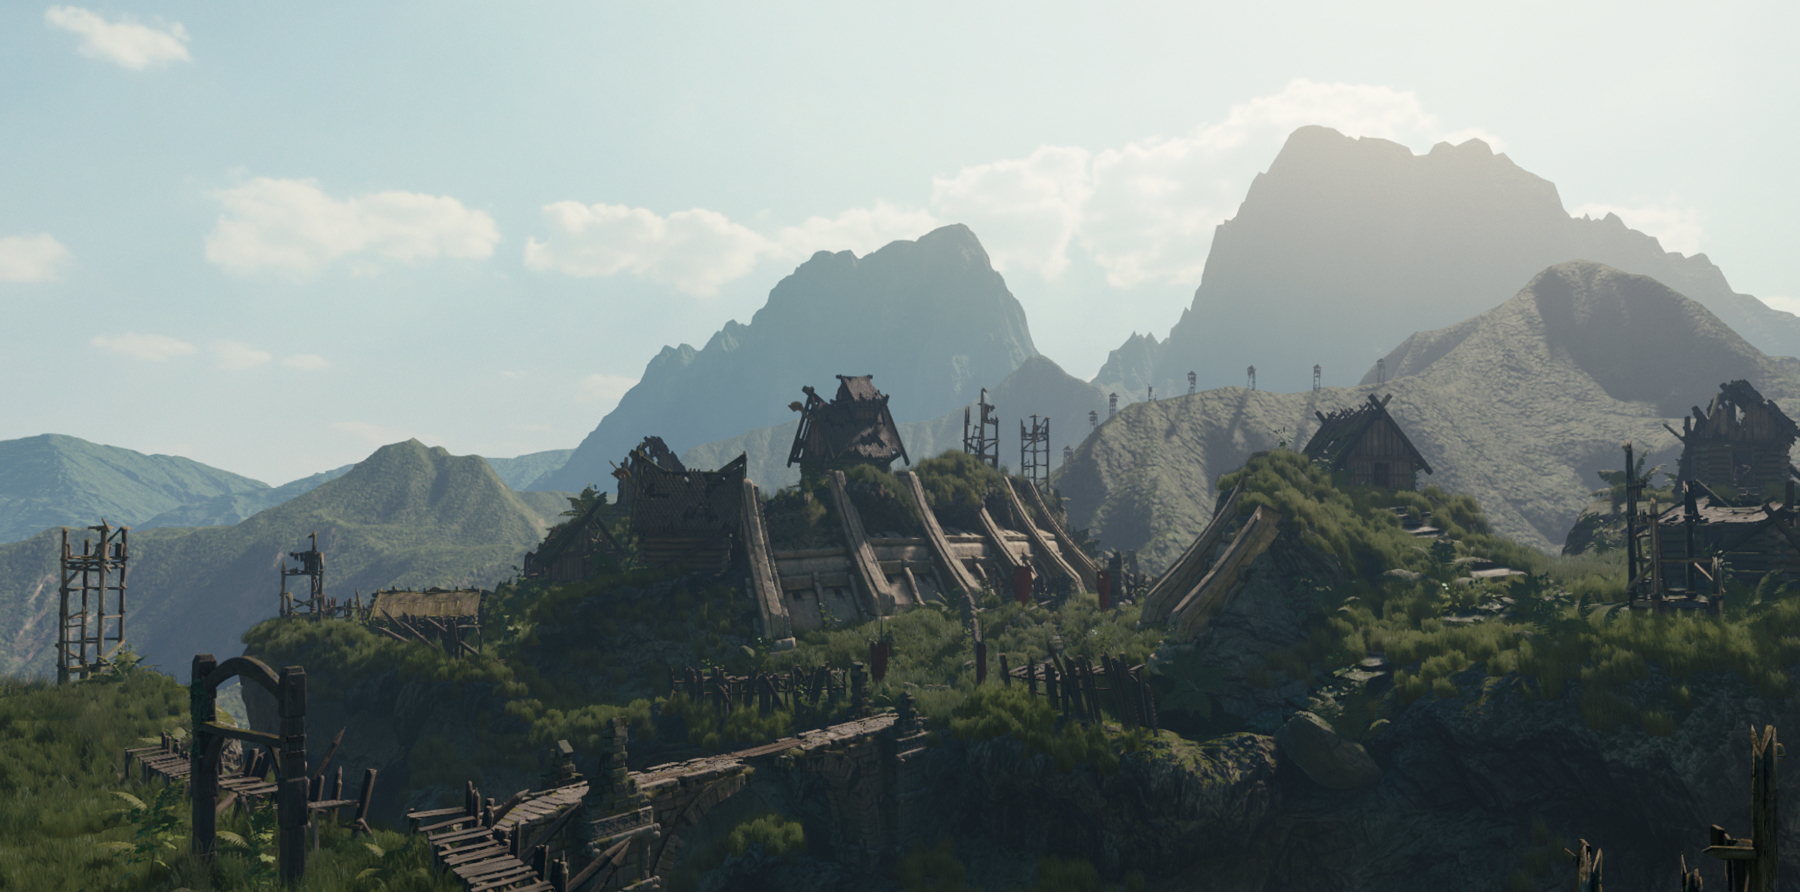
We decided to slightly transform the original environment from the video, so that it would be more convenient to use in games. Detailed setup will require additional time, but for you this is a great opportunity to practice. This is how the version of the environment available for download looks like:
The difference is that for our video we configured the environment depending on the location of the cameras. If you're interested, this is what the environment looks like in the Scene View window of the original project:
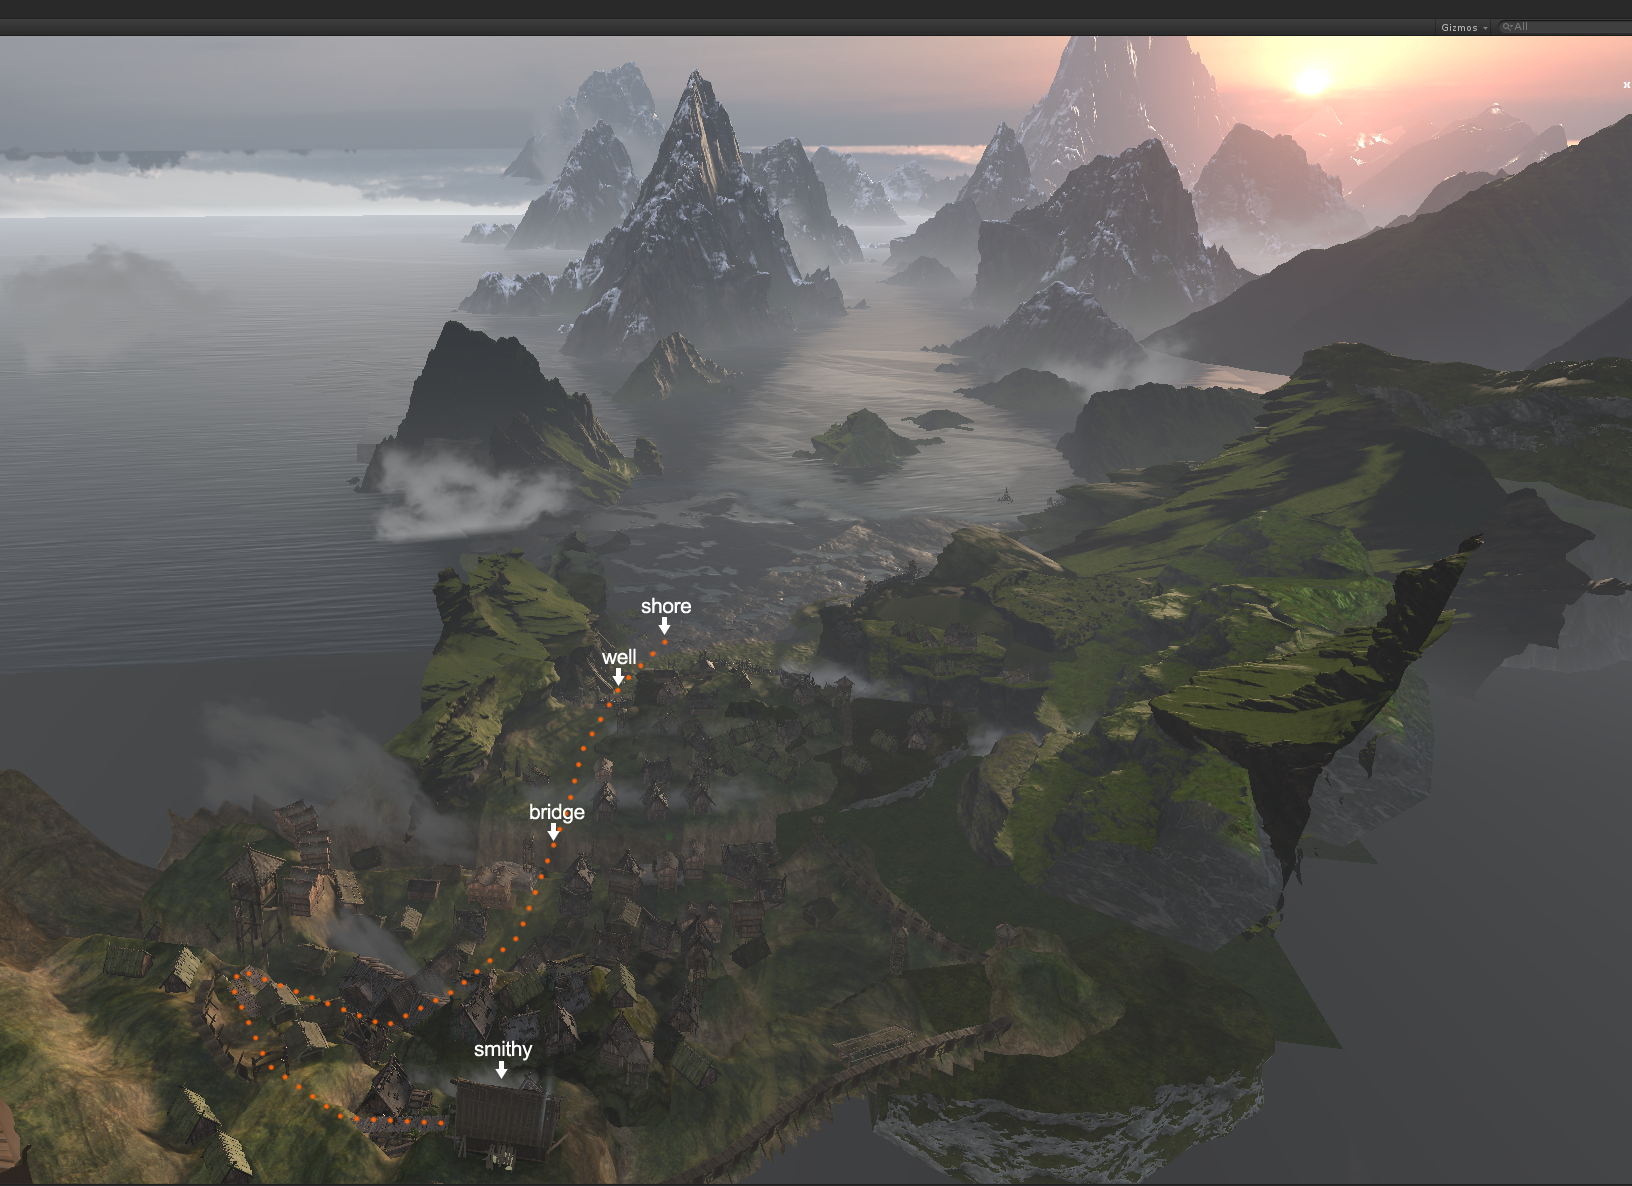
Scene view in the Scene View window of the original project The Blacksmith
Some assets were not used in the new version of the environment, but we still added them to the project.
The author of the scene of the environment and most of the resources presented in this package is Plamen 'Paco' Tamnev.
Atmospheric scattering
Our unique solution for atmospheric dispersion can be found as part of this project or downloaded as a separate package on the Asset Store. More information can be found here.
PaintJob
tool This tool allows you to draw vegetation not only on Unity landscapes, but also on any geometry. Thanks to him, we were able to make maximum use of the built-in Unity tools in accordance with our goals.
You can extract it from The Blacksmith - Environments and use it freely in your projects.
Vegetation system
When creating the vegetation, we had several tasks. First of all, we wanted to make it soft and use unique shading for it. Secondly, it had to support dynamic GI and not mix with the ground (or with what we used as the ground). Finally, we wanted the vegetation to work without Unity landscapes. The last task was solved using the PaintJob tool, but all the rest required additional configuration. We decided to create a component that would collect data from PaintJob, as well as from any other vegetation added manually, and generate the corresponding number of baked meshes. At the same time, we could completely control the process of rendering them, using any sorting algorithm or projecting data from light probes onto dynamic textures.
MaskyMix shader MaskyMix
is an advanced standard shader that mixes an additional set of part textures based on masking criteria (hence the name MaskyMix). When creating a mask, the angle between the orientation in the space of the world defined by the material and the pixel-by-pixel normal selected from the base normal map is taken as a basis. In addition, the mask can be modified with a tile texture or alpha channel with the vertex color of the mesh, if any. Depending on the masking thresholds indicated in the material, an additional layer of parts may be added to the final mask. And if an alpha channel is provided in the mesh, the albedo of this layer can also be painted with vertex color.
Modified Standard Shader
When creating the Blacksmith video, we used a number of modifications of the standard shader, and also added several new features. Some of them are completely useless outside the scope of this project, but there are some that may be useful to you - you will find them as part of the standard surface shader in this package. Here are some examples of modifications: the possibility of pixel-by-pixel sampling of the smoothness value from the alpha albedo channel instead of the selected texture, the ability to control the culling mode of any material, the ability to adjust the color and intensity of the reflected global illumination, etc.
Tonemapping
In a previous articleWe’ve already talked about color grading and tonal compression in The Blacksmith’s video. And after the release of the short film, our development team decided to implement tonemapping in Unity.
The HDR sky textures in this package were borrowed from the NoEmotionHDRs website (author - Peter Sanitra ) under the CC BY-ND 4.0 license and were used without any modifications.
That's all. We have fulfilled our promise and are now heading towards new adventures.
It will be very interesting for us to learn about how you use this demo project. You can leave a response in the comments or write us on the mail: [email protected]. And if you have interesting ideas or practical solutions, be sure to share them with the community.
See you later!
You can find more detailed information about each aspect of working on the Blacksmith video in our previous articles:
Introduction to the Unity Demo Team and FAQ on the Blacksmith project.
Shadows of characters in the video The Blacksmith.
Creation of The Blacksmith: stage preparation, shading and lighting.
Wrinkle maps for The Blacksmith.
Atmospheric scattering in The Blacksmith movie.
Creation of The Blacksmith: animation, camera effects, audio / video.
Creation of The Blacksmith: concept and decoration.
Firstly, you can download the demo project in an exe file.
For your convenience, we have divided all assets, tools, and shaders into two packages: The Blacksmith - Characters (Characters) and The Blacksmith - Environments (Environment).
Below is more detailed information about each package, as well as arguments in favor of choosing a particular technology. We want this project not only to demonstrate the capabilities of Unity 5, but also bring you immediate practical benefits.
Ahead of the question that we often hear after the release of demo materials, we will answer right away: you can absolutely freely use these resources, even in commercial projects. At the same time, the provisions of the standard Asset Store license remain in force. We will be glad if this release is useful to you and will contribute to the success of your project.
EXE-file
You can control the video playback using the simple interface:
• Use the slider to fast forward / rewind.
• To stop or resume playing a video, press the Play / Pause button or click the mouse outside the UI.
• To look around by slightly changing the viewing angle, press the pause and move the cursor.
• To turn off the audio, press the Mute button.
You can choose one of the predefined quality settings:
• Low - recommended for weak devices.
• Medium - Recommended for high-end mid-range laptops and desktops. On a laptop with a Quad Core i7 processor (2.5 GHz) and a GeForce GT 750M graphics card, the video plays in 720p at 30fps.
• High - Recommended for most desktops. On a computer with a Core i7 4770 processor and a GeForce GTX 760 graphics card, the video plays in 1080p at 30fps.
• Very high — Recommended for PCs with a GTX 760 or higher.
Depending on the platform, loading a project may take more than 30 seconds.
THE BLACKSMITH PACKAGE - CHARACTERS
This package includes:
• model of a blacksmith;
• antagonist model;
• hair shader;
• wrinkle cards;
• unique character shadows;
• planar reflections.
Download the Blacksmith - Characters package here.
Blacksmith and antagonist.
Character models in the project are presented separately.
We converted the skin of the antagonist, which was used in the video, to a more universal one. Now you can safely add it to any environment and start experimenting. But keep in mind that for good animation you still have to work on it. As an example, we added two animations to the project: idle (inaction) and walk (walking).
In this package you will also find the main character - the blacksmith. His skin is much more complicated than that of the antagonist, so we left everything as it is, so as not to waste time in vain. We remind you: you can absolutely freely use this original 3D model in your projects.
Despite the fact that we used some textures in lower resolution (2K), the package contains original full-size 4K-textures for both characters.
The authors of the models and textures for the characters are Jonas Tornqvist and Sergey Samuilov.
Hair rendering
To make the hair look realistic, we needed a characteristic anisotropic lighting, so we decided to make a separate shader for the hair. In addition, we added a component to it that calculates the ambient occlusion value separately for the hair, and set up multi-pass rendering to avoid sorting errors of overlapping transparent polygons.
The hair shader and accompanying sample scene can be downloaded from the Asset Store. Detailed information on its use and configuration is contained in the readme-file.
Wrinkle cards
To make the facial expressions of the antagonist more realistic, we added wrinkle-based wrinkle maps to the draft. Our unique component defines the blends with the greatest influence and compiles the normal and shadow maps at the pre-renderer stage accordingly. Then, the received data is imported into the standard shader, replacing the normal and shadow maps assigned in the material.
A separate package with wrinkle cards can be downloaded on the Asset Store , and more information can be found here.
Unique character shadows
We tried to ensure that in all shots with close-ups the characters had soft shadows in high resolution. But at the same time, the quality of the shadows of the environment should not have suffered. To solve this problem, we added the ability to configure a unique shadow map for a group of objects to the project.
A pack of character shadows can also be downloaded on the Asset Store , and more information can be found here.
Planar reflections
At first glance, the planar reflections in The Blacksmith’s video are no different from ordinary reflections on the surface of the water. But everything is not so simple: after rendering, the reflected images are minimized at all mip-levels of the reflecting texture. Due to convolution, the closer to the reflective surface, the sharper the image becomes. Thus, we create the effect of ray tracing. The resulting unique textures replace the cubic texture of reflections in the standard shader. In this case, the smoothness of the material determines the selection of mip-levels. As a result, by switching the corresponding parameter with the keyword, the modified standard shader selects reflections from dynamic textures instead of cubic ones.
THE BLACKSMITH PACKAGE - ENVIRONMENTS
This package includes:
• a forge;
• environment;
• atmospheric dispersion;
• PaintJob tool (drawing vegetation on any surface);
• vegetation system;
• MaskyMix shader;
• modified standard shader;
• tonemapping.
To switch between the first-person view and the animated camera, press the C key. You can switch between the lighting modes using the V key.
You can download The Blacksmith - Environments package here (note: it's quite large).
Forge
Here is the interior of the smithy:
The game kind of forge of package The Blacksmith - Environments
Setting
We decided to slightly transform the original environment from the video, so that it would be more convenient to use in games. Detailed setup will require additional time, but for you this is a great opportunity to practice. This is how the version of the environment available for download looks like:
The difference is that for our video we configured the environment depending on the location of the cameras. If you're interested, this is what the environment looks like in the Scene View window of the original project:
Scene view in the Scene View window of the original project The Blacksmith
Some assets were not used in the new version of the environment, but we still added them to the project.
The author of the scene of the environment and most of the resources presented in this package is Plamen 'Paco' Tamnev.
Atmospheric scattering
Our unique solution for atmospheric dispersion can be found as part of this project or downloaded as a separate package on the Asset Store. More information can be found here.
PaintJob
tool This tool allows you to draw vegetation not only on Unity landscapes, but also on any geometry. Thanks to him, we were able to make maximum use of the built-in Unity tools in accordance with our goals.
You can extract it from The Blacksmith - Environments and use it freely in your projects.
Vegetation system
When creating the vegetation, we had several tasks. First of all, we wanted to make it soft and use unique shading for it. Secondly, it had to support dynamic GI and not mix with the ground (or with what we used as the ground). Finally, we wanted the vegetation to work without Unity landscapes. The last task was solved using the PaintJob tool, but all the rest required additional configuration. We decided to create a component that would collect data from PaintJob, as well as from any other vegetation added manually, and generate the corresponding number of baked meshes. At the same time, we could completely control the process of rendering them, using any sorting algorithm or projecting data from light probes onto dynamic textures.
MaskyMix shader MaskyMix
is an advanced standard shader that mixes an additional set of part textures based on masking criteria (hence the name MaskyMix). When creating a mask, the angle between the orientation in the space of the world defined by the material and the pixel-by-pixel normal selected from the base normal map is taken as a basis. In addition, the mask can be modified with a tile texture or alpha channel with the vertex color of the mesh, if any. Depending on the masking thresholds indicated in the material, an additional layer of parts may be added to the final mask. And if an alpha channel is provided in the mesh, the albedo of this layer can also be painted with vertex color.
Modified Standard Shader
When creating the Blacksmith video, we used a number of modifications of the standard shader, and also added several new features. Some of them are completely useless outside the scope of this project, but there are some that may be useful to you - you will find them as part of the standard surface shader in this package. Here are some examples of modifications: the possibility of pixel-by-pixel sampling of the smoothness value from the alpha albedo channel instead of the selected texture, the ability to control the culling mode of any material, the ability to adjust the color and intensity of the reflected global illumination, etc.
Tonemapping
In a previous articleWe’ve already talked about color grading and tonal compression in The Blacksmith’s video. And after the release of the short film, our development team decided to implement tonemapping in Unity.
The HDR sky textures in this package were borrowed from the NoEmotionHDRs website (author - Peter Sanitra ) under the CC BY-ND 4.0 license and were used without any modifications.
That's all. We have fulfilled our promise and are now heading towards new adventures.
It will be very interesting for us to learn about how you use this demo project. You can leave a response in the comments or write us on the mail: [email protected]. And if you have interesting ideas or practical solutions, be sure to share them with the community.
See you later!
You can find more detailed information about each aspect of working on the Blacksmith video in our previous articles:
Introduction to the Unity Demo Team and FAQ on the Blacksmith project.
Shadows of characters in the video The Blacksmith.
Creation of The Blacksmith: stage preparation, shading and lighting.
Wrinkle maps for The Blacksmith.
Atmospheric scattering in The Blacksmith movie.
Creation of The Blacksmith: animation, camera effects, audio / video.
Creation of The Blacksmith: concept and decoration.