Nginx: protect url with a one-time password
There was a task to secure the admin part on the site. And this had to be done without making changes to the code of the site itself. The best I could find was oauth2_proxy and nginx-google-oauth , but they required callback processing. I did not like these decisions and I rejected them.
I had to turn to one of the nginx modules and accessories for the bike .
Because I am not a programmer, I will gladly accept comments on my margarine code. So. I sketched a simple application .
An example installation will be based on Debian / Ubuntu.
Installation:
Application Setup:
The last command will produce something like this:
Scan QR: http://2qr.ru/otpauth://totp/OTPAuth:test1?secret=LOS5VMN5WI3FUTE4&issuer=OTPAuth
Or add manually SECRET KEY: LOS5VMN5WI3FUTE4
Emergency codes: 39816948790866668338338338334 95159743,24616032
Add this to your OTP generator. I think you already have Google Authentificator or the like installed. If not, then you have to install. Here is help from Google. When you add users, backup codes are also generated in case you lose your phone.
We proceed to configure nginx. For the selected location, add:
And these locations do the authorization:
We launch our application and restart nginx:
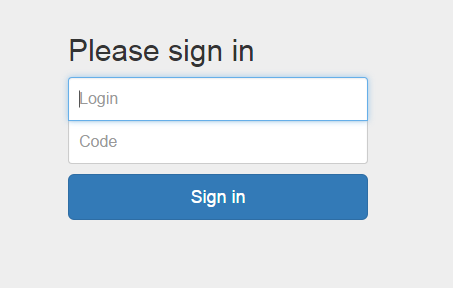
Now when you open site.name/private, you will see a one-time password entry page:

What is implemented:
What's in the plans:
I had to turn to one of the nginx modules and accessories for the bike .
Because I am not a programmer, I will gladly accept comments on my margarine code. So. I sketched a simple application .
An example installation will be based on Debian / Ubuntu.
Installation:
# установим nginx  с поддержкой модуля ngx_http_auth_request_module
nginx -V 2>&1 | grep -qF -- --with-http_auth_request_module && echo "OK" || sudo aptitude update && sudo aptitude install nginx-extras
# клонируем репозитарий
git clone git@github.com:loukash/otp-auth.git  # или git clone git@bitbucket.org:loukash/otp-auth.git
# установим все зависимости
cd otp-auth
pip install -r requirements.txt
Application Setup:
# создадим базу пользователей
python manage.py initdb
#  добавим пользователя
python manage.py useradd -l test
The last command will produce something like this:
Scan QR: http://2qr.ru/otpauth://totp/OTPAuth:test1?secret=LOS5VMN5WI3FUTE4&issuer=OTPAuth
Or add manually SECRET KEY: LOS5VMN5WI3FUTE4
Emergency codes: 39816948790866668338338338334 95159743,24616032
Add this to your OTP generator. I think you already have Google Authentificator or the like installed. If not, then you have to install. Here is help from Google. When you add users, backup codes are also generated in case you lose your phone.
We proceed to configure nginx. For the selected location, add:
location /private {
  ...
  auth_request /auth;
  error_page 401 /login;
  ...
}
And these locations do the authorization:
location = /auth {
  internal;
  proxy_pass_request_body off;
  proxy_set_header Content-Length "";
  proxy_pass http://127.0.0.1:5000;
}
location = /login {
  proxy_pass http://127.0.0.1:5000;
}
We launch our application and restart nginx:
sudo service nginx reload
python manage.py runserver
Now when you open site.name/private, you will see a one-time password entry page:

What is implemented:
- One-time password verification
- user management
- Reserve codes
What's in the plans:
- Make the app custom
- Demonization
- Logging
