Hello android from qt
This article is about how to make friends Java and C ++ in one application for the Android operating system.
A huge amount of code is written in C ++. I would like to somehow use this code in my applications, but for some reason my process of use caused some discomfort. Most likely, this, corny, was due to the fact that the basis of my working environment is Android Studio, in which working with native code, let's say, is not the best. But the idea of comfortably developing an application with a native part has never left me. Therefore, I decided to try to combine the power of the Qt library and an application written in the native language for Android - Java.
At the moment, the Qt ecosystem allows you to write an application completely using this framework, and even more - compile it for a whole set of operating systems, including Android. But moving this way it is very difficult to develop an interface that will look and behave accordingly to the platform guides. And it becomes impossible to use libraries written in Java to design the appearance and behavior of the application. That is why I would like to try out a development model in which all business logic was written in C ++, and the user interface was written using the target platform. In the future, this will provide a simple transfer of the application to other platforms with the appearance typical for the target system and functionality that has already been tested and postponed.
So, next you will find instructions on how to write an application that will have a part written in Qt and a part in Java.
To work, we need the Qt library and ide Qt Creator, configured to work with Android projects (this is quite simple, you can read more about this at the link ), Android Studio , as well as Android ndk .
1. First you need to create an android project (let's call it QTtests) and set “penguin.in.flight.qttests” as the name of the package. At the next stages of the project creation wizard, you can choose any settings convenient for work. The main condition in order to be able to follow further instructions is to comply with the package name.
2. When the Android project is already there, you can forget about it for a while and proceed to the creation of the Qt part. The first step is to create (preferably at the root of the main project) a standard project such as a library. Give it the name cpp_lib. When creating a project, select armeabi-v7 as the target platform.
3. We have a project template, now it's time to write our Hello Word in Qt.
cpp_lib.h
cpp_lib.cpp
As you can see from the code, the application will be very simple. It contains two functions - say and Java_penguin_in_flight_qttests_utils_JavaNatives_sayHello. The first is simple and straightforward. They take an input object, which in the framework is a text string, and gives a new line. The following function is much more interesting. In it, JNIEXPORT and JNICALL mean that it can be called from code written in Java. It has jstring as its return type (which is accessible to us thanks to this inclusion #include) This type is a String type in Java.
In conclusion, we analyze the arguments of the method. * env is a reference to a structure that contains the methods necessary for working with Java entities, and obj is the object that called the method.
3. After the code is written, we need to make sure that our library is correctly assembled and we can use it in our projects. To do this, we need to remove this line TEMPLATE = lib in the project settings file (in our case, it is cpp_lib.pro). If this is not done, then during the assembly we will get an error like this:
Internal Error: Could not find .pro file.
Error while building / deploying project cpp_lib (kit: Android for armeabi-v7a (GCC 4.9, Qt 5.4.1))
When executing step “Build Android APK”
4. Next, you need to make Qt Creator build the library at the following address: {project_path} / QTtests / app / src / main / qt_output:
5. In the same place where we indicated the place of assembly, you need to check the build settings of the application. Namely, the target assembly platform. You need to choose the latter (I have android 22). Next, check the box next to Build Qt libraries in APK. This is necessary in order for the build system to generate all the necessary libraries. You also need to check the Use Gradle checkbox in order for the build system to generate the project of the type we need.
6. Now we can build the library and get all the necessary files.
7. This is where the work with the native library ends. We are going back to Android studio. The first thing to do is edit the assembly file to enable the Qt library. To do this, add the following lines in the file /QT_tests/app/build.gradle:
src / main / qt_output / android-build / res is needed in order to have access to the resources into which the build system registered the names of the libraries on which the main Qt project depends. The path src / main / qt_output / android-build / libs points to the place where the library files themselves lie.
We also modify the dependency block as follows:
8. Now we have a library collection and they are even connected to the project. Next, you need to connect them during the start of the program itself. To do this, we will use the following class:
As you can see from the code, the class is in the package penguin.in.flight.qttests.utils and is called JavaNatives. This is important in order to ensure the connection between the code that we wrote in the native part. To understand how, let's recall a method called Java_penguin_in_flight_qttests_utils_JavaNatives_sayHello. Its name consists of the Java_ prefix, then comes the name of the package, where the names of the sub packages are separated by the symbol "_" (penguin_in_flight_qttests_utils). Next comes the class name and finally the method name. Read more about naming methods in native code here .
9. To use the class we wrote in onCreate in the starting activity, you need to insert this line:
10. Now it remains only to use what we wrote. To do this, add a button and in the processing of clicking on it, insert the following code:
On this, the instructions for using the native part written in Qt in Android applications are over.
Thank you all for your attention, all sample code is available on github.com .
A huge amount of code is written in C ++. I would like to somehow use this code in my applications, but for some reason my process of use caused some discomfort. Most likely, this, corny, was due to the fact that the basis of my working environment is Android Studio, in which working with native code, let's say, is not the best. But the idea of comfortably developing an application with a native part has never left me. Therefore, I decided to try to combine the power of the Qt library and an application written in the native language for Android - Java.
At the moment, the Qt ecosystem allows you to write an application completely using this framework, and even more - compile it for a whole set of operating systems, including Android. But moving this way it is very difficult to develop an interface that will look and behave accordingly to the platform guides. And it becomes impossible to use libraries written in Java to design the appearance and behavior of the application. That is why I would like to try out a development model in which all business logic was written in C ++, and the user interface was written using the target platform. In the future, this will provide a simple transfer of the application to other platforms with the appearance typical for the target system and functionality that has already been tested and postponed.
So, next you will find instructions on how to write an application that will have a part written in Qt and a part in Java.
To work, we need the Qt library and ide Qt Creator, configured to work with Android projects (this is quite simple, you can read more about this at the link ), Android Studio , as well as Android ndk .
1. First you need to create an android project (let's call it QTtests) and set “penguin.in.flight.qttests” as the name of the package. At the next stages of the project creation wizard, you can choose any settings convenient for work. The main condition in order to be able to follow further instructions is to comply with the package name.
Creating a new project in Android Studio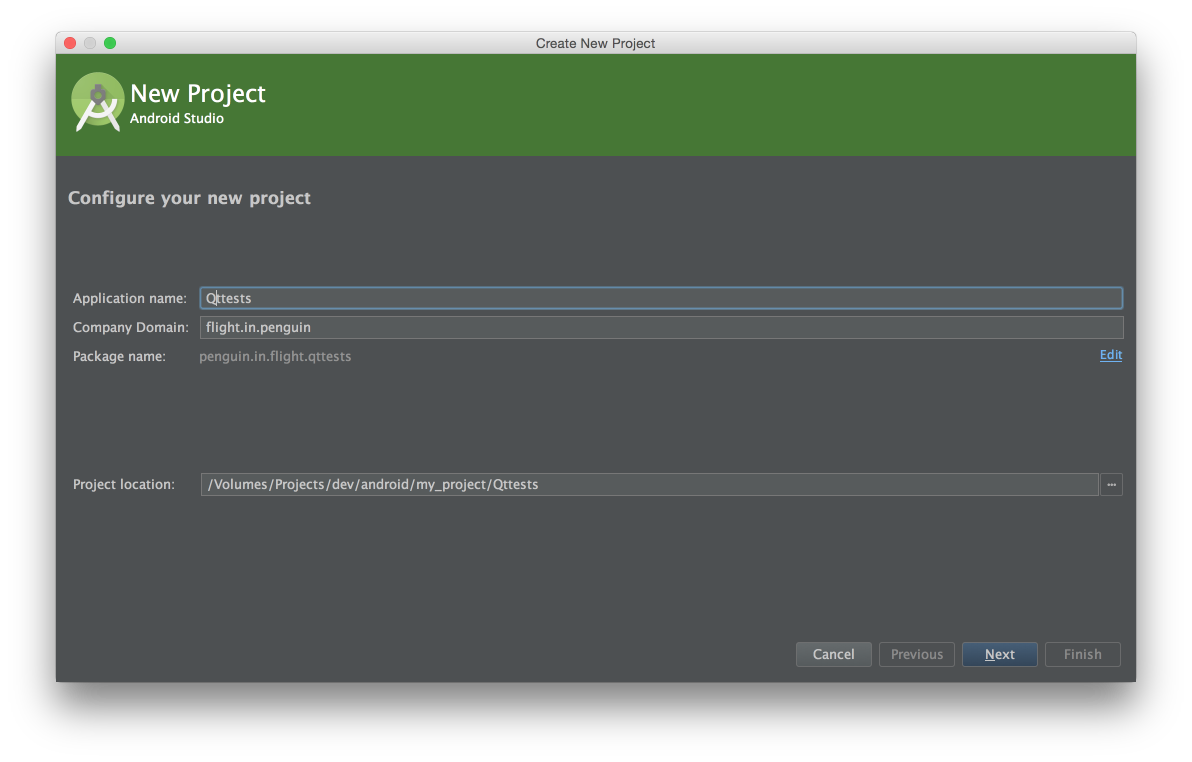
2. When the Android project is already there, you can forget about it for a while and proceed to the creation of the Qt part. The first step is to create (preferably at the root of the main project) a standard project such as a library. Give it the name cpp_lib. When creating a project, select armeabi-v7 as the target platform.
Library creation


3. We have a project template, now it's time to write our Hello Word in Qt.
cpp_lib.h
#ifndef CPP_LIB_H
#define CPP_LIB_H
#include "cpp_lib_global.h"
#include
#include
class CPP_LIBSHARED_EXPORT Cpp_lib
{
public:
    Cpp_lib();
    QString say(QString subject);
};
#ifdef __cplusplus
extern "C" {
#endif
    JNIEXPORT jstring JNICALL Java_penguin_in_flight_qttests_utils_JavaNatives_sayHello(JNIEnv *env, jobject obj);
#ifdef __cplusplus
}
#endif
#endif // CPP_LIB_H
cpp_lib.cpp
#include "cpp_lib.h"
Cpp_lib::Cpp_lib()
{
}
QString Cpp_lib::say(QString subject)
{
    QString result = QString("Qt say \" %1 \"").arg(subject);
    return result;
}
JNIEXPORT jstring JNICALL Java_penguin_in_flight_qttests_utils_JavaNatives_sayHello(JNIEnv *env, jobject obj){
    Cpp_lib *lib = new Cpp_lib();
    return  env->NewStringUTF(lib->say("Hello android!!!").toLatin1().data());
}
As you can see from the code, the application will be very simple. It contains two functions - say and Java_penguin_in_flight_qttests_utils_JavaNatives_sayHello. The first is simple and straightforward. They take an input object, which in the framework is a text string, and gives a new line. The following function is much more interesting. In it, JNIEXPORT and JNICALL mean that it can be called from code written in Java. It has jstring as its return type (which is accessible to us thanks to this inclusion #include
In conclusion, we analyze the arguments of the method. * env is a reference to a structure that contains the methods necessary for working with Java entities, and obj is the object that called the method.
3. After the code is written, we need to make sure that our library is correctly assembled and we can use it in our projects. To do this, we need to remove this line TEMPLATE = lib in the project settings file (in our case, it is cpp_lib.pro). If this is not done, then during the assembly we will get an error like this:
Internal Error: Could not find .pro file.
Error while building / deploying project cpp_lib (kit: Android for armeabi-v7a (GCC 4.9, Qt 5.4.1))
When executing step “Build Android APK”
4. Next, you need to make Qt Creator build the library at the following address: {project_path} / QTtests / app / src / main / qt_output:
Set build folder
5. In the same place where we indicated the place of assembly, you need to check the build settings of the application. Namely, the target assembly platform. You need to choose the latter (I have android 22). Next, check the box next to Build Qt libraries in APK. This is necessary in order for the build system to generate all the necessary libraries. You also need to check the Use Gradle checkbox in order for the build system to generate the project of the type we need.
Settings screenshot
6. Now we can build the library and get all the necessary files.
Assemble project
7. This is where the work with the native library ends. We are going back to Android studio. The first thing to do is edit the assembly file to enable the Qt library. To do this, add the following lines in the file /QT_tests/app/build.gradle:
   sourceSets {
        main {
            java.srcDirs += ['/src/main/java']
            res.srcDirs += ['src/main/res','src/main/qt_output/android-build/res']
            jniLibs.srcDirs += 'src/main/qt_output/android-build/libs'
        }
    }
src / main / qt_output / android-build / res is needed in order to have access to the resources into which the build system registered the names of the libraries on which the main Qt project depends. The path src / main / qt_output / android-build / libs points to the place where the library files themselves lie.
We also modify the dependency block as follows:
dependencies {
    compile fileTree(dir: 'libs', include: ['*.jar'])
    compile files('src/main/qt_output/android-build/libs/QtAndroid-bundled.jar')
    compile files('src/main/qt_output/android-build/libs/QtAndroidAccessibility-bundled.jar')
    //остальные зависимости
}
8. Now we have a library collection and they are even connected to the project. Next, you need to connect them during the start of the program itself. To do this, we will use the following class:
package penguin.in.flight.qttests.utils;
import android.content.Context;
import android.util.Log;
import penguin.in.flight.qttests.R;
/**
 * Created on 11.04.15.
 */
public class JavaNatives {
    public native static String sayHello();
    public static void init(Context context) {
        load(context, R.array.bundled_in_assets);
        load(context, R.array.qt_libs);
        System.loadLibrary("cpp_lib");
    }
    static void load(Context context, int arrayResourceId) {
        String[] libsToLoad = context.getResources().getStringArray(arrayResourceId);
        for (String lib : libsToLoad) {
            if (lib.indexOf('/') > -1) {
                lib = lib.substring(lib.indexOf('/'));
            }
            if (lib.indexOf("lib") == 0) {
                lib = lib.substring(3);
            }
            if (lib.endsWith(".so")) {
                lib = lib.substring(0, lib.length() - 3);
            }
            Log.i(JavaNatives.class.getSimpleName(), "loading " + lib);
            try {
                System.loadLibrary(lib);
            } catch (Throwable e) {
                Log.i(JavaNatives.class.getSimpleName(), "failed to load " + lib + " " + e);
                e.printStackTrace();
            }
            Log.i(JavaNatives.class.getSimpleName(), "Successfully loaded " + lib);
        }
    }
}
As you can see from the code, the class is in the package penguin.in.flight.qttests.utils and is called JavaNatives. This is important in order to ensure the connection between the code that we wrote in the native part. To understand how, let's recall a method called Java_penguin_in_flight_qttests_utils_JavaNatives_sayHello. Its name consists of the Java_ prefix, then comes the name of the package, where the names of the sub packages are separated by the symbol "_" (penguin_in_flight_qttests_utils). Next comes the class name and finally the method name. Read more about naming methods in native code here .
9. To use the class we wrote in onCreate in the starting activity, you need to insert this line:
JavaNatives.init(this);
10. Now it remains only to use what we wrote. To do this, add a button and in the processing of clicking on it, insert the following code:
AlertDialog.Builder dialog = new AlertDialog.Builder(this);
dialog.setMessage(JavaNatives.sayHello());
dialog.setPositiveButton("Ok", null);
dialog.show();
On this, the instructions for using the native part written in Qt in Android applications are over.
Thank you all for your attention, all sample code is available on github.com .