Private cloud for the Internet of Things
- Tutorial
Greetings, Habr!
We are a team of IT architects from IBM, which is engaged in the creation and promotion of industrial solutions for various industries. In our spare time, we explore new technologies, experiment and try out the best practices.
Recent years, the subject of the Internet of Things is very popular. Our customers ask about universal box solutions and platforms that can be located locally in their Data Processing Centers. Most importantly, it is expected that on the basis of such "boxes", all new services and applications should be developed and launched very quickly, or rather instantly or "just yesterday."
We asked the question: “What if we put together something similar on open and publicly available technologies?”
Much has already been told and shown about the use of Docker containers and their management tools based on Kubernetes . However, it has not yet been possible to see how all these advanced technologies can be used on an industrial scale for business tasks, specifically under the Internet of Things. So let's fill this gap. The concept of microservices, as well as fashionable development approaches (DevOps), application integration and deployment (CI / CD), will be considered a slightly different task and set aside for later.
In this article we want to talk about the preparation and installation of one of the key components - IBM Cloud Private (in fact, the Docker / Kubernetes industrial assembly and a little more), which can act as a conditional infrastructure core when creating the local platform of the Internet of Things. Ask why him?
Because we promised open and publicly available technologies (free community version and community support): hub.docker.com/r/ibmcom/icp-inception
IBM Cloud Private Overview
IBM Cloud Private (ICP) is a private cloud platform for local deployment and operation. ICP is an integrated environment that allows you to design, develop, deploy and manage local applications created with the container architecture. The ICP delivery includes a Kubernetes orchestrator (K8s), a local image repository, as well as a management console and monitoring tools.
What is a private or private cloud?
The private cloud is a cloud computing model that runs exclusively for one organization, usually on its territory and resources. Such a cloud can be managed and maintained both by its own specialists and by third-party employees. Placing such a platform can be both behind and outside the company's firewall. The private cloud provides the benefits of a public cloud, including rapid deployment and scalability, as well as ease of use, management and flexibility. At the same time, the local version provides greater control over the system, increased productivity, accurately predictable costs, increased security requirements and flexible management options depending on the needs of the organization.
Before proceeding with the installation of ICP, we define the terminology: the
master node
- Monitors and manages the K8s cluster.
- kubectl: command line tool for cluster management.
- REST API: interface for working with nodes.
- etcd: is a permanent and accessible keystore, used as a backup storage for K8s for all cluster data.
- kube-scheduler: this component monitors newly created containers (pods) that do not have an assigned node, and selects the node to launch them.
- Usually, 3 or more major nodes are required for stable operation and resiliency. In our case, to save resources, we will install all the necessary ICP components on one dedicated server (Single Node).
Work node
- The working machine in the K8s formerly known as the Minion. This node can be any of the hosts that receives tasks from the main node and also controls the process of launching containers on it. Depending on the cluster settings, the work node can be either a virtual machine or a physical server.
- The following components can be run on each node:
- kubelet: is the primary work node service. It monitors the containers that have been assigned to its node (either apirusver for a secure connection, or through a local configuration file).
- kube-proxy: displays the services defined in the K8s API on each node, maintaining the network rules on the host and performing connection redirection.
- docker: a container startup and management environment.
- supervisord: This is a lightweight monitoring process and management system that can be used to maintain the kubelet and docker.
- fluentd: This is a service that helps ensure logging at the cluster level.
Containers (containers)
- An application running in an isolated environment.
- The set of executable processes and the run image of the program.
Cocoons (pods)
- A pod is a group of one or more Docker containers, with shared storage / network and a specification of how to run containers on a working node.
- Each Pod has its own IP.
- Pod divides the PID namespace, network and host name.
Replication controller
- Provides availability and scalability.
- Responsible for controlling the number of deployed Pods.
- Uses a template that describes what each Pod should contain.
Labels
- Metadata assigned to K8s resources, for example: containers, services.
- Key-value pairs attached to objects for identification.
- These parameters are critical because they are based on a cluster request for resources with certain labels.
Services
- A collection of containers set as an endpoint.
- Information about the state of the K8s cluster and network settings that apply to all work nodes.
- When properly configured, Pods created by the replication controller will be automatically registered as a corresponding service.
Secret Information (secrets)
- Confidential information to be read or used by containers.
- Special volumes (volumes) of the disk drive are mounted automatically so that the containers can read the contents.
- Each entry has its own way.
Architecture
Below is the high-level ICP architecture which lists the main components broken down into main, working and proxy nodes. It is worth noting that this article focuses on a bunch of Docker containers and Kubernetes management environments. These open source components are key and fundamental to the ICP platform. However, to fully work with ICP, you also need to know Helm, the manager of software package management. K8s is used to deploy and host application instances that are built into Helm's schemas; they in turn refer to Docker images. The Helm diagrams contain information about the details of your application, and the Docker images contain all the software packages that are needed to run your application.
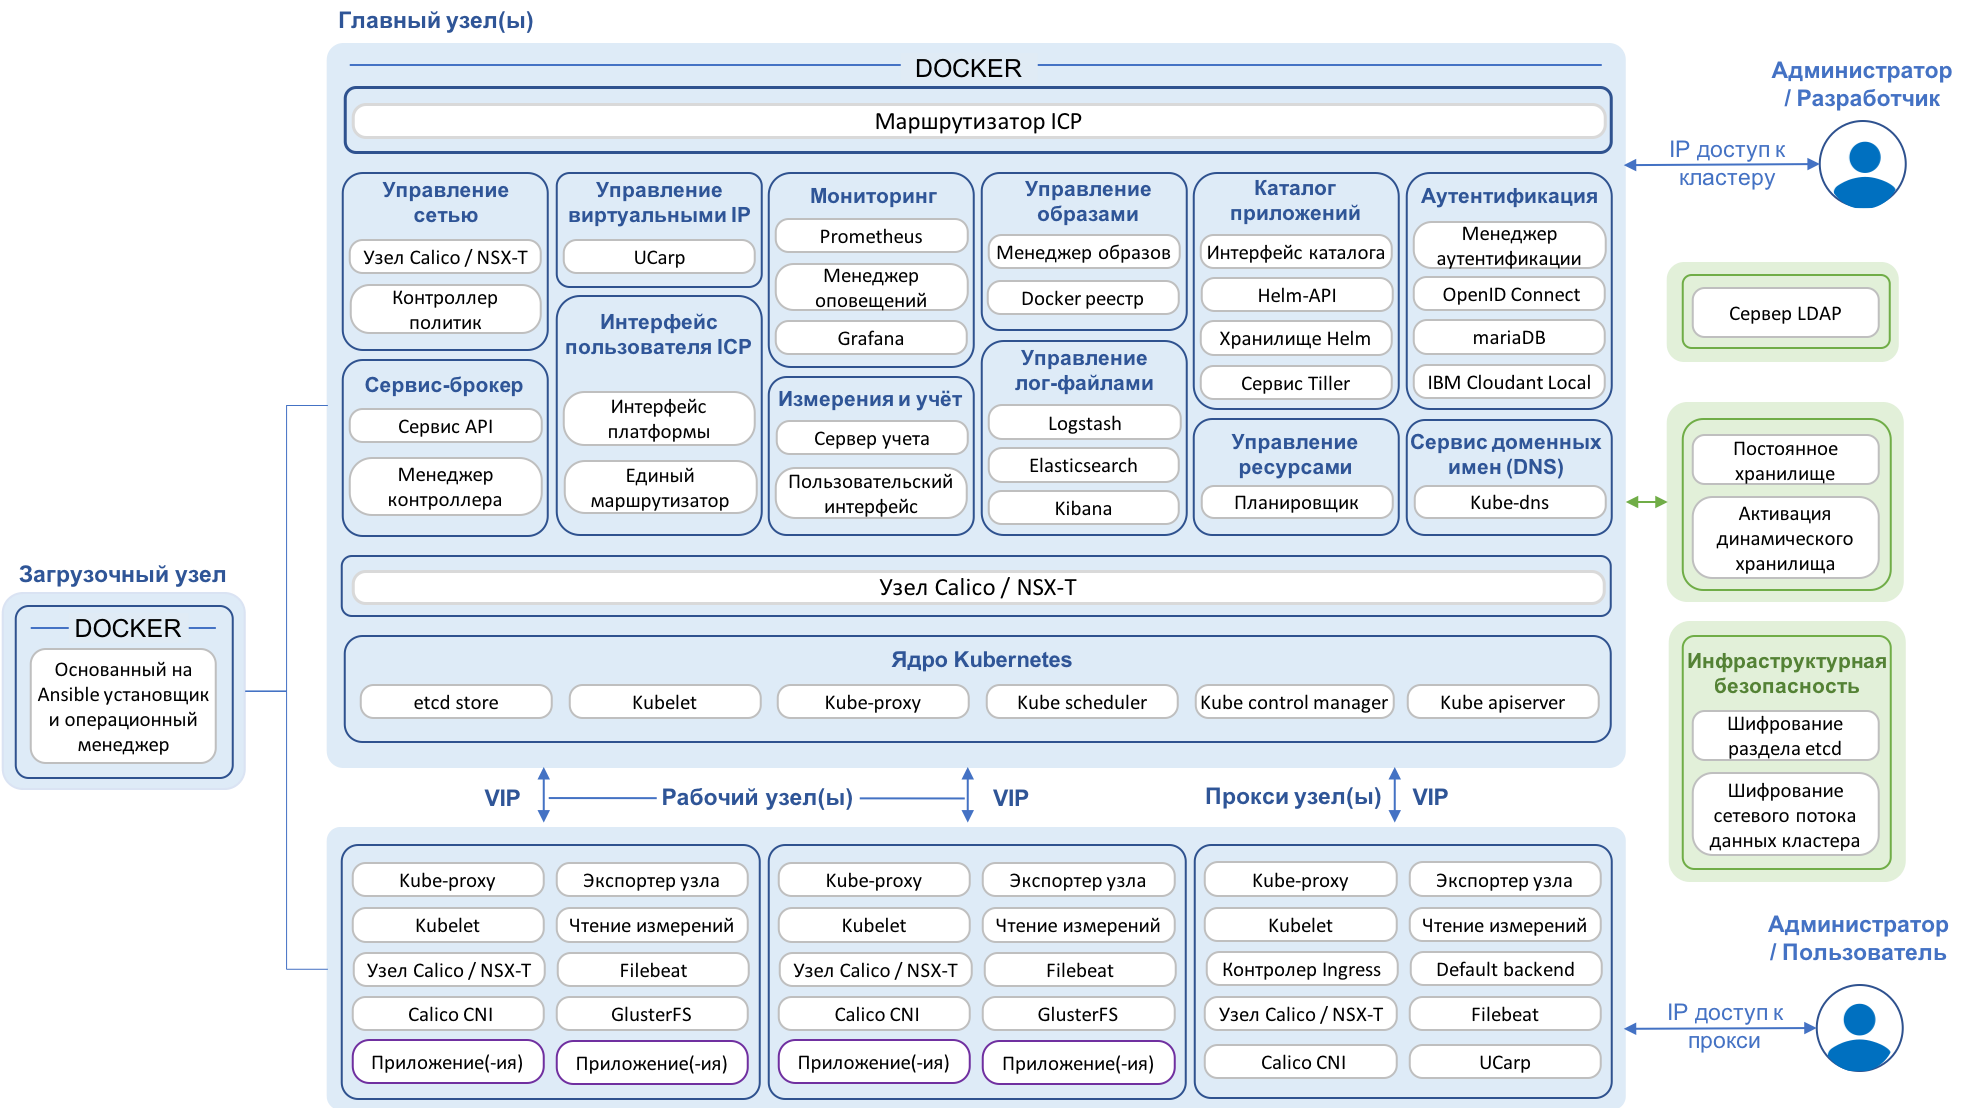
For detailed information about the architecture and components of the ICP platform, you can use the link to the documentation in the IBM Knowledge Center .
Training
In order to comfortably complete the ICP installation in 20-30 minutes, the following minimum hardware resources and Internet access are required:
• Single host (physical or virtual)
• CPU = 8 cores (or virtual cores)
• RAM = 10 GB (actually up to 14GB required)
• Disk = 40 GB (as always on SSD, faster)
Note: if you have a little more free time and a little less hardware resources, then somewhere in 40-60 minutes you can install ICP on 1 virtual core i5 and 10 GB of RAM.
Installation
Ubuntu boot
Download the Ubuntu Server distribution version 04/16/05 . Perform a standard OS installation on a virtual or physical machine with the above characteristics.
Getting an IP Address
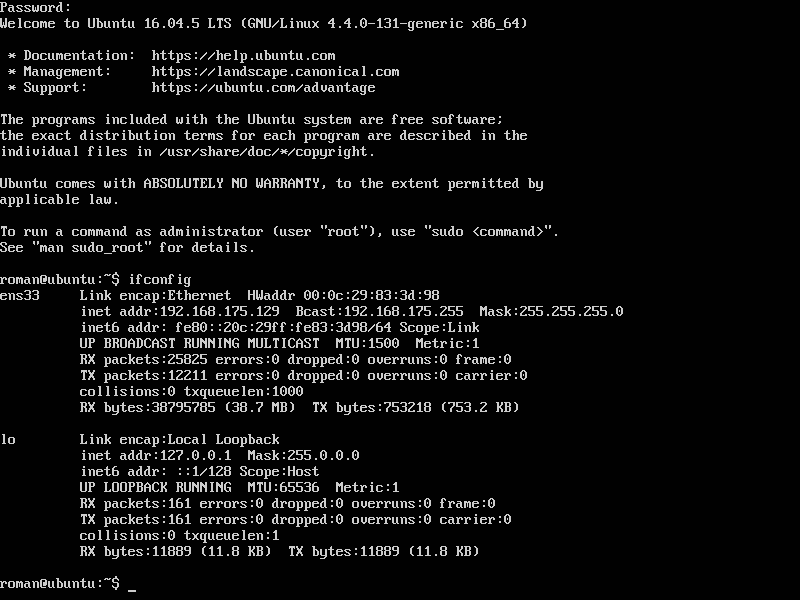
After the OS installation process is complete, on the command line, find out the IP address of your virtual machine using the following command:
ifconfigYou need to write / remember the Ethernet IP address (inet addr), as well as Bcast and Mask. These parameters will be displayed after the execution of the corresponding command: Figure 1. An example of the execution of the command “ifconfig”
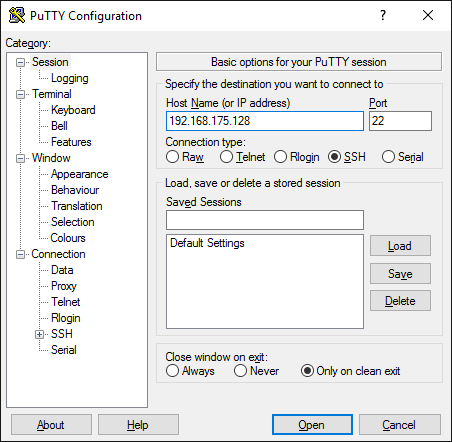
SSH connection
If you used the Easy Install feature when setting up a virtual machine, then after you have fully installed Ubuntu Server, you need to install the OpenSSH server. You can do this with the following commands:
apt install openssh-server
sudo systemctl enable sshd
After executing the appropriate commands, you will be able to connect to the virtual machine using SSH. Depending on the OS, you can use different connection methods. For Windows, you can use the popular PuTTY tool ; for MacOS, you can use the ssh command in the terminal. Figure 2. Example of connecting via PuTTY for Windows In the next step, you need to set a password for the super-user (root):
sudo -i
passwd
Figure 3. Setting a new password for the root user
Network Interface Update
After we configured the ability to connect via SSH and updated the super-user password, we need to configure the network interface to determine the static network parameters. This is done by the following command:
nano /etc/network/interfacesWe update the settings of the network interface (primary network interface) based on the information obtained during the execution of the ifconfig command, our example looks like this:
auto ens33
iface ens33 inet static
address 192.168.175.7
netmask 255.255.255.0
network 192.168.175.0
broadcast 192.168.175.255
gateway 192.168.175.2
dns-nameservers 192.168.175.2 8.8.8.8
Note: It is important to correctly specify the DNS server, since Internet access is necessary for the subsequent installation of ICP components.
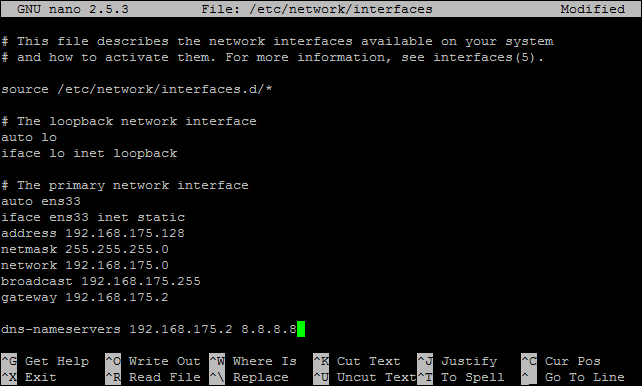
Figure 4. Configuring the network interface
Save the updated file using the following actions: Ctrl + X, Yes, Enter.
To simplify the login to the virtual machine with super user rights (root), you need to make changes to the SSH service configuration. To do this, run the following command:
nano /etc/ssh/sshd_configNext, find the access permission string and edit it accordingly:
PermitRootLogin yes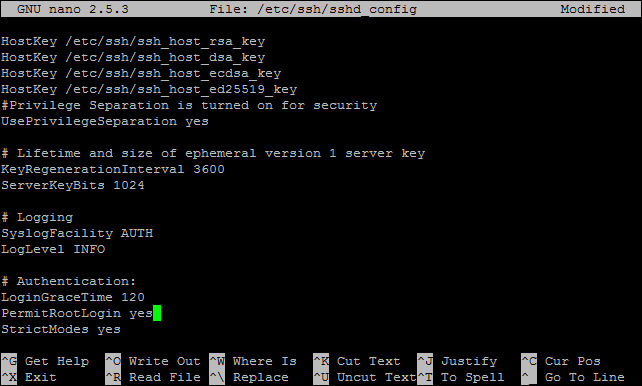
Figure 5. Updating the SSH configuration
Save the file as in the previous step: Ctrl + X, Yes, Enter.
After making all the changes, to apply the new settings, it makes sense to restart the virtual machine or restart the corresponding services (networking and ssh), for example, with the following commands:
shutdown -r 0or
service <service_name> restartAfter restarting the machine, you need to log in again through SSH.
Component Update
Update Ubuntu Server using the following command (the command should run as root):
apt updateNote: If an error occurs during the upgrade: "The repository 'cdrom: // Ubuntu-Server 04/16/54 LTS _Xenial Xerus_ - Release amd64 (20180731) xenial Release' does not have a Release file.". You must run the following command:
sudo nano /etc/apt/sources.listAnd comment out the line:
deb cdrom:[Ubuntu-Server 16.04.5 LTS …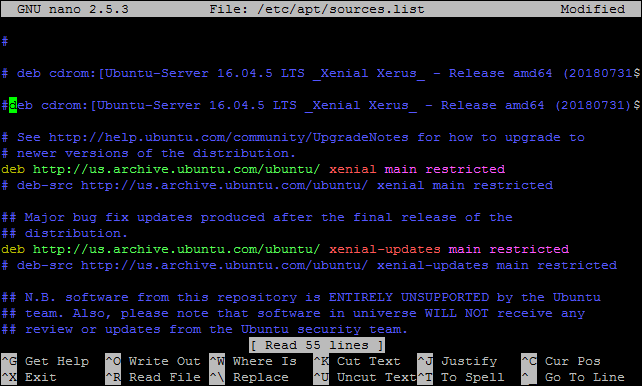
Figure 6. Fix possible errors
Then save the file as it was done previously: Ctrl + X, Yes, Enter
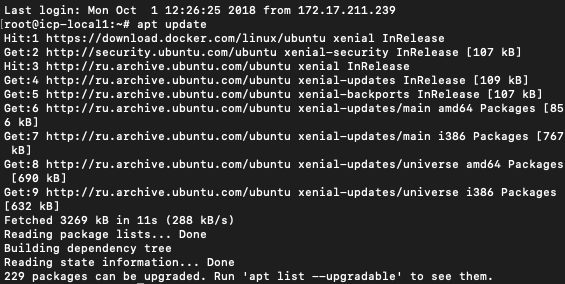
After correcting possible errors, do re-update command, and as a result you should see something like this: Figure 7. Ubuntu Update
Installing IBM Cloud Private
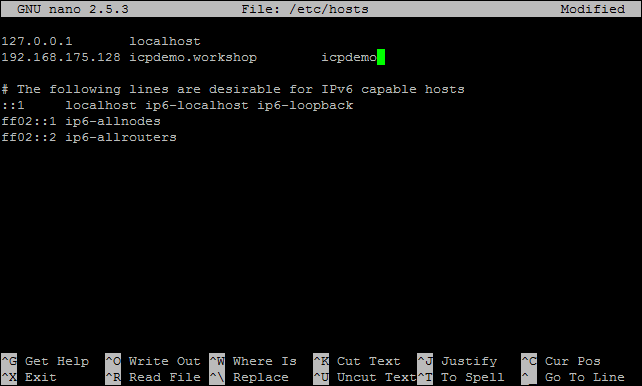
Before you install the ICP, you need to edit the hosts file:
nano /etc/hostsReplace line 127.0.1.1 ubuntu with your IP address and any suitable hostname.
Make sure that the host and alias names in the line are separated by a tab or space: Figure 8. Changing the hosts file Save the file: Ctrl + X, Yes, Enter The following 2 commands allow you to update the system and install additional modules.
apt update
apt-get install apt-transport-https ca-certificates curl software-properties-common python-minimal jq
Observe the terminal output for errors: Figure 9. Installing additional components Increase the maximum virtual memory with the command:
sysctl -w vm.max_map_count=262144
K8s will not start with swap enabled. You can disable it with the command:
swapoff –aNote: the two previous commands will work in the current session. When rebooting, these parameters will be lost and you need to register them again.
The use of these parameters when booting the OS can be enabled with the following commands:
sed -i '/ swap / s/^/#/' /etc/fstab
echo"vm.max_map_count=262144" >> /etc/sysctl.conf
Adding GPG key
Use the following command:
curl -fsSL https://download.docker.com/linux/ubuntu/gpg | apt-key add -Add repository to install Docker
To install the repository, you must run the following 2 commands:
add-apt-repository "deb [arch=amd64] https://download.docker.com/linux/ubuntu $(lsb_release -cs) stable"
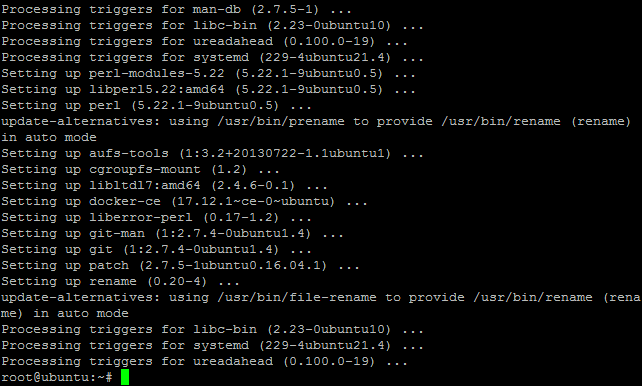
apt-get updateDocker installation
Use the following command to install Docker (Docker version 17.12.1 is the maximum supported version for IBM Cloud Private 2.1.0.3):
apt-get install docker-ce=17.12.1~ce-0~ubuntuFigure 10. Docker installation process
You can check the Docker operation by the following command:
docker version
Figure 11. Docker check
IBM Cloud Private Download
To download the ICP-ce image (Сommunity Edition) from the dockerHub resource, you need to use the Docker toolkit. You can do this with the following command:
docker pull ibmcom/icp-inception:2.1.0.3
Figure 12.
IBM ICP download packed all major components required for installation into one package (note that you can change the version to a newer version if necessary). The pull command will load the image into the local file system (the image will be launched to install the ICP).
Create a directory and go to it:
mkdir /opt/icp
cd /opt/icp
Copy the ICP package to this directory:
docker run -e LICENSE=accept -v "$(pwd)":/data ibmcom/icp-inception:2.1.0.3 cp -r cluster /dataNote: This Docker Toolkit command executes the Linux copy (cp) command from the specified directory (-v parameter). This will create a cluster directory in / opt / icp with all the necessary files.
Setting SSH keys
Create new ssh keys in the / opt / icp / cluster directory:
ssh-keygen -b 4096 -f ~/.ssh/id_rsa -N ""
cat ~/.ssh/id_rsa.pub | sudo tee -a ~/.ssh/authorized_keys
systemctl restart sshd
cp ~/.ssh/id_rsa ./cluster/ssh_key
Check that the key is created and located in the / opt / icp / cluster folder:
ls /opt/icp/cluster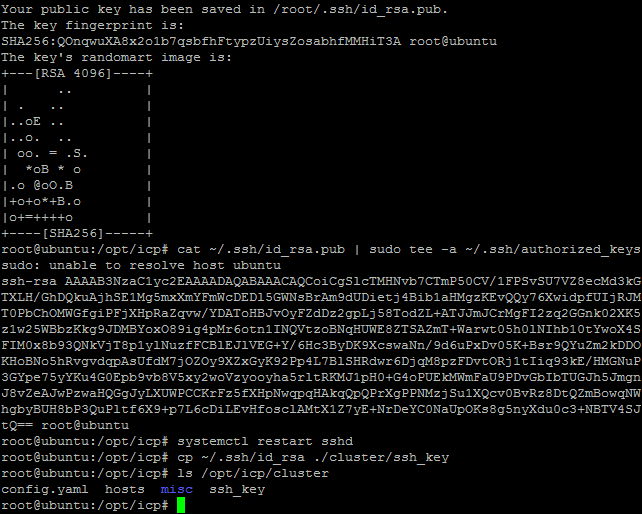
Figure 13. The contents of the cluster folder
ICP Setup
Add the IP address of each node in the cluster to the / opt / icp / cluster / hosts file (in our case, we use the same IP address for each component that we specified in / etc / hosts). We do this with the following command:
nano /opt/icp/cluster/hosts
Figure 14. The contents of the hosts file
Save the file: Ctrl + X, Yes, Enter
Detailed information about the installation parameters can be found in the configuration file:
more /opt/icp/cluster/config.yamlWe do not recommend changing the default installation settings.
Note: The two most important installation files are hosts and config.yaml, they describe the ICP installation options. In a multi-worker configuration, you must specify a list of IP addresses in the worker section. When you install the current version of ICP in Single Node mode, the IP addresses change only in the hosts file.
ICP installation
Go to the cluster directory and run the installation:
cd /opt/icp/cluster
docker run -e LICENSE=accept --net=host -t -v "$(pwd)":/installer/cluster ibmcom/icp-inception:2.1.0.3 install
Depending on the resources available, the installation can last from 20 to 60 minutes. If there are errors (red messages), make the appropriate changes in the configuration files. Sometimes the installation may slow down a bit due to attempts to reconnect to components that have not yet started (for example, during the launch of Cloudant or IAM).
The end of the installation should look like this: Figure 15. The result of ICP Installation In case of errors you may need to uninstall ICP:

docker run -e LICENSE=accept --net=host -t -v "$(pwd)":/installer/cluster ibmcom/icp-inception:2.1.0.3 uninstallBefore proceeding to the next step, wait about 5 minutes so that all ICP components can start successfully.
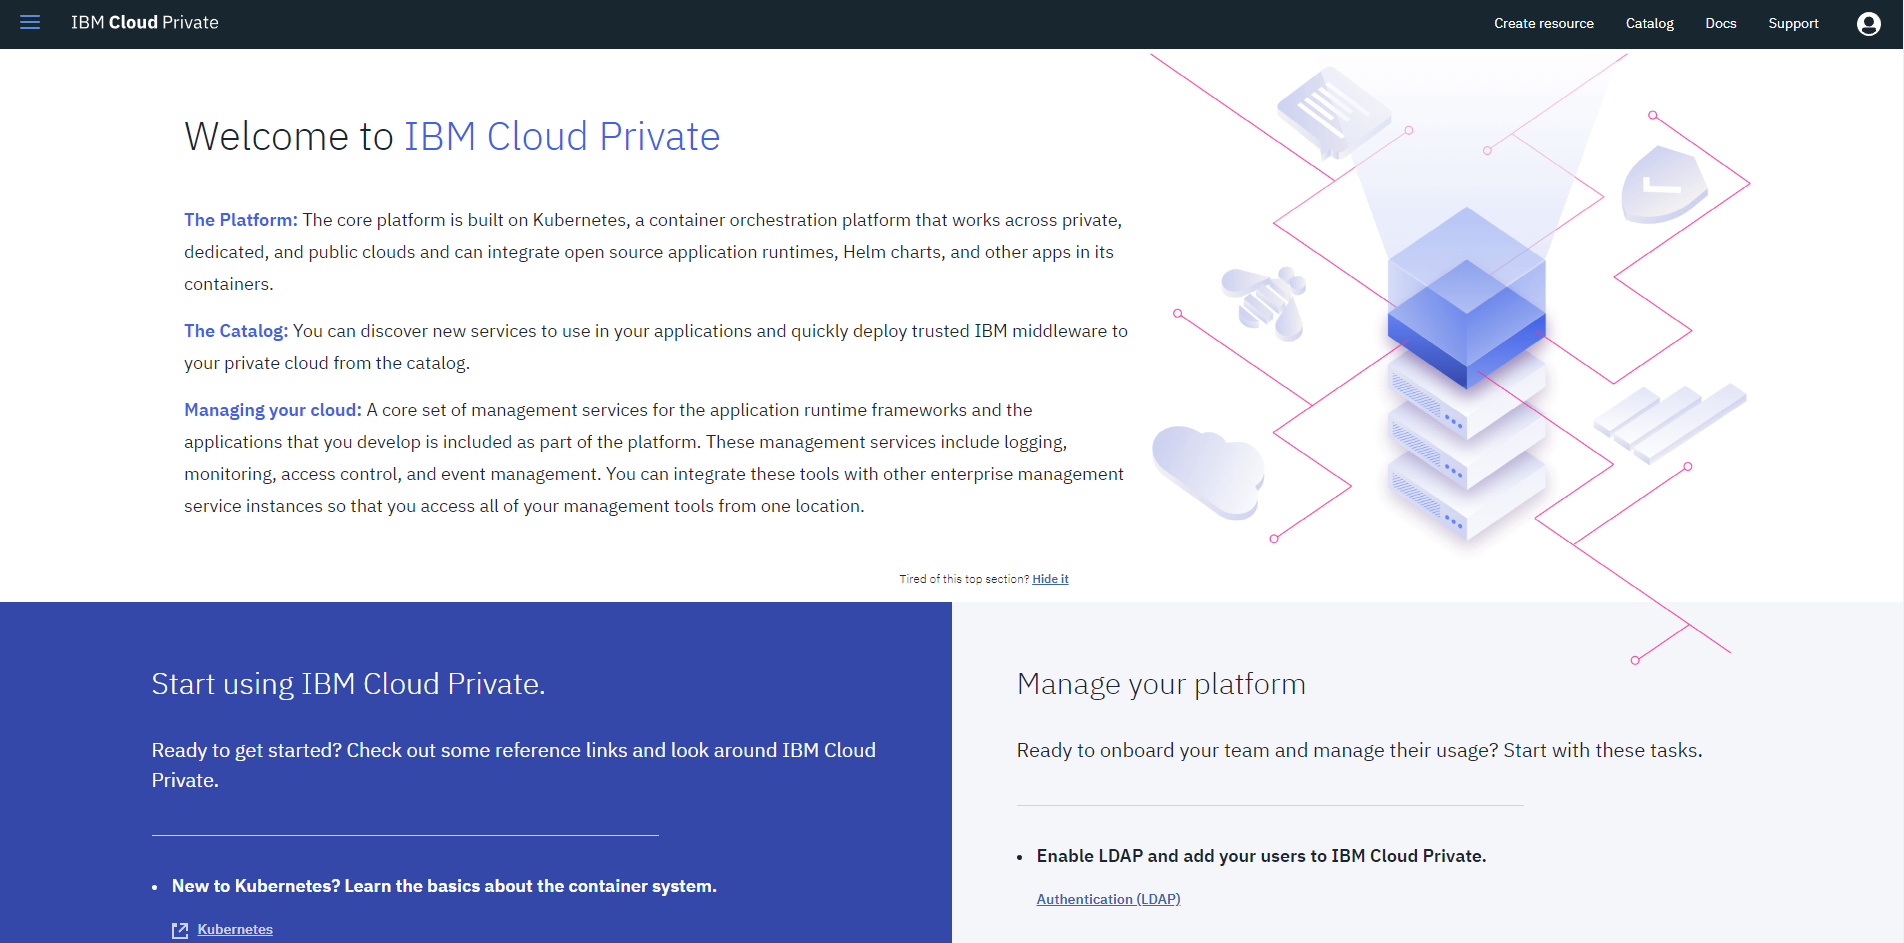
By the link indicated after the installation is completed, enter the ICP console (admin / admin):
https://<ip_address>:8443
Figure 16. The login page in control panel
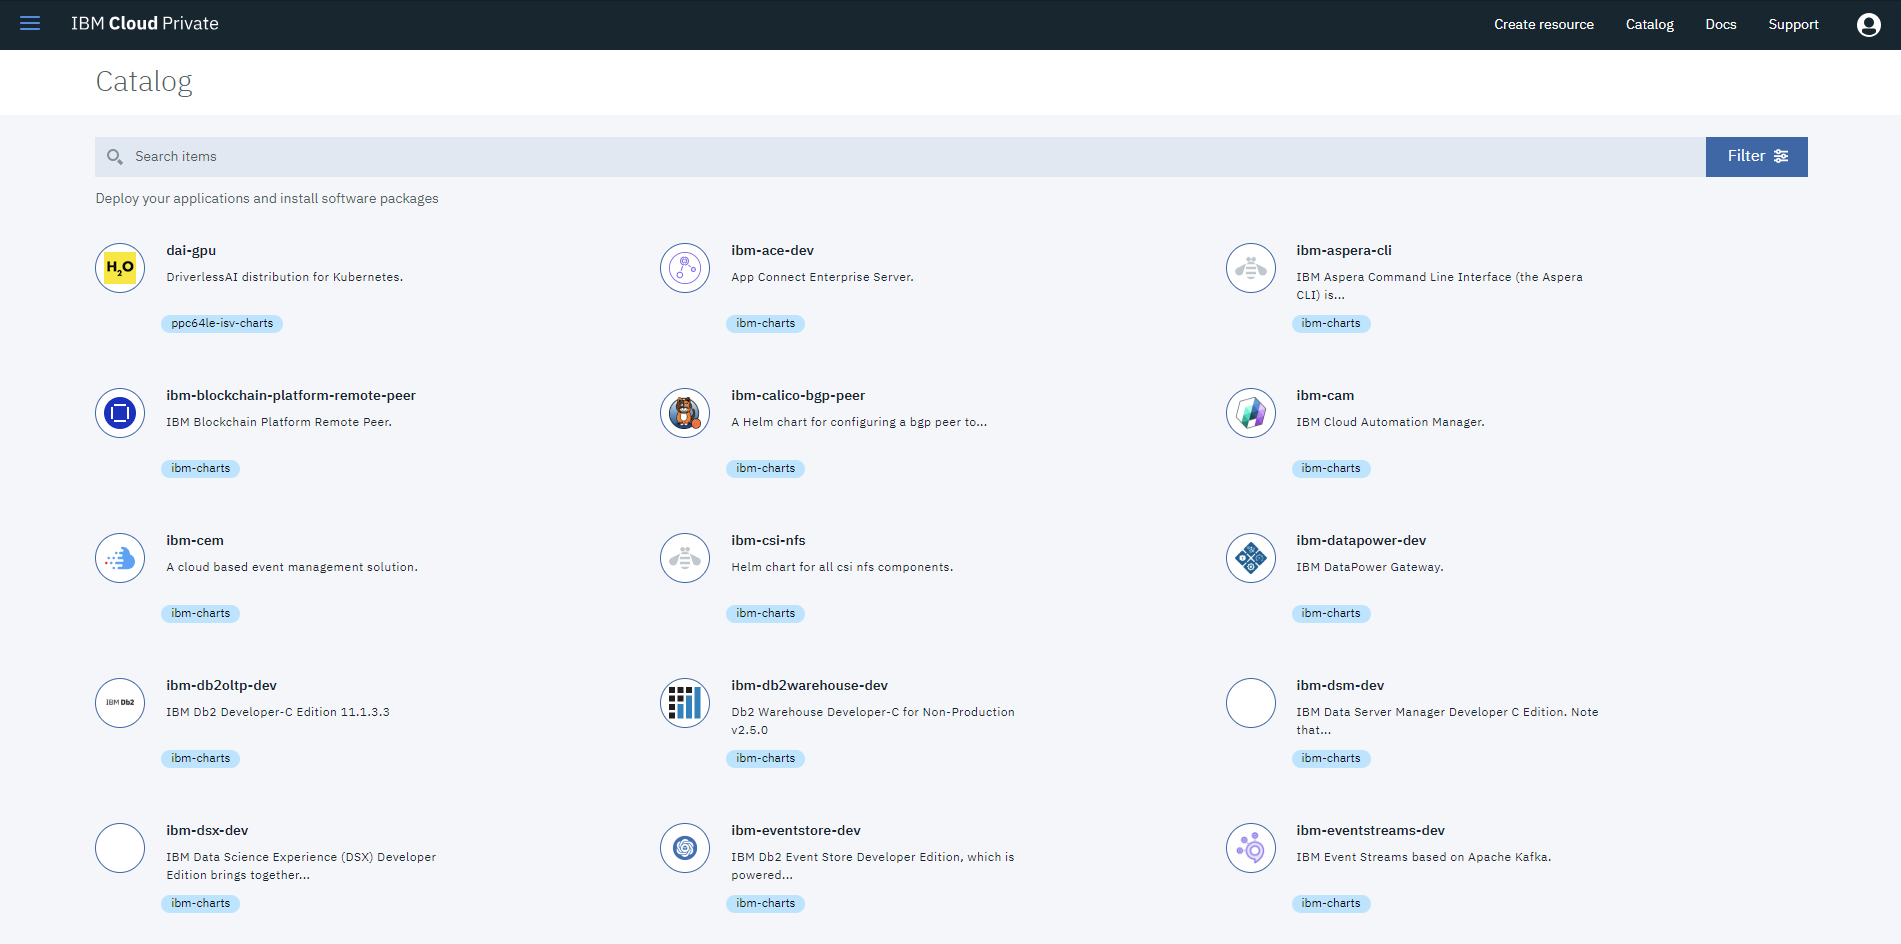
welcome page ICP: Figure 17. Web interface control panel at the top right, select the «Catalog» menu displays a list of available applications: Figure 18. Product components This catalog contains a list of applications and software, the description of which you can study at your leisure, but do not hurry to deploy them yet. We have yet to learn how to properly handle the newly installed ICP (not only via the Web interface, but also the console in the form of a CLI - Command Line Interface), connect persistent storage and make small adjustments.
As a conclusion
Let's sum up.
We successfully deployed the IBM Cloud Private community edition (version 2.1.0.3) on a single host in a virtual machine running Ubuntu Server 16.04.5. At the moment we have personally tested the installation on VMware and Hyper-V hypervisors, it works exactly on XenServer and there should be no difficulties for VirtualBox and KVM.
Who really can not wait to plunge further into the study of ICP, that is, an excellent selection of laboratory work of our colleagues here: github.com/phthom/IBMCloudPrivate
From the upcoming steps - after a fresh installation, it remains for us to adjust the ICP a little and start filling it with something useful and close to practical tasks.
If the Habr community supports this initiative in a positive way, as our research and experimentation progresses, we will fill the platform core with the necessary components for telemetry collection, data storage, processing, analysis, forecasting, creating external program interfaces and creating custom applications. Accordingly, developing a series of such articles.
We are waiting for your feedback and suggestions!
Also, our like-minded people from AIXportal.ru prepared a wonderful video clip on installing IBM Cloud Private on their Youtube channel; it will be more convenient for someone like this: youtu.be/eQwOOTzjM24
Links and useful materials
• Product page in Russian
• Who wants to practice English, the book is “ ICP for Dummies ” 2018. (40 pages)
• Official ICP 2.1.0.3 documentation on the IBM Knowledge Center
• Open ICP community on IBM developerWorks
• ICP recipes for developers