DIY thermometer for Instagram on arduino nano
We continue to make useful and not very smart / smart / bluetooth devices for arduino. In previous articles, I talked about how to make a bluetooth machine , a bluetooth voltmeter and a bluetooth remote for a TV , but today we will talk about creating a more fashionable, but less useful device. This davyce allows you to post a thermometer on instagram indicating the exact time and place of temperature measurements. First, I’ll show you how it looks and works on video, and a detailed description will be already under the cut.
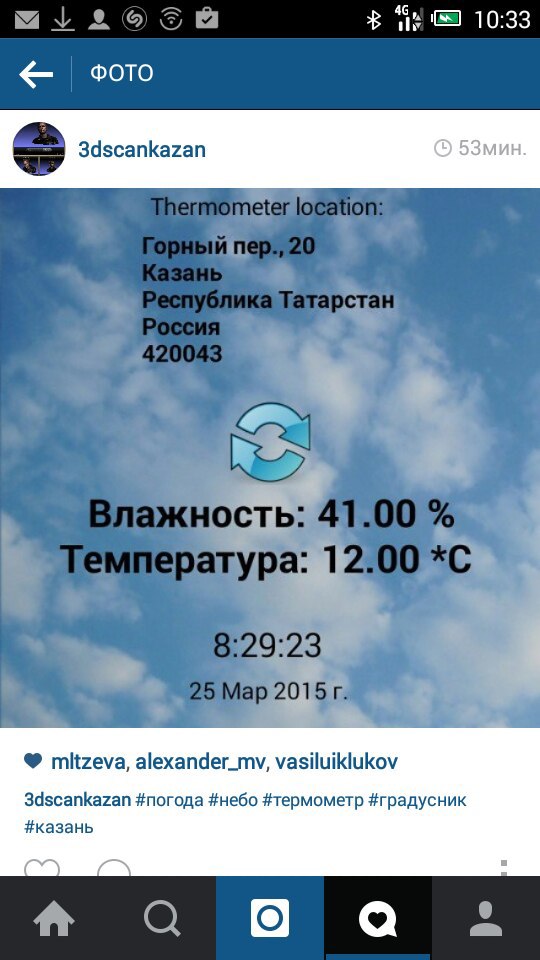
And this is what the measurement results on Instagram will look like:
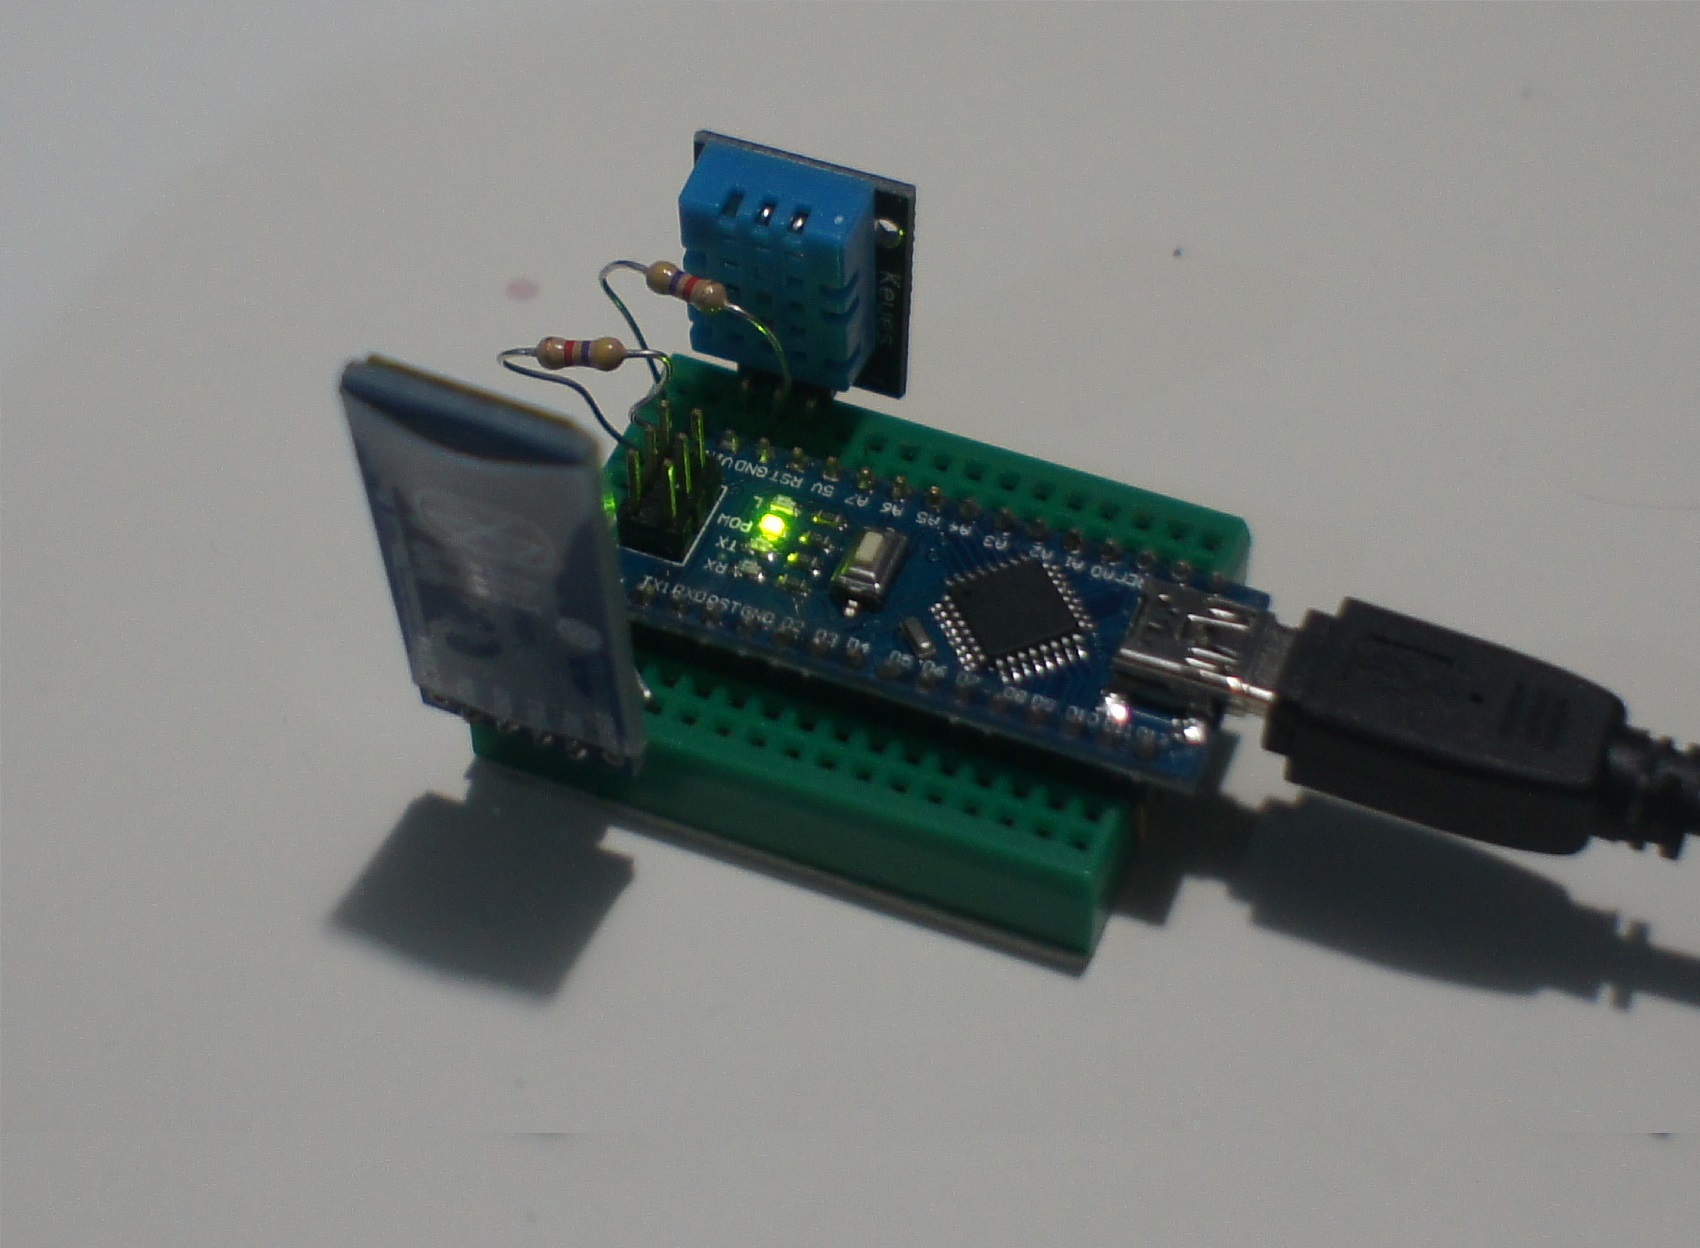
Now I’ll briefly talk about the design and connection diagram. My bluetooth / instagram thermometer consists of:
Arduino Nano
Bluetooth module HC06
Temperature and humidity sensor DHT11
Arduino Nano
Bluetooth module HC06
Temperature and humidity sensor DHT11
In general, a temperature sensor can be used with any of those that can be connected to an arduino. For example, I also tried using the DS18B20. The main thing is that under this sensor there should be a library for arduino. And it’s an ideal case if there is a ready-made sketch in the library that sends temperature values to the serial port. Then you can use this particular sketch to transfer data via bluetooth module. Everything is very simple here, but just in case, I’ll leave the connection diagram and sketch for the DHT11 sensor if someone wants to use it. Library for dht 11

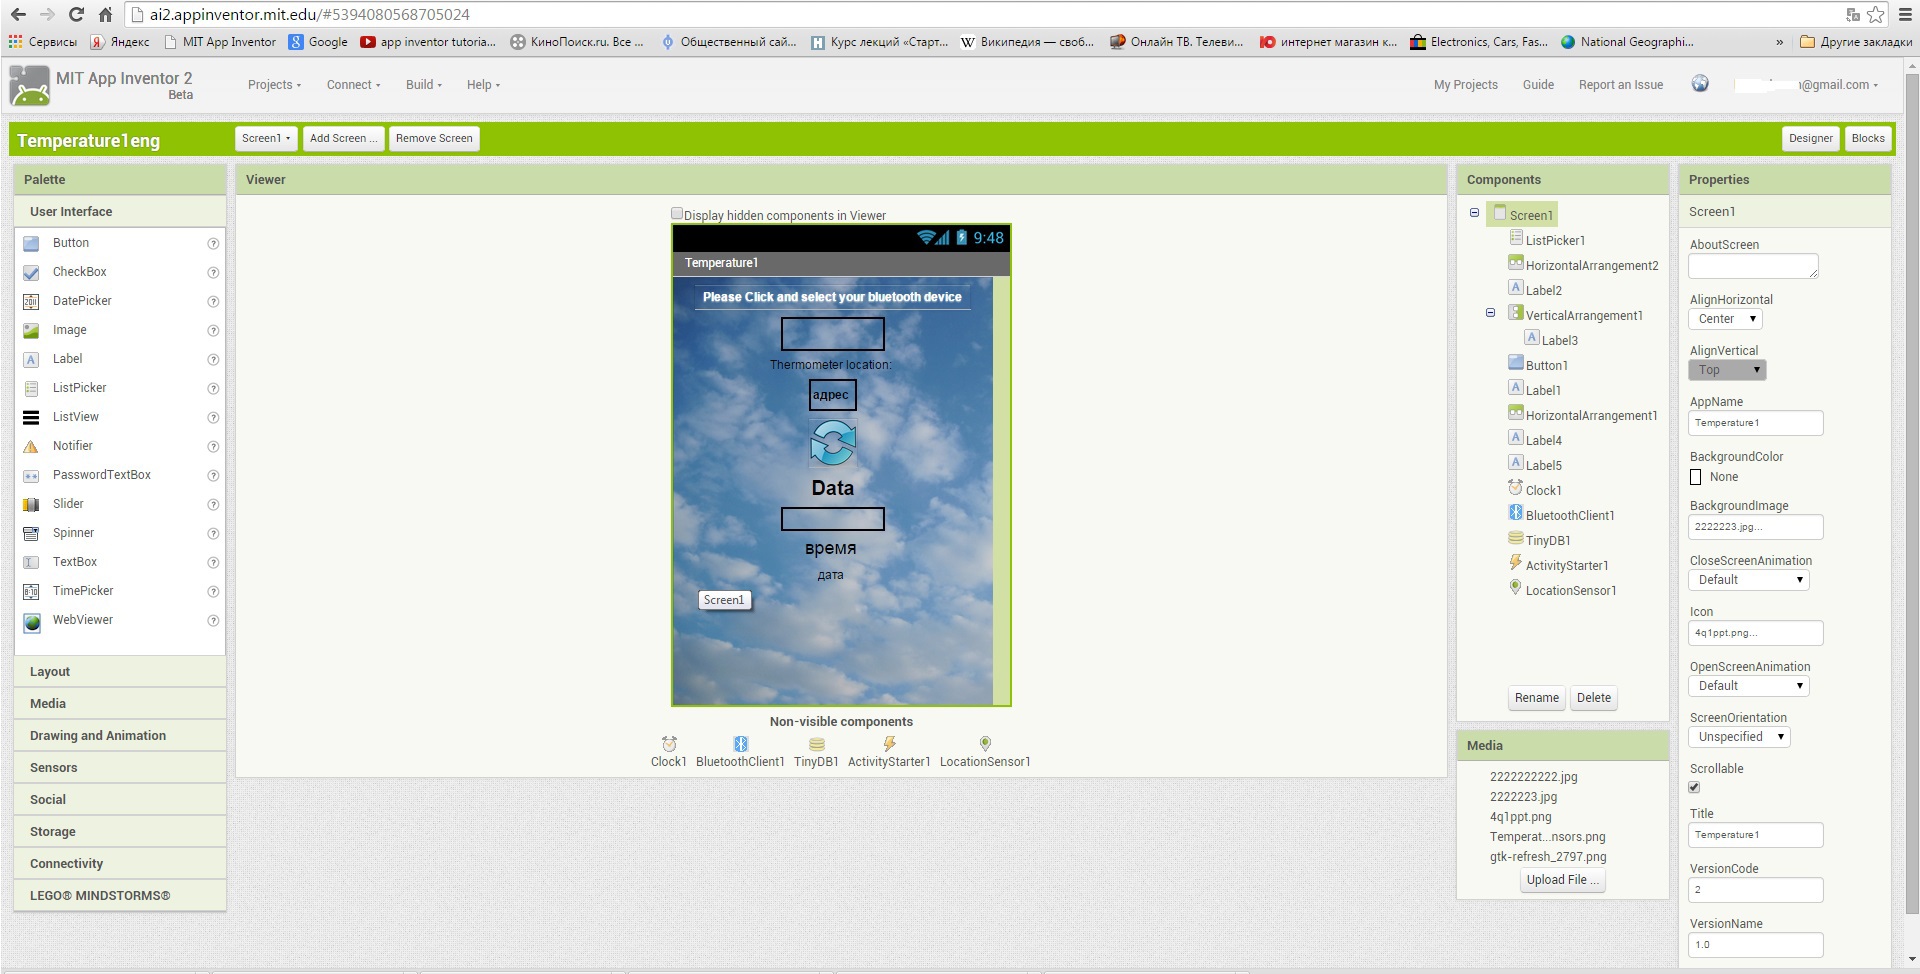
With the "iron" part figured out, now you can start writing an android application. The easiest way to do it is using the visual development environment for Android applications App Inventor 2. It works from a browser, you do not need to install anything. Any arduino worker will understand. In the screenshot, a list of elements used in the application, their location and some characteristics.
The application itself is also quite simple and looks like this:

The application consists of only 5 blocks, two of which (Listpicker) are responsible for connecting to one of the paired bluetooth devices. Screen1 is only executed when the program starts, retrieving the poppy address of the last connected device from the phone’s memory, and also launching the location of the smartphone. Clock1 is responsible for changing the stopwatch and checks to see if new temperature information has arrived. Button1 sends an arduino request to update information if necessary.
Well, in conclusion, about the appearance of the bluetooth / instagram thermometer. This device works on my balcony, so it’s not affected by natural phenomena, and therefore the case doesn’t need it. Perhaps if there is some simple solution for the case, someday I will install it outside the window, In the meantime, it looks like bluetooth / instagram the thermometer like this:
Well, the Android application turned out like this:

PS For those who have never encountered creating applications in App Inventor 2, I made a video with a slightly more detailed description of the process of creating this application (you need to go to YouTube to view it).
PPS A collection of more than 100 instructional materials on arduino for beginners and pros here.
Online course on arduino on the gyms here.
And this is what the measurement results on Instagram will look like:
Now I’ll briefly talk about the design and connection diagram. My bluetooth / instagram thermometer consists of:
Arduino Nano
Bluetooth module HC06
Temperature and humidity sensor DHT11
Arduino Nano
Bluetooth module HC06
Temperature and humidity sensor DHT11
In general, a temperature sensor can be used with any of those that can be connected to an arduino. For example, I also tried using the DS18B20. The main thing is that under this sensor there should be a library for arduino. And it’s an ideal case if there is a ready-made sketch in the library that sends temperature values to the serial port. Then you can use this particular sketch to transfer data via bluetooth module. Everything is very simple here, but just in case, I’ll leave the connection diagram and sketch for the DHT11 sensor if someone wants to use it. Library for dht 11
sketch
#include "DHT.h"
#define DHTPIN 2
#define DHTTYPE DHT11 // DHT 11
DHT dht (DHTPIN, DHTTYPE);
unsigned long a;
void setup () {
Serial.begin (9600);
Serial.setTimeout (4);
dht.begin ();
}
void loop () {
delay (2000);
float h = dht.readHumidity ();
float t = dht.readTemperature ();
float f = dht.readTemperature (true);
if (isnan (h) || isnan (t) || isnan (f)) {
Serial.println ("Failed to read from DHT sensor!");
return
}
if (Serial.available ())
{a = Serial.parseInt ();
if (a == 1) {
float hi = dht.computeHeatIndex (f, h);
Serial.print ("Humidity:„);
Serial.print (h);
Serial.print (“% \ t");
Serial.print ("Temperature:„);
Serial.print (t);
Serial.print (“* C„);
}
}
}
With the "iron" part figured out, now you can start writing an android application. The easiest way to do it is using the visual development environment for Android applications App Inventor 2. It works from a browser, you do not need to install anything. Any arduino worker will understand. In the screenshot, a list of elements used in the application, their location and some characteristics.
The application itself is also quite simple and looks like this:
The application consists of only 5 blocks, two of which (Listpicker) are responsible for connecting to one of the paired bluetooth devices. Screen1 is only executed when the program starts, retrieving the poppy address of the last connected device from the phone’s memory, and also launching the location of the smartphone. Clock1 is responsible for changing the stopwatch and checks to see if new temperature information has arrived. Button1 sends an arduino request to update information if necessary.
Well, in conclusion, about the appearance of the bluetooth / instagram thermometer. This device works on my balcony, so it’s not affected by natural phenomena, and therefore the case doesn’t need it. Perhaps if there is some simple solution for the case, someday I will install it outside the window, In the meantime, it looks like bluetooth / instagram the thermometer like this:
Well, the Android application turned out like this:
PS For those who have never encountered creating applications in App Inventor 2, I made a video with a slightly more detailed description of the process of creating this application (you need to go to YouTube to view it).
PPS A collection of more than 100 instructional materials on arduino for beginners and pros here.
Online course on arduino on the gyms here.