Customize autoscaling in InfoboxCloud
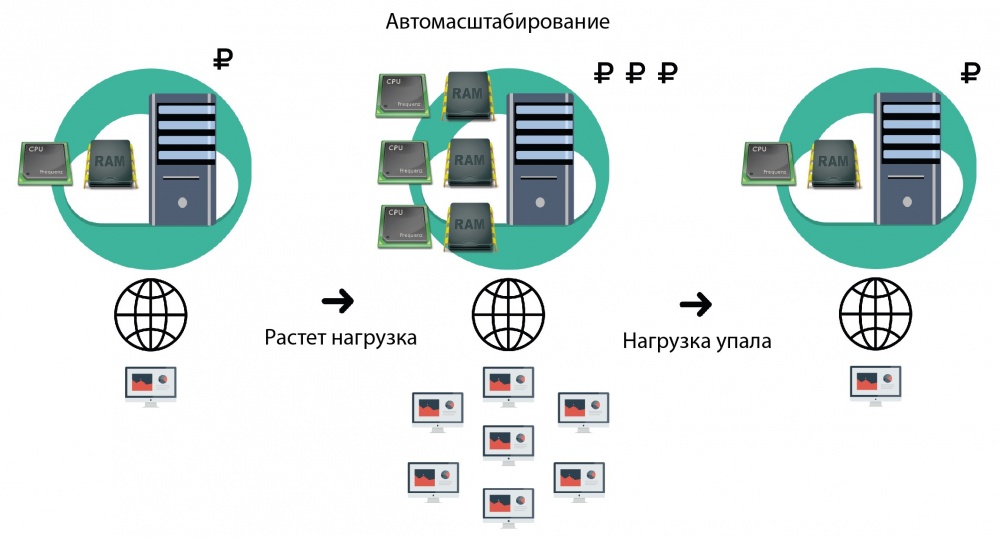
The InfoboxCloud cloud infrastructure enables you to automatically scale the resources of your cloud servers to respond to changing workloads. Auto-scaling helps maximize the use of cloud resources and save money: increase resources when the load increases and reduce when it decreases.
Uneven server load is a common occurrence. For example, at night the server may be idle, and in the morning the load may increase. Auto-scaling during advertising campaigns, submitting business reports via the Internet is useful to ensure the operation of online stores before the holidays and in the software development process.
When autoscaling is enabled, the server’s occupied resources are monitored. Changes to available resources and the step of these changes depends on the rules configured by the user and the goal of autoscaling. For some projects, it is more important to be able to quickly scale; for others, to save more money. In this article, we will look at how to configure autoscaling in InfoboxCloud .
We hope you already have an account with InfoboxCloud . If not yet, create one .
Log in to the control panel . Create a cloud server.

When creating a server, you need to pay attention to the flag " I will control the kernel of the OS ." In InfoboxCloud, CPU and memory autoscaling works for containers (servers that use OS-level virtualization). For virtual machines (servers using hardware virtualization), autoscaling is possible only on the CPU. If you want to use autoscaling from memory - do not set the flag “I will control the kernel of the OS” when creating the server.

In the next step, select the required OS and complete the server creation process.
After creating, click on the server in the control panel.

You will be taken to the server management section. As you can see below, autoscaling is disabled. In order to understand the current resource consumption by the server, go to the "Performance" section.

Charts are updated 1 time in 5 minutes. In order to see the consumption for the required period of time, select the area on the lower graph of each resource.

The red line on the graph is the set resource limits in the control panel. Blue - current resource consumption.

Both in the graph of processor performance and in the graph of memory consumption, the difference between limitation and actually consumed resources is large. So computing resources are idle, and users pay extra money.
You reduce the amount of resources consumed by the server in the Summary server management section. Autoscaling will not be involved.

This is a good way if you clearly know how much resources the server will consume.
If the load is less predictable or changing, use autoscaling.
To configure, go to the corresponding "Autoscale" section.

You can enable autoscaling based on processor frequency and RAM. You cannot scale by processor cores - guest operating systems require a reboot when changing the number of cores.
It is recommended that after creating the server, first install the software that will be used, make sure that it works correctly and determine the amount of resource consumption at different loads (autoscale boundaries). Then you can enable autoscaling and test its operation so that the result in industrial use is suitable and expected.
Sliders (sliders) set the minimum and maximum value of the resource that is acceptable for work without autoscaling (in percent of the resources used). If the resource loading is greater than the set value with the slider “if more was used” - the resource will be added. If the resource value is less than the set value "if less was used" - the resource will be reduced.
For autoscaling a processor, the resource is the processor frequency, for memory, the amount of RAM.

The period for estimating the amount of resources used is indicated in the “during” fields. Autoscaling up and down is possible only after evaluating the resources used (building a performance graph) for each cloud server. The minimum period is 5 minutes.
Auto-scaling borders - the fields “increase to” and “decrease to”. This is the maximum and minimum amount of resource to which autoscaling is possible. It is recommended to set the minimum resource size not less than that specified in the minimum system requirements of the software used or not less than the minimum working value for your use case.
The autoscaling step is indicated in the "Step" field. This is the value by which the amount of available resources changes during autoscaling: it increases or decreases.
Autoscale pace - the number of steps that autoscale must go through to change the amount of resources from minimum to maximum. This is the reciprocal of the autoscaling speed.
The tempo can be calculated as follows:

For the correct application of autoscaling rules, the pace, step and autoscaling boundaries must be integers! You cannot take half a step, but you can take a small step of at least 1 MHz.
Let's look at an example: let's say we want the minimum processor frequency to be 200 MHz, the maximum to 2000 MHz. Suppose we use auto-scaling periods of 5 minutes to both increase the amount of the resource and decrease it. The load is increasing. If the autoscaling step is set to 200 MHz:

The autoscaling rate is 9. Let us determine the time during which the processor frequency will increase from 200 to 2000 MHz with a significantly increased load.

Maximum autoscale time = 9 * 5 = 45 minutes.
Need to auto-scale faster? Increase the step, but so that the pace is still an integer.
For example, you can set the lower limit of autoscaling at 500 MHz, the upper at 2000 MHz, a step of 500 MHz, the periods will remain for 5 minutes.
Then the tempo = (2000-500) / 500 = 3. The
maximum autoscale time = 3 * 5 = 15 minutes.
In the same way, the calculation is also made for memory.
Let's say the lower border is 1024 MB, the upper - 65536 MB. The periods are 5 minutes each. Step - 1024 Mb. Then the tempo = (65536-1024) / 1024 = 63. The
maximum autoscale time from 1 GB of memory to 64 GB = 63 * 5 = 315 minutes.
As can be seen from the calculations, autoscaling does not work instantly, which is associated with the cost of computing resources and the amount of service traffic needed to build graphs of cloud server downloads. This means that the lower limit of autoscaling should be set with a margin sufficient to withstand the load with the expected increase in load within 5 minutes (before the autoscale operation). This will ensure predictable server performance with increasing load.
A useful feature of autoscaling is the ability to maximize resource savings. Using autoscaling, you can reduce the amount of resources available to the server to values less than what can be set directly from the control panel. For example, values such as 25 MHz of the processor and 48 megabytes of memory for an unvisited personal blog or git repository are quite real. This opens up the possibility for users to use the cloud inexpensively, without overpaying for extra resources, minimizing the cost of a cloud server.
A feature of the autoscale InfoboxCloudis the precise control of the process by the administrator. You determine the auto-scaling process and the result is predictable, since all parameters are set and the operation algorithm is clear. Autoscaling is not a panacea, but a very useful tool that allows you to use resources more efficiently and save money.
If you find a mistake in the article, the author will gladly correct it. Please write to the PM or e-mail about it. Write questions in the comments or by mail. If you cannot leave comments on Habré - write to us in InfoboxCloud Community .
Successful work!
Uneven server load is a common occurrence. For example, at night the server may be idle, and in the morning the load may increase. Auto-scaling during advertising campaigns, submitting business reports via the Internet is useful to ensure the operation of online stores before the holidays and in the software development process.
When autoscaling is enabled, the server’s occupied resources are monitored. Changes to available resources and the step of these changes depends on the rules configured by the user and the goal of autoscaling. For some projects, it is more important to be able to quickly scale; for others, to save more money. In this article, we will look at how to configure autoscaling in InfoboxCloud .
What do we need to configure
We hope you already have an account with InfoboxCloud . If not yet, create one .
Log in to the control panel . Create a cloud server.
When creating a server, you need to pay attention to the flag " I will control the kernel of the OS ." In InfoboxCloud, CPU and memory autoscaling works for containers (servers that use OS-level virtualization). For virtual machines (servers using hardware virtualization), autoscaling is possible only on the CPU. If you want to use autoscaling from memory - do not set the flag “I will control the kernel of the OS” when creating the server.
In the next step, select the required OS and complete the server creation process.
After creating, click on the server in the control panel.
You will be taken to the server management section. As you can see below, autoscaling is disabled. In order to understand the current resource consumption by the server, go to the "Performance" section.
Charts are updated 1 time in 5 minutes. In order to see the consumption for the required period of time, select the area on the lower graph of each resource.
The red line on the graph is the set resource limits in the control panel. Blue - current resource consumption.
Both in the graph of processor performance and in the graph of memory consumption, the difference between limitation and actually consumed resources is large. So computing resources are idle, and users pay extra money.
You reduce the amount of resources consumed by the server in the Summary server management section. Autoscaling will not be involved.
This is a good way if you clearly know how much resources the server will consume.
If the load is less predictable or changing, use autoscaling.
To configure, go to the corresponding "Autoscale" section.
You can enable autoscaling based on processor frequency and RAM. You cannot scale by processor cores - guest operating systems require a reboot when changing the number of cores.
It is recommended that after creating the server, first install the software that will be used, make sure that it works correctly and determine the amount of resource consumption at different loads (autoscale boundaries). Then you can enable autoscaling and test its operation so that the result in industrial use is suitable and expected.
Autoscale setting
Sliders (sliders) set the minimum and maximum value of the resource that is acceptable for work without autoscaling (in percent of the resources used). If the resource loading is greater than the set value with the slider “if more was used” - the resource will be added. If the resource value is less than the set value "if less was used" - the resource will be reduced.
For autoscaling a processor, the resource is the processor frequency, for memory, the amount of RAM.
The period for estimating the amount of resources used is indicated in the “during” fields. Autoscaling up and down is possible only after evaluating the resources used (building a performance graph) for each cloud server. The minimum period is 5 minutes.
Auto-scaling borders - the fields “increase to” and “decrease to”. This is the maximum and minimum amount of resource to which autoscaling is possible. It is recommended to set the minimum resource size not less than that specified in the minimum system requirements of the software used or not less than the minimum working value for your use case.
The autoscaling step is indicated in the "Step" field. This is the value by which the amount of available resources changes during autoscaling: it increases or decreases.
Autoscale pace - the number of steps that autoscale must go through to change the amount of resources from minimum to maximum. This is the reciprocal of the autoscaling speed.
The tempo can be calculated as follows:
For the correct application of autoscaling rules, the pace, step and autoscaling boundaries must be integers! You cannot take half a step, but you can take a small step of at least 1 MHz.
Let's look at an example: let's say we want the minimum processor frequency to be 200 MHz, the maximum to 2000 MHz. Suppose we use auto-scaling periods of 5 minutes to both increase the amount of the resource and decrease it. The load is increasing. If the autoscaling step is set to 200 MHz:
The autoscaling rate is 9. Let us determine the time during which the processor frequency will increase from 200 to 2000 MHz with a significantly increased load.
Maximum autoscale time = 9 * 5 = 45 minutes.
Need to auto-scale faster? Increase the step, but so that the pace is still an integer.
For example, you can set the lower limit of autoscaling at 500 MHz, the upper at 2000 MHz, a step of 500 MHz, the periods will remain for 5 minutes.
Then the tempo = (2000-500) / 500 = 3. The
maximum autoscale time = 3 * 5 = 15 minutes.
In the same way, the calculation is also made for memory.
Let's say the lower border is 1024 MB, the upper - 65536 MB. The periods are 5 minutes each. Step - 1024 Mb. Then the tempo = (65536-1024) / 1024 = 63. The
maximum autoscale time from 1 GB of memory to 64 GB = 63 * 5 = 315 minutes.
As can be seen from the calculations, autoscaling does not work instantly, which is associated with the cost of computing resources and the amount of service traffic needed to build graphs of cloud server downloads. This means that the lower limit of autoscaling should be set with a margin sufficient to withstand the load with the expected increase in load within 5 minutes (before the autoscale operation). This will ensure predictable server performance with increasing load.
A useful feature of autoscaling is the ability to maximize resource savings. Using autoscaling, you can reduce the amount of resources available to the server to values less than what can be set directly from the control panel. For example, values such as 25 MHz of the processor and 48 megabytes of memory for an unvisited personal blog or git repository are quite real. This opens up the possibility for users to use the cloud inexpensively, without overpaying for extra resources, minimizing the cost of a cloud server.
A feature of the autoscale InfoboxCloudis the precise control of the process by the administrator. You determine the auto-scaling process and the result is predictable, since all parameters are set and the operation algorithm is clear. Autoscaling is not a panacea, but a very useful tool that allows you to use resources more efficiently and save money.
Conclusion
If you find a mistake in the article, the author will gladly correct it. Please write to the PM or e-mail about it. Write questions in the comments or by mail. If you cannot leave comments on Habré - write to us in InfoboxCloud Community .
Successful work!