Jump Start in PowerShell (Part I)
- From the sandbox
- Tutorial
Automation only. PowerShell only.

As a hobby and in the presence of time I teach students at UKIT (formerly Moscow State College of Information Technologies). At the moment, I have little time to devote it to a group of students, but it’s quite enough to prepare a post here on Habré.
I work as a system administrator in a large non-IT company with a great deal of IT resources. By the nature of the activity, it seems to solve a large number of similar tasks for user service.
I became acquainted with the PowerShell language about two years ago, but only after a year did it come to grips with it, without first realizing its huge capabilities. In the article, first of all, I will focus on those who want to start working with PowerShell, but do not yet trust him or don’t know which side to approach this miracle.
Caution: PowerShell is addictive.
Wikipedia tells us:
The PowerShell environment may look like the command line:
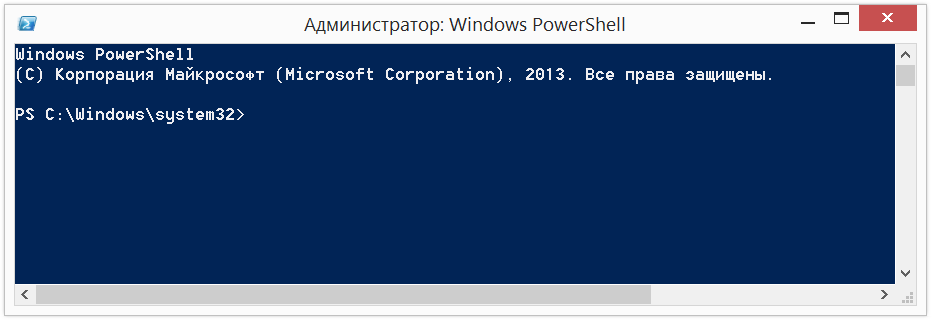
powershell.exe
Or as an application:
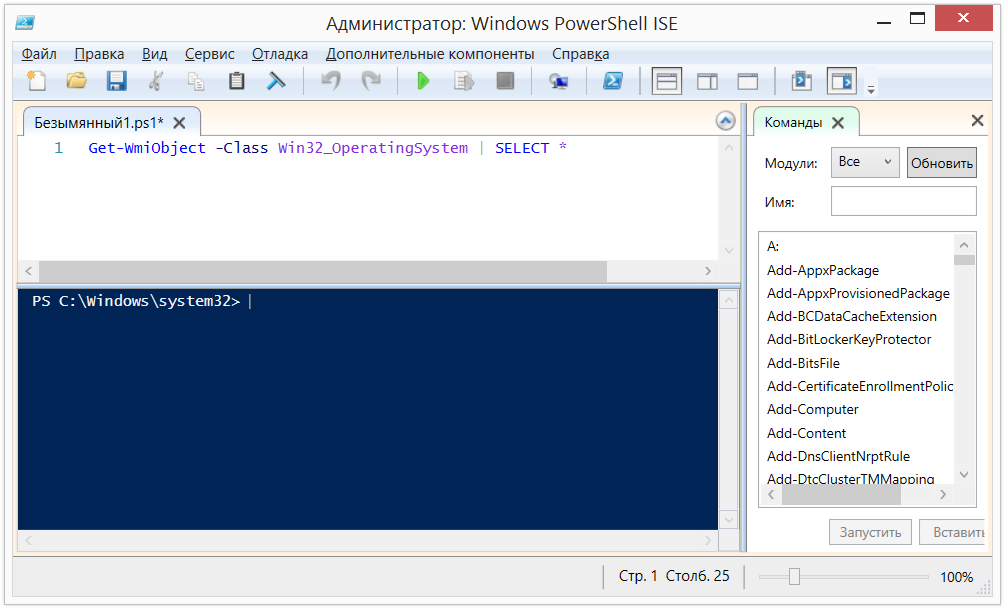
powershell_ise.exe
Powershell_ise.exe is called the integrated scripting environment - Windows PowerShell ISE. It allows you to work with the language in a convenient environment with syntax highlighting, a command designer, autocomplete of commands by pressing TAB and other delights. Ideal for creating and testing scripts.
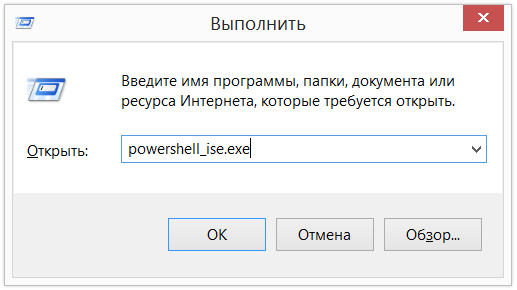
To start the powershell.exe or powershell_ise.exe environment, just type the same name in the run line.
The PowerShell script file has the extension .ps1 .

The script will fail to start with double LMB. This is done specifically so as not to harm the system by accidentally running a script.
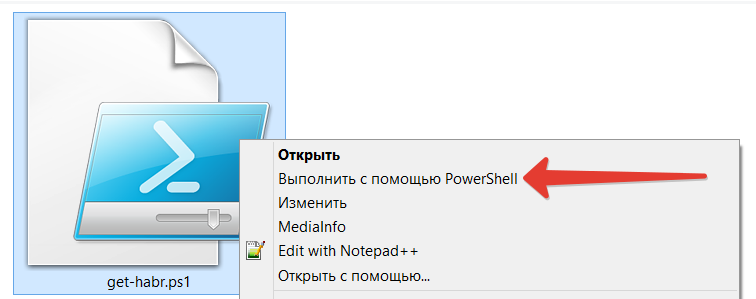
To start, click “Run using PowerShell” by clicking RMB:
In addition to the fact that there is a restriction on running LMB scripts, by default script execution in the system is prohibited, again, for the reason described above, do not harm the system. To check the current execution policy, run the command:
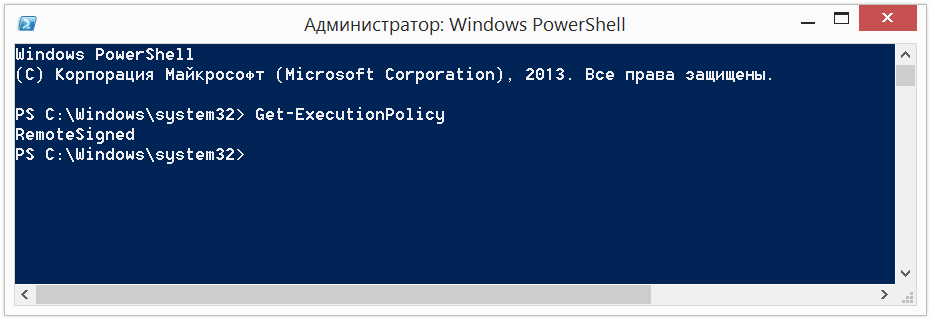
We will get one of the following values. With a high probability, if this was the first launch, we will get Restricted .
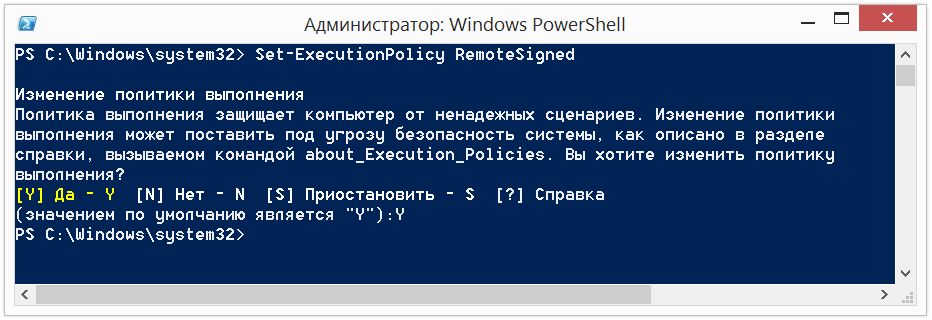
To execute and test, we will lower the policy to RemoteSigned by running the command:
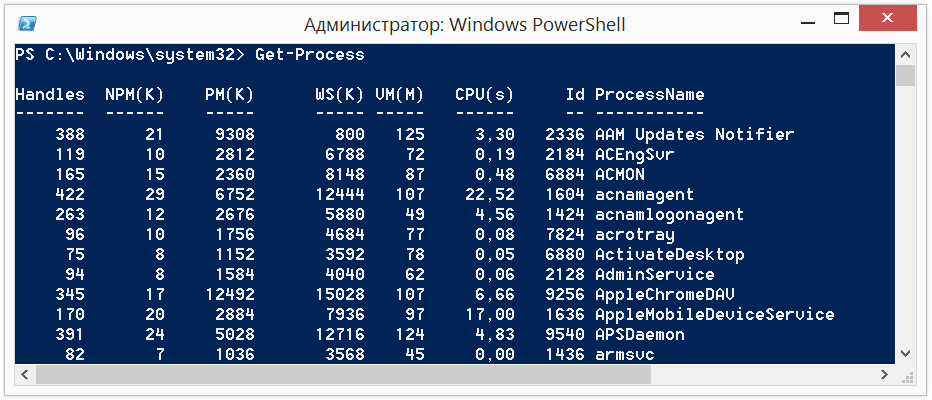
For example, to get the current processes, we will execute the command:
And we get the result:
Try it yourself:
You do not have to know all the cmdlets by heart. Get-Help will save the situation.
Information about all available cmdlets can be obtained by entering the following command:
If we use PowerShell ISE, we facilitate the development process.
It is enough to enter a dash " - " after the cmdlet has been entered, and we will get all possible options for the parameters and their types:

Try:
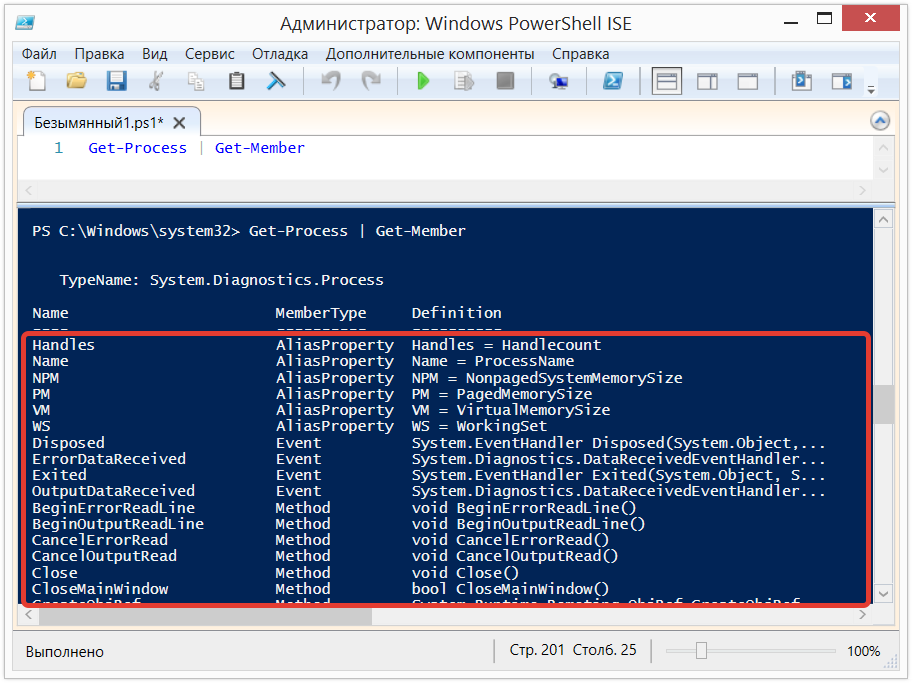
If, nevertheless, we forget what properties a particular cmdlet has, run it through Get-Member :
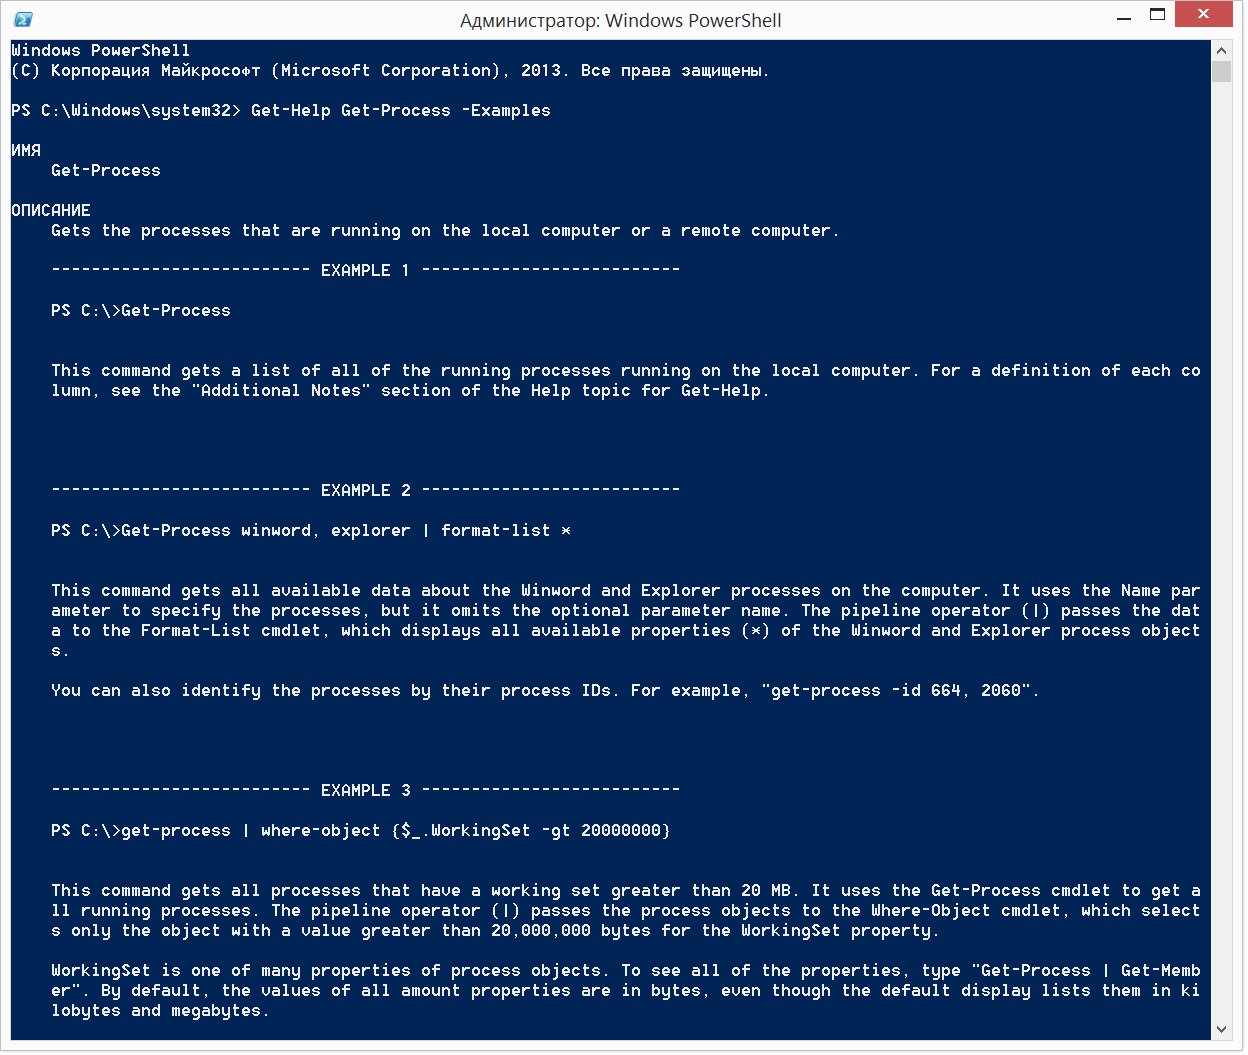
Not enough information? Refer to the help with the -Examples parameter :
We get a description of Get-Process , and even with examples of use:
Try to do:
Which is similar to the entry:
Now stop the process:
Or so:
We said a little earlier that cmdlets are named according to the Verb-Noun rule. I will clarify that the verb does not have to be Get . Besides the fact that we can get, we can define the Set (remember, Set-ExecutionPolicy), run Etpu Start , stop the Stop , output Out , to create New , and many others. The name of the cmdlet is not limited to anything, and when we create your own, we can name it as you please.
Let's try to output to a file:
By the way, similarly, you can write this:
We all know, using comments is a good form.
Comments in PowerShell are lowercase - # and block - <# ... #> :

Note the code from the example:
For those who are familiar with WMI , who do this on the good old VBScript, remember how much code you need to write?
Pipeline ( | ) - transfers the output of one command to the input for processing by another command. We used the pipeline earlier, getting all the properties of the object or, in the previous example, selecting only the Caption field from the data set.
To understand the principle of the pipeline, let's execute the code:
What will happen: we get all the services (Get-Service), transfer all the received services for sorting to the Sort-Object cmdlet and indicate that we want to sort them by the Status parameter. At the conclusion, we will receive first all services with Stop status, and then all services with Running status.
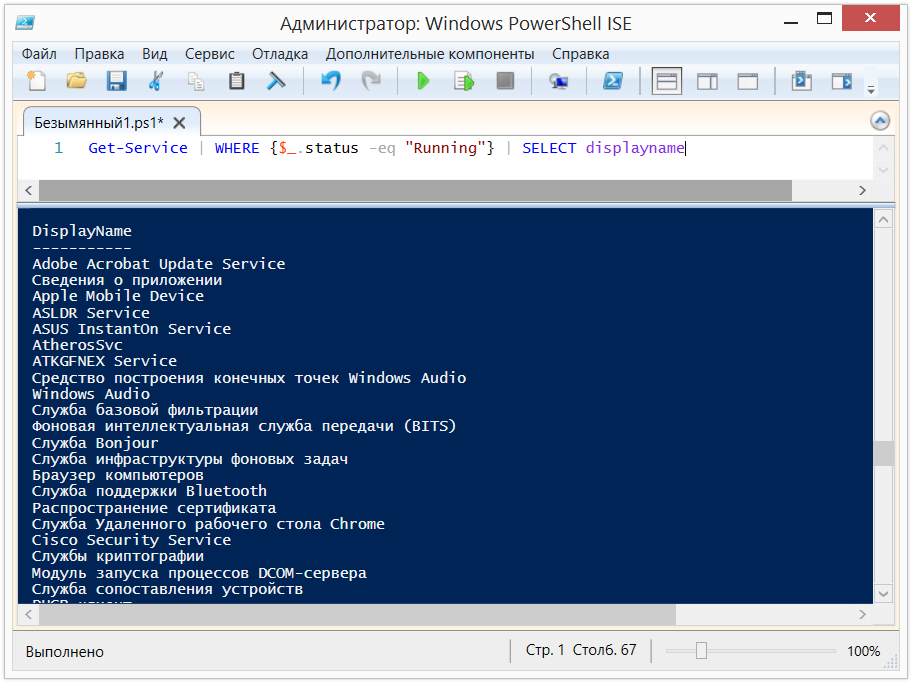
In the example below, we first get all running services. After the first pipeline, we go through each element, select only those services that have the Running status and on the second pipeline select that we want to see only displayname of services on the output:
In the example, we use $ _ . This entry means the current item in the pipeline.
In this part, we learned how to run PowerShell, figured out the script execution policy. We understood what cmdlets are, we know how to transfer them along the pipeline and how to get their properties. If we forget something, be sure to Get-Help.
All this knowledge is necessary in order to make the first jump into the language. Believe me, there are many more interesting things!

Foreword
As a hobby and in the presence of time I teach students at UKIT (formerly Moscow State College of Information Technologies). At the moment, I have little time to devote it to a group of students, but it’s quite enough to prepare a post here on Habré.
I work as a system administrator in a large non-IT company with a great deal of IT resources. By the nature of the activity, it seems to solve a large number of similar tasks for user service.
I became acquainted with the PowerShell language about two years ago, but only after a year did it come to grips with it, without first realizing its huge capabilities. In the article, first of all, I will focus on those who want to start working with PowerShell, but do not yet trust him or don’t know which side to approach this miracle.
Caution: PowerShell is addictive.
Introduction
Wikipedia tells us:
Windows PowerShell is Microsoft's extensible automation tool , consisting of a shell with a command line interface and an accompanying scripting language.
The PowerShell environment may look like the command line:

powershell.exe
Or as an application:

powershell_ise.exe
Powershell_ise.exe is called the integrated scripting environment - Windows PowerShell ISE. It allows you to work with the language in a convenient environment with syntax highlighting, a command designer, autocomplete of commands by pressing TAB and other delights. Ideal for creating and testing scripts.
To start the powershell.exe or powershell_ise.exe environment, just type the same name in the run line.

The PowerShell script file has the extension .ps1 .

The script will fail to start with double LMB. This is done specifically so as not to harm the system by accidentally running a script.
To start, click “Run using PowerShell” by clicking RMB:

In addition to the fact that there is a restriction on running LMB scripts, by default script execution in the system is prohibited, again, for the reason described above, do not harm the system. To check the current execution policy, run the command:
Get-ExecutionPolicy

We will get one of the following values. With a high probability, if this was the first launch, we will get Restricted .
- Restricted - Scripts cannot be run;
- AllSigned - Only scripts signed by a trusted publisher can be run. Before running the trusted publisher script, confirmation will be requested;
- RemoteSigned - Allowed to execute scripts created by us and downloaded scripts, signed by a trusted publisher;
- Unrestricted - No restrictions, all scripts can be run.
To execute and test, we will lower the policy to RemoteSigned by running the command:
Set-ExecutionPolicy RemoteSigned

Getting to work
Cmdlet
- Cmdlets are PowerShell commands that contain various functionality;
- Cmdlets can be either system or user created by someone;
- Cmdlets are named according to the Verb-Noun rule, which simplifies their memorization;
- Cmdlets display results in the form of objects or their collections;
- Cmdlets can both receive data for processing and transfer data via a pipeline (about pipelines later);
- Cmdlets are not case sensitive (you can write get-process, Get-Process, and GeT-pRoCeSs);
- It is not necessary to put " ; " after the cmdlets , except when we execute several cmdlets on the same line (Get-Process; Get-Services).
For example, to get the current processes, we will execute the command:
Get-Process
And we get the result:

Try it yourself:
Get-Service #для получения статуса служб, запущенных на компьютерах
Get-Content C:\Windows\System32\drivers\etc\hosts #для получения содержимого файла. В данном случае, файл hosts
You do not have to know all the cmdlets by heart. Get-Help will save the situation.
Information about all available cmdlets can be obtained by entering the following command:
Get-Help -Category cmdlet
If we use PowerShell ISE, we facilitate the development process.
It is enough to enter a dash " - " after the cmdlet has been entered, and we will get all possible options for the parameters and their types:

Try:
Get-Service -Name p*
If, nevertheless, we forget what properties a particular cmdlet has, run it through Get-Member :
Get-Process | Get-Member
#Знак "|" называется конвейером. О нём ниже.

Not enough information? Refer to the help with the -Examples parameter :
Get-Help Get-Process -Examples
We get a description of Get-Process , and even with examples of use:

- Cmdlets can be abbreviated as aliases. For example, instead of Get-Help, you can simply use Help . For all abbreviations, run Get-Alias .
Try to do:
Start-Process notepad
Which is similar to the entry:
start notepad
Now stop the process:
Stop-Process -Name notepad
Or so:
spps -Name notepad
We said a little earlier that cmdlets are named according to the Verb-Noun rule. I will clarify that the verb does not have to be Get . Besides the fact that we can get, we can define the Set (remember, Set-ExecutionPolicy), run Etpu Start , stop the Stop , output Out , to create New , and many others. The name of the cmdlet is not limited to anything, and when we create your own, we can name it as you please.
Let's try to output to a file:
"Hello, Habr!" | Out-File C:\test.txt
& C:\test.txt
By the way, similarly, you can write this:
"Hello, Habr!" > C:\test.txt
& C:\test.txt
Comments
We all know, using comments is a good form.
Comments in PowerShell are lowercase - # and block - <# ... #> :

Note the code from the example:
Get-WmiObject -Class Win32_OperatingSystem | SELECT Caption
For those who are familiar with WMI , who do this on the good old VBScript, remember how much code you need to write?
On Error Resume Next
strComputer = "."
Set objWMIService = GetObject("winmgmts:\\" & strComputer & "\root\cimv2")
Set colItems = objWMIService.ExecQuery("Select * from Win32_OperatingSystem",,48)
For Each objItem in colItems
    Wscript.Echo "Caption: " & objItem.Caption
Next
Conveyor
Pipeline ( | ) - transfers the output of one command to the input for processing by another command. We used the pipeline earlier, getting all the properties of the object or, in the previous example, selecting only the Caption field from the data set.
To understand the principle of the pipeline, let's execute the code:
Get-Service | Sort-Object -property Status
What will happen: we get all the services (Get-Service), transfer all the received services for sorting to the Sort-Object cmdlet and indicate that we want to sort them by the Status parameter. At the conclusion, we will receive first all services with Stop status, and then all services with Running status.
In the example below, we first get all running services. After the first pipeline, we go through each element, select only those services that have the Running status and on the second pipeline select that we want to see only displayname of services on the output:
Get-Service | WHERE {$_.status -eq "Running"} | SELECT displayname
In the example, we use $ _ . This entry means the current item in the pipeline.

Afterword
In this part, we learned how to run PowerShell, figured out the script execution policy. We understood what cmdlets are, we know how to transfer them along the pipeline and how to get their properties. If we forget something, be sure to Get-Help.
All this knowledge is necessary in order to make the first jump into the language. Believe me, there are many more interesting things!
To be continued...
Additional Information
- Jump Start in PowerShell (part II) ;
- Download PowerShell v.5 for free without registration ;
- Great MVA course: Advanced features and scripting in PowerShell 3.0 (Jump Start) . My advice is to look at the first 3 blocks, plunge into the language, try to perform some tasks, and after a week, look at the remaining blocks. Russian subtitles;
- TechDays theme video;
PowerShell Script Gallery on Technet ;
Blog PowerShell developers .
