Working with the Virtual Private Cloud API: Console Clients

We are continuing a series of publications about the new service “Virtual Private Cloud”. Today we will talk about the OpenStack API and show how you can interact with it using console clients.
Create user
Before you start working with the API, you need to create a new user and add him to the project. In the "Virtual Private Cloud" menu, select the "Users" item:
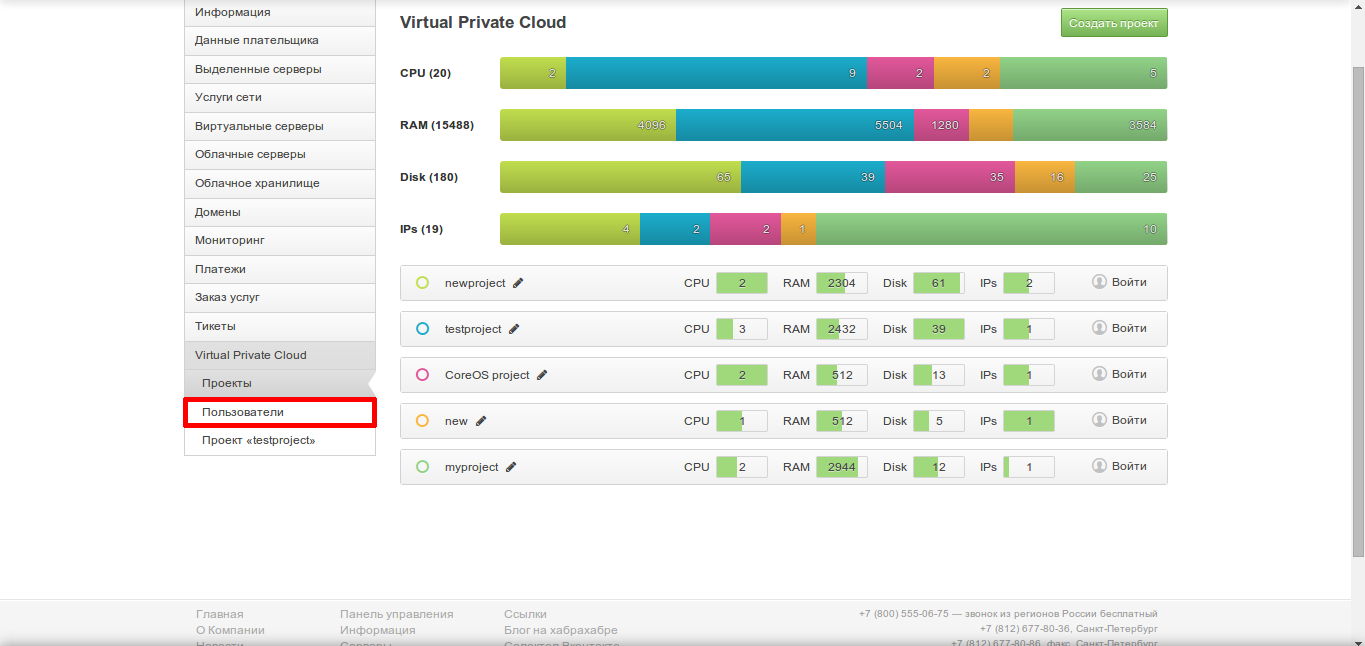
A page with a list of users will open : The
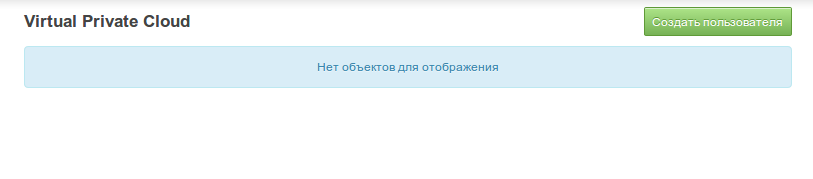
list is still empty. We click on the “Create User” button, in the window that opens, enter his name and again click on the “Create” button. The password to enter the panel will be generated automatically.
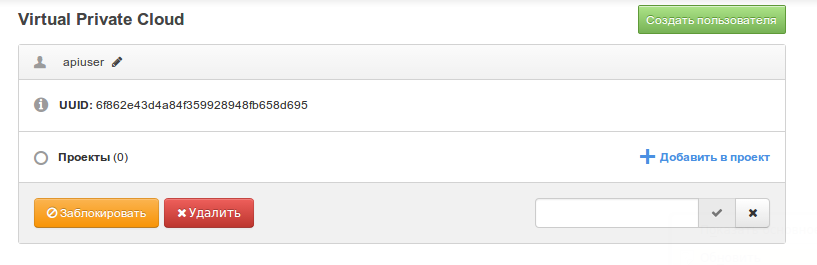
We’ll review the properties of the new user by clicking on the icon next to his name in the list: Click on the “Add to project” link and select from the list of projects that the created user will have access to.
After that, the user will be displayed in the control panels of these projects. A link will be indicated next to the username, through which you can access the project resources through a browser:
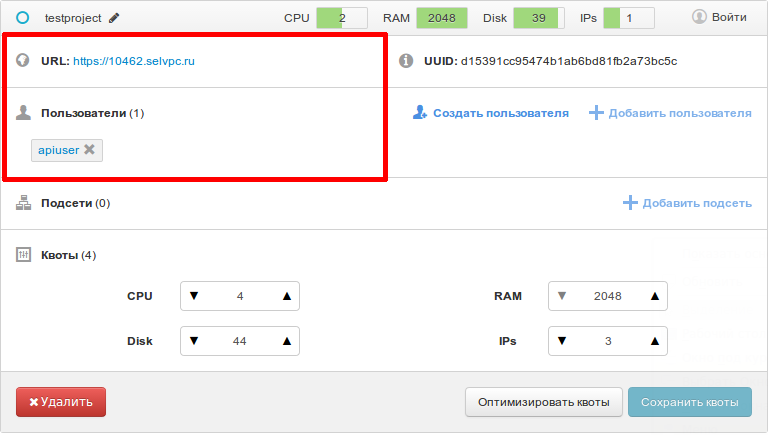
We will click on this link and enter the project under the account of the created user. After that, go to the “Access” tab and download the RC-file (it is a script with which console clients can log in to Identity API v3).
Install software
To configure the system to work with the project, you will need to install additional software. In this article, we provide installation instructions for OC Ubuntu 14.04. For other operating systems, commands may vary; Instructions for Debian 7.0 and CentOS 6.5 can be found directly in the control panel (“Access” tab).
Install the following packages:
$ apt-get update
$ apt-get install curl python-pip python-dev git libxml2-dev libxslt1-dev python-keystoneclient python-heatclient python-novaclient python-glanceclient python-neutronclient
Next, install the software, which is either absent in the Ubuntu repositories or present, but in older versions:
$ pip install git+https://github.com/openstack/python-cinderclient
$ pip install cliff --upgrade
$ pip install python-openstackclient
After that, execute the command:
$ source rc.sh
The program will ask for a password. We re-enter the password of the user under whose account we are logged into the external panel.
Now you can get to work.
View Network Information
To create virtual machines, you need a network. Let's see the list of available networks:
$ neutron net-list
+--------------------------------------+------------------+-----------------------------------------------------+
| id                                   | name             | subnets                                             |
+--------------------------------------+------------------+-----------------------------------------------------+
| 1c037362-487f-4103-a73b-6cba3f5532dc | nat              | b7be542a-2eef-465e-aacd-34a0c83e6afa 192.168.0.0/24 |
| ab2264dd-bde8-4a97-b0da-5fea63191019 | external-network | 102a9263-2d84-4335-acfb-6583ac8e70aa                |
|                                      |                  | aa9e4fc4-63b0-432e-bcbd-82a613310acb                |
| fce90252-7d99-4fc7-80ae-ef763d12938d | newnetwork       | 5a1a68f9-b885-47b7-9c7e-6f0e08145e3b 192.168.1.0/24 |
+--------------------------------------+------------------+-----------------------------------------------------+
Each network has an identification number (column ID); it will need to be specified when creating a new server.
You can activate the network configuration via the graphical interface (for more details, see here ).
Server Operations
Let's look at the list of available images:
$ glance image-list
+--------------------------------------+--------------------------+-------------+------------------+-------------+--------+
| ID                                   | Name                     | Disk Format | Container Format | Size        | Status |
+--------------------------------------+--------------------------+-------------+------------------+-------------+--------+
| 552bc246-5ae7-4b48-9a64-e1e881a64cab | CentOS 6 32-bit          | raw         | bare             | 219152384   | active |
| 708a7642-80ab-486e-a031-e6b6a652004c | CentOS 6 32-bit          | raw         | bare             | 2147483648  | active |
| 978d81c0-c508-412d-9847-fb8cec294410 | CentOS 6 64-bit          | raw         | bare             | 263192576   | active |
| ee5d5bb7-8a31-467a-8bbf-f6f5bbb79334 | CentOS 6 64-bit          | raw         | bare             | 2147483648  | active |
| 647bce00-5f29-49fe-9e83-8b33cb188d17 | CentOS 7 64-bit          | raw         | bare             | 2147483648  | active |
| dff9df74-b7b3-44b0-92f3-40cb4dfd9a94 | CoreOS                   | qcow2       | ovf              | 449839104   | active |
| 3eda89b9-9ce0-47b7-9907-a2978d88632e | CoreOS                   | qcow2       | ovf              | 413007872   | active |
| d2033c50-e8f4-4ff6-9c21-cade02007f34 | Debian 7 (Wheezy) 32-bit | raw         | bare             | 10485760    | active |
| ba78ce9b-f800-4fb2-ad85-a68ca0f19cb8 | Debian 7 (Wheezy) 32-bit | raw         | bare             | 2147483648  | active |
| b2c8bc6a-dbb8-4a1a-ab8e-c63f5f2b9bdf | Debian 7 (Wheezy) 64-bit | raw         | bare             | 11534336    | active |
| 18a18569-389c-4144-82ae-e5e85862fca4 | Debian 7 (Wheezy) 64-bit | raw         | bare             | 2147483648  | active |
| 8c3233c9-25cd-4181-a422-aa24032255cc | OpenSUSE 13.1 32-bit     | raw         | bare             | 74448896    | active |
| d965d37c-6796-40bd-8966-d0d7f7f41313 | OpenSUSE 13.1 32-bit     | raw         | bare             | 3221225472  | active |
| b77015d0-3eba-4841-9d02-7e9d606d343a | OpenSUSE 13.1 64-bit     | raw         | bare             | 76546048    | active |
| b20a1e1a-3c81-4d13-926f-eb39546b9b36 | OpenSUSE 13.1 64-bit     | raw         | bare             | 3221225472  | active |
| c168e0e5-c01e-44ec-be36-1c10e2da94a5 | selectel-rescue-initrd   | ari         | ari              | 13665966    | active |
| 0b117761-4ab5-40d7-a610-127d1e10206f | selectel-rescue-kernel   | aki         | aki              | 5634192     | active |
| c2fce974-4aeb-473a-9475-176207c3f293 | Ubuntu 12.04 LTS 32-bit  | raw         | bare             | 22020096    | active |
| eeb9143c-1500-4086-8025-307bc96fc467 | Ubuntu 12.04 LTS 32-bit  | raw         | bare             | 2147483648  | active |
| dbdd5cb3-f73f-4d98-85e9-eb333463e431 | Ubuntu 12.04 LTS 64-bit  | raw         | bare             | 26214400    | active |
| c1231800-9423-4018-b138-af8860ea8239 | Ubuntu 12.04 LTS 64-bit  | raw         | bare             | 2147483648  | active |
| c61cfa0d-3f7b-489f-8e55-4904a0d6e830 | Ubuntu 14.04 LTS 32-bit  | raw         | bare             | 26214400    | active |
| fbb2bb25-5058-4f06-85c8-6d3ca268e686 | Ubuntu 14.04 LTS 32-bit  | raw         | bare             | 2147483648  | active |
| e024042b-80f5-4eea-ae29-733ae32f65e6 | Ubuntu 14.04 LTS 64-bit  | raw         | bare             | 33554432    | active |
| f10ab2a9-478d-4401-9371-384bd9731156 | Ubuntu 14.04 LTS 64-bit  | raw         | bare             | 2147483648  | active |
| 6a4b53e6-109c-4fc0-9535-b97bc2912de6 | windows_2012_final       | raw         | bare             | 10737418240 | active |
+--------------------------------------+--------------------------+-------------+------------------+-------------+--------+
After selecting the desired image, copy its id - it will be needed when creating the server.
Now let's create the required server configuration (in OpenStaсk terminology they are denoted by the term flavor, which can hardly be translated into Russian):
$ nova flavor-create <имя конфигурации> auto <объём памяти> <ёмкость жёсткого диска> <количество ядер>
The size of the hard disk in this command should be set equal to zero. In our implementation, the Cinder volume is attached to the machine as the root (system) disk. This solution was chosen because of flexibility: unlike local disks (in Amazon terminology they are called instance store), Cinder volumes can be disconnected and attached to other machines.
The auto key in this command means that the server configuration ID will be generated automatically:
+------------------------------------+------+---------+----+---------+----+-----+-----------+---------+
|ID                                  |Name  |Memory,MB|Disk|Ephemeral|Swap|VCPUs|RXTX_Factor|Is_Public|
+------------------------------------+------+---------+----+---------+----+-----+-----------+---------+
|fc275dcc-f51a-48c3-b0c3-c3fdd300dd65|myflvr| 1024    | 0  | 0       |    | 2   | 1.0       | True    |
+------------------------------------+------+---------+----+---------+----+-----+-----------+---------+
The ID needs to be copied - it will also be needed when creating the server.
Then create an SSH key:
$ nova keypair-add <имя ключа> <имя файла>
$ chmod 600
This command will output a private key to the file, using which it will be possible to connect to virtual machines via SSH (the connection command in this case will look like this: ssh -i <file name>
If you already have a private key-public key pair, you can specify the public key as an argument:
$ nova keypair-add <имя ключа> pub-key <путь к публичному ключу>
For instance:
$ nova keypair-add myKey --pub-key /home/user/.ssh/id_rsa.pub
SSH keys can also be added from the control panel (the "Access" tab in the project properties).
Having chosen the image and configuration, we proceed directly to the creation of the server:
$ nova boot <имя сервера> --nic net-id= --key-name myKey --block-device id=,source=image,dest=volume,size=0,device=vda,bootindex=0
After the boot command, specify the server name, then the ID of the selected image, configuration ID and SSH key.
When creating our control panel and images, we tried to exclude the possibility of transmitting passwords in unencrypted form over the network. That is why our images do not accept a password, but its hash generated by the control panel.
To access the machine from the console, just enter your username and press Enter. SSH login will only be possible with a key.
Disk operations
You can create a new disk and connect it to the server using the command:
$ cinder create --name <имя диска> <размер, ГБ>
In case of successful disk creation, a table with its main characteristics is displayed on the console:
+-------------------+--------------------------------------+
|      Property     |                Value                 |
+-------------------+--------------------------------------+
|    attachments    |                  []                  |
| availability_zone |                ru-1a                 |
|      bootable     |                false                 |
|     created_at    |      2014-10-23T11:10:15.000000      |
|    description    |                 None                 |
|     encrypted     |                False                 |
|         id        | 76586803-9cfd-4f75-931d-0a4dee98e496 |
|      metadata     |                  {}                  |
|        name       |                mydisk                |
|        size       |                  5                   |
|    snapshot_id    |                 None                 |
|    source_volid   |                 None                 |
|       status      |               creating               |
|      user_id      |   6f862e43d4a84f359928948fb658d695   |
|    volume_type    |               default                |
+-------------------+--------------------------------------+
To connect the disk to the server, copy the id parameter from this table and execute the command:
$ nova volume-attach <имя сервера> Creating and Assigning an IP Address
To create an external IP address at which the server will be accessible from the Internet, execute the command:
$ neutron floatingip-create external-network
Assign the created address to the server:
$ nova floating-ip-associate <имя сервера> <адрес>
Power Management and Reboot
There are two ways to restart the server: software and hardware (via power off) reboot.
For a soft reset, use the following command:
$ nova reboot <имя сервера>
and for the hardware -
$ nova reboot --hard <имя сервера>
Power management is performed using the start and stop commands:
#включить указанный сервер
$ nova start <имя сервера>
#выключить указанный сервер
$ nova stop <имя сервера>
Network Port Operations
Create a new network:
$ neutron net-create <имя сети>
Upon execution of the command, a table with information about the network will be displayed on the console:
+----------------+--------------------------------------+
| Field          | Value                                |
+----------------+--------------------------------------+
| admin_state_up | True                                 |
| id             | add73ca5-6120-43bd-bb56-d1d8d71d21ac |
| name           | localnet                             |
| shared         | False                                |
| status         | ACTIVE                               |
| subnets        |                                      |
| tenant_id      | d15391cc95474b1ab6bd81fb2a73bc5c     |
+----------------+--------------------------------------+
You can create a subnet on this network using the following command:
$ neutron subnet-create --name 192.168.1.0/24 192.168.1.0/24 (we take the network id from the output of the previous command).
Then create a port on the network:
$ neutron port-create <имя сети>
and connect the server to it:
$ nova interface-attach --port-id <имя сервера>
Conclusion
This article is just a brief introduction to the OpenStack API. If you have questions about working with console clients, we will answer them in the comments.
We will consider in more detail the features of interaction with the API in the following publications.
Readers who for one reason or another cannot post comments here are welcome to join our blog .