Making an HTML5 quest: creating a character and basic animation
- Tutorial
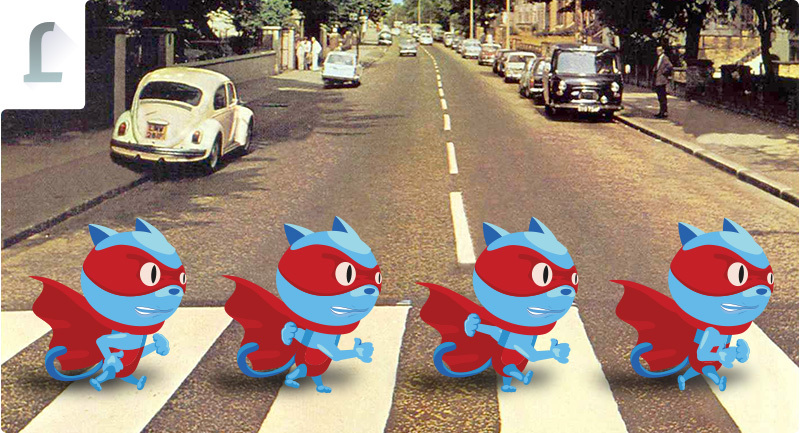
We continue to talk about the development of the first game for our educational platform Learzing - this will be a quest that helps in learning English idioms. Today we’ll talk about creating a character and its animation in the form of a step-by-step guide.
Some things are not described in the manual (for example, drawing preliminary sketches or building logic in Construct 2), we will discuss these topics in our next articles.
To create a game scene, we need a tool for creating Construct 2 HTML5 games , and a vector editor to create a character. In our case, we will use Adobe Illustrator, you can also use CorelDRAW or Inkscape, these editors have similar basic tools.
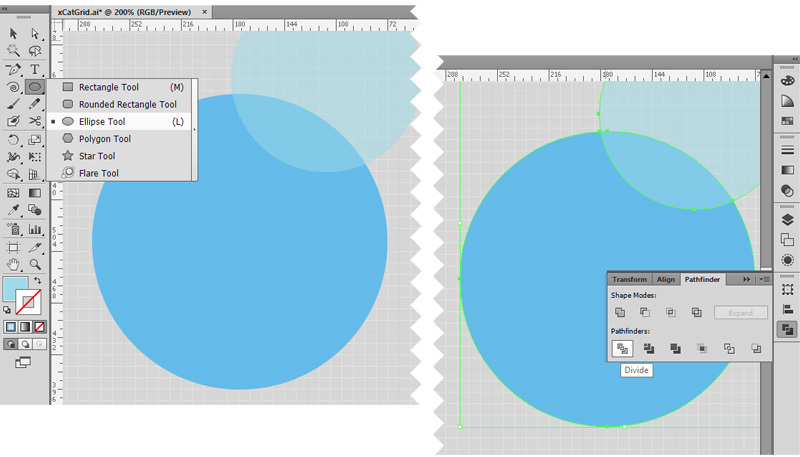
Let's start by creating the head of our character. Select the Ellipse Tool, make two circles. Select both circles and use the Divide tool in the Pathfinder panel (Shift + Ctrl + F9), delete the upper part of the circle and add two more ovals on the right. We get a universal substrate for at least two camera angles: at rest and in motion.
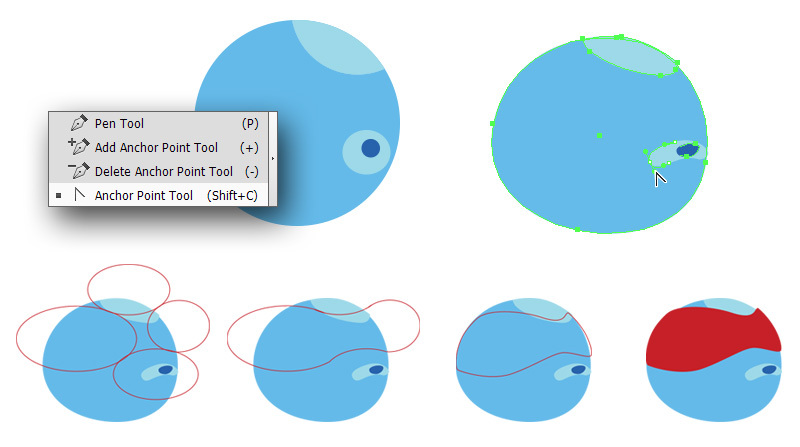
We pick up the Anchor Point Tool (Shift + C) and from perfect geometric shapes we make a semblance of handwork, changing the direction of the point.
Next, again select the Ellipse Tool, mark with four ovals the place where the mask will go. Using the Pathfinder tool we combine the necessary and remove the excess.
In this case, we create a superhero and now we want to show the folds on his bandage. The right moment has come to pick up the Pen Tool and draw a blot; the training on managing Bezier lines is never superfluous.

It is impossible to draw Bezier lines and is devoid of any sense, except to spontaneously depict the indistinct form of a blot, thus indicating a shadow. This tool is needed to stroke the outline or refine the lines of the object. If you want to draw without a sketch, use ovals and rectangles.
We continue to use the Pathfinder panel, the eyes of our superhero were made using the Intersect tool on two ovals. We create possible variations of the eyes to express the state of shock or attack. In the same way we find the shape of the ears.
Our hero not only looks with his head, but he eats into it, so we will analyze in detail how to draw a mouth. We use three already familiar tools: Ellipse Tool, Pathfinder and Anchor Point Tool.
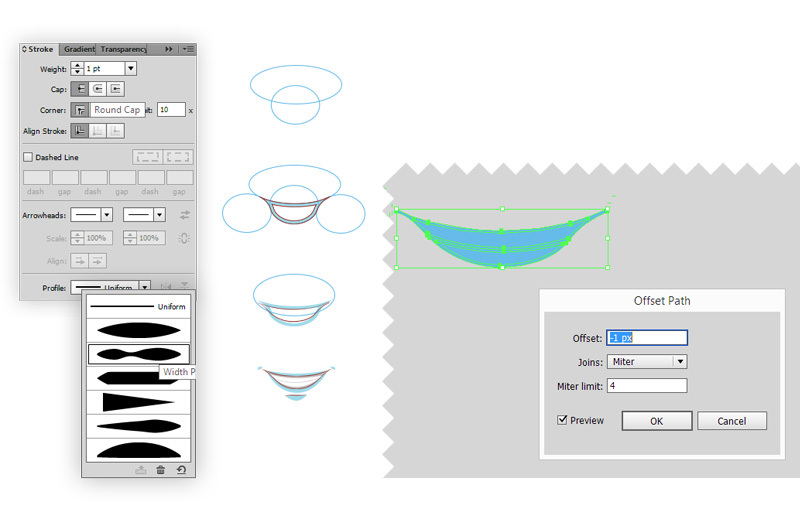
Using the Stroke panel, you can control the thickness of the contour and change its profile. Outline is good to highlight a smile, eyebrows and eyes. The outline enhances the element, adding more detail.
We divide the object into two parts, creating the illusion of jaws. For more explicit underlining, select two objects and select Object -> Path -> Offset Path, shift by -1px. We slightly adjust the curves using the Anchor Point Tool. Done.
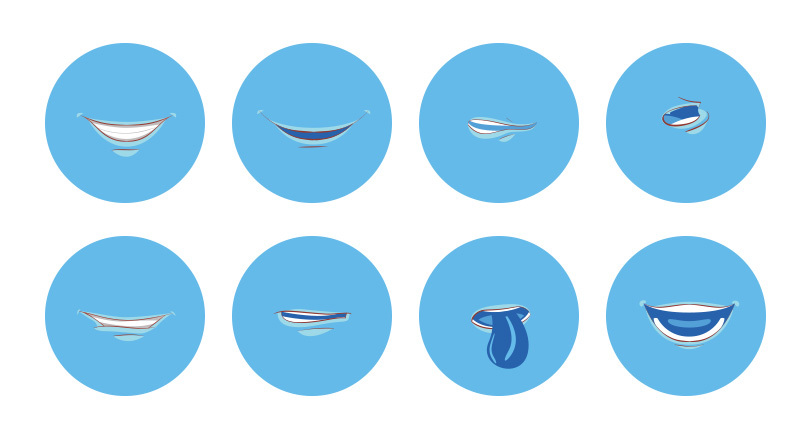
While thinking what to describe further - arms, legs or tail, he depicted several more variations of the mouth, for different situations. We are almost at the finish line, it remains to find the proportions and draw a storyboard.
A small lyrical digression - I never did illustration, I was engaged in graphic design for a long time: I designed navigation, packaging and user interfaces. The genre has changed, but the approaches have remained the same. We will search for proportions by the golden ratio, in the best traditions of Twitter , from larger to smaller, the goal is to find out the height and width of the body.
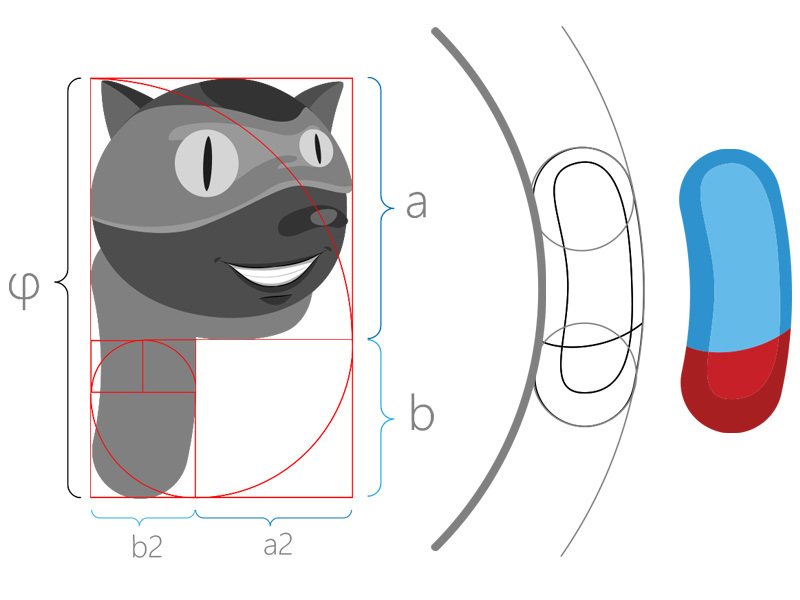
Enter the head 1: 1 on the segment a, we get the height of the body 0.61: 1 - b and the width - b2.
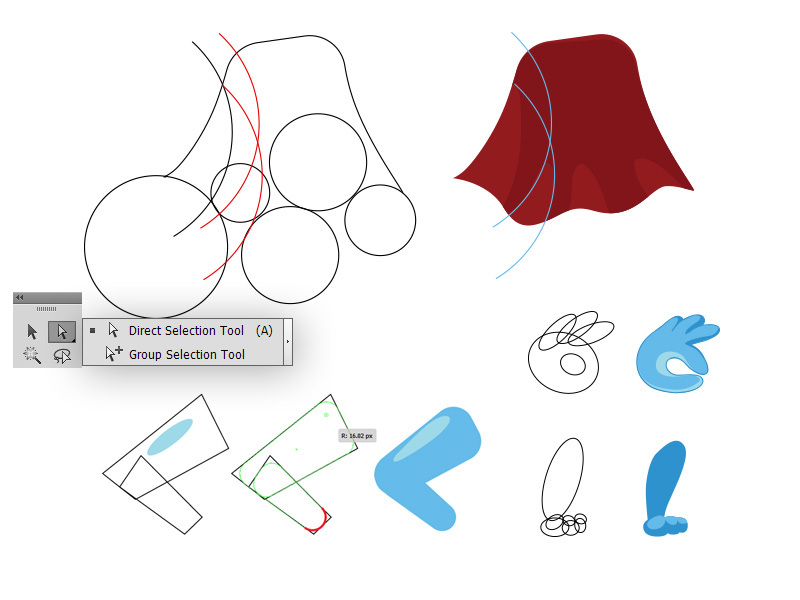
Each superhero has a cloak, even if he is a cat, this will complement the image and balance the composition. In the last two versions of Illustrator CC, they added the ability to change the angle and apply neat smoothing with a fixed radius parameter. Use to smooth the Direct Selection Tool, select the corner point. A ring will appear next to the node, it changes the radius. The tail curve is borrowed from a golden section spiral. The image is ready, it can be used in the game in a state of inaction.
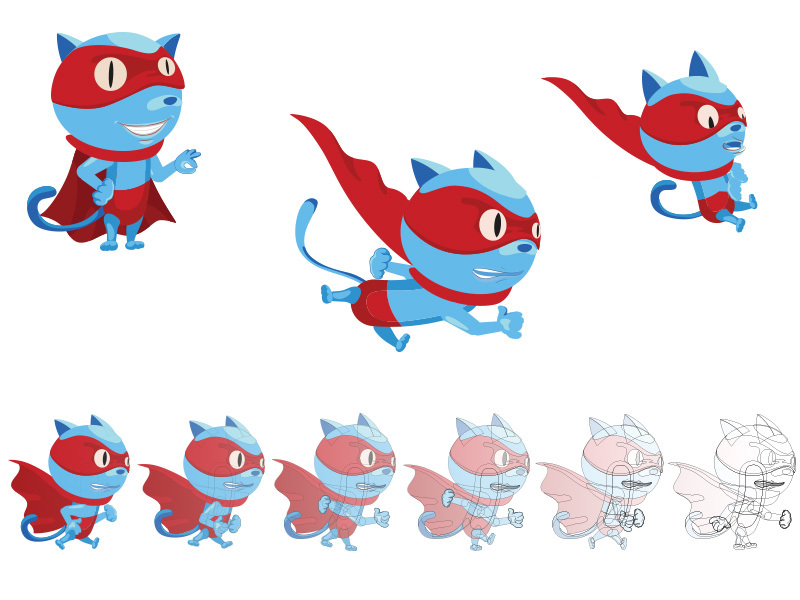
Make a storyboard for the basic sprite animation - draw a couple of variations of the cloak and change the mask to create side views. For the states of jump, fall and inaction, it is enough to do one image. For smooth movement of the character will require at least six frames. To create a basic animation, we need separately saved character images on a transparent background. Open Construct 2.
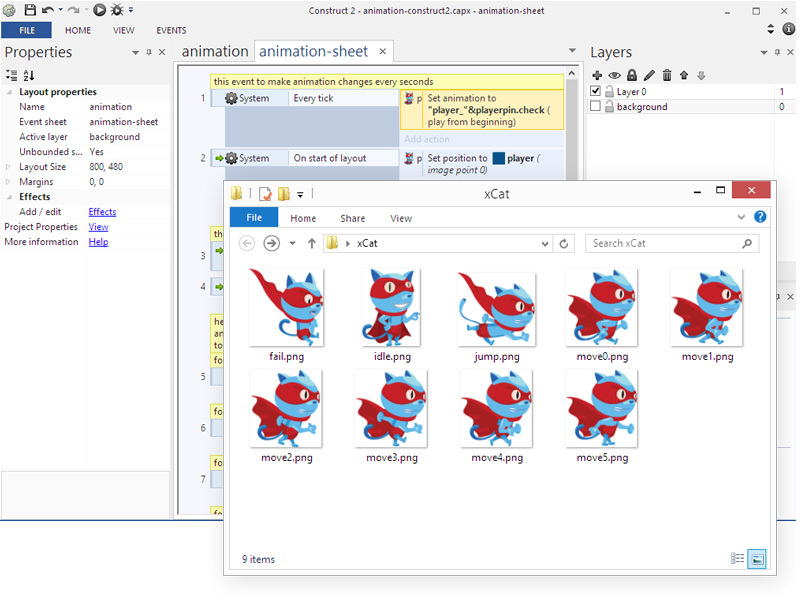
In the created empty project, double-click on the Layout1 field and select Sprite, then click on the field again with the target. Then the sprite editor opens, in the Animations panel we create four basic animations: idle, move, jump and fall. Important animation parameters that you should pay attention to: the Properties panel (this is the playback speed) and the coordinates of the Origin point, which is present on each frame. Origin affects the symmetry of the character’s rotation and at the same time is the starting point of contact with objects.
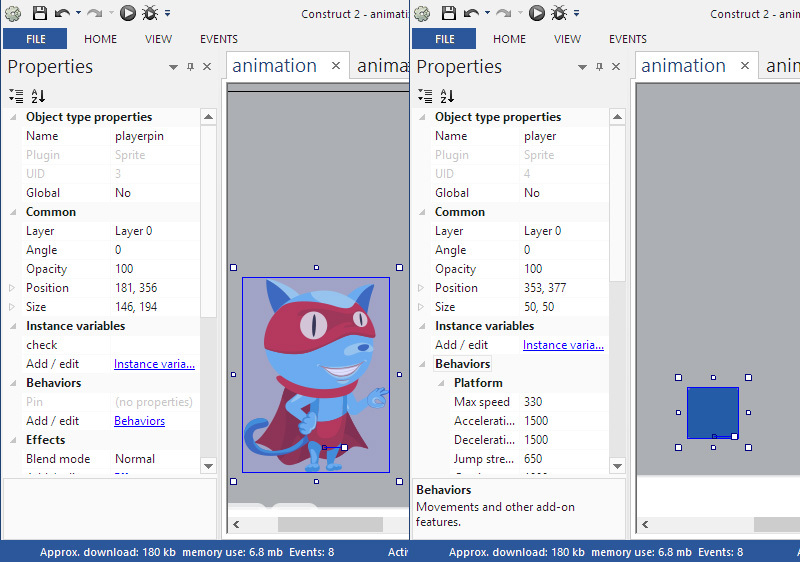
Now for the cat we’ll create a basic sprite called player and apply the Platform behavior to it, this allows the object to move in two directions (left and right) and make jumps. We will give the playerpin the name of the created object and apply the Pin behavior to it, this allows you to attach the object to any other object and inherit its behavior. The next step - we need to attach the playerpin cat to the base player sprite. To do this, go to the events by clicking on the animation-sheet tab.
Here, by right-clicking, we click on the Add event option. Select System, and then the Every tick command is a condition that is always true. Once per tick - this is approximately 60 times per second on most computers.
Opposite the condition we created, create an action by clicking on Add action. There we find and select a character sprite with the name playerpin and then the Set animation command. When the window appears, set the animation update parameters “player _” & playerpin.check from the beginning (play from beginning).
Add another System event, and then the On start of layout command - this is a trigger, it launches actions when the level starts. Create an action by clicking on Add action. There again we select a character sprite named playerpin and then the command Set position to another object. When the window appears, click on the button
In the same event, we add one more action - for the playerpin sprite, use the Pin to object command. When the window appears, click on the button

In order for our player to be mirrored in the direction of movement, we will create the following events. Click on the Add event option. There we select Keyboard, then the On key pressed command. When the window appears, click on the button
Create an action with our character (Add action -> sprite playerpin) and use the Set mirrored command, in the window that appears, select the Not mirrored state. We make an event for the button with the left arrow in the same way, only the state of the Set mirrored team will be Mirrored.

Next, we define one animation, using the example of a jump. Let's create an event Add event. In the window, select the player sprite, apply the platform state Is jumping. Create an action for the playerpin sprite, select the Set value variable. In the window that opens, in the line value (Value), write the name of our jump animation jump. By the same principle we define animations idle, move and fall.
All.
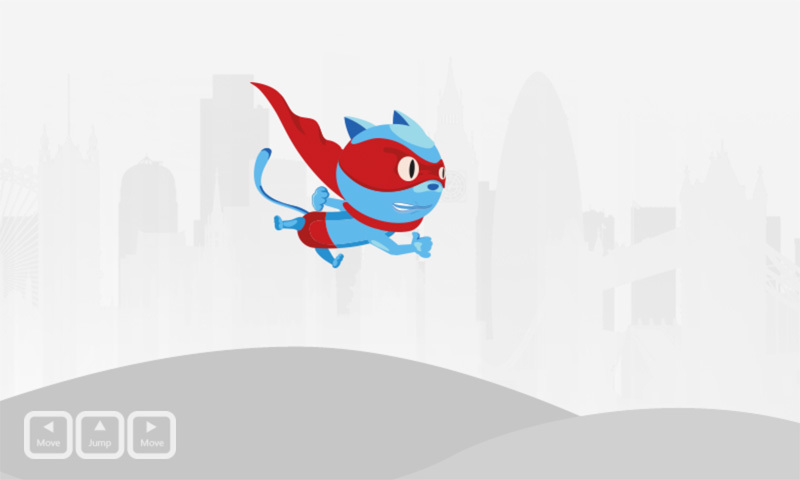
The finished result is a demo scene where you can watch the animation in action and even control a supercat: http://htmlpreview.github.io/?https://github.com/legandy/xCat-animation/blob/master/demo/index .html Project source: https://github.com/legandy/xCat-animation/blob/master/source We examined the basic features of Construct 2 for working with animation. In the next article, we will consider skeletal animation and its integration into Construct 2. We will work in the Spriter skeleton animation editor from BrashMonkey. We note the main advantages of this type of animation, the differences from the classic sprite and tell about the prospects for its use in HTML5 games.
Poll
Traditionally, at the end of the article, we invite all hawkers to help us create a game for learning English idioms - spend a few minutes and fill out a short survey that will affect our development.First of all, we would like to build on the wishes and needs of users (that is, you), and only then on our own ideas. Everyone who completed the survey will receive early access to our quest.
All articles in the series
- Startup step by step: the future of online education
- Startup step by step: team and mentors
- Startup step by step: the first business model
- How we did the educational platform: first design, landing page and logo
- How we did the educational platform: first application
- Making an HTML5 Quest: Using the MVC Pattern in Construct 2
- Making an HTML5 quest: creating a character and basic animation