Overview of the domestic single-board computer MB 77.07: From unpacking and firmware, to writing the first DSP program
Nowadays, the SBC (Single Board Computer) market has grown rapidly, and a huge number of single-board computers have appeared on a wide variety of processors, from old and well-known to completely new and specialized. Recently, I got Module MB 77.07 - a single-board computer from STC "Module" on a domestic processor K1879HB1Ya, about which people from Promwad company had already left a small note on the hub . From the moment of that post, they began to sell the board to everyone and the software was posted on the company's official github - http://github.com/RC-MODULE.
The article will describe the hardware and software, from unpacking and firmware, to writing a simple example - audio echo effect on the NeuroMatrix core embedded in the DSP processor used.
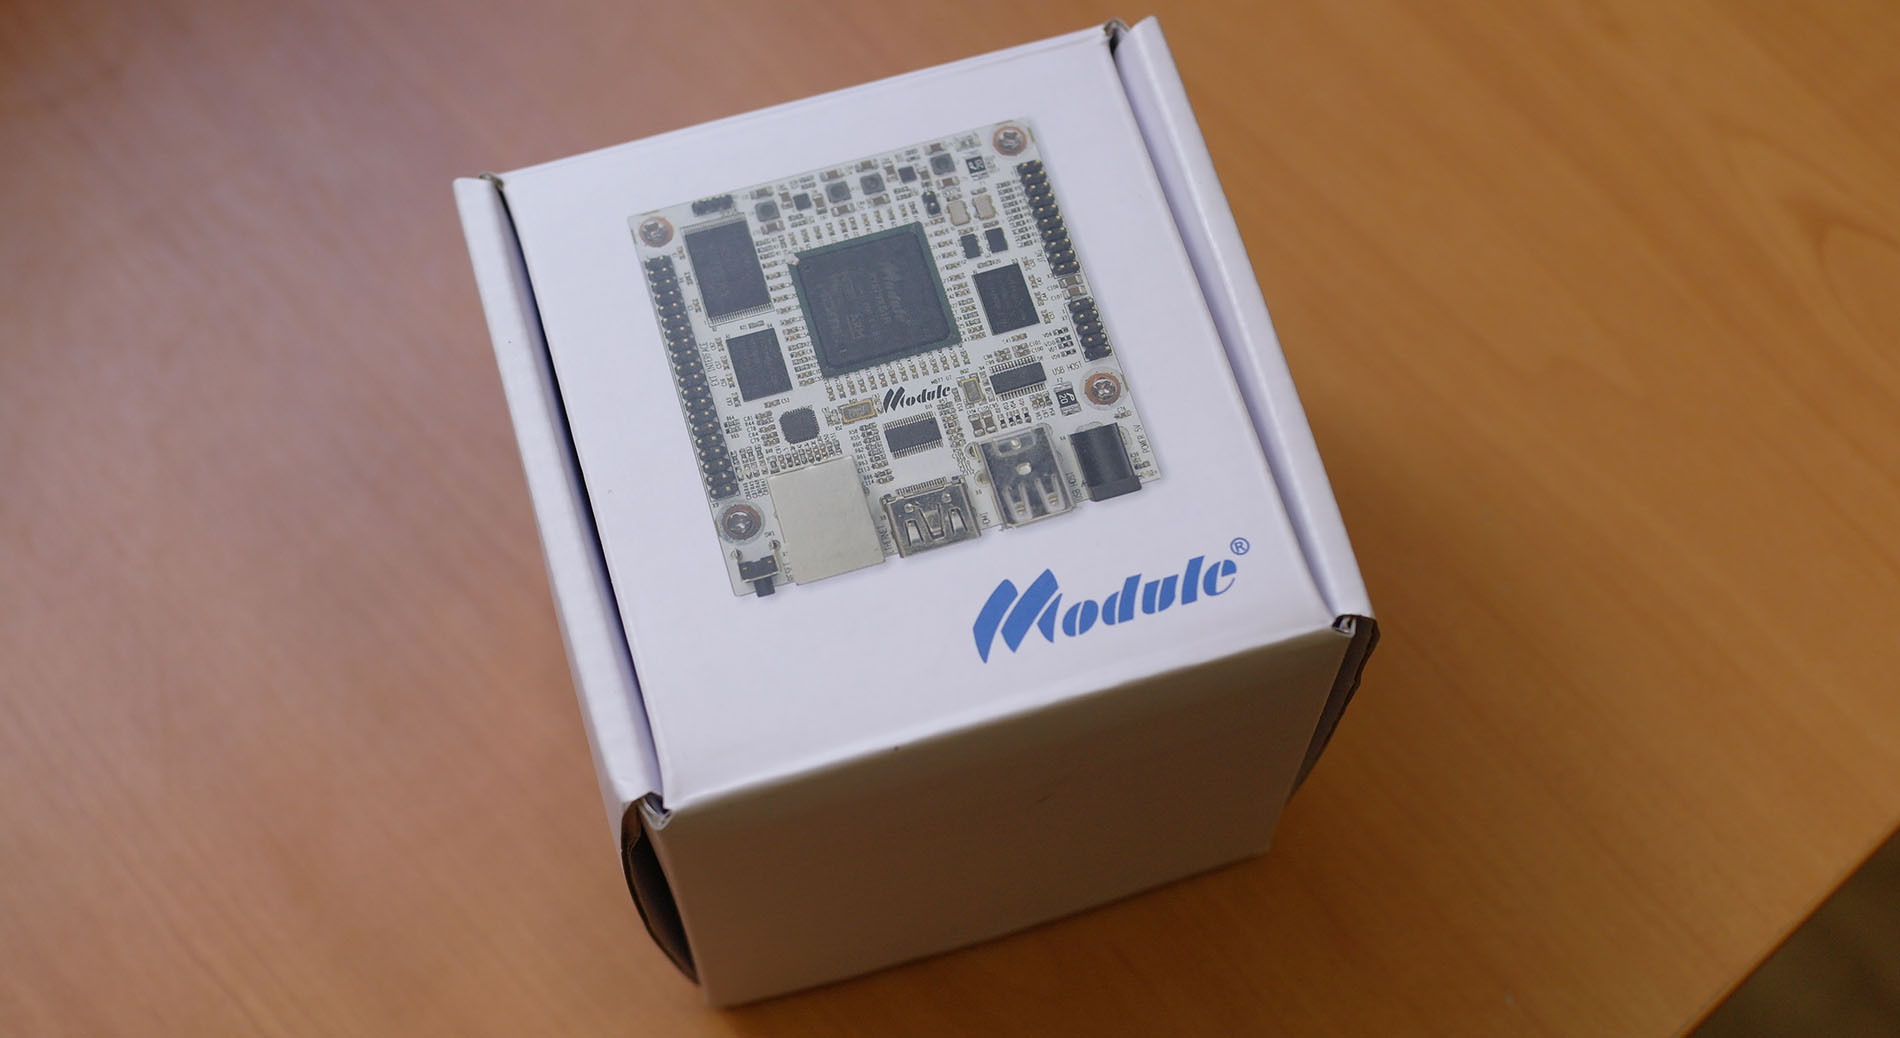
The board comes in a color box. Inside are:
Here one can argue whether all this is necessary or if the usual OEM supply would be enough in the form of an antistatic bag with a board. I think it will be useful for beginners to immediately get USB-UART, there will be fewer people who want to google, get the standard bad advice "connect to the COM port, nothing will happen" and burn the board on the first day after purchase.

Now it’s worth considering the board itself. On board the board is ARM1176, the same core is used in the Raspberry Pi. You can run sharpened distributions for r-pi, of course, with the proviso that you will need to slip drivers for the local IP core used in the processor. To facilitate this task, the processor developer, STC "Module", provides ready-made images of Debian Jessie and Raspbian Wheezy, packages are periodically updated.
Near the K1879HB1Ya itself, two DDR2 RAM chips of 128MB, 1GB NAND memory, a USB-hub with 4 ports, Ethernet PHY and a bundle are soldered.
Various external interfaces are located on the pins located on two sides of the board:
Right side:
Left side, a long connector resembling an IDE:
A detailed pinout is available at the link: http://www.module.ru/mb7707/doc/MB77.07-X9-pinout.pdf
Let's take a look at the GPIO in more detail, as this is the very first place that you will want to touch yourself. GPIOs are two different types. The first type, those that are displayed on the comb, they are picked up by the gpio-pl061 driver (IP core ARM PrimeCell ™ General Purpose Input / Output PL061 ). These GPIOs can pull interrupts to the ARM core, which is sometimes useful. In addition, if you do not need Transport Stream, then its _D [0-7] pins can be multiplexed in GPIO, so you can get 16 controlled legs.
The GPIO numbering of legs in sysfs is in the documents above by reference, and you can twitch them through sysfs if you wish:
The second type of GPIO is more simplified, managed by a different IP core; they cannot pull interrupts. Two paid LEDs are connected to these GPIOs, one of them is registered through the Linux framework of the Linux kernel as a heartbeat and shows the Load Average. When debugging, it’s useful to visually see if everything is hanging.
A separate place on the board is occupied by two pins for the boot jumper.
Downloading is made simple and reliable: when there is no jumper - loading from NAND memory occurs, when the jumper is on - the board is waiting for loading via JTAG or EDCL. The jumper position is read when the board is reset. It is worth telling about the last mode in more detail, as it is possible you have not encountered it.
EDCL or Ethernet Debug Communications Link is a hardware feature built into the Ethernet controller that allows you to write and read physical memory by sending properly formed Ethernet packets. This function was bundled with the IP Core of the Ethernet controller used - greth. The EDCL itself is quite convenient, but if you leave it turned on in production, you get a very big security hole (I wonder how many processors with the same Ethernet controller work with the included EDCL in production?).
On top of EDCL runs the curious edcltool tool, which gives the lua host API to edcl. This technology is used for firmware and firmware boards. Edcltool itself was originally designed for Linux, unlike the popular SoC manufacturers that provide you with some kind of livesuit / phoenixsuit or rkbatch.
There is a version for Windows, but it is experimental, whipped up through mingw and requires the installation of WinPCAP. It also works quite slowly.
The Linux version is set as standard ./bootstrap && ./configure --prefix = / usr && make && sudo make install and asks only lua5.1-dev or lua5.2-dev and libelf. The latter is needed if you need to work with NeuroMatrix DSP, which will be discussed below.
Edcltool itself executes edcl scripts, which in fact are ordinary lua scripts, look very simple and readable. For example, here is a script that runs code on a bare ARM:
Next, here is the mboot bootloader firmware:
Creating a partition table in NAND, writing the kernel, dtb and root file system:
This is how the code runs on bare NeuroMatrix (NMC for short):
Running the scripts themselves is very simple:
If you forget the interface name, edcltool will use eth0 (on Windows, the 0-th interface). The edcltool –l command listing the available interfaces may be useful, especially useful on Windows, where it may not be very clear in the control panel which interface is registered under which number in the system.
In addition to the above, other DSP scripts are included, in fact, you can not load Linux to develop DSP code. To write your scripts in the archive with edcltool, there is the SCRIPTING.TXT file, which describes in detail the functions available from edcl environment.
Now let's talk about the main thing that is required from the processor developer after its release - support for firmware and the set of their delivery. Each firmware from the official site contains a complete environment, including a bootloader, a kernel, an edcl script for firmware, a win-version just in case, and README.
Detailed instructions on the current firmware package are provided in each archive, but it makes no sense to quote it, since it comes down to one thing:
For full-fledged work with the board, we need an environment for building software for the board processor and its DSP - the module provides already-built toolchains for both Linux and Windows. Installing them is quite simple, for example, suppose that the toolchains are stored in a place familiar to many under the name ~ / x-tools. Next, you need to put the downloaded toolchain from the Module there and do not forget to register the next bin in your PATH:
The processor manufacturer is minimalistic in building its distributions, and by default, Debian and Raspbian come in a minimal configuration with support for network and ssh. X11 at 324MHz somehow works slowly, plus, the bootloader does not know how to draw anything on the screen. The main way to communicate with the board is its serial console, for the sake of which UART was put in the delivery kit. By default, the network with distributions from the manufacturer rises with the address of the board 192.168.0.7, login root, password 12345678.
Manufacturer repositories are set as follows in sources.list:
Now a little about how the system boots with NAND. The IPL loader is executed first and checks the position of the boot jumper and:
The first to start the mboot bootloader. This is a fork of u-boot, a little refactored. It works from SRAM memory, which on the processor is surprisingly many: 4 banks, under the names IM [0-3]. Each bank is 256 kilobytes. As it turned out, the purpose of each is as follows:
By the way, the old version of mboot can be found on google, it lies on Sergey Mironov’s github account, a link to reduce search time: github.com/ierton/mboot , you can also find overlay for Gentoo there, but it has not been updated for quite some time, so it’s unlikely that it will be useful to anyone.
The last thing that can be said about the bootloader is that besides the pmgr command there are a couple of update commands - fwupgrade and eupgrade, designed for flashing tftp images, which may be larger than the size of the available DDR memory, this also happens. Otherwise, this is a regular u-boot, which many are used to. From the bootloader, a network is available, work with NAND, SPI Flash (which, unfortunately, they did not put on MB77.07) and a little usb, without support for file systems.
Let's go back to the memory, in the address space immediately after IM0 comes IM1, and then immediately IM3, it is worth remembering when writing low-level code that works with SRAM, also when writing such code it is worth remembering that there really is a lot of SRAM memory, on some the good old AT91RM9200 on-chip memory was only 4K. For this reason, the boot loader here works directly in SRAM, without SPL. This approach is very useful, because in contrast to DDR, that of ARM, that of NeuroMatrix, access time will be only a couple of ticks. In other words, the code from there will work very, very fast. Moreover, if the code for NMC will work only from IM1 / IM3, without resorting to DDR in any way, it will be possible to twist some very hard realtime part on NMC.
Further, it is worth considering NAND in more detail, it is divided into partitions, boot, env and dtb are the first. They are tightly clogged and you cannot resize them. In the first lies the bootloader, in the second is its environment, in the third is a compiled Device Tree Blob. The rest is broken interactively with the pmgr bootloader command, or automatically when flashing the image from the edcl script. The loader passes the specified sections to the kernel, adding standard mtdparts to cmdline.
NAND was generally expected to see something stunned. From experience with linux-sunxi and linux-rockchip, NAND was in terrible condition both there and there. Allwinner made NAND their own block device with a partially closed FTL (flash translation layer), with its own nasty wear-leveling algorithms and more. Rockchip generally provides NAND only in the form of a closed module rknand.ko, the source code of which is not even given under NDA to partners of the company, as I was told in # linux-rockhip @ freenode. Here, NAND is an ordinary standalone mtd device, on top of which UBIFS, which has already become the standard, is used, which cannot but rejoice.
Now about the download itself. I think many would be interested to look at dmesg:
The first thing that attracts attention is the line “EasyNMC DSP Framework © RC Module 2014”. Next, the log writes how many NMC cores are found, and based on this, it can be assumed that drivers and utilities are geared to the fact that there will ever be many NMC cores. There is only one NMC core in the processor on this board.
The following many would be interested to know how NMC interacts with Linux. The following information was tested from the developers: three interrupts go to the NMC from ARM. Non-maskable NMI, HP (High Priority) and LP (Low Priority). In the opposite direction as HP and LP. To start the kernel DSP, you need to file an initial reset and pull NMI. This launches the NeuroMatrix IPL code. After the first run, NMC spins in this initial code, which handles the NMI interrupt. Through this initial code, a restart of the application is organized. Everything is pretty simple.
Half of the article constantly mentions DSP, now it's time to consider in detail how to work with it. To work with it, there is a nmc-utils package, it consists of two utilities and a library:
The IPL source code for NeuroMatrix, examples, and libeasynmc-nmc (part of this library running on nmc) were also found in the source tree. No binary blobs were found during the excavations; the secret agents of the Free Software Foundation can sleep peacefully.
Let's start with the utilities. The first is nmctl. She knows how to load the source code, start, stop, monitor events, send interrupts, and a bunch more.
One of the main functions is the output of information on the number of NMC cores in the system:
Next, consider nmrun.
This is a wrapper for DSP code. It runs .abs files on NMC in such a way that all printf with NMC occurs in stdout of this wrapper, and all that we send to stdin receives NMC. There is support for passing parameters, if you list the parameters after the .abs file, they are passed to NMC in the form of argv arguments. The return from main () running on the NMC is passed to nmrun, which it also returns to the system as a regular return code. All this instantly turns a complex DSP program into a regular command line utility, which even a beginner in DSP can handle. The entry threshold is reduced significantly, nothing needs to be changed or specially processed.
Let's try to run the simplest example:
The NMC kernels themselves are present in the system as / dev / nmc0io and / dev / nmc0mem, where:
For all other operations - ioctl, the same for both devices, they are used by libeasynmc.
The utilities themselves are built on this library, the sources are also completely open under LGPLv2. A quick inspection reveals that there is a fairly simple and clear synchronous API inside. It would seem, why do we need a synchronous API in the days of node.js? It turned out that DSP drivers support epoll / select not only for stdio, all events from NMC (interrupts, the fact of sending NMI by another process) can be received through poll / epoll. Accordingly, this descriptor can be slipped by your favorite libevent, libuv, etc.
Now, armed with these exercises, let's try to deploy the development environment and build something for NMC. Let's say in MB77.07 we flashed Raspbian, installed toolchains.
Let's start with nmc-utils.
Let's look at what we cloned with github:
Cross-assembly comes down to the following magic:
If you need to collect all utilities (nmctl, mnrun) statically:
If the board is loaded via NFS and the root is available somewhere nearby, then you can install everything in it by running the following:
Further, if desired, on .deb based systems, you can collect a bunch of deb packages:
When building deb packages, you need dpkg-deb in the system and you need to specify the deb architecture that will appear in the package: armhf for Raspbian, armel for Debian. At the output we get the files:
Putting all this with your hands is not necessary, since all the latest firmware from the Module already contains all these packages by default.
For his first NMC program, it was decided to play around with sound and do something that would add an echo effect to the NMC in real time. You can use the following pipeline:
Where arecord will record data from the microphone and transfer it directly to our DSP, which will add echo and output samples to the output, then transfer them to playback in aplay. To capture the sound, a cheap Chinese USB sound card was used, lying on the shelf for years. In this example, you do not need to use libeasynmc, just normal nmrun.
Before continuing, we need to digress and tell something about the performance of such a solution. stdin / stdout, although the easiest way to exchange data, is still quite slow. They use two ring buffers, each byte must first be written by the ARM kernel to the ring buffer, then read from there to another buffer by the NMC core, processed, the result is written to another ring buffer, from where the ARM will again be copied. To put it mildly, this is not very fast, even though the ring buffers lie in SRAM memory. Therefore, if you need maximum performance, you still have to forget about stdio and the command line and use libeasynmc.
When developing in C / C ++ for NeuroMatrix, several features should be taken into account that can plunge many who have never written anything under the DSP processor into a cultural shock. The following is a list of rakes that you can step on:
We will do an echo in C. For simplicity, the samples will go to NMC 8-bit, respectively, with the reformatting enabled, we will get them on the DSP in the form of 32-bit numbers.
Let's start by taking an example of the hello world project and looking at the contents:
Consider a Makefile. It is more or less general and extremely simple. The only thing we need to change is EASYNMC_DIR, the path to the libeasynmc-nmc directory where the NMC part of the libeasynmc library is located. If it is necessary to connect some other libraries, then they will need to be specified in libs.
I draw attention to the path to the easynmc.lib libraries - without it, stdin / stdout, argc / argv and the return code will not work, the documentation also states that it should go before the C library. The
second most important file is mb7707brd.cfg , for the compiler NeuroMatrix has the same role as the script for gcc LD. Here you can arrange the sections in different places in memory. The default values are quite sane and you can safely use them:
Speaking of memory map - it can be taken at http://www.module.ru/mb7707/doc/K1879-memory-map.pdf
After building with the make command, the output will be two files - hello.abs and hello.dump. abs file is an ELF with absolute addresses in the NMC address space. It can be loaded into IM1 or IM3 banks when we work from Linux on the board, since the Linux kernel is responsible for all the remaining memory, while working with edcl the rules are easier and we can lay out sections throughout the address space. dump is a disassembled listing that may be useful to someone who knows assembler under NMC.
Moving on, one assembler file is connected to the project - easyconf.asm. The assembler here is quite sophisticated, with macros and other joys of life. In easyconf lies the configuration of stdio and arguments, which is done literally by two macros:
This code reserves a place in the abs file for arguments and ring buffers, you can see that 128 bytes are output on stdio, as well as on arguments. If nmrun passes more than 128 characters of arguments when starting this program, nmrun will throw an error.
Finally, consider main.c, which looks pretty simple:
It was a standard hello world project, now it's time to modify it for our task. We proceed as follows, we give the size of the delay buffer somewhere around 200ms, with a sampling frequency of about 1600 samples. We round up to the nearest value of the power of two and get 2048. Since the NMC in the floating point is most likely not strong (although the compiler eats floats), we will do everything in integers, and we will make the attenuation bit shift.
You get something in the spirit of this:
We assemble, copy abs to the board. By default, the board has only one ALSA device - HDMI. We want to use output / input from a USB sound card. You need its name in ALSA, this is done quite simply, using -L to arecord or aplay. The result should be like this:
We connect the microphone and headphones and enjoy, we just wrote the first application for the domestic DSP processor.
Perhaps this is all for today. It remains to draw conclusions. MB77.07 leaves a positive impression, if, of course, you close your eyes to a rather weak ARM. We list the general pros and cons:
+ Officially open source of everything that is possible, from the bootloader to the IPL code of the DSP processor. On github from the chip manufacturer. Among other manufacturers, this is possible only with Freescale and Qualcomm (Code Aurora). Usually, at best, they dump everything in the form of a GPL source-drop in the form of servers packed in rar tar'ov on ftp servers, raking then this is a special pleasure. Still, it happens, they throw everything off with a huge folder together with a .git index.
+ DSP kernel, compiler and toolkit for it. Initially, it was thought out so that it would be very simple for a beginner to work, for a start, read on the K&R diagonal is enough. Especially considering that NMC in this configuration can easily provide hard realtime - for robotics and machine tool operators this is just a godsend.
+ Drivers. It cannot be said that the ideal, but frank horror like Allwinner (libnand), Rockchip (rk_fb, rknand), Mediatek (in general, everything) and the like were not noticed. Everywhere they try to use standard kernel subsystems. If there is a community or the desire of developers, most of them can easily get into the mainline. There are no proprietary blobs in the core.
+ Kernel version. Now there is 3.10 LTS, in the fall, the developers decided to think about the next LTS. For comparison, the kernel in linux-sunxi community is 3.4, and in upstream there is practically no multimedia. Rockchip only recently squeezed out 3.10.x with a very large creak and only for rk3288. All attempts to start this business with the popular rk3188 failed - the MMC controller does not work. HardKernel ODROID sits on 3.8.y linux-stable + ubuntu merge, although there is a movement towards support in the mainline.
+ Indestructibility. Even if you physically kill NAND or unsolder, MB77.07 can be revived and downloaded via EDCL. Therefore, such a board may be useful for beginners who want to learn how to lift the bootloader, operating system, etc. on bare metal. You can not be afraid to kill the board. In the case of jambs like on the RK3188, you will never need to shorten the NAND legs for flashing the bootloader here.
+ deb packages, repositories, and more. Much has been done without waiting for the community to appear, much remains to be done.
+ Interestingly divorced, all the connectors on one side are much more convenient than on r-pi.
- Price. This fact, of course, spoils raspberries (pun intended)
- No RTC. For many projects, it may not be important, but it may be required. Plus, the system has to raise ntp first.
- Performance. Yes, 324MHz ARM1176 is not particularly fun. It is partly compensated by the fact that both ARM and NMC can execute their code from on-chip memory, from where they work simply reactively, but nonetheless. Let's hope that it will be more interesting later and the Module will not quit OpenSource and we will see their next projects, already on more productive solutions.
- The complexity of the order. Here it’s purely a matter of convenience and more likely a question for marketing than for engineers. The module’s website lacks a huge fat button “buy” in the split screen and instant payment through qiwi.
The article will describe the hardware and software, from unpacking and firmware, to writing a simple example - audio echo effect on the NeuroMatrix core embedded in the DSP processor used.
Equipment
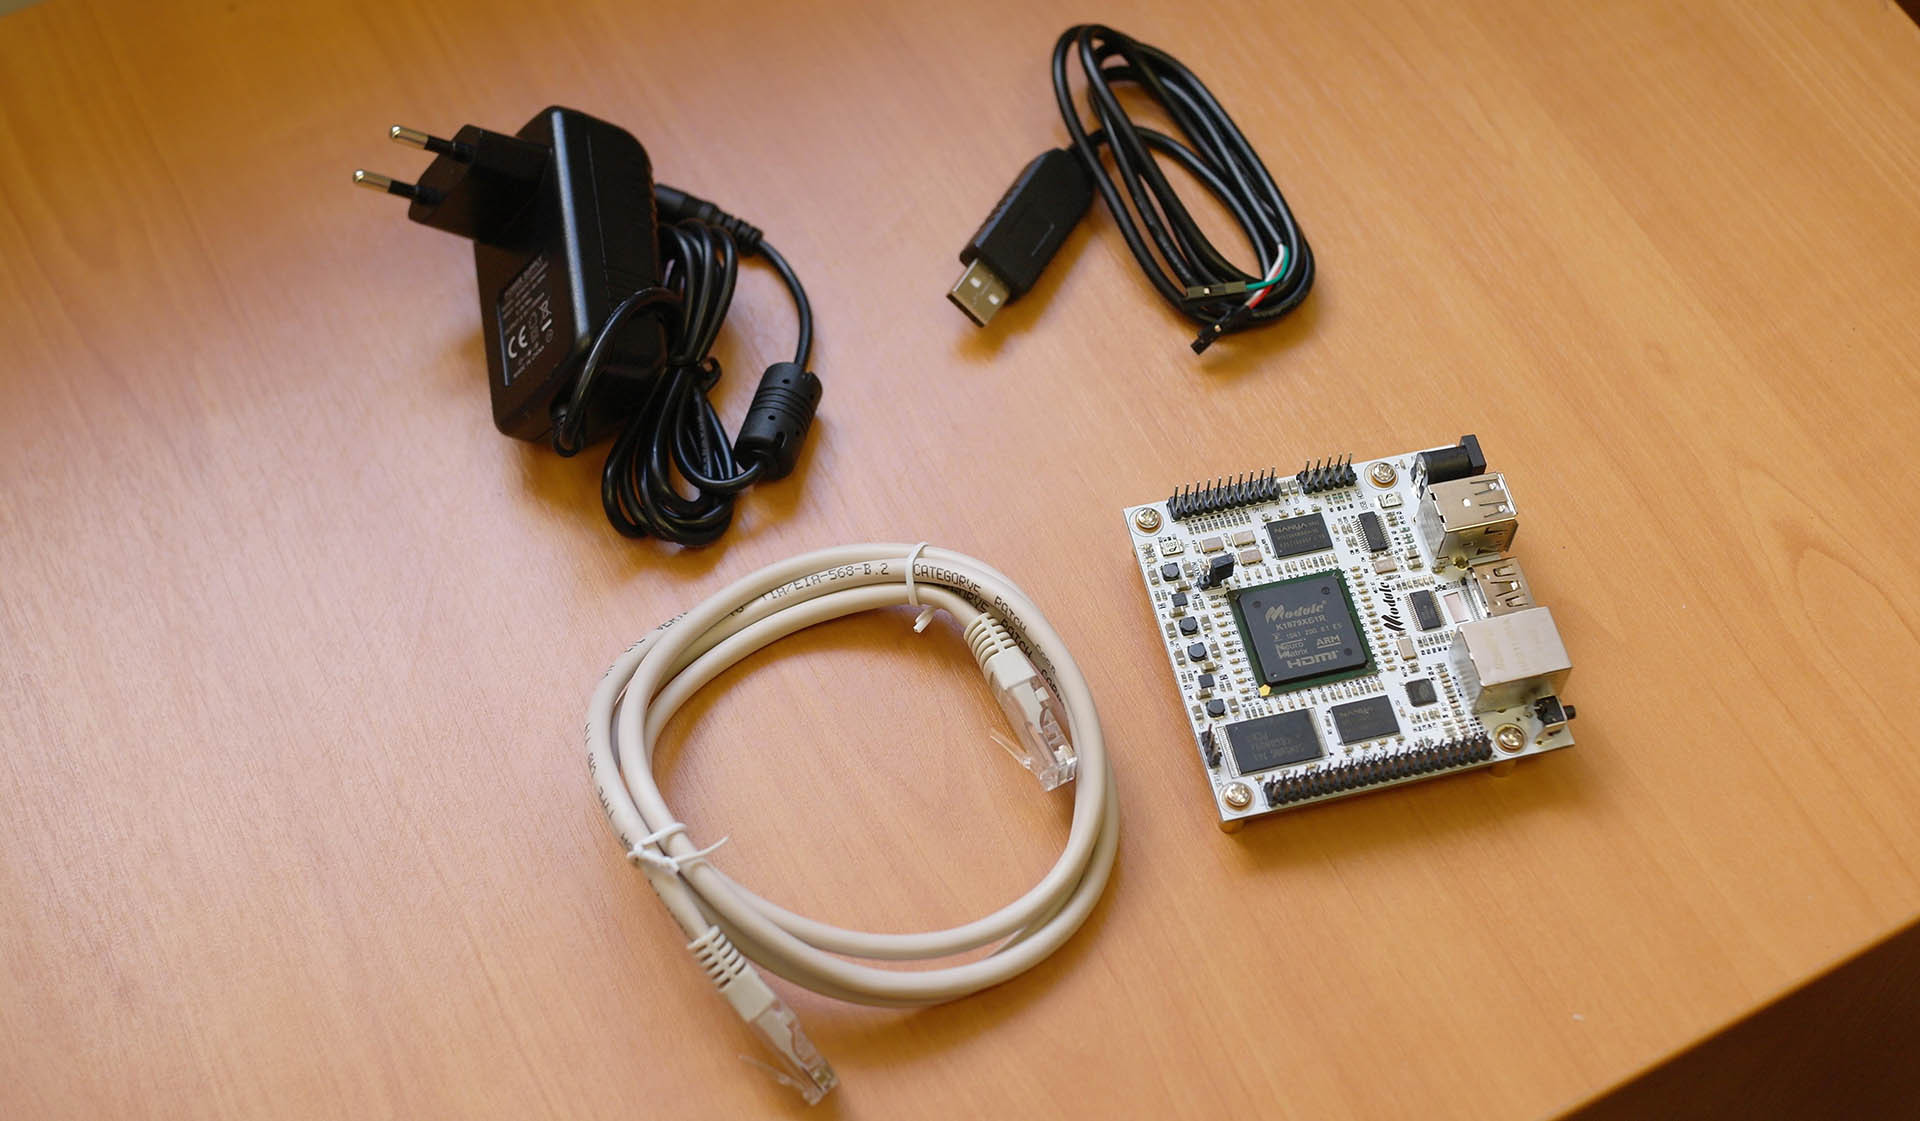
The board comes in a color box. Inside are:
- motherboard MB 77.07
- Ethernet patchcord
- 5V / 2A power supply
- USB-UART for those who get to know the embedded world for the first time
Here one can argue whether all this is necessary or if the usual OEM supply would be enough in the form of an antistatic bag with a board. I think it will be useful for beginners to immediately get USB-UART, there will be fewer people who want to google, get the standard bad advice "connect to the COM port, nothing will happen" and burn the board on the first day after purchase.
Iron
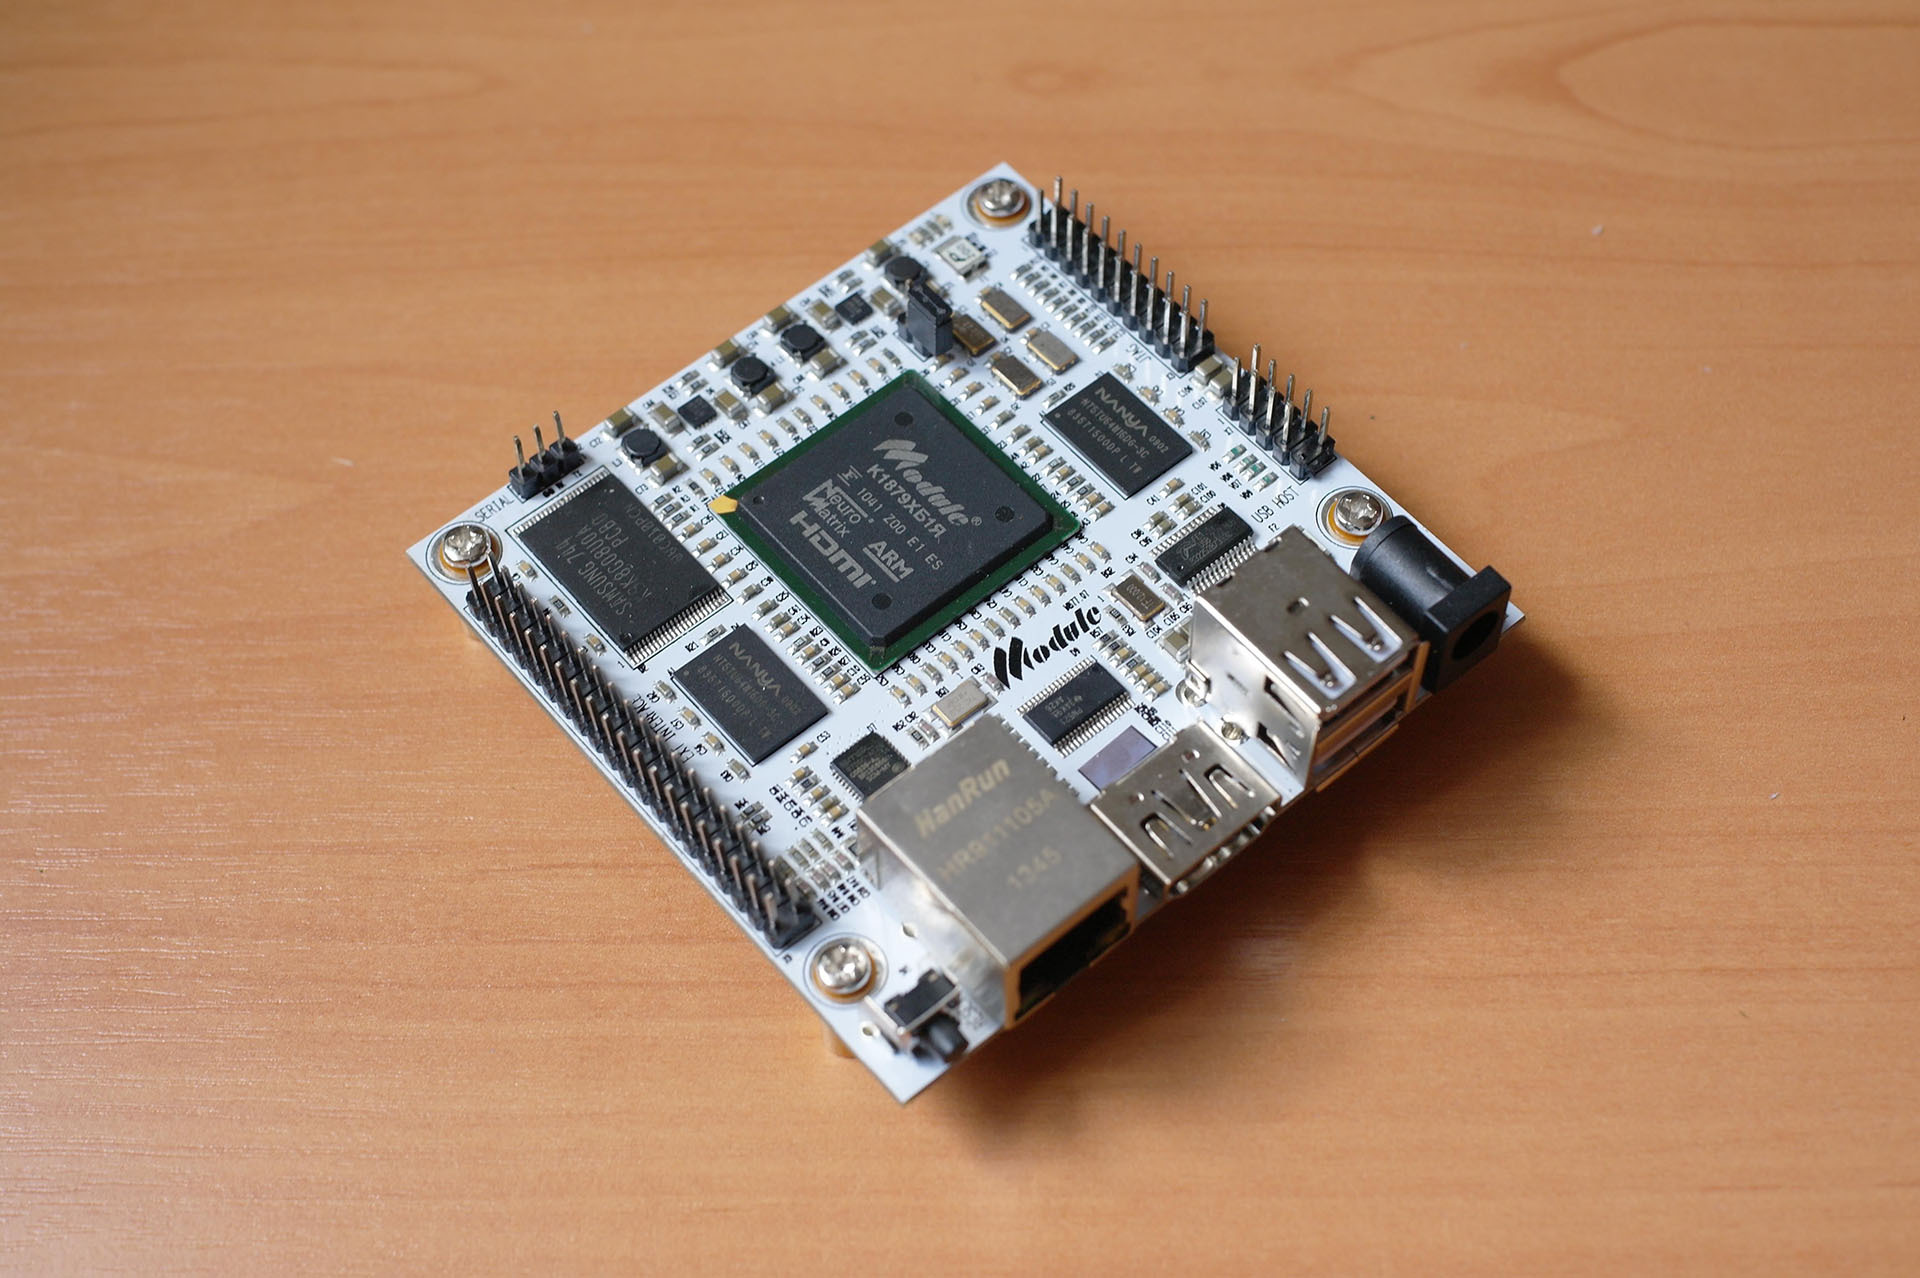
Now it’s worth considering the board itself. On board the board is ARM1176, the same core is used in the Raspberry Pi. You can run sharpened distributions for r-pi, of course, with the proviso that you will need to slip drivers for the local IP core used in the processor. To facilitate this task, the processor developer, STC "Module", provides ready-made images of Debian Jessie and Raspbian Wheezy, packages are periodically updated.
Near the K1879HB1Ya itself, two DDR2 RAM chips of 128MB, 1GB NAND memory, a USB-hub with 4 ports, Ethernet PHY and a bundle are soldered.
Various external interfaces are located on the pins located on two sides of the board:
Right side:
- Jtag
- 2xUSB - pinout is exactly the same as on motherboards, remove the slats from the boxes
- UART with boot console
Left side, a long connector resembling an IDE:
- 8x GPIO
- 1x Transport Stream Interface (very detailed here)
- 1x I2C
- 1x SPI
- 1x I2S
- 1x SPDIF
- 1x External Interrupt
- 1.5x UART - one UART full, the second only RX
- 1x RESET
- 5V
- 3.3V - the dedicated channel of the switching power supply is responsible for this channel, giving out 800mA, if I really knew modern Chinese components, I would not hang here more than 500mA
A detailed pinout is available at the link: http://www.module.ru/mb7707/doc/MB77.07-X9-pinout.pdf
Let's take a look at the GPIO in more detail, as this is the very first place that you will want to touch yourself. GPIOs are two different types. The first type, those that are displayed on the comb, they are picked up by the gpio-pl061 driver (IP core ARM PrimeCell ™ General Purpose Input / Output PL061 ). These GPIOs can pull interrupts to the ARM core, which is sometimes useful. In addition, if you do not need Transport Stream, then its _D [0-7] pins can be multiplexed in GPIO, so you can get 16 controlled legs.
The GPIO numbering of legs in sysfs is in the documents above by reference, and you can twitch them through sysfs if you wish:
# перейдем в sysfs, в директорию, где лежат классы gpio
cd /sys/class/gpio
# экспортируем 23-тий пин
echo 23 > export
# переключим его направление в out
echo out > gpio23/direction
# установим высокий уровень
echo 1 > gpio23/value
The second type of GPIO is more simplified, managed by a different IP core; they cannot pull interrupts. Two paid LEDs are connected to these GPIOs, one of them is registered through the Linux framework of the Linux kernel as a heartbeat and shows the Load Average. When debugging, it’s useful to visually see if everything is hanging.
A separate place on the board is occupied by two pins for the boot jumper.
Downloading is made simple and reliable: when there is no jumper - loading from NAND memory occurs, when the jumper is on - the board is waiting for loading via JTAG or EDCL. The jumper position is read when the board is reset. It is worth telling about the last mode in more detail, as it is possible you have not encountered it.
Edcl
EDCL or Ethernet Debug Communications Link is a hardware feature built into the Ethernet controller that allows you to write and read physical memory by sending properly formed Ethernet packets. This function was bundled with the IP Core of the Ethernet controller used - greth. The EDCL itself is quite convenient, but if you leave it turned on in production, you get a very big security hole (I wonder how many processors with the same Ethernet controller work with the included EDCL in production?).
On top of EDCL runs the curious edcltool tool, which gives the lua host API to edcl. This technology is used for firmware and firmware boards. Edcltool itself was originally designed for Linux, unlike the popular SoC manufacturers that provide you with some kind of livesuit / phoenixsuit or rkbatch.
There is a version for Windows, but it is experimental, whipped up through mingw and requires the installation of WinPCAP. It also works quite slowly.
The Linux version is set as standard ./bootstrap && ./configure --prefix = / usr && make && sudo make install and asks only lua5.1-dev or lua5.2-dev and libelf. The latter is needed if you need to work with NeuroMatrix DSP, which will be discussed below.
Edcltool itself executes edcl scripts, which in fact are ordinary lua scripts, look very simple and readable. For example, here is a script that runs code on a bare ARM:
fw = require("fw");
edcl_init();
fw.run_code("mboot-uemd.bin");
Next, here is the mboot bootloader firmware:
fw = require("fw");
edcl_init();
fw.run_code("mboot-uemd.bin", true); -- start in slave mode
fw.write_bootloader("mboot-signed.bin")
Creating a partition table in NAND, writing the kernel, dtb and root file system:
fw = require("fw");
edcl_init();
fw.run_code("mboot-uemd.bin",true); -- start in slave mode
fw.write_bootloader("mboot-signed.bin") -- save signed loader in NAND
-- all sizes are in bytes
partition_table = {
   { "kernel", 4*1024*1024 },
   { "rootfs", "-" },
}
fw.partition(partition_table);
-- prepare and erase all nand
fw.mboot_cmd("parterase kernel y y")
fw.mboot_cmd("parterase rootfs y y")
fw.flash_part("kernel", "uImage", false);
fw.flash_part("dtb", "mb77.07.dtb", false);
fw.flash_part("rootfs", "filesystem.ubifs", false);
fw.mboot_cmd("setenv bootargs console=ttyS0,38400n8 earlyprintk=serial   ubi.mtd=4,2048 root=ubi0:rootfs rootfstype=ubifs");
fw.mboot_cmd("setenv bootfdt 1")
fw.mboot_cmd("save");
This is how the code runs on bare NeuroMatrix (NMC for short):
nmc = require("easynmc");
nmc.debug = true;
edcl_init();
nmc.init_core("ipl-K1879-nmc-debug.abs");
entry = nmc.upload("myfile.abs");
nmc.run(entry);
-- Warning: nmc stdio, arguments and return code are NOT yet supported
-- when running nmc prog via edcltool.  Use linux libeasynmc.
-- Expect these implemented in future updates. Sorry.
Running the scripts themselves is very simple:
edcltool -f script.edcl -i имя_интерфейса
If you forget the interface name, edcltool will use eth0 (on Windows, the 0-th interface). The edcltool –l command listing the available interfaces may be useful, especially useful on Windows, where it may not be very clear in the control panel which interface is registered under which number in the system.
In addition to the above, other DSP scripts are included, in fact, you can not load Linux to develop DSP code. To write your scripts in the archive with edcltool, there is the SCRIPTING.TXT file, which describes in detail the functions available from edcl environment.
Firmware
Now let's talk about the main thing that is required from the processor developer after its release - support for firmware and the set of their delivery. Each firmware from the official site contains a complete environment, including a bootloader, a kernel, an edcl script for firmware, a win-version just in case, and README.
Detailed instructions on the current firmware package are provided in each archive, but it makes no sense to quote it, since it comes down to one thing:
- short the jumper boot
- press reset on board
- run edcltool –f eupgrade.edcl
- drink tea 7-10 minutes
- remove the jumper and press reset
Environment
For full-fledged work with the board, we need an environment for building software for the board processor and its DSP - the module provides already-built toolchains for both Linux and Windows. Installing them is quite simple, for example, suppose that the toolchains are stored in a place familiar to many under the name ~ / x-tools. Next, you need to put the downloaded toolchain from the Module there and do not forget to register the next bin in your PATH:
export PATH=$PATH:~/x-tools/arm-module-linux-gnueabi/bin
Distributions
The processor manufacturer is minimalistic in building its distributions, and by default, Debian and Raspbian come in a minimal configuration with support for network and ssh. X11 at 324MHz somehow works slowly, plus, the bootloader does not know how to draw anything on the screen. The main way to communicate with the board is its serial console, for the sake of which UART was put in the delivery kit. By default, the network with distributions from the manufacturer rises with the address of the board 192.168.0.7, login root, password 12345678.
Manufacturer repositories are set as follows in sources.list:
# RC Module's repository with MB77.07 packages
deb http://www.module.ru/mb7707/ stable updates
Boot system
Now a little about how the system boots with NAND. The IPL loader is executed first and checks the position of the boot jumper and:
- waiting for the magic address 0x00100000 (the starting address of the first SRAM memory bank IM0) from edcl / jtag 32-bit address where to jump if the jumper is installed
- loads the bootloader from NAND into IM0, checks md5 and starts its execution if the jumper is not installed
The first to start the mboot bootloader. This is a fork of u-boot, a little refactored. It works from SRAM memory, which on the processor is surprisingly many: 4 banks, under the names IM [0-3]. Each bank is 256 kilobytes. As it turned out, the purpose of each is as follows:
- IM0 - the memory where the bootloader works from is not used and idle after loading, you can use it for your own selfish purposes.
- IM1, IM3 - NeuroMatrix memory, where it is supposed to run the NMC code from, NMC has priority when accessing it.
- IM2 - used by h264 decoder. If the decoder is not used, you can use it for your needs.
By the way, the old version of mboot can be found on google, it lies on Sergey Mironov’s github account, a link to reduce search time: github.com/ierton/mboot , you can also find overlay for Gentoo there, but it has not been updated for quite some time, so it’s unlikely that it will be useful to anyone.
The last thing that can be said about the bootloader is that besides the pmgr command there are a couple of update commands - fwupgrade and eupgrade, designed for flashing tftp images, which may be larger than the size of the available DDR memory, this also happens. Otherwise, this is a regular u-boot, which many are used to. From the bootloader, a network is available, work with NAND, SPI Flash (which, unfortunately, they did not put on MB77.07) and a little usb, without support for file systems.
Let's go back to the memory, in the address space immediately after IM0 comes IM1, and then immediately IM3, it is worth remembering when writing low-level code that works with SRAM, also when writing such code it is worth remembering that there really is a lot of SRAM memory, on some the good old AT91RM9200 on-chip memory was only 4K. For this reason, the boot loader here works directly in SRAM, without SPL. This approach is very useful, because in contrast to DDR, that of ARM, that of NeuroMatrix, access time will be only a couple of ticks. In other words, the code from there will work very, very fast. Moreover, if the code for NMC will work only from IM1 / IM3, without resorting to DDR in any way, it will be possible to twist some very hard realtime part on NMC.
Further, it is worth considering NAND in more detail, it is divided into partitions, boot, env and dtb are the first. They are tightly clogged and you cannot resize them. In the first lies the bootloader, in the second is its environment, in the third is a compiled Device Tree Blob. The rest is broken interactively with the pmgr bootloader command, or automatically when flashing the image from the edcl script. The loader passes the specified sections to the kernel, adding standard mtdparts to cmdline.
NAND was generally expected to see something stunned. From experience with linux-sunxi and linux-rockchip, NAND was in terrible condition both there and there. Allwinner made NAND their own block device with a partially closed FTL (flash translation layer), with its own nasty wear-leveling algorithms and more. Rockchip generally provides NAND only in the form of a closed module rknand.ko, the source code of which is not even given under NDA to partners of the company, as I was told in # linux-rockhip @ freenode. Here, NAND is an ordinary standalone mtd device, on top of which UBIFS, which has already become the standard, is used, which cannot but rejoice.
Now about the download itself. I think many would be interested to look at dmesg:
Boot system
MBOOT (K1879 and friends): Version mboot-00063-g9302e24-dirty (Built Thu Aug 21 17:10:13 MSK 2014)
OTP info: boot_source 2 jtag_stop 0 words_len 1024
Maximum bank size: 0x10000000 bytes
Detected 134217728 bytes of EM0 memory
MEMORY: 40000000 -> 48000000
Memory layout
        0x00100010  early
        0x001001C8  text
        0x0011E9BC  data
        0x00127D40  signature
        0x00127D44  bss_start
        0x00135EB4  stack_start
        0x00137FF8^ stack_ptr
        0x00138000  malloc
        0x0017F000  env
mnand_read_id: flash id 0xD3
mnand_read_id: flash ext_id 0x95
mnand_read_id: CS0 NAND 1GiB 3,3V 8-bit size(1024) writesize(2048) oobsize(64) erasesize(131072)
mnand_read_id: flash id 0x00
mnand_read_id: WARNING: Unknown flash ID. Using default (0xF1)
mnand_read_id: flash ext_id 0x00
mnand: Chip configurations differ, ignoring CS1
greth: Setting GRETH base addr to 0x20034000
greth: Found GRETH at 0x20034000, irq 255
greth: Resetting GRETH
greth: greth: 'phyaddr' not set, fall back to built-in table
greth: greth: using preset PHY addr: 1f
greth: Resetting the PHY
greth: write_mii: 0x20034010 < 0xF809F801 [p:31 a:0 d:0xF809]
greth: write_mii: 0x20034010 < 0x0000F801 [p:31 a:0 d:0x0000]
greth: 10/100 GRETH Ethermac at [0x20034000] irq 255. Running 10 Mbps half duplex
PHY info not available
greth: greth_init
greth: greth_init: enabling receiver
ETH new device: name GRETH_10/100
greth: GRETH: New MAC address: 02:00:f7:00:27:0f
USB thresholds: in 0x20 out 0x7e
Is there an EDCL emergency? Nope
edcl: Ethernet debug disabled by environment
MTD Partition:       boot @ 0x00000000 size 0x00040000
MTD Partition:        env @ 0x00040000 size 0x00020000
MTD Partition:        dtb @ 0x00060000 size 0x00020000
MTD Partition:     kernel @ 0x00080000 size 0x00400000
MTD Partition:     rootfs @ 0x00480000 size 0x3FB80000
Hit any key (in 2 sec) to skip autoload...
Running autoload command 'tftp;bootm;'
TFTP Using GRETH_10/100 device
TFTP params: server 192.168.0.1 our_ip 192.168.0.7
TFTP params: filename 'uImage-3' load_address 0x40100000
TFTP Loading: T #################################################################
        #################################################################
        #################################################################
        #################################################################
        #################################################################
        #################################################################
        #################################################################
        ################################
TFTP done
Linux preparing to boot the kernel: machid 0xcd1
Using Flatterned Device Tree boot method
IMG moving image: type 2 from 0x40100040 to 0x40008000
HINT: To optimize boot time adjust loadaddr to: 0x40007fc0
Linux entry 0x40008000
USB thresholds: in 0x20 out 0x7e
Uncompressing Linux... done, booting the kernel.
[    0.000000] Booting Linux on physical CPU 0x0
[    0.000000] Linux version 3.10.28-shadow1-00032-gb8b1a50 (necromant@sylwer) (gcc version 4.8.1 (crosstool-NG 1.19.0) ) #141 Thu Aug 21 14:23:26 MSK 2014
[    0.000000] CPU: ARMv6-compatible processor [410fb767] revision 7 (ARMv7), cr=00c5387d
[    0.000000] CPU: PIPT / VIPT nonaliasing data cache, VIPT nonaliasing instruction cache
[    0.000000] Machine: Module MB77.07, model: Module MB77.07
[    0.000000] bootconsole [earlycon0] enabled
[    0.000000] Memory policy: ECC disabled, Data cache writeback
[    0.000000] On node 0 totalpages: 24128
[    0.000000] free_area_init_node: node 0, pgdat c050df84, node_mem_map c0596000
[    0.000000]   Normal zone: 288 pages used for memmap
[    0.000000]   Normal zone: 0 pages reserved
[    0.000000]   Normal zone: 24128 pages, LIFO batch:3
[    0.000000] pcpu-alloc: s0 r0 d32768 u32768 alloc=1*32768
[    0.000000] pcpu-alloc: [0] 0
[    0.000000] Built 1 zonelists in Zone order, mobility grouping on.  Total pages: 23840
[    0.000000] Kernel command line: debug console=ttyS0,38400n8 earlyprintk=serial  ubi.mtd=4,2048 root=ubi0:rootfs rootfstype=ubifs mtdparts=mnand:0x40000@0x0(boot),0x20000@0x40000(env),0x20000@0x60000(dtb),0x400000@0x80000(kernel),0x3FB8000)
[    0.000000] PID hash table entries: 512 (order: -1, 2048 bytes)
[    0.000000] Dentry cache hash table entries: 16384 (order: 4, 65536 bytes)
[    0.000000] Inode-cache hash table entries: 8192 (order: 3, 32768 bytes)
[    0.000000] Memory: 94MB 0MB = 94MB total
[    0.000000] Memory: 89208k/89208k available, 41864k reserved, 0K highmem
[    0.000000] Virtual kernel memory layout:
[    0.000000]     vector  : 0xffff0000 - 0xffff1000   (   4 kB)
[    0.000000]     fixmap  : 0xfff00000 - 0xfffe0000   ( 896 kB)
[    0.000000]     vmalloc : 0xc8800000 - 0xff000000   ( 872 MB)
[    0.000000]     lowmem  : 0xc0000000 - 0xc8000000   ( 128 MB)
[    0.000000]     modules : 0xbf000000 - 0xc0000000   (  16 MB)
[    0.000000]       .text : 0xc0008000 - 0xc04af9cc   (4767 kB)
[    0.000000]       .init : 0xc04b0000 - 0xc04d31d4   ( 141 kB)
[    0.000000]       .data : 0xc04d4000 - 0xc0515d50   ( 264 kB)
[    0.000000]        .bss : 0xc0515d50 - 0xc0595990   ( 512 kB)
[    0.000000] SLUB: HWalign=32, Order=0-3, MinObjects=0, CPUs=1, Nodes=1
[    0.000000] NR_IRQS:128
[    0.000000] regs = 0xf8000000, irq_start = 0
[    0.000000] VIC @f8000000: id 0x00041192, vendor 0x41
[    0.000000] regs = 0xf8010000, irq_start = 32
[    0.000000] VIC @f8010000: id 0x00041192, vendor 0x41
[    0.000000] UEMD: Firing up timer system
[    0.000000] Clocksource: rate 54000000 mult 19418074 shift 20
[    0.000000] Clockevent: rate 54000000 mult 231928233 shift 32
[    0.000000] sched_clock: 32 bits at 100 Hz, resolution 10000000ns, wraps every 4294967286ms
[    0.000000] Console: colour dummy device 80x30
[    0.020000] Calibrating delay loop... 215.04 BogoMIPS (lpj=1075200)
[    0.100000] pid_max: default: 32768 minimum: 301
[    0.110000] Mount-cache hash table entries: 512
[    0.120000] CPU: Testing write buffer coherency: ok
[    0.130000] Setting up static identity map for 0xc03417b8 - 0xc03417f0
[    0.150000] devtmpfs: initialized
[    0.160000] NET: Registered protocol family 16
[    0.170000] DMA: preallocated 256 KiB pool for atomic coherent allocations
[    0.240000] OTP ROM is not flashed
[    0.250000] msvdhd: configuring memory
[    0.260000] hw-breakpoint: found 6 breakpoint and 1 watchpoint registers.
[    0.270000] hw-breakpoint: maximum watchpoint size is 4 bytes.
[    0.410000] bio: create slab  at 0
[    0.430000] SCSI subsystem initialized
[    0.440000] ssp-pl022 2002e000.ssp: ARM PL022 driver, device ID: 0x00041022
[    0.450000] ssp-pl022 2002e000.ssp: BUSNO: 0
[    0.460000] pl022: mapped registers from 0x2002e000 to f802e000
[    0.470000] ssp-pl022 2002e000.ssp: registered master spi0
[    0.480000] spi spi0.0: allocated memory for controller's runtime state
[    0.490000] ssp-pl022 2002e000.ssp: SSP Target Frequency is: 25000000, Effective Frequency is 13500000
[    0.500000] ssp-pl022 2002e000.ssp: SSP cpsdvsr = 2, scr = 1
[    0.510000] spi spi0.0: 4 <= n <=8 bits per word
[    0.520000] spi spi0.0: DMA mode NOT set in controller state
[    0.530000] spi spi0.0: setup mode 1, 8 bits/w, 25000000 Hz max --> 0
[    0.540000] ssp-pl022 2002e000.ssp: registered child spi0.0
[    0.550000] ssp-pl022 2002e000.ssp: probe succeeded
[    0.570000] usbcore: registered new interface driver usbfs
[    0.580000] usbcore: registered new interface driver hub
[    0.590000] usbcore: registered new device driver usb
[    0.600000] media: Linux media interface: v0.10
[    0.610000] Linux video capture interface: v2.00
[    0.620000] Advanced Linux Sound Architecture Driver Initialized.
[    0.630000] Switching to clocksource uemd_timer1
[    0.730000] NET: Registered protocol family 2
[    0.740000] TCP established hash table entries: 1024 (order: 1, 8192 bytes)
[    0.750000] TCP bind hash table entries: 1024 (order: 0, 4096 bytes)
[    0.760000] TCP: Hash tables configured (established 1024 bind 1024)
[    0.780000] TCP: reno registered
[    0.790000] UDP hash table entries: 256 (order: 0, 4096 bytes)
[    0.800000] UDP-Lite hash table entries: 256 (order: 0, 4096 bytes)
[    0.810000] NET: Registered protocol family 1
[    0.820000] RPC: Registered named UNIX socket transport module.
[    0.830000] RPC: Registered udp transport module.
[    0.840000] RPC: Registered tcp transport module.
[    0.850000] RPC: Registered tcp NFSv4.1 backchannel transport module.
[    0.930000] squashfs: version 4.0 (2009/01/31) Phillip Lougher
[    0.950000] NFS: Registering the id_resolver key type
[    0.960000] Key type id_resolver registered
[    0.970000] Key type id_legacy registered
[    0.980000] msgmni has been set to 174
[    1.000000] alg: No test for stdrng (krng)
[    1.010000] io scheduler noop registered (default)
[    1.020000] fj_gpio: Added 32 gpio lines at base -981095888
[    1.040000] module_vdu 80173000.vdu: found VDU device at 80173000, id
[    1.070000] Console: switching to colour frame buffer device 90x36
[    1.090000] fb0: Module VDU frame buffer device
[    1.140000] Serial: 8250/16550 driver, 3 ports, IRQ sharing disabled
[    1.150000] 2002b000.uart: ttyS0 at MMIO 0x2002b000 (irq = 7) is a 8250
[    1.160000] console [ttyS0] enabled, bootconsole disabled
[    1.160000] console [ttyS0] enabled, bootconsole disabled
[    1.170000] 20022000.uart: ttyS1 at MMIO 0x20022000 (irq = 9) is a 8250
[    1.180000] 2002c000.uart: ttyS2 at MMIO 0x2002c000 (irq = 8) is a 8250
[    1.200000] [drm] Initialized drm 1.1.0 20060810
[    1.240000] loop: module loaded
[    1.250000] msvdhd 80180000.video_decoder: found device at 0x80180000, id 0x0025300b
[    1.300000] EasyNMC Unified DSP Framework. (c) RC Module 2014
[    1.310000] easynmc-nmc3: imem at phys 0x140000 virt 0xc8900000 size 0x80000 bytes
[    1.320000] easynmc-nmc3: HP IRQ 14 LP IRQ 15
[    1.330000] easynmc: registering core K1879-nmc (nmc3) with id 0
[    1.350000] flash ext_id 0x95
[    1.360000] mnand CS0 Samsung size(1024) writesize(2048) oobsize(64) erasesize(131072)
[    1.370000] mnand: Bad chip id or no chip at CS1
[    1.380000] mnand: Detected 1073741824 bytes of NAND
[    1.390000] 5 cmdlinepart partitions found on MTD device mnand
[    1.400000] Creating 5 MTD partitions on "mnand":
[    1.410000] 0x000000000000-0x000000040000 : "boot"
[    1.430000] 0x000000040000-0x000000060000 : "env"
[    1.450000] 0x000000060000-0x000000080000 : "dtb"
[    1.470000] 0x000000080000-0x000000480000 : "kernel"
[    1.510000] 0x000000480000-0x000040000000 : "rootfs"
[    6.500000] libphy: greth-mdio: probed
[    9.590000] ehci_hcd: USB 2.0 'Enhanced' Host Controller (EHCI) Driver
[    9.600000] uemd-ehci 10040000.ehci: UEMD EHCI
[    9.610000] uemd-ehci 10040000.ehci: new USB bus registered, assigned bus number 1
[    9.630000] uemd-ehci 10040000.ehci: irq 35, io mem 0x10040000
[    9.660000] uemd-ehci 10040000.ehci: USB 2.0 started, EHCI 1.00
[    9.680000] hub 1-0:1.0: USB hub found
[    9.690000] hub 1-0:1.0: 2 ports detected
[    9.700000] ohci_hcd: USB 1.1 'Open' Host Controller (OHCI) Driver
[    9.710000] usbcore: registered new interface driver usb-storage
[    9.720000] usbcore: registered new interface driver usbserial
[    9.730000] mousedev: PS/2 mouse device common for all mice
[    9.740000] i2c /dev entries driver
[    9.770000] module_hdmi: module_hdmi: Device ID: 0x9132
[    9.780000] usbcore: registered new interface driver i2c-tiny-usb
[    9.800000] ledtrig-cpu: registered to indicate activity on CPUs
[    9.850000] usbcore: registered new interface driver usbhid
[    9.860000] usbhid: USB HID core driver
[    9.900000] TCP: cubic registered
[    9.910000] Key type dns_resolver registered
[    9.920000] VFP support v0.3: implementor 41 architecture 1 part 20 variant b rev 5
[    9.950000] UBI: attaching mtd4 to ubi0
[   10.020000] usb 1-1: new high-speed USB device number 2 using uemd-ehci
[   10.180000] hub 1-1:1.0: USB hub found
[   10.190000] hub 1-1:1.0: 4 ports detected
[   25.560000] UBI: scanning is finished
[   25.640000] UBI: attached mtd4 (name "rootfs", size 1019 MiB) to ubi0
[   25.650000] UBI: PEB size: 131072 bytes (128 KiB), LEB size: 126976 bytes
[   25.660000] UBI: min./max. I/O unit sizes: 2048/2048, sub-page size 2048
[   25.670000] UBI: VID header offset: 2048 (aligned 2048), data offset: 4096
[   25.680000] UBI: good PEBs: 8141, bad PEBs: 15, corrupted PEBs: 0
[   25.690000] UBI: user volume: 1, internal volumes: 1, max. volumes count: 128
[   25.700000] UBI: max/mean erase counter: 4/1, WL threshold: 4096, image sequence number: 23379108
[   25.710000] UBI: available PEBs: 0, total reserved PEBs: 8141, PEBs reserved for bad PEB handling: 145
[   25.720000] mvdu: will allocate buffers
[   25.730000] mvdu: did allocate buffers cc000000
[   25.740000] UBI: background thread "ubi_bgt0d" started, PID 620
[   25.750000] ALSA device list:
[   25.760000]   #0: Module MB7707
[   25.860000] UBIFS: recovery needed
[   26.940000] UBIFS: recovery deferred
[   26.950000] UBIFS: mounted UBI device 0, volume 0, name "rootfs", R/O mode
[   26.960000] UBIFS: LEB size: 126976 bytes (124 KiB), min./max. I/O unit sizes: 2048 bytes/2048 bytes
[   26.970000] UBIFS: FS size: 1013395456 bytes (966 MiB, 7981 LEBs), journal size 9023488 bytes (8 MiB, 72 LEBs)
[   26.980000] UBIFS: reserved for root: 0 bytes (0 KiB)
[   26.990000] UBIFS: media format: w4/r0 (latest is w4/r0), UUID D7B60B07-E5DE-408F-886D-5EACF67535FC, small LPT model
[   27.010000] VFS: Mounted root (ubifs filesystem) readonly on device 0:11.
[   27.020000] devtmpfs: mounted
[   27.030000] Freeing unused kernel memory: 140K (c04b0000 - c04d3000)
Mount failed for selinuxfs on /sys/fs/selinux:  No such file or directory
INIT: version 2.88 booting
[info] Using makefile-style concurrent boot in runlevel S.
[info] Setting the system clock.
head: cannot open '/etc/adjtime' for reading: No such file or directory
hwclock: Cannot access the Hardware Clock via any known method.
hwclock: Use the --debug option to see the details of our search for an access method.
[....] Unable to set System Clock to: Thu Jan 1 00:00:33 UTC 1970 ... (warning).
[....] Activating swap...done.
[   33.700000] UBIFS: completing deferred recovery
[   33.830000] UBIFS: background thread "ubifs_bgt0_0" started, PID 870
[   33.850000] UBIFS: deferred recovery completed
[....] Activating lvm and md swap...done.
[....] Checking file systems...fsck from util-linux 2.20.1
done.
[....] Cleaning up temporary files... /tmp. ok
[....] Mounting local filesystems...done.
[....] Activating swapfile swap...done.
[....] Cleaning up temporary files.... ok
[....] Setting kernel variables ...done.
[....] Configuring network interfaces...done.
[....] Cleaning up temporary files.... ok
INIT: Entering runlevel: 2
[info] Using makefile-style concurrent boot in runlevel 2.
[....] Starting OpenBSD Secure Shell server: sshd. ok
Debian GNU/Linux jessie/sid shadow ttyS0
shadow login: root
Password:
Last login: Thu Jan  1 00:16:23 UTC 1970 from 192.168.0.1 on pts/0
Linux shadow 3.10.28-shadow1-00032-gb8b1a50 #141 Thu Aug 21 14:23:26 MSK 2014 armv6l
The programs included with the Debian GNU/Linux system are free software;
the exact distribution terms for each program are described in the
individual files in /usr/share/doc/*/copyright.
Debian GNU/Linux comes with ABSOLUTELY NO WARRANTY, to the extent
permitted by applicable law.
root@shadow:~# uname -a
Linux shadow 3.10.28-shadow1-00032-gb8b1a50 #141 Thu Aug 21 14:23:26 MSK 2014 armv6l GNU/Linux
root@shadow:~#
The first thing that attracts attention is the line “EasyNMC DSP Framework © RC Module 2014”. Next, the log writes how many NMC cores are found, and based on this, it can be assumed that drivers and utilities are geared to the fact that there will ever be many NMC cores. There is only one NMC core in the processor on this board.
The following many would be interested to know how NMC interacts with Linux. The following information was tested from the developers: three interrupts go to the NMC from ARM. Non-maskable NMI, HP (High Priority) and LP (Low Priority). In the opposite direction as HP and LP. To start the kernel DSP, you need to file an initial reset and pull NMI. This launches the NeuroMatrix IPL code. After the first run, NMC spins in this initial code, which handles the NMI interrupt. Through this initial code, a restart of the application is organized. Everything is pretty simple.
Time for DSP
Half of the article constantly mentions DSP, now it's time to consider in detail how to work with it. To work with it, there is a nmc-utils package, it consists of two utilities and a library:
- nmctl
- nmrun
- libeasynmc (used by the utilities themselves)
The IPL source code for NeuroMatrix, examples, and libeasynmc-nmc (part of this library running on nmc) were also found in the source tree. No binary blobs were found during the excavations; the secret agents of the Free Software Foundation can sleep peacefully.
nmctl
Let's start with the utilities. The first is nmctl. She knows how to load the source code, start, stop, monitor events, send interrupts, and a bunch more.
Nmctl help
root @ shadow: ~ # nmctl --help
nmctl - The EasyNMC control utility
© 2014 RC Module | Andrew 'Necromant' Andrianov
This is free software; see the source for copying conditions. There is NO
warranty; not even for MERCHANTABILITY or FITNESS FOR A PARTICULAR PURPOSE.
License: LGPLv2
Usage: ./nmctl [options] [actions] - operate on core 0 (default)
./nmctl --core = n [options] - operate on selected core
./nmctl --core = all [options] - operate all cores
Valid options are:
--core = id - Select a core to operate on (--core = all selects all cores)
--list - list available nmc cores in this system and their state
--help - Show this help
--force - Disable internal seatbelts (DANGEROUS!)
--nostdio - Do not auto-attach stdio
--debug - print lots of debugging info (nmctl)
--debug-lib - print lots of debugging info (libeasynmc)
Valid actions are:
--boot - Load initcode and boot a core (all cores)
--reset-stats - Reset driver statistics for core (all cores)
--load = file.abs - Load abs file to core internal memory
--start = file.abs - Load abs file to core internal memory and start it
--irq = [nmi, lp, hp] - Send an interrupt to NMC
--kill - Abort nmc program execution
--mon - Monitor IRQs from NMC
--dump-ldr-regs - Dump init code memory registers
ProTIP (tm): You can supply init code file to use via NMC_STARTUPCODE env var
When no env is set nmctl will search a set of predefined paths
One of the main functions is the output of information on the number of NMC cores in the system:
nmctl --list
root @ shadow: ~ # ./nmctl --list
0. name: K1879-nmc type: nmc3 (cold)
IRQs Recv: HP: 0 LP: 0
IRQs Sent: NMI: 0 HP: 0 LP: 0
0. name: K1879-nmc type: nmc3 (cold)
IRQs Recv: HP: 0 LP: 0
IRQs Sent: NMI: 0 HP: 0 LP: 0
nmrun
Next, consider nmrun.
Nmrun help
root @ shadow: ~ # ./nmrun --help
nmrun - The EasyNMC app runner wrapper
© 2014 RC Module | Andrew 'Necromant' Andrianov
This is free software; see the source for copying conditions. There is NO
warranty; not even for MERCHANTABILITY or FITNESS FOR A PARTICULAR PURPOSE.
License: LGPLv2
Usage: ./nmrun [options] myapp.abs [arguments] - operate on core 0 (default)
Valid options are:
--help - Show this help
--core = id - Select a core to operate on (Default - use first usused core)
--force - Disable internal seatbelts (DANGEROUS!)
- nostdio - Do not auto-attach stdio
--nosigint - Do not catch SIGINT
--detach - Run app in background (do not attach console)
Debugging options:
--debug - Print lots of debugging info (nmctl)
--debug-lib - Print lots of debugging info (libeasynmc)
This is a wrapper for DSP code. It runs .abs files on NMC in such a way that all printf with NMC occurs in stdout of this wrapper, and all that we send to stdin receives NMC. There is support for passing parameters, if you list the parameters after the .abs file, they are passed to NMC in the form of argv arguments. The return from main () running on the NMC is passed to nmrun, which it also returns to the system as a regular return code. All this instantly turns a complex DSP program into a regular command line utility, which even a beginner in DSP can handle. The entry threshold is reduced significantly, nothing needs to be changed or specially processed.
Let's try to run the simplest example:
root@shadow:~# nmrun /usr/share/examples/easynmc-0.1/arguments.abs hello world
Application now started, hit CTRL+C to stop it
Hello world! I am the NMC blinking ledz!
I have been given 3 arguments
Argument 0 is nmrun
Argument 1 is hello
Argument 2 is world
App terminated with result 3, exiting
root@shadow:~# echo $?
3
The NMC kernels themselves are present in the system as / dev / nmc0io and / dev / nmc0mem, where:
- / dev / nmc0mem - NMC memory, the same SRAM banks - IM1 + IM3, which were discussed above. Just by doing cat / dev / nmc0mem> dump.bin you can remove the DSP memory dump
- / dev / nmc0io - virtual serial port, you can write and read stdio, including in non-blocking form via poll / epoll
For all other operations - ioctl, the same for both devices, they are used by libeasynmc.
The utilities themselves are built on this library, the sources are also completely open under LGPLv2. A quick inspection reveals that there is a fairly simple and clear synchronous API inside. It would seem, why do we need a synchronous API in the days of node.js? It turned out that DSP drivers support epoll / select not only for stdio, all events from NMC (interrupts, the fact of sending NMI by another process) can be received through poll / epoll. Accordingly, this descriptor can be slipped by your favorite libevent, libuv, etc.
Action
Now, armed with these exercises, let's try to deploy the development environment and build something for NMC. Let's say in MB77.07 we flashed Raspbian, installed toolchains.
Let's start with nmc-utils.
git clone github.com/RC-MODULE/nmc-utils.git
cd nmc-utils
Let's look at what we cloned with github:
- libeasynmc sources are at the root, they are not particularly numerous, since the library is extremely simple. Nmctl source code can be used as a simple example of working with libeasynmc in all its variants
- libeasynmc-nmc contains the source code for the NMC part of the library that we will connect to our NMC projects
- doc / has a detailed description of how to work with the library and how to compile it. Especially useful in the initial stages is the possibility of static assembly of nm * utilities
- ipl / contains the source code of the source code, which runs on NMC
- in examples / there is a bunch of simple examples
Cross-assembly comes down to the following magic:
GNU_TARGET_NAME=arm-module-linux-gnueabihf make
If you need to collect all utilities (nmctl, mnrun) statically:
GNU_TARGET_NAME=arm-module-linux-gnueabihf make STATIC=y
If the board is loaded via NFS and the root is available somewhere nearby, then you can install everything in it by running the following:
DESTDIR=/srv/rootfs/mb7707/ make install
Further, if desired, on .deb based systems, you can collect a bunch of deb packages:
GNU_TARGET_NAME=arm-module-linux-gnueabihf ARCH=armhf make deb
When building deb packages, you need dpkg-deb in the system and you need to specify the deb architecture that will appear in the package: armhf for Raspbian, armel for Debian. At the output we get the files:
- nmc-utils-abs-0.1-armhf.deb - Example binaries are put in /usr/share/examples/easynmc-0.1
- nmc-utils-bin-0.1-armhf.deb - nmctl, nmrun and the libeasynmc.so library itself
- nmc-utils-dev-0.1-armhf.deb - Header files, pkg-config .pc file and more
- nmc-utils-doc-0.1-armhf.deb - README and all the contents of doc /
- nmc-utils-ipl-0.1-armhf.deb - IPL, put in /usr/share/easynmc-0.1/ipl/
Putting all this with your hands is not necessary, since all the latest firmware from the Module already contains all these packages by default.
For his first NMC program, it was decided to play around with sound and do something that would add an echo effect to the NMC in real time. You can use the following pipeline:
arecord | nmrun ./echo.abs | aplay
Where arecord will record data from the microphone and transfer it directly to our DSP, which will add echo and output samples to the output, then transfer them to playback in aplay. To capture the sound, a cheap Chinese USB sound card was used, lying on the shelf for years. In this example, you do not need to use libeasynmc, just normal nmrun.
Before continuing, we need to digress and tell something about the performance of such a solution. stdin / stdout, although the easiest way to exchange data, is still quite slow. They use two ring buffers, each byte must first be written by the ARM kernel to the ring buffer, then read from there to another buffer by the NMC core, processed, the result is written to another ring buffer, from where the ARM will again be copied. To put it mildly, this is not very fast, even though the ring buffers lie in SRAM memory. Therefore, if you need maximum performance, you still have to forget about stdio and the command line and use libeasynmc.
When developing in C / C ++ for NeuroMatrix, several features should be taken into account that can plunge many who have never written anything under the DSP processor into a cultural shock. The following is a list of rakes that you can step on:
- Missing byte addressing. sizeof (char) == 1, sizeof (short) == 1. The pointer in the case of NMC points to 32-bit memory cells. Accordingly, the address in the NMC space can be obtained by a shift of two bits to the right
- Because of the previous paragraph, all ASCII are an array of uint32_t [] in the low byte of each character we need, in high zeros
- nmrun by default tells the driver to reformat the strings back and forth for stdin and stdout (can be disabled)
- NMC does not have an MMU and addresses physical memory. Therefore, we simply cannot pass a pointer to a buffer with data from the application
- Если использовать NMC ядром какую-нибудь периферию напрямую, то лучше выгрузить соответствующие драйвера со стороны Linux. Ни один драйвер не ожидает, что с его регистрами будет работать кто-то еще, кроме него самого
- В чипе есть некоторые блоки (несколько таймеров, например) доступные только со стороны NMC. API можно посмотреть в nc_int_soc.h из состава тулчейна
- Библиотека языка С достаточно спартанская
- Так как NeuroMatrix имеет доступ ко всему адресному пространству, ошибка в коде для него может легко завалить всю систему и вызвать необходимость перезапуска
- Исходя из предыдущего, если выставить плату в интернет, то удаленный атакующий получив доступ к NMC, может потенциально заставить его пропатчить память ядра для поднятия прав в системе. Соответственно права на /dev/nmc надо выставлять очень аккуратно. Иначе получится как в прошлый раз у Samsung с /dev/exynos-mem
- NeuroMatrix состоит из RISC части и векторного ядра. Все, что пишется на C, исполняется на не особенно быстрой RISC части, от которой не следует ожидать чудес производительности. Исполняя код на DSP вы не делаете его по взмаху волшебной палочки идеально быстрым. Реальный выигрыш можно получить только задействовав векторное ядро, на ассемблере. Не все алгоритмы хорошо ложаться на то, что может сделать векторное ядро
We will do an echo in C. For simplicity, the samples will go to NMC 8-bit, respectively, with the reformatting enabled, we will get them on the DSP in the form of 32-bit numbers.
Let's start by taking an example of the hello world project and looking at the contents:
- Makefile - the main makefile
- colorizer.mk - included in the Makefile, here lies the entire output color. The coloring is implemented portable for Windows / Linux / Mac, so it looks very hacky. On Windows, it uses cecho
- easyconf.asm - assembly file with io / args configuration. It contains a couple of macros that specify the size of the area for argc / argv and the size of the ring buffers for stdio.
- K1879.cfg - configuration file of the linker (about it below)
- main.c - actually our file with main ()
Consider a Makefile. It is more or less general and extremely simple. The only thing we need to change is EASYNMC_DIR, the path to the libeasynmc-nmc directory where the NMC part of the libeasynmc library is located. If it is necessary to connect some other libraries, then they will need to be specified in libs.
Makefile
#
# This is a basic Makefile template for a Neuromatrix DSP project
# to be run on Module MB77.07. To compile it you need:
# * Latest NMSDK installed with utilities in your $PATH
# * NEURO environment variable pointing to NMSDK directory
# * Host GCC (Since nmcpp doesn't support generating deps,
#              we use gcc for that)
#
# For verbose build run 'make VERBOSE=y'
#
-include colorizer.mk
-include *.dep
.SUFFIXES:
OBJECTS :=  \
        main.o \
        easyconf.o
TARGET=helloworld
# Set this to libeasynmc-nmc dir. Relative or absolute.
# Make sure you build it prior to building the actual project.
EASYNMC_DIR     = ../../libeasynmc-nmc
CROSS_COMPILE   =
NMCPP_FLAGS     = -DNEURO -OPT2 -inline -I$(EASYNMC_DIR)/include
ASM_FLAGS       = -soc -Sc -Stmp -X-q -I$(EASYNMC_DIR)/include
C2ASM_FLAGS     = -soc -q
#BIG FAT WARNING: easynmc.lib MUST go BEFORE libc
#BIG FAT WARNING: Otherwise argc/argv won't work
LIBS            = easynmc.lib libc05.lib
BUILDER_FLAGS   = -cK1879.cfg -m -heap=0 -heap1=0 -heap2=0 -heap3=0 -stack=20000 \
                  -full_names
IDIRS           = -I. -I"$(NEURO)/include"
LIBDIR          = -l"$(NEURO)/lib" -l"$(EASYNMC_DIR)"
.DEFAULT_GOAL=all
all: $(TARGET).abs
%.asmx: %.cpp
        $(SILENT_DEP)gcc -E -MM $(<) -o$(@).dep
        $(SILENT_NMCPP)$(CROSS_COMPILE)nmcpp -Tp $(NMCPP_FLAGS) $(<) -O$(@) $(IDIRS)
%.asmx: %.c
        $(SILENT_DEP)gcc -E -MM $(<) -o$(@).dep
        $(SILENT_NMCPP)$(CROSS_COMPILE)nmcpp -Tc99 $(NMCPP_FLAGS) $(<) -O$(@) $(IDIRS)
%.o: %.asmx
        $(SILENT_ASM)$(CROSS_COMPILE)asm $(C2ASM_FLAGS) $(<) -o$(@)
%.o: %.asm
        $(SILENT_DEP)gcc -E -MM -xassembler-with-cpp $(<) -o$(@).dep
        $(SILENT_ASM)$(CROSS_COMPILE)nmcc $(ASM_FLAGS) $(<) -o$(@)
$(TARGET).lib: $(OBJECTS)
        -$(SILENT_LIBRARIAN)$(CROSS_COMPILE)libr -c $(@) $(^) > /dev/null
$(TARGET).abs: $(OBJECTS)
        -$(SILENT_LINKER)$(CROSS_COMPILE)linker  $(BUILDER_FLAGS) -o$(@) $(^) $(LIBS) $(LIBDIR)
$(TARGET).dump: $(TARGET).abs
        -$(SILENT_NMDUMP)$(CROSS_COMPILE)nmdump -f $(^) > $(@)
run: $(TARGET).abs
        edcltool -f run_nmc_code.edcl -i eth1
clean:
        -$(SILENT_CLEAN)rm -f *.asmx; rm -f *.o; rm -f $(TARGET).abs $(TARGET).dump *.dep \
        *.ac *.map *~ *.abs *.lib
I draw attention to the path to the easynmc.lib libraries - without it, stdin / stdout, argc / argv and the return code will not work, the documentation also states that it should go before the C library. The
second most important file is mb7707brd.cfg , for the compiler NeuroMatrix has the same role as the script for gcc LD. Here you can arrange the sections in different places in memory. The default values are quite sane and you can safely use them:
.cfg
MEMORY
{
        //-------------- NMC ---------------------------------------
        LOADERMEM:              at  0x00000000,         len = 0x00000200;
        IM1:                    at  0x00000200,         len = 0x0000fe00;
        IM3:                    at  0x00010000,         len = 0x00010000;
        //------------- ARM ----------------------------------------
        INTERNAL_MEMORY0:       at      0x00040000,     len = 0x00010000;       // 256K-IM0 ARM         (ARM:0x00100000 0x0013ffff      0x4000(256kB))
        INTERNAL_MEMORY2:       at      0x20040000,     len = 0x00010000;       // 256K-IM2 ARM         (ARM:0x80100000 0x8013ffff      0x4000(256kB))
        //------------- DDR ----------------------------------------
        EXTERNAL_MEMORY0:       at      0x10000000,     len = 0x10000000;       // 16MB-EM0-DDR         (ARM:0x40000000 0x7fffffff)
        EXTERNAL_MEMORY1:       at      0x30000000,     len = 0x10000000;       // 16MB-EM1-DDR         (ARM:0xc0000000 0xffffffff)
}
SEGMENTS
{
        code            : in IM3;
        data            : in IM1;
}
SECTIONS
{
        .text                           : in code;
        .init                           : in code;
        .fini                           : in code;
        .data                           : in code;
        .bss                            : in code;
        .stack                          : in code;
        .heap                           : in code;
        .heap1                          : in code;
        .heap2                          : in code;
        .heap3                          : in code;
}
Speaking of memory map - it can be taken at http://www.module.ru/mb7707/doc/K1879-memory-map.pdf
After building with the make command, the output will be two files - hello.abs and hello.dump. abs file is an ELF with absolute addresses in the NMC address space. It can be loaded into IM1 or IM3 banks when we work from Linux on the board, since the Linux kernel is responsible for all the remaining memory, while working with edcl the rules are easier and we can lay out sections throughout the address space. dump is a disassembled listing that may be useful to someone who knows assembler under NMC.
Moving on, one assembler file is connected to the project - easyconf.asm. The assembler here is quite sophisticated, with macros and other joys of life. In easyconf lies the configuration of stdio and arguments, which is done literally by two macros:
.asm
import from "easynmc/easynmc.mlb";
/* Declare 2 circular buffers for stdio */
const EASYNMC_IOBUFLEN = 128;
EASYNMC_CBUF(".easynmc_stdin",  _easynmc_stdin_hdr,  _easynmc_stdin_data,  EASYNMC_IOBUFLEN);
EASYNMC_CBUF(".easynmc_stdout", _easynmc_stdout_hdr, _easynmc_stdout_data, EASYNMC_IOBUFLEN);
/* Reserve 128 32-bit words for arguments */
EASYNMC_ARGS(128);
This code reserves a place in the abs file for arguments and ring buffers, you can see that 128 bytes are output on stdio, as well as on arguments. If nmrun passes more than 128 characters of arguments when starting this program, nmrun will throw an error.
Finally, consider main.c, which looks pretty simple:
main.c
#include
#include
#include
#include
#include
int main(int argc, char** argv)
{
        printf("Hello world from NeuroMatrix! I am the NMC printf'ing to you!\n");
        return 0;
}
It was a standard hello world project, now it's time to modify it for our task. We proceed as follows, we give the size of the delay buffer somewhere around 200ms, with a sampling frequency of about 1600 samples. We round up to the nearest value of the power of two and get 2048. Since the NMC in the floating point is most likely not strong (although the compiler eats floats), we will do everything in integers, and we will make the attenuation bit shift.
You get something in the spirit of this:
main.c
#include
#include
#include
#include
#include
#define SIZE 2048
static unsigned int delaybuf[SIZE];
static unsigned int pos;
int main()
{
	while(1) {
		unsigned int in = getc();
		unsigned int out = in + (delaybuf[pos] >> 2);
		if (out >255)
			out = 255;
		delaybuf[pos++] = in;
		pos &= (SIZE -1);
		putc(out);
	}
}
We assemble, copy abs to the board. By default, the board has only one ALSA device - HDMI. We want to use output / input from a USB sound card. You need its name in ALSA, this is done quite simply, using -L to arecord or aplay. The result should be like this:
arecord -D default:CARD=Device | nmrun echo.abs | aplay -D default:CARD=Device
We connect the microphone and headphones and enjoy, we just wrote the first application for the domestic DSP processor.
Conclusion
Perhaps this is all for today. It remains to draw conclusions. MB77.07 leaves a positive impression, if, of course, you close your eyes to a rather weak ARM. We list the general pros and cons:
+ Officially open source of everything that is possible, from the bootloader to the IPL code of the DSP processor. On github from the chip manufacturer. Among other manufacturers, this is possible only with Freescale and Qualcomm (Code Aurora). Usually, at best, they dump everything in the form of a GPL source-drop in the form of servers packed in rar tar'ov on ftp servers, raking then this is a special pleasure. Still, it happens, they throw everything off with a huge folder together with a .git index.
+ DSP kernel, compiler and toolkit for it. Initially, it was thought out so that it would be very simple for a beginner to work, for a start, read on the K&R diagonal is enough. Especially considering that NMC in this configuration can easily provide hard realtime - for robotics and machine tool operators this is just a godsend.
+ Drivers. It cannot be said that the ideal, but frank horror like Allwinner (libnand), Rockchip (rk_fb, rknand), Mediatek (in general, everything) and the like were not noticed. Everywhere they try to use standard kernel subsystems. If there is a community or the desire of developers, most of them can easily get into the mainline. There are no proprietary blobs in the core.
+ Kernel version. Now there is 3.10 LTS, in the fall, the developers decided to think about the next LTS. For comparison, the kernel in linux-sunxi community is 3.4, and in upstream there is practically no multimedia. Rockchip only recently squeezed out 3.10.x with a very large creak and only for rk3288. All attempts to start this business with the popular rk3188 failed - the MMC controller does not work. HardKernel ODROID sits on 3.8.y linux-stable + ubuntu merge, although there is a movement towards support in the mainline.
+ Indestructibility. Even if you physically kill NAND or unsolder, MB77.07 can be revived and downloaded via EDCL. Therefore, such a board may be useful for beginners who want to learn how to lift the bootloader, operating system, etc. on bare metal. You can not be afraid to kill the board. In the case of jambs like on the RK3188, you will never need to shorten the NAND legs for flashing the bootloader here.
+ deb packages, repositories, and more. Much has been done without waiting for the community to appear, much remains to be done.
+ Interestingly divorced, all the connectors on one side are much more convenient than on r-pi.
- Price. This fact, of course, spoils raspberries (pun intended)
- No RTC. For many projects, it may not be important, but it may be required. Plus, the system has to raise ntp first.
- Performance. Yes, 324MHz ARM1176 is not particularly fun. It is partly compensated by the fact that both ARM and NMC can execute their code from on-chip memory, from where they work simply reactively, but nonetheless. Let's hope that it will be more interesting later and the Module will not quit OpenSource and we will see their next projects, already on more productive solutions.
- The complexity of the order. Here it’s purely a matter of convenience and more likely a question for marketing than for engineers. The module’s website lacks a huge fat button “buy” in the split screen and instant payment through qiwi.
References
- The official account of Scientific and Technical Center "Module" on github: github.com/RC-MODULE
- Product page at of. website: www.module.ru/catalog/micro/micro_pc
- Page processor at the office. website: www.module.ru/catalog/micro/mikroshema_dekodera_cifrovogo_televizionnogo_signala_sbis_k1879hb1ya
- Page with binary software and documents on the "Module" website: www.module.ru/mb7707
- Github ierton with mboot sources: github.com/ierton
- Unofficial barebox port (found by google): github.com/frantony/barebox/tree/next.mb7707.20140416