Unity3D + Google Services: multiplayer for your Android and iOS project
In this article I want to talk about the use of Google gaming services in your Unity application. To write this material I was prompted by a fairly large number of problems encountered during the development of our application, as well as the lack of any materials in Russian on this topic. And actually, in English too. The description of the plugin used on the github is very short and does not provide an answer to possible problems with the operation of services. I think it’s not worth explaining here that multiplayer and player ratings often increase the interest of users, and therefore your potential profit. And thanks to this article, novice developers will be able to start using these advantages.
Plugin
We used the free Play Games For Unity plugin . It contains libraries for working with Google services. The plugin includes user authorization on Google+, the ability to use achievements and ratings for players, Google clouds to store data and organize multiplayer both in real time and in a step-by-step mode. Installing the plugin does not cause any difficulties: in Unity you need to select the asset import (Assets-> ImportPackage-> CustomPackage) and in the window that opens, select the asset located in the current-build folder.
Next, you need to enter the id of your application: open the “Google Play Games” drop-down list and select “Android Setup”. You can find the application id in the Google Developer Console. It is issued after adding a new application to the "Game Services", you can see it next to the name of your game. After adding id, you can go directly to the code.
To initialize the plugin, use the following code:
// Подключаем необходимые библиотеки
using GooglePlayGames;
using UnityEngine.SocialPlatforms;
 // Активирует платформу Google Play Games
    PlayGamesPlatform.Activate();
PlayGamesPlatform.Activate (); it is enough to call only once after starting your application. After initialization, you can access the platform using Social.Active.
To implement user authorization, use the following code:
 ...
    // Аутентификация пользователя:
    Social.localUser.Authenticate((bool success) => {
       // Код, выполняемый после удачной или неудачной попытки.
    });
The success variable takes the value true if the input is successful and false, respectively, if the input is unsuccessful. In our case, upon successful login, the method for loading the required given user from the Google cloud is called. And immediately the first problem we encountered on the way: the method is called, but if it fails, it does not return false, and therefore authorization does not pass and there is no way to call the method again with (! Success). I had to write a crutch that calls the method at a certain interval until authorization passes (provided that the user has confirmed the authorization request before that).
After user authorization, we get the opportunity to use Google services.
Raise the multiplayer
Some of this is described on the github, some on developers.google. Here I collected a useful squeeze.
There are 4 multiplayer modes available in the plugin:
- Creating a room with random players (quick play)
- Creating a room with an invitation screen (allows you to invite friends from Google+ circles to the game)
- Invitations overview (allows you to see which friends on Google+ want to invite you to the game)
- Invitations by id (we won’t consider it, because we did not use this mode in our application; those interested can read about it via the link on Github)
In order to facilitate the work with the following functions, your class should inherit from the RealTimeMultiplayerListener interface.
Create a quick game / connect
A room is created where random opponents are recruited, or there is an automatic connection to the already created room.
const int MinOpponents = 1, MaxOpponents = 3;
    const int GameVariant = 0;
    PlayGamesPlatform.Instance.RealTime.CreateQuickGame(MinOpponents, MaxOpponents, GameVariant, listener);
Obviously, the minimum and maximum number of players is determined by the variables MinOpponents, MaxOpponents. In our game MaxOpponents = 1, this means that in multiplayer you will have only one opponent.
If your class inherits from RealTimeMultiplayerListener, then instead of listener you need to write this.
Creating a room with an invitation screen
Almost identical to the previous one. The player can invite friends from Google+ or add random opponents.
const int MinOpponents = 1, MaxOpponents = 3;
   const int GameVariant = 0;
   PlayGamesPlatform.Instance.RealTime.CreateWithInvitationScreen(MinOpponents, MaxOpponents, GameVariant, listener);
Invitation Overview
PlayGamesPlatform.Instance.RealTime.AcceptFromInbox(listener);
A menu will open in which the player can see his Google+ invitations.
Connection to the room
The following method allows the user to show the load during creation or connection to the room:
public void OnRoomSetupProgress(float progress) {
       // (процесс загрузки отображается от 0.0 до 100.0)
    }
In our case, we simply output the variable progress.
When the connection to the room was successful (or not), the following method is called:
public void OnRoomConnected(bool success) {
       if (success) {
           // Выполняется при успешном соединении
           // …можете начинать игру…
       } else {
           // Выполняется при неудачном соединении
           // …сообщение об ошибке…
       }
    }
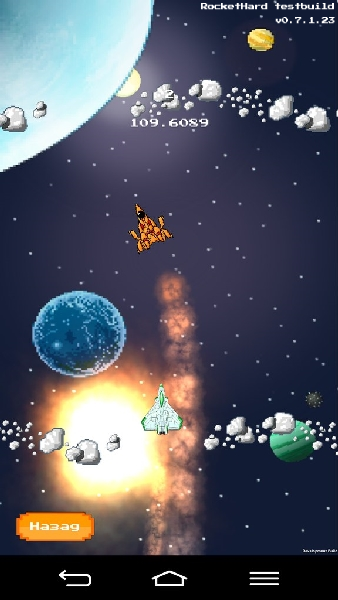
In our game, for every online race obstacles are generated randomly, and accordingly their position should be the same on both phones. Upon successful connection, a host is selected from the list of participants and obstacles are generated on its phone. After they are generated, the transmission of messages with level parameters to another phone immediately begins, and as soon as the receiving phone has loaded the last obstacle, it sends a message that it is ready and the game starts. The serial number of the spacecraft used is also transmitted so that the correct model is displayed on the screen of another player. Moreover, various service variables are passed that are necessary to determine the readiness of all the parameters necessary for the game.
members id
To find out the id of all participants, including yours, you can use the following code (it can be executed only after connecting to the room).
    using System.Collections.Generic;
    List participants = PlayGamesPlatform.Instance.RealTime.GetConnectedParticipants();
For all participants, the sheet will be sorted the same way.
In order to find out your Id, use the following method:
Participant myself = PlayGamesPlatform.Instance.RealTime.GetSelf();
    Debug.Log("My participant ID is " + myself.ParticipantId);
Sending messages:
The plugin supports 2 types of messages, reliable and unreliable. A reliable message is slower, but guarantees delivery, unreliable faster, but delivery verification is not performed.
To send a reliable message, use the following code:
byte[] message = ....; // сообщение в формате byte[]
    bool reliable = true;
    PlayGamesPlatform.Instance.RealTime.SendMessageToAll(reliable, message);
Accordingly, for unreliable, you should change the reliable variable to false. A message will be sent to all participants in the room except you.
You can also send a message to a specific participant:
byte[] message = ...;
    bool reliable = true;
    string participantId = ...;
    PlayGamesPlatform.Instance.RealTime.SendMessage(reliable, participantId, message);
In this way, you can send a message to yourself by specifying your id in participantId.
The maximum length of one reliable message is 1400 bytes, unreliable 1168 bytes.
There was also a problem: even if you send one message per frame, they are not sent. We still have not figured out what this is connected with, probably they just do not have time to form (maybe someone in the comments will correct me). Therefore, a frame counter was made and messages were sent at a strictly defined interval, measured in frames. Then everything began to work great. During the game, our application involves the constant sending of messages (coordinates and the rotation angle of the spacecraft), therefore unreliable messages are used, because the transmission speed comes to the fore, and if a couple of packets are lost, then it’s okay, with a fairly frequent transmission, people practically don’t will notice this.
We check the receipt of all the necessary messages to start the game:
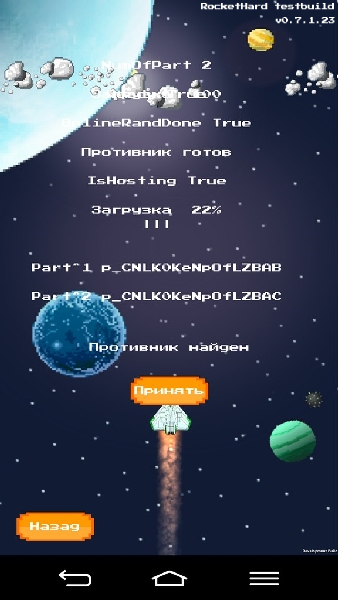
Finally, after dozens of builds and tests, everything started working:
Receiving Messages
When you receive a message, the following method is called:
public void OnRealTimeMessageReceived(bool isReliable, string senderId, byte[] data) {
       // Обработка сообщения
    }
The received message is completely identical to the sent one, both in length and content.
Since our game uses a lot of different messages (whether it’s the coordinates of the ship, or a message about the winnings of one of the participants, etc.), in order to understand which message was received, we took a rather simple and obvious step: the first byte was a number defining , what kind of message and which method to call when it is received, and the transmitted data started from the second byte.
Connection events
If the user disconnects from the room, the following method is called:
public void OnLeftRoom() {
       // Возвращение в меню и показ сообщения об ошибке
       // не вызывайте здесь PlayGamesPlatform.Instance.RealTime.LeaveRoom()
       // вы уже вышли из комнаты
    }
Important: When minimizing the game, the player disconnects from the room. Perhaps for some applications this will be a problem. But in our case, folding would inevitably lead to defeat, in view of the specifics of the game. Therefore, when one of the participants disconnects from the room, the OnPeersDisconnected () method is called, which is described below.
If someone connects or disconnects from the room, the following methods will be called.
public void OnPeersConnected(string[] participantIds) {
       // реакция на появление нового участника
    }
    public void OnPeersDisconnected(string[] participantIds) {
       // реакция на отсоединение участника
    }
Participants can connect at any time during the game, if there are empty slots, and here it is necessary to ensure that the participant does not connect after the game has already begun. You can wait until all the slots are full and only then start the game.
In our game, with an early exit, one of the participants sends a message determining the victory of the opponent and the game ends, and therefore you need to call the following method.
Quit the game
After your game is over, you need to leave the room:
PlayGamesPlatform.Instance.RealTime.LeaveRoom();
After that, OnLeftRoom () will be called.
Conclusion
I hope our article will be useful for both beginners and more experienced Unity developers who have not met with the organization of multiplayer in their projects. If there is interest, I’ll write a continuation about the use of this plugin for working with the Google Cloud, which also encountered difficulties in development, but naturally there were no answers in English / Russian.