Grub 2 + VHD: installing and downloading Windows 7 Ultimate
Introduction
It’s no secret to anyone that starting with the version of Windows 7 Ultimate, Microsoft operating systems can boot when installed on a VHD hard disk image. However, this feature “out of the box” is available only to users of this same Windows 7 Ultimate.
As for me, a convinced Arch Linux user, the need to use this technology arose because of the need to have Windows on hand in a dual boot and in a real environment. 90% of the tasks for which Windows is needed, of course, are solved by virtualization, and the power of modern hardware, and the capabilities of virtual machines, even allow you to play games in a virtual environment. However, there was a need to use the Universal Mechanism package, which works crookedly under wines (I admit that my hands are crooked), and in a virtual environment, of course, it shamelessly loses agility. In general, I needed Windows, but I really did not want to drag the partitions on the screw and change its layout for the sake of installing one program under Windows.
The solution was to implement boot from a VHD image using the Grub2 bootloader, which has become the de facto standard in many popular Linux distributions. This will actually be discussed.
What are the advantages over standard installation of Windows in dualboot with Linux?
- The entire installation and configuration process is performed in the Linux OS environment using the VirtualBox virtual machine manager
- The section where images are stored can be of any type: primary or logical. It does not have to be active.
- The number of installed systems is limited only by the size of the NTFS partition. All systems are isolated from each other.
- MBR rewriting does not occur, Linux bootloader remains untouched
- When replacing the HDD, you can simply copy Linux (the contents of all partitions, more on that here ) to a new screw, recursively with the same attributes, install Grub 2 on a new screw and voila - your Windows systems will be transferred as if nothing had happened. It's comfortable
So, let's move on to the description of the method.
1. Soil preparation
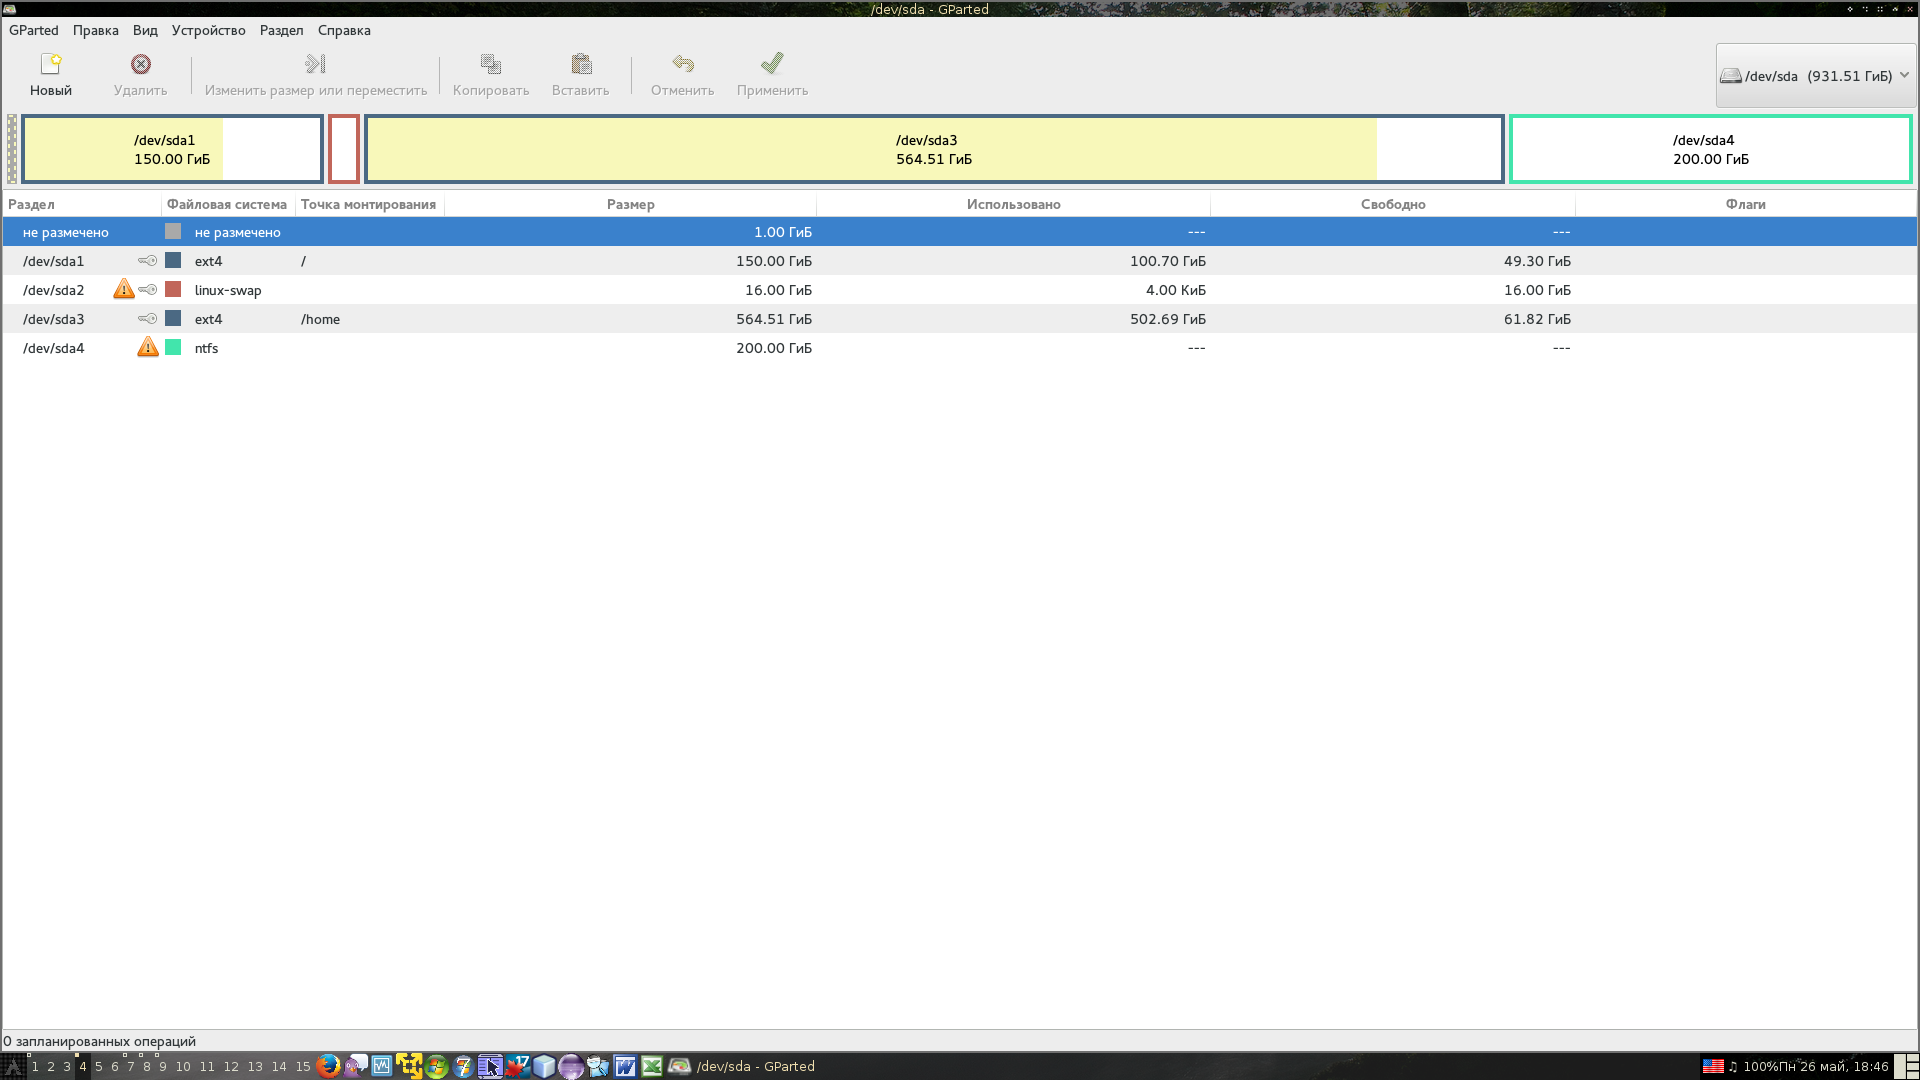
To store images, we still need an NTFS partition, which can be either primary or logical, and not necessarily active. It can be created using gparted , and formatted in NTFS in the same place. I had an unallocated area reserved for various experiments with axes on NDD, and I gave it to this section.
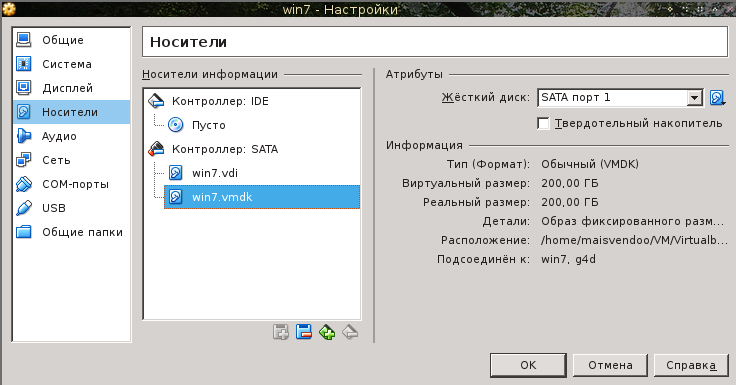
Next we make this section available for VirtualBox virtual machines
$ VBoxManage internalcommands createrawvmdk -filename ~/<Путь к файлу>/win7.vdmk -rawdisk /dev/<раздел>
that is, we create a virtual disk in the form of a file link to a section of a real HDD. We connect this disk to a virtual machine with Windows 7 Ultimate - it will come in handy for us to solve the task
2. Create a VHD image with the system
Now you need to create a VHD image of the HDD. It will have to be created using the tools provided by Windows 7 Ultimate, because the disks created by the same VirtualBox cause the subsequent crash of the loaded Windows in BSOD.
We load the virtual machine with Windows. We go to the panel Control Panel -> System and Security -> Administration -> Computer Management -> Disk Management. On the right side of the window there is a menu where we select the creation of a virtual disk

and then specify the path to it and set its parameters.

It is better to choose a fixed image size - it will work faster.
Click OK and while the process is running, execute
3. Configuring the bootmgr bootloader
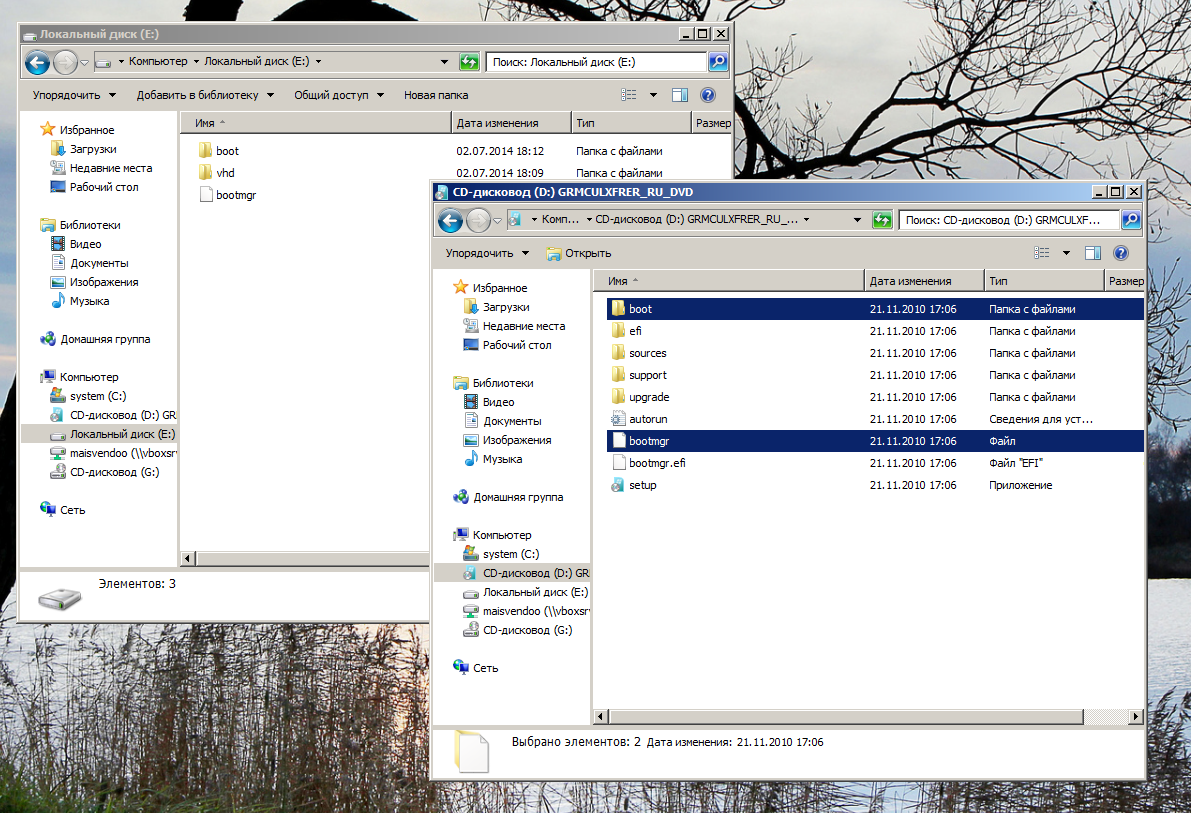
The bootmgr bootloader itself and the directory with its boot config are trivially copied from the Windows 7 installation DVD to the root of the NTFS partition, to the same place as the folder with the VHD disks.
We delete the file \ boot \ bcd , because this container stores the configuration from the boot DVD, and create a new container. To do this, use the tiny bootice utility . Run it, select the “BCD edit” tab.
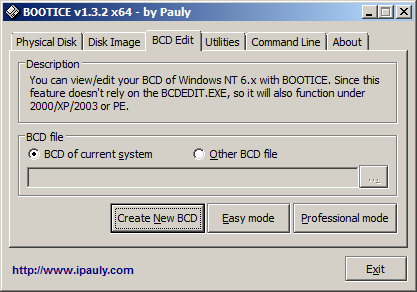
Next, click “Create new BCD”, select the path along which the configuration file will be located and create it with the name BCD. Next, select this file and click “Easy mode” - launch the editor in simplified mode.

The configuration file will open in edit mode, click the “Add” button and select the option “New VHD boot entry”. The editor will create a template for the boot record and we can only enter the path to our image.
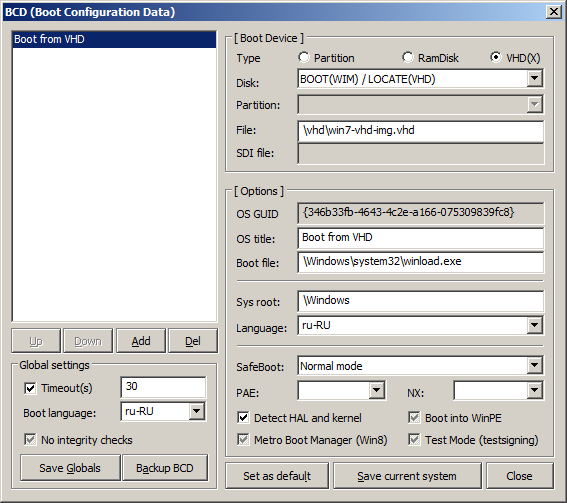
The path to the VHD-file from the root of the section with images is entered in the “File” field. After that, click “Save current system” and exit the program.
We wait until the process of creating a VHD image is completed and we leave the virtual seven.
4. Install Windows 7 Ultimate on a VHD image
Made by VirtualBox. For this:
- Mounted NTFS partition with image in Linux host system
- A virtual machine was created, and the image we created was selected as the disk image
- Installed Windows, standard, without tricks
However, I must say this. We remember that our system is installed in the VM, and therefore some devices are defined at the installation stage and the system slipped the appropriate drivers for them. When run on your real computer with a probability of 99%, you get a BSOD. This is due to the fact that VirtualBox emulates the IDE controller as follows,

and this driver, working in a bootable system, conflicts with what is actually installed on the mat. controller board, when the system tries to read the image file from disk. It is solved simply - we select “Update driver”, we say that we don’t need to search, and we will specify the necessary driver and select “Standard two-channel IDE controller”.

After that, turn off our virtual machine and make it “real”
5. Configuring the Grub2 bootloader
In the Grub2 config, you need to add a boot record of this kind
menuentry “Windows 7 Ultimate SP1″ {
   set root=’hd0,msdos4′
   ntldr /bootmgr
}
where (hd0, msdos4) is the NTFS partition where the VHD images are located.
After that, you can reboot and try ...
Conclusion
After downloading, install the drivers on our real hardware and enjoy life:
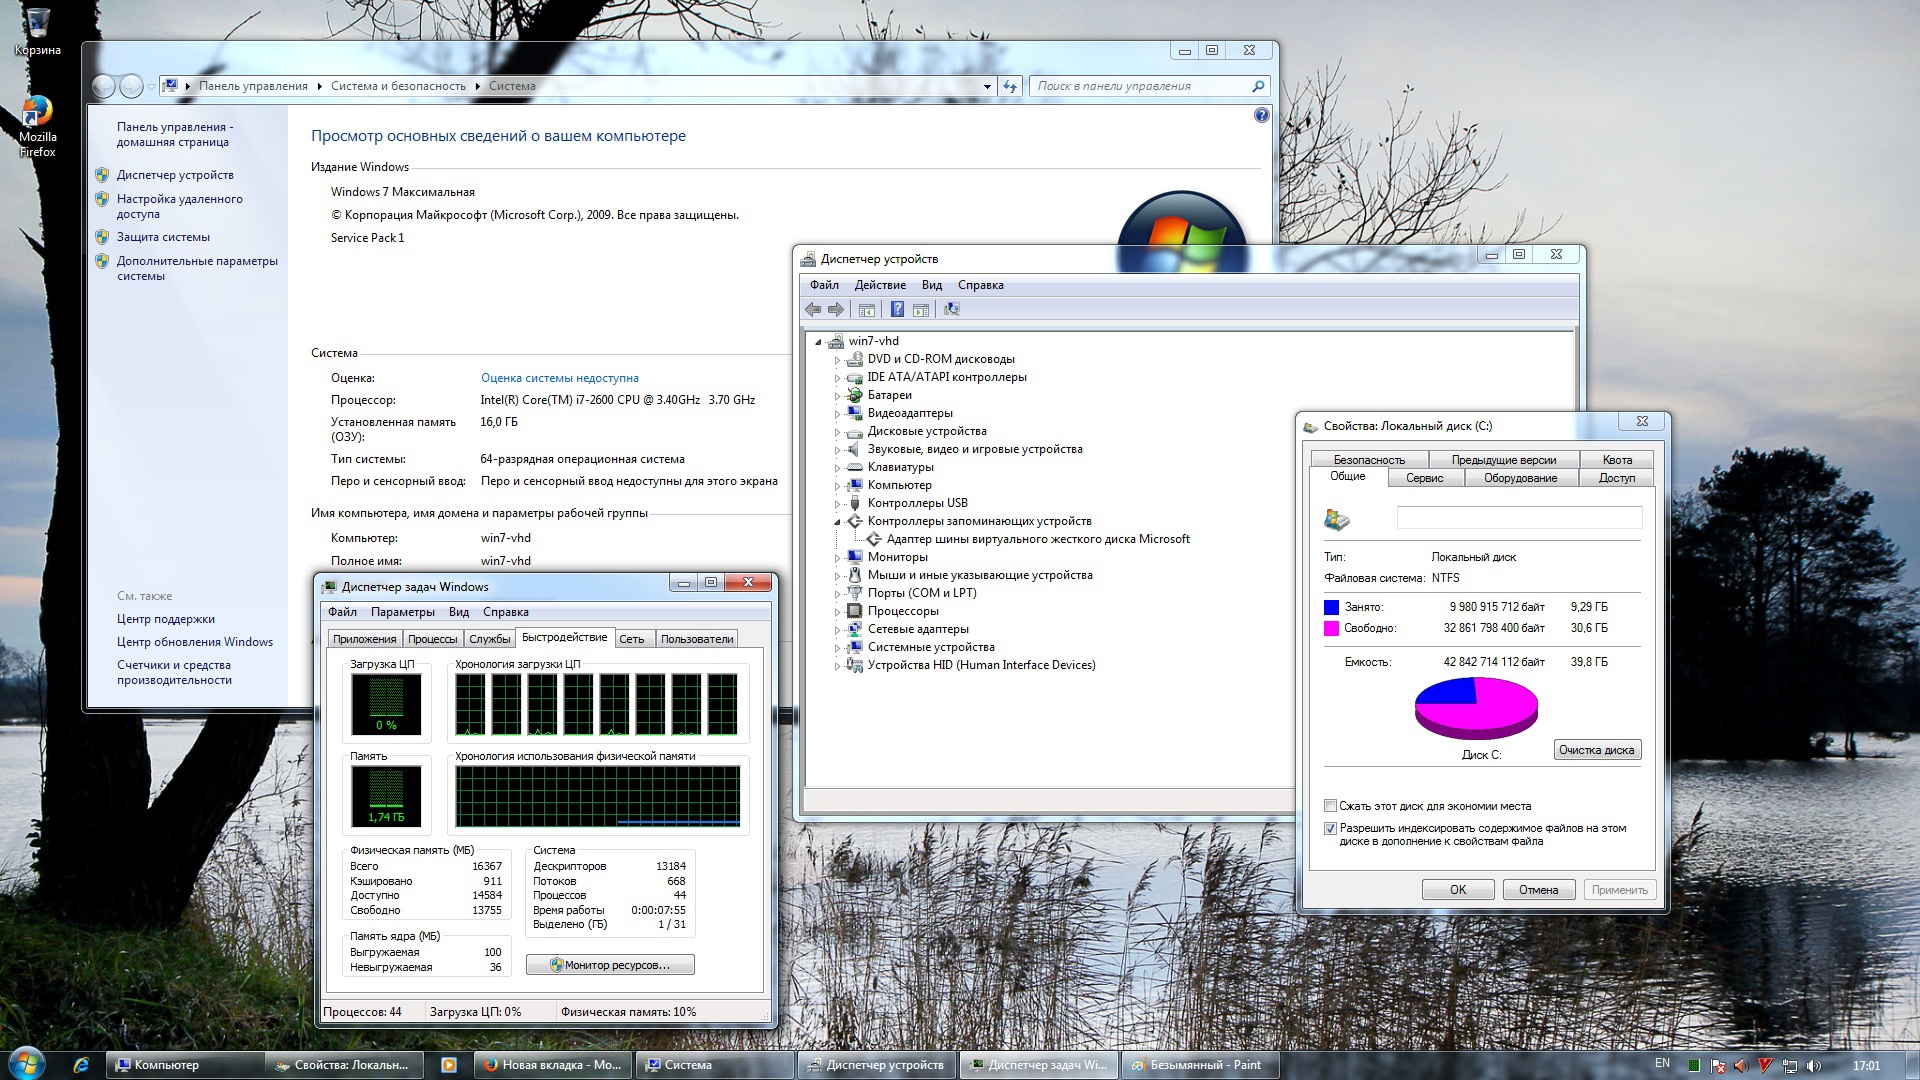
Pictured on the screenshots is a full-fledged OS running on real hardware. But it is just a file on your hard drive. This file can be copied, deleted, moved, archived and more. In addition, this method solves the eternal problem of the conflict of Windows vs Linux on one HDD. Now they peacefully get along with each other and do not spoil each other's life.