The monitor bracket from chipboard, and how to make the DELL 2713HM show native resolution via HDMI
After acquiring a 27 "monitor, thanks to its diagonal, it was decided to use it concurrently as a TV. However, the standard leg did not allow this in view of the location of the computer table relative to the resting place. After reviewing various options for ready-made solutions, I came to the conclusion that in order to please all my If you wish, you will have to do everything yourself,
as well as “earnestly ask” the monitor to be displayed in maximum resolution for HDMI, contrary to the manuals.
Almost all the solutions presented in stores are made of metal, this is cool and effective, but unfortunately I have no way to process it at home. Chipboard became a compromise - durable, affordable material, plus goes well with furniture. Master Alexander, who made the kitchen at that time, agreed to assist in the manufacture of two parts according to a simple sketch, the beginning has been made, we are moving on!
As hinges we use ordinary door hinges. I chose the largest with several bearings, to the fact that they did not attach collapsible values, as it turned out in vain - more on that below in the description of the second release.
Thanks to the design of the native leg, almost all the necessary mechanisms for regulation were extracted from it:
The increase in “monitor coverage” naturally required longer cables.
- Power cable - everything is simple, cut, soldered. I lengthened the cable remaining from the wiring of the apartment by 1.5 sq. Mm. (white)
- Signal cable - I did not solder, I bought a 5m HDMI cable, as it turned out later, not a very good solution.
Laying the cables was not as trivial as I thought, it took me to probe all the positions of the monitor and the bracket to make sure that the bending of the cable would not interfere and their length would be enough, and also remember that they should not break very much on bends. I used a narrow tape for fixing - cheaply, quickly and relatively efficiently.
What was the chagrin when connecting through a brand new long HDMI cable I got the maximum resolution of only 1920x1080 ...
The official position of the DELL support team:
>>> But I just wonder why HDMI on U2713HM does not support 2560x1440?
DELL-Chris M: The $ 699.99 U2713HM has HDMI 1.3 (1920x1080). The $ 999.99 U2713H has HDMI 1.4 (2560x1440).
proof en.community.dell.com/support-forums/peripherals/f/3529/t/19483304.aspx I
sincerely do not understand why there is an interface in the monitor that does not support matrix resolution!
However, after playing with the resolution settings, we managed to achieve the coveted 2560x1440 pixels, though the refresh rate was only 40Hz.
In principle, you can say this is the minimum relatively comfortable level, you can live, but still I plan to purchase a DVI Dual link 24pin 5m cable to raise it to 60Hz.
Update: issue resolved further in R03i01
After the first release and short-term use, an unpleasant bug was discovered - since the loops rotate very easily, due to the slightest distortion of the design, the monitor could not hold in the right positions, and gradually self-balanced in the most comfortable position. A temporary crutch in the literal and figurative sense of the cardboard box is placed under the monitor.
It was decided to correct the situation and the monitor, on the nose the second release.
Despite my hopes, the first segment of the bracket could not cope with the torsion load. With the L-shaped position of the segments there is a very noticeable up-and-down roll of the monitor and, as a result, the sag of the monitor as a whole with a relatively perfectly rigid design.
The panel of the “real” varnished chipboard from the times of the USSR helps us, once there was a headboard from the bed and now it is the reinforcement of the first bracket segment. I had to work hard to saw it with a hacksaw. I drilled, missed with glue, scrolled with screws - done, the rigidity was restored!
The hinges turned out to be with a slight but still backlash, which gave an even greater deviation from the ideal.
We see the difference in the gaps of the upper and lower loops - this is due to play:
We compensate for the sagging and backlash with the help of a substrate under the lower loop - ordinary washers / substrates are difficult to adjust in thickness, so we resort to tricks - we screw in the screws and adjust them:
The main advantage of the hinges is that it is easy to turn, now it plays against us, the monitor does not fix well in the selected position. As previously mentioned, if the hinges were collapsible, it would be possible to fill in something viscous, but alas ...
The sample with sunflower oil did not give results, it should dry and become sticky and sticky, but after a month the loops function easily and smoothly as before, obviously lubrication from the factory prevented the idea.
The part from the furniture hinge comes to the rescue of us - we create something like a brake for the hinge, we adjust the friction to an acceptable fixation:
Initially, it was a piece of rubber, but because of its softness there was a slight recoil after the turn, replaced it with a piece of wood, now after the turn, the exact position fixation.
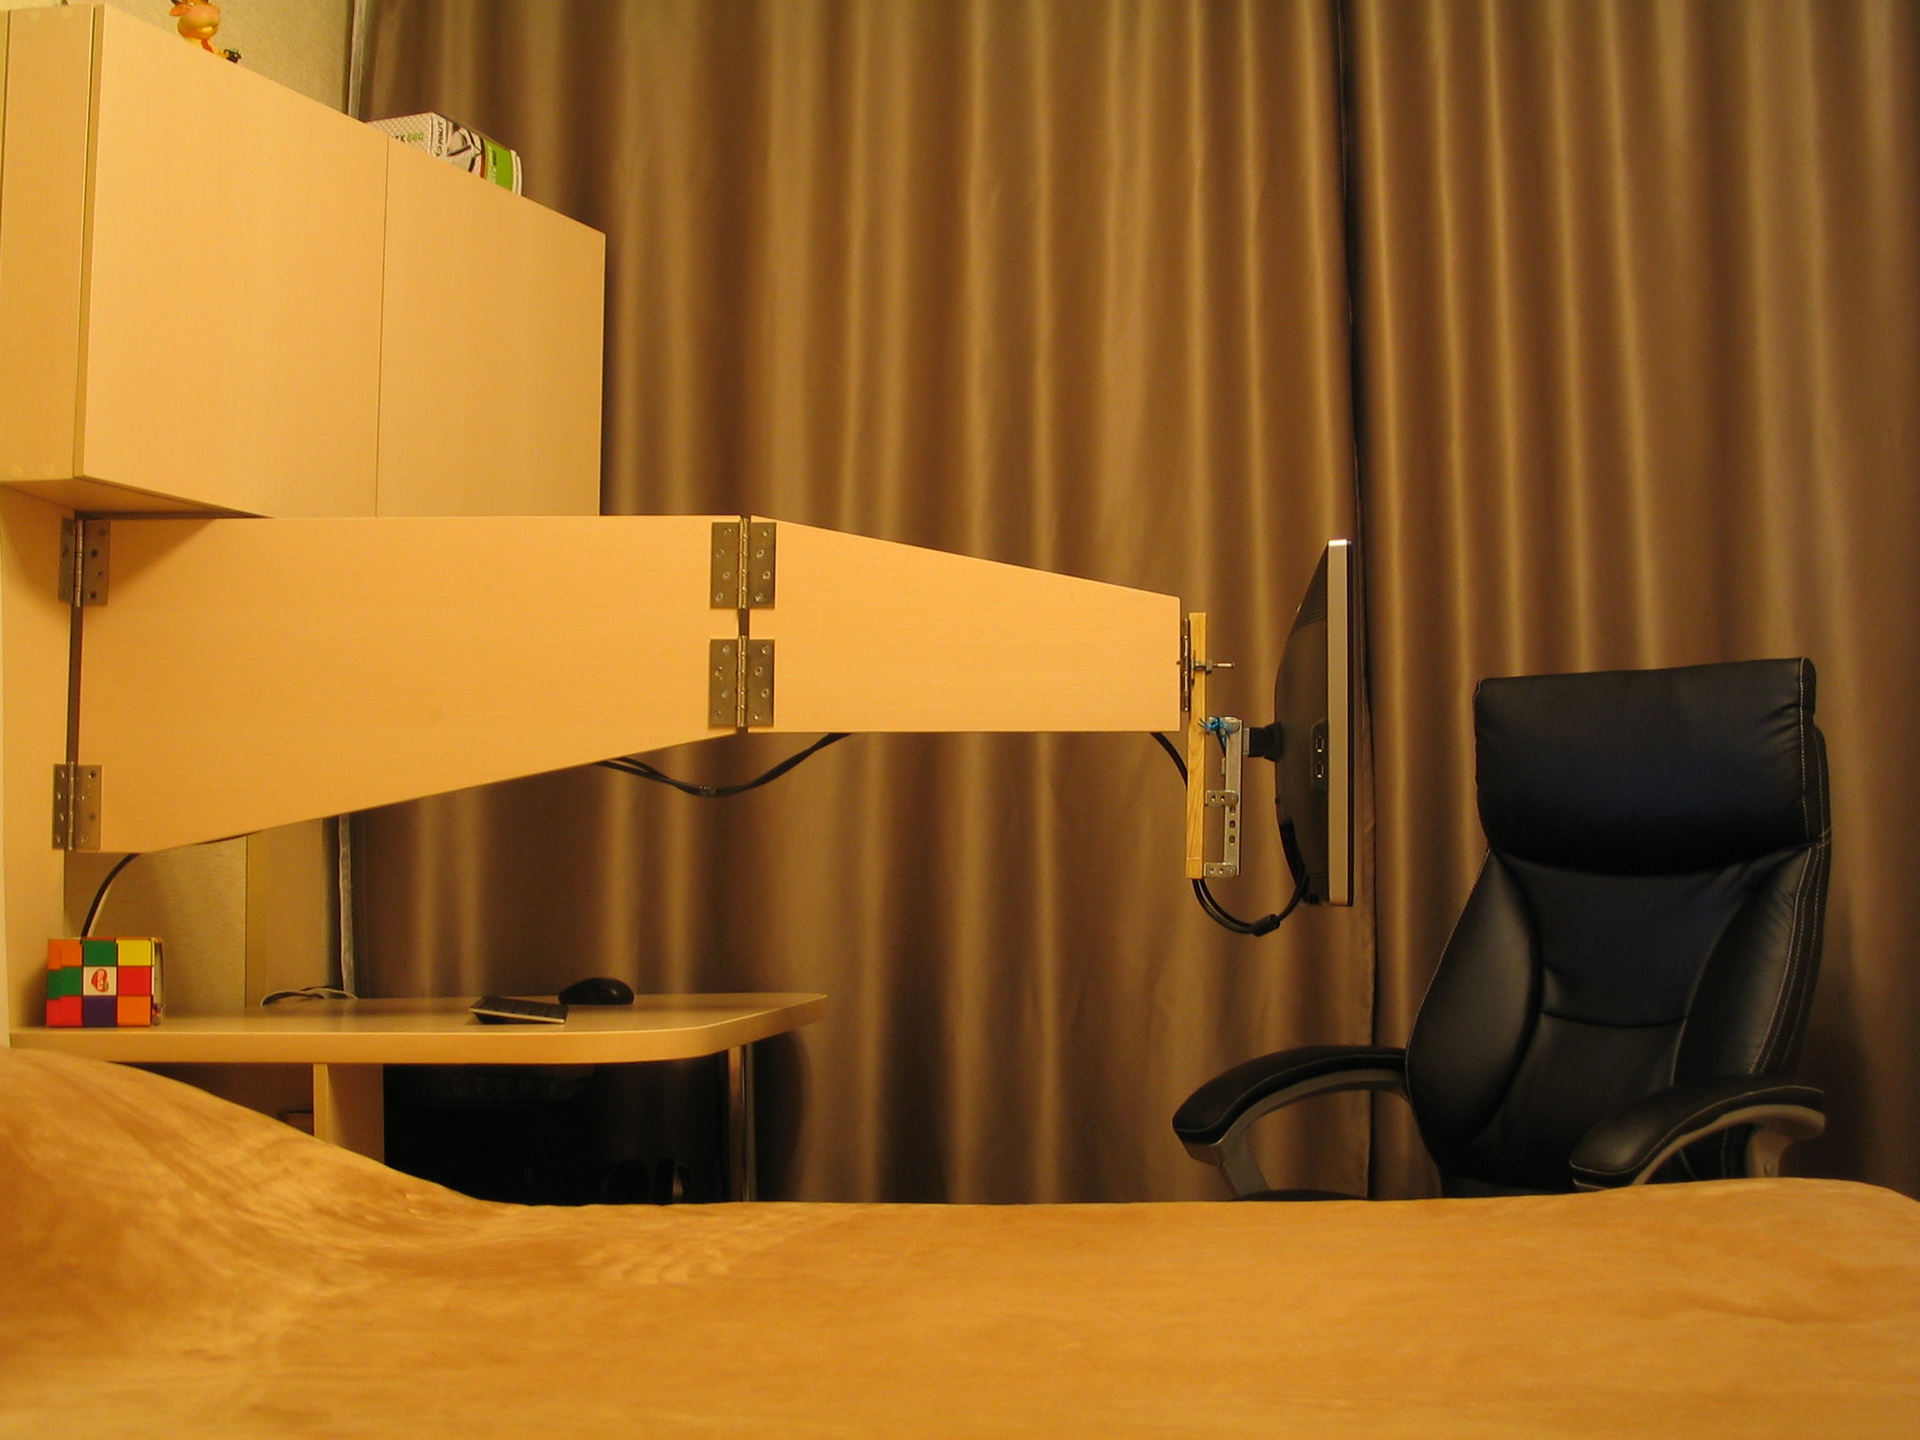
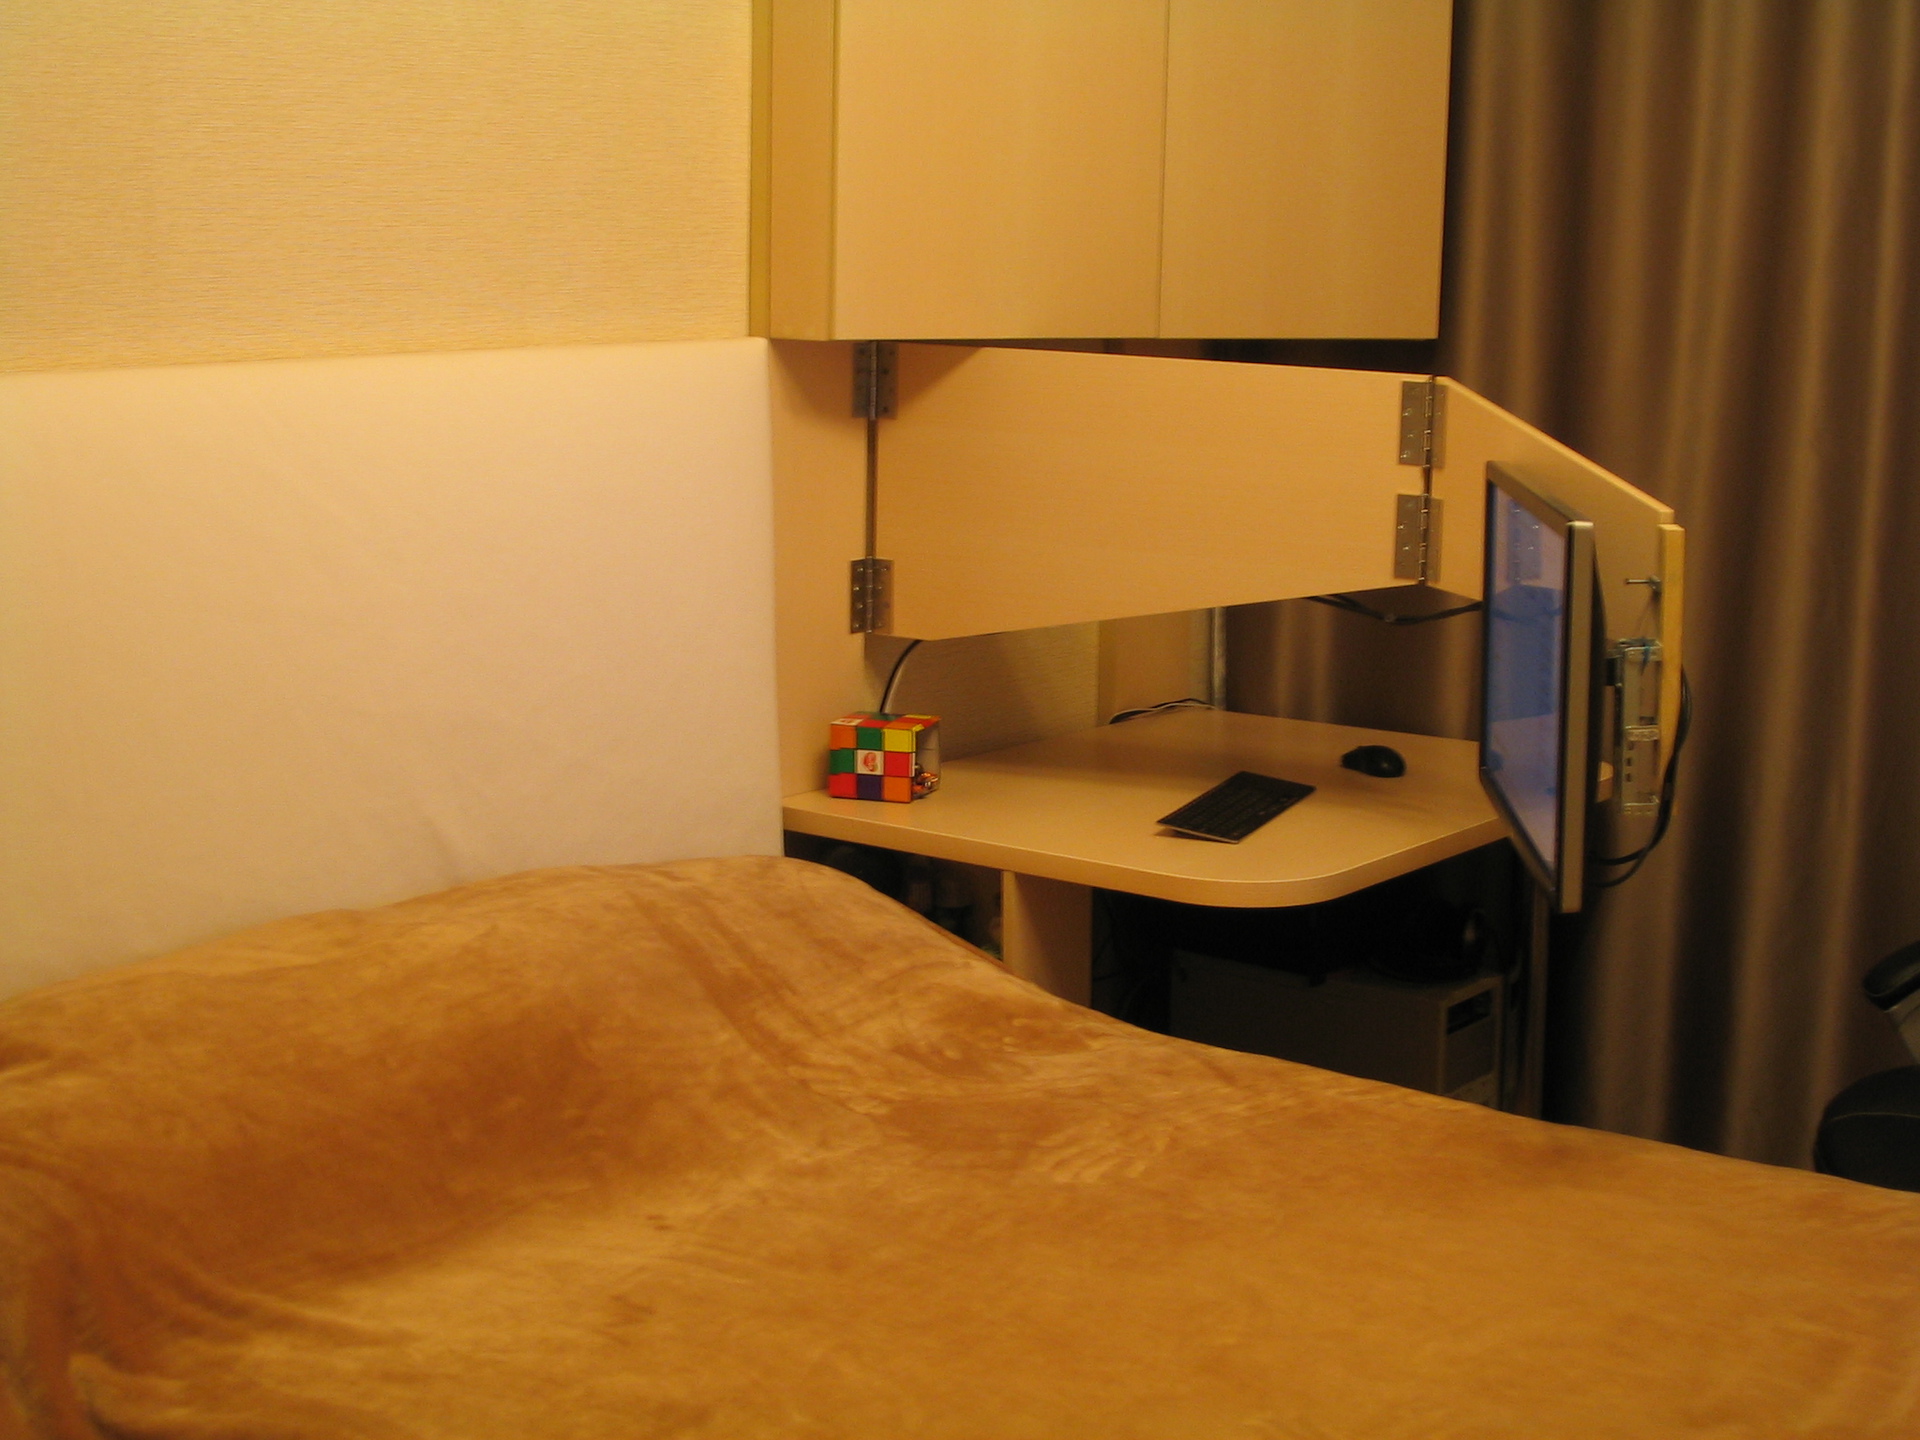
In general, everything turned out as expected, convenient, practical, the maximum possible size of the bracket.
Free up a lot of space under the monitor that occupied the leg:
While the article was expecting its fate in the sandbox, the third release solved the problem with the HDMI interface.
As I wrote earlier, it was planned to purchase another cable for comfortable work: DVI-DVI 5m Dual Link - $ 8 .. $ 10.
While I was searching, choosing, I came across such an HDMI-DVI adapter ~ $ 2, and the store was nearby.
The miracle is wonderful - a penny adapter saves $ 300 ($ 699.99- $ 999.99 see above)
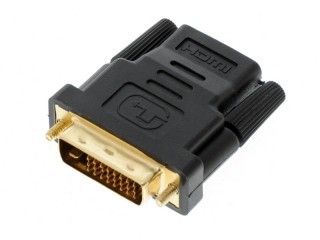
Actually the trick: we connect the HDMI cable through the adapter to the DVI interface of the monitor,
namely, we bypass the poor HDMI interface of the monitor, although we take the signal from the video card from the HDMI port, and the cable is also HDMI.
Profit in my case: no need to replace and reinstall the cable, spent only $ 2 on the adapter instead of as much as $ 10 on the cable.
Please note: we managed to raise it to 65Hz against the standard 60Hz - and this is good.
I liked it very much in use, there are no complaints, all the main problems are fixed, the main ugliness is hidden from the non-visibility side and behind the monitor.
The plans are some little things:
At first, I could not imagine that it would all be so entertaining, I thought how I would twist a couple of pieces of wood with loops and I’m done, but no, here you are.
I wish you all interesting undertakings and their creative solutions!
Update: From the comments I see interest in a couple of points.
1) Material
2) The big lever, the screws will rip out, the chipboard will break.
Yes, the lever is large, but the chipboard and screws are decent:
3) Collective farm
Yes, some knots of collective farms from what was at hand, and honestly showed them in a close-up photo for technical reasons, but this does not mean that it sticks out in all directions and is not aesthetically pleasing.
In general, as I already wrote, all the uglinesses are hidden "behind a screen" and do not cause trouble.
Well, in conclusion, a fact that is relatively difficult to challenge:
For more than 2 months now, the flight is normal, the
screws are not loose, the
monitor does not swing and is quite rigid.
as well as “earnestly ask” the monitor to be displayed in maximum resolution for HDMI, contrary to the manuals.
R01i01 Iron - or rather chipboard
Almost all the solutions presented in stores are made of metal, this is cool and effective, but unfortunately I have no way to process it at home. Chipboard became a compromise - durable, affordable material, plus goes well with furniture. Master Alexander, who made the kitchen at that time, agreed to assist in the manufacture of two parts according to a simple sketch, the beginning has been made, we are moving on!
As hinges we use ordinary door hinges. I chose the largest with several bearings, to the fact that they did not attach collapsible values, as it turned out in vain - more on that below in the description of the second release.
Thanks to the design of the native leg, almost all the necessary mechanisms for regulation were extracted from it:
- heights (not completely) - temporarily fixed with a rope in the upper position, revision is planned
- tilt
- turning
Ported regulatory mechanisms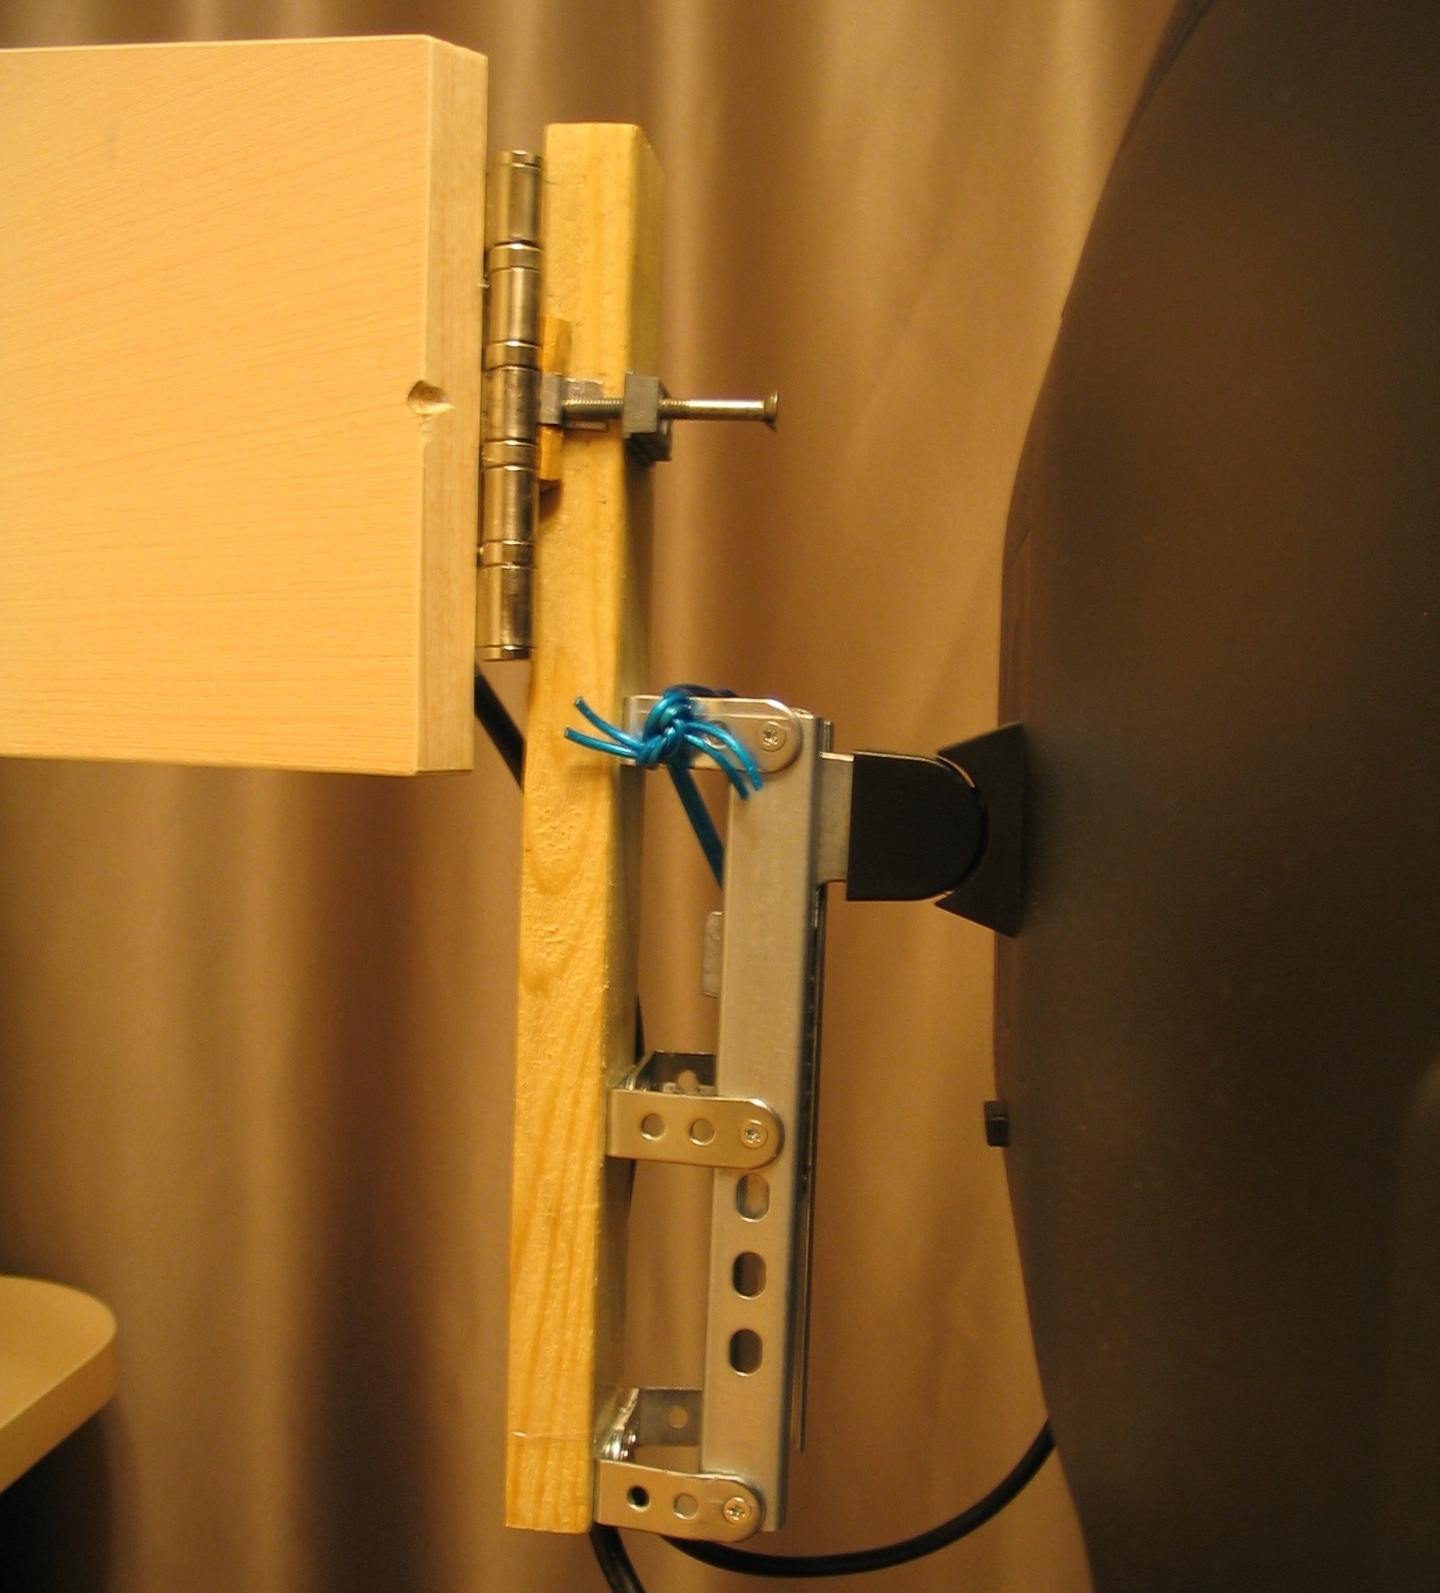
R01i02 Electrics - wiring installation
The increase in “monitor coverage” naturally required longer cables.
- Power cable - everything is simple, cut, soldered. I lengthened the cable remaining from the wiring of the apartment by 1.5 sq. Mm. (white)
- Signal cable - I did not solder, I bought a 5m HDMI cable, as it turned out later, not a very good solution.
Laying the cables was not as trivial as I thought, it took me to probe all the positions of the monitor and the bracket to make sure that the bending of the cable would not interfere and their length would be enough, and also remember that they should not break very much on bends. I used a narrow tape for fixing - cheaply, quickly and relatively efficiently.
Cable management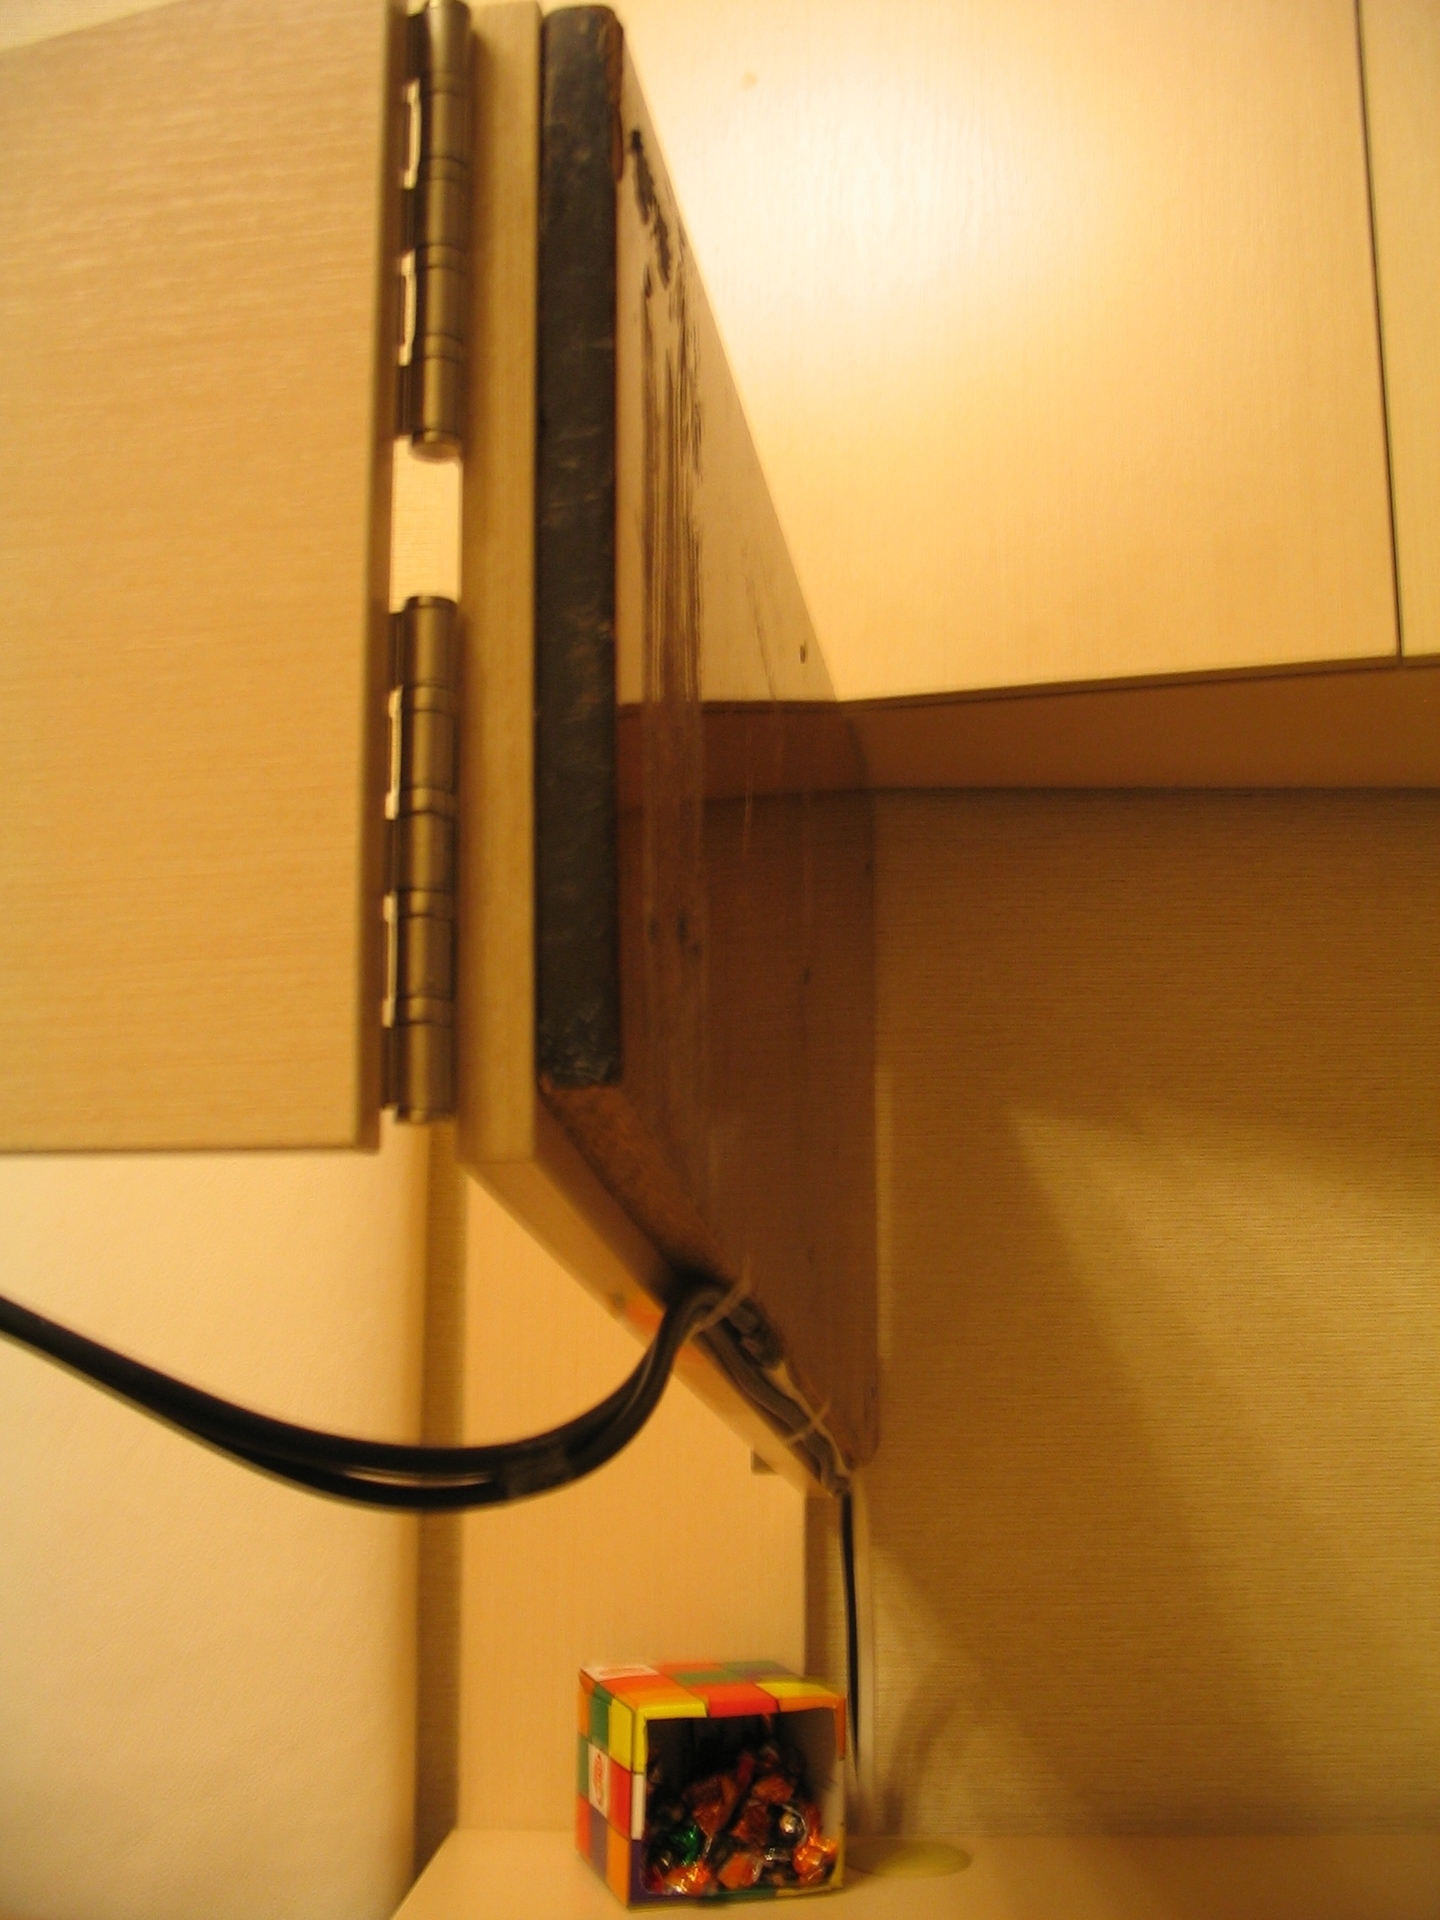
R01i03 Software - like a real programmer, we fix iron bugs with software
What was the chagrin when connecting through a brand new long HDMI cable I got the maximum resolution of only 1920x1080 ...
The official position of the DELL support team:
>>> But I just wonder why HDMI on U2713HM does not support 2560x1440?
DELL-Chris M: The $ 699.99 U2713HM has HDMI 1.3 (1920x1080). The $ 999.99 U2713H has HDMI 1.4 (2560x1440).
proof en.community.dell.com/support-forums/peripherals/f/3529/t/19483304.aspx I
sincerely do not understand why there is an interface in the monitor that does not support matrix resolution!
However, after playing with the resolution settings, we managed to achieve the coveted 2560x1440 pixels, though the refresh rate was only 40Hz.
Settings screenshot for 2560x1440 @ 40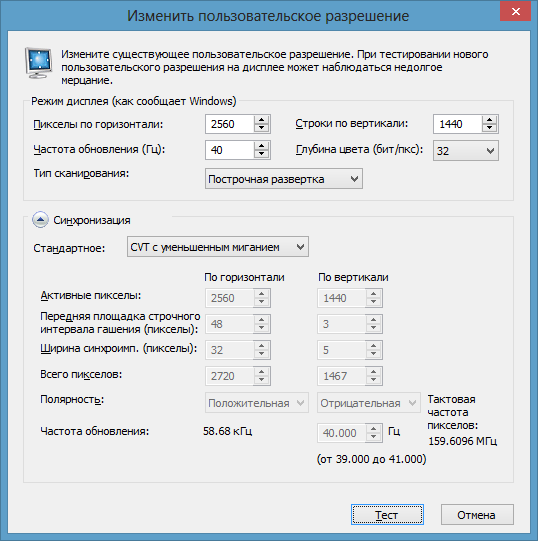
In principle, you can say this is the minimum relatively comfortable level, you can live, but still I plan to purchase a DVI Dual link 24pin 5m cable to raise it to 60Hz.
Update: issue resolved further in R03i01
R01 testing Chef, everything went!
After the first release and short-term use, an unpleasant bug was discovered - since the loops rotate very easily, due to the slightest distortion of the design, the monitor could not hold in the right positions, and gradually self-balanced in the most comfortable position. A temporary crutch in the literal and figurative sense of the cardboard box is placed under the monitor.
It was decided to correct the situation and the monitor, on the nose the second release.
R02i01 Yes, I’ll twist you into a ram’s horn!
Despite my hopes, the first segment of the bracket could not cope with the torsion load. With the L-shaped position of the segments there is a very noticeable up-and-down roll of the monitor and, as a result, the sag of the monitor as a whole with a relatively perfectly rigid design.
The panel of the “real” varnished chipboard from the times of the USSR helps us, once there was a headboard from the bed and now it is the reinforcement of the first bracket segment. I had to work hard to saw it with a hacksaw. I drilled, missed with glue, scrolled with screws - done, the rigidity was restored!
Reinforced construction + final cable management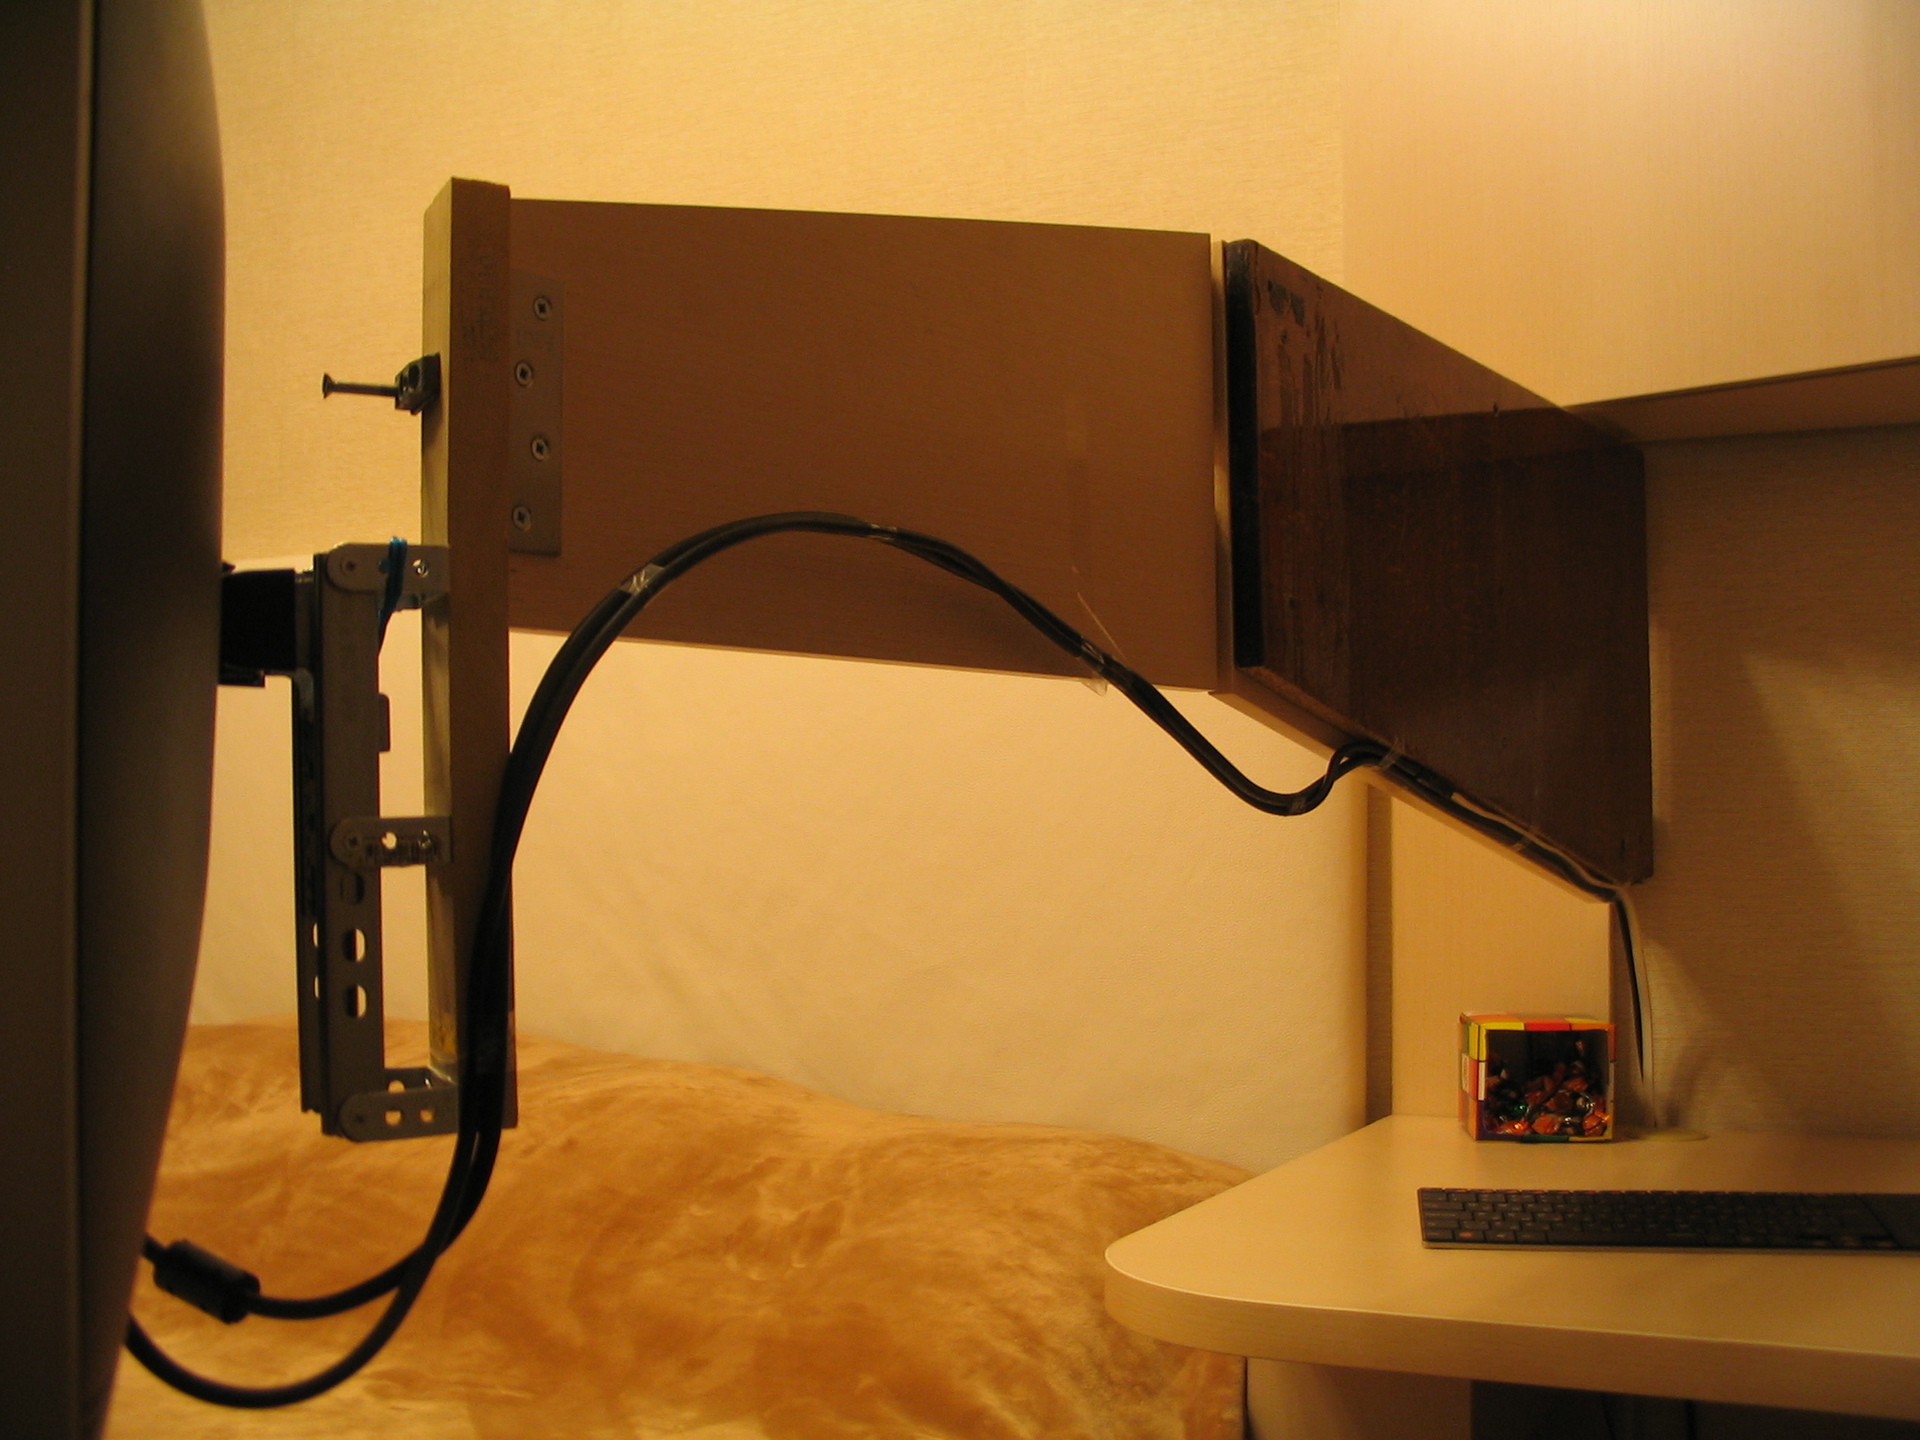
R02i02 Backlash loops
The hinges turned out to be with a slight but still backlash, which gave an even greater deviation from the ideal.
We see the difference in the gaps of the upper and lower loops - this is due to play:
Skew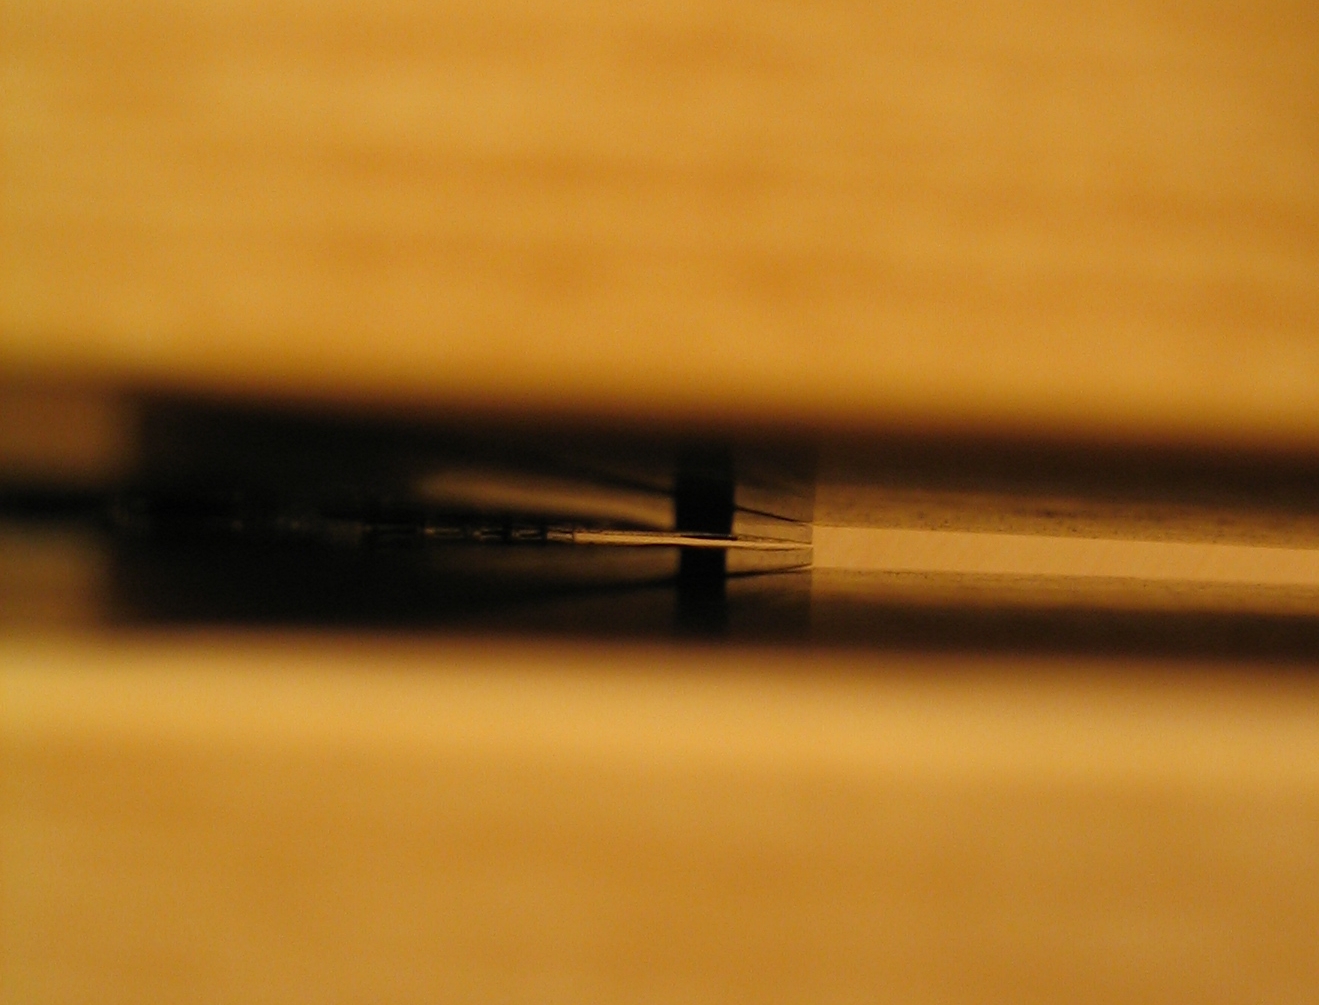
We compensate for the sagging and backlash with the help of a substrate under the lower loop - ordinary washers / substrates are difficult to adjust in thickness, so we resort to tricks - we screw in the screws and adjust them:
We adjust almost like a door on the refrigerator
R02i03 Plus - Minus
The main advantage of the hinges is that it is easy to turn, now it plays against us, the monitor does not fix well in the selected position. As previously mentioned, if the hinges were collapsible, it would be possible to fill in something viscous, but alas ...
The sample with sunflower oil did not give results, it should dry and become sticky and sticky, but after a month the loops function easily and smoothly as before, obviously lubrication from the factory prevented the idea.
The part from the furniture hinge comes to the rescue of us - we create something like a brake for the hinge, we adjust the friction to an acceptable fixation:
Damping mechanism
Initially, it was a piece of rubber, but because of its softness there was a slight recoil after the turn, replaced it with a piece of wood, now after the turn, the exact position fixation.
R02 testing Plans for R03
In general, everything turned out as expected, convenient, practical, the maximum possible size of the bracket.
Free up a lot of space under the monitor that occupied the leg:
Hooray! There is even more room for creative mess!
Sandbox Update R03i01 Scammed monitor - maximum quality via HDMI cable!
While the article was expecting its fate in the sandbox, the third release solved the problem with the HDMI interface.
As I wrote earlier, it was planned to purchase another cable for comfortable work: DVI-DVI 5m Dual Link - $ 8 .. $ 10.
While I was searching, choosing, I came across such an HDMI-DVI adapter ~ $ 2, and the store was nearby.
The miracle is wonderful - a penny adapter saves $ 300 ($ 699.99- $ 999.99 see above)
Actually the trick: we connect the HDMI cable through the adapter to the DVI interface of the monitor,
namely, we bypass the poor HDMI interface of the monitor, although we take the signal from the video card from the HDMI port, and the cable is also HDMI.
Profit in my case: no need to replace and reinstall the cable, spent only $ 2 on the adapter instead of as much as $ 10 on the cable.
Victory! 2560x1440 @ 65 via HDMI cable.
Please note: we managed to raise it to 65Hz against the standard 60Hz - and this is good.
Summary:
I liked it very much in use, there are no complaints, all the main problems are fixed, the main ugliness is hidden from the non-visibility side and behind the monitor.
The plans are some little things:
- glue the old chipboard part in the corresponding color.
- unlock the height adjustment - move the spring from the original leg or make an alternative solution.
- Replace HDMI cable with DVI-D. (Already decided in R03i01)
A few more photos

At first, I could not imagine that it would all be so entertaining, I thought how I would twist a couple of pieces of wood with loops and I’m done, but no, here you are.
I wish you all interesting undertakings and their creative solutions!
Update: From the comments I see interest in a couple of points.
1) Material
A metal product is cool and effective, but unfortunately I have no way to process it at home. A compromise solution was chipboard.
2) The big lever, the screws will rip out, the chipboard will break.
Yes, the lever is large, but the chipboard and screws are decent:
- on a stand at the very “root”, the diameter of the thread on some screws reaches 5-5.5mm, length 30mm (butt in thickness with chipboard)
- the rack and the first section are from a double sheet of chipboard (16 + 16 = 32mm) the first section is reinforced with a super chipboard made in Made in the USSR - it is very strong.
- the screws screwed in with great difficulty and creak - so they sit very tightly.
3) Collective farm
Yes, some knots of collective farms from what was at hand, and honestly showed them in a close-up photo for technical reasons, but this does not mean that it sticks out in all directions and is not aesthetically pleasing.
In general, as I already wrote, all the uglinesses are hidden "behind a screen" and do not cause trouble.
Well, in conclusion, a fact that is relatively difficult to challenge:
For more than 2 months now, the flight is normal, the
screws are not loose, the
monitor does not swing and is quite rigid.