Camera and microscope - how to do it
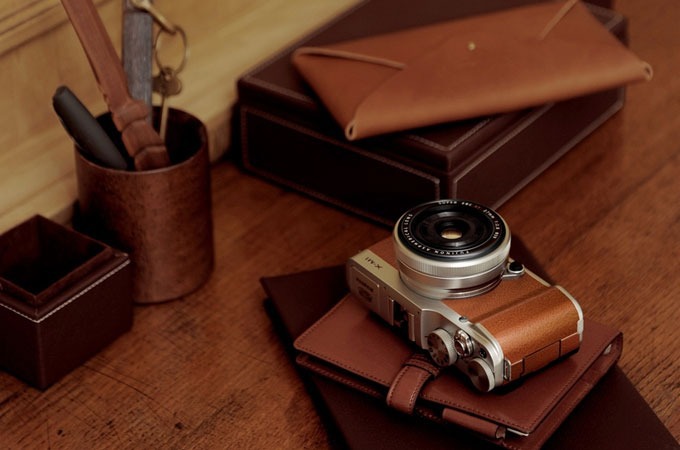
I recently chose a BZK and eventually bought the Fujifilm X-A1 - a great camera with interchangeable lenses. But what if a microscope is used instead of lenses? Inside the post there is a short story, several photos, 3D modeling and printing.
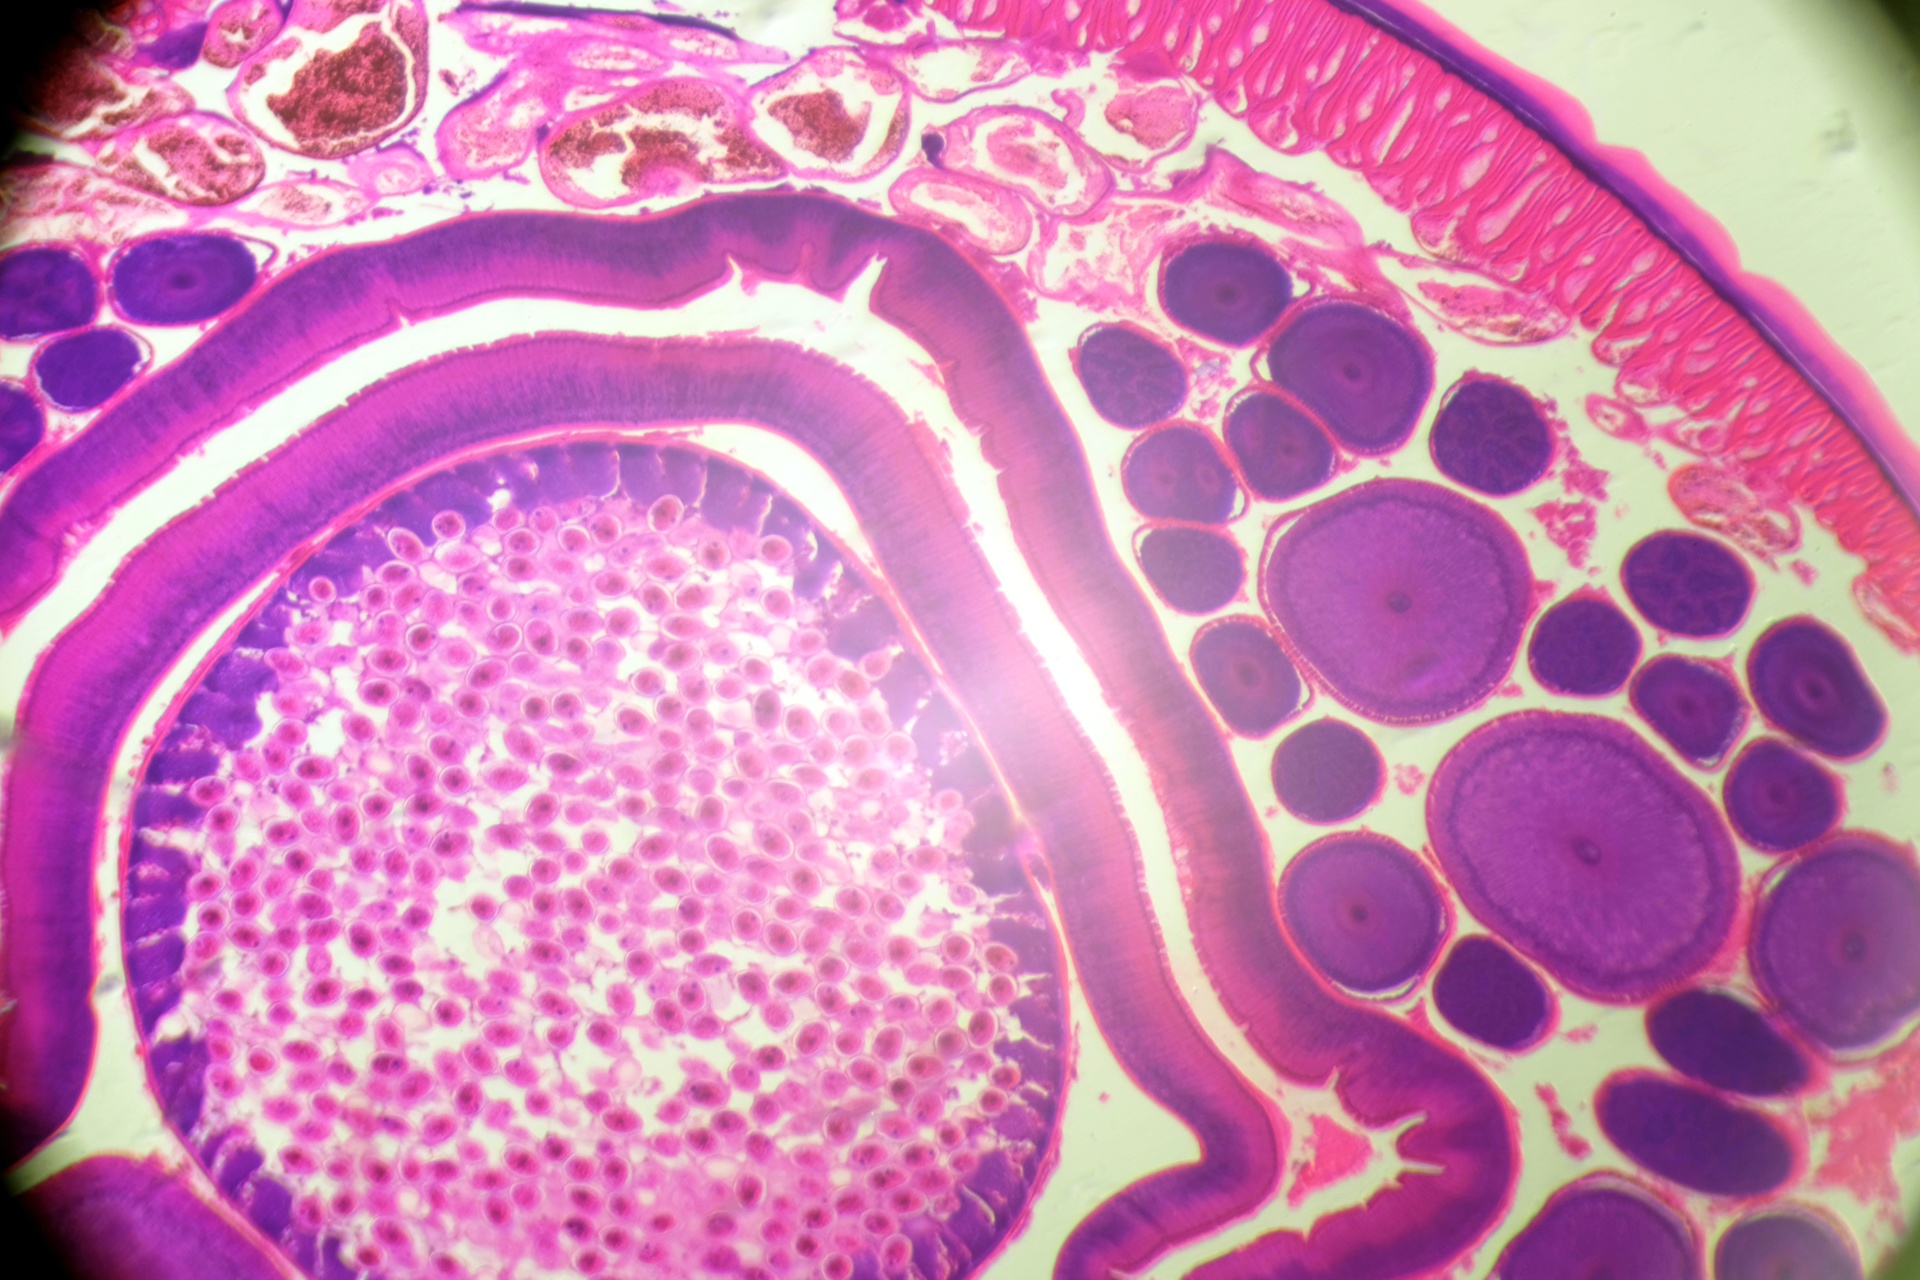
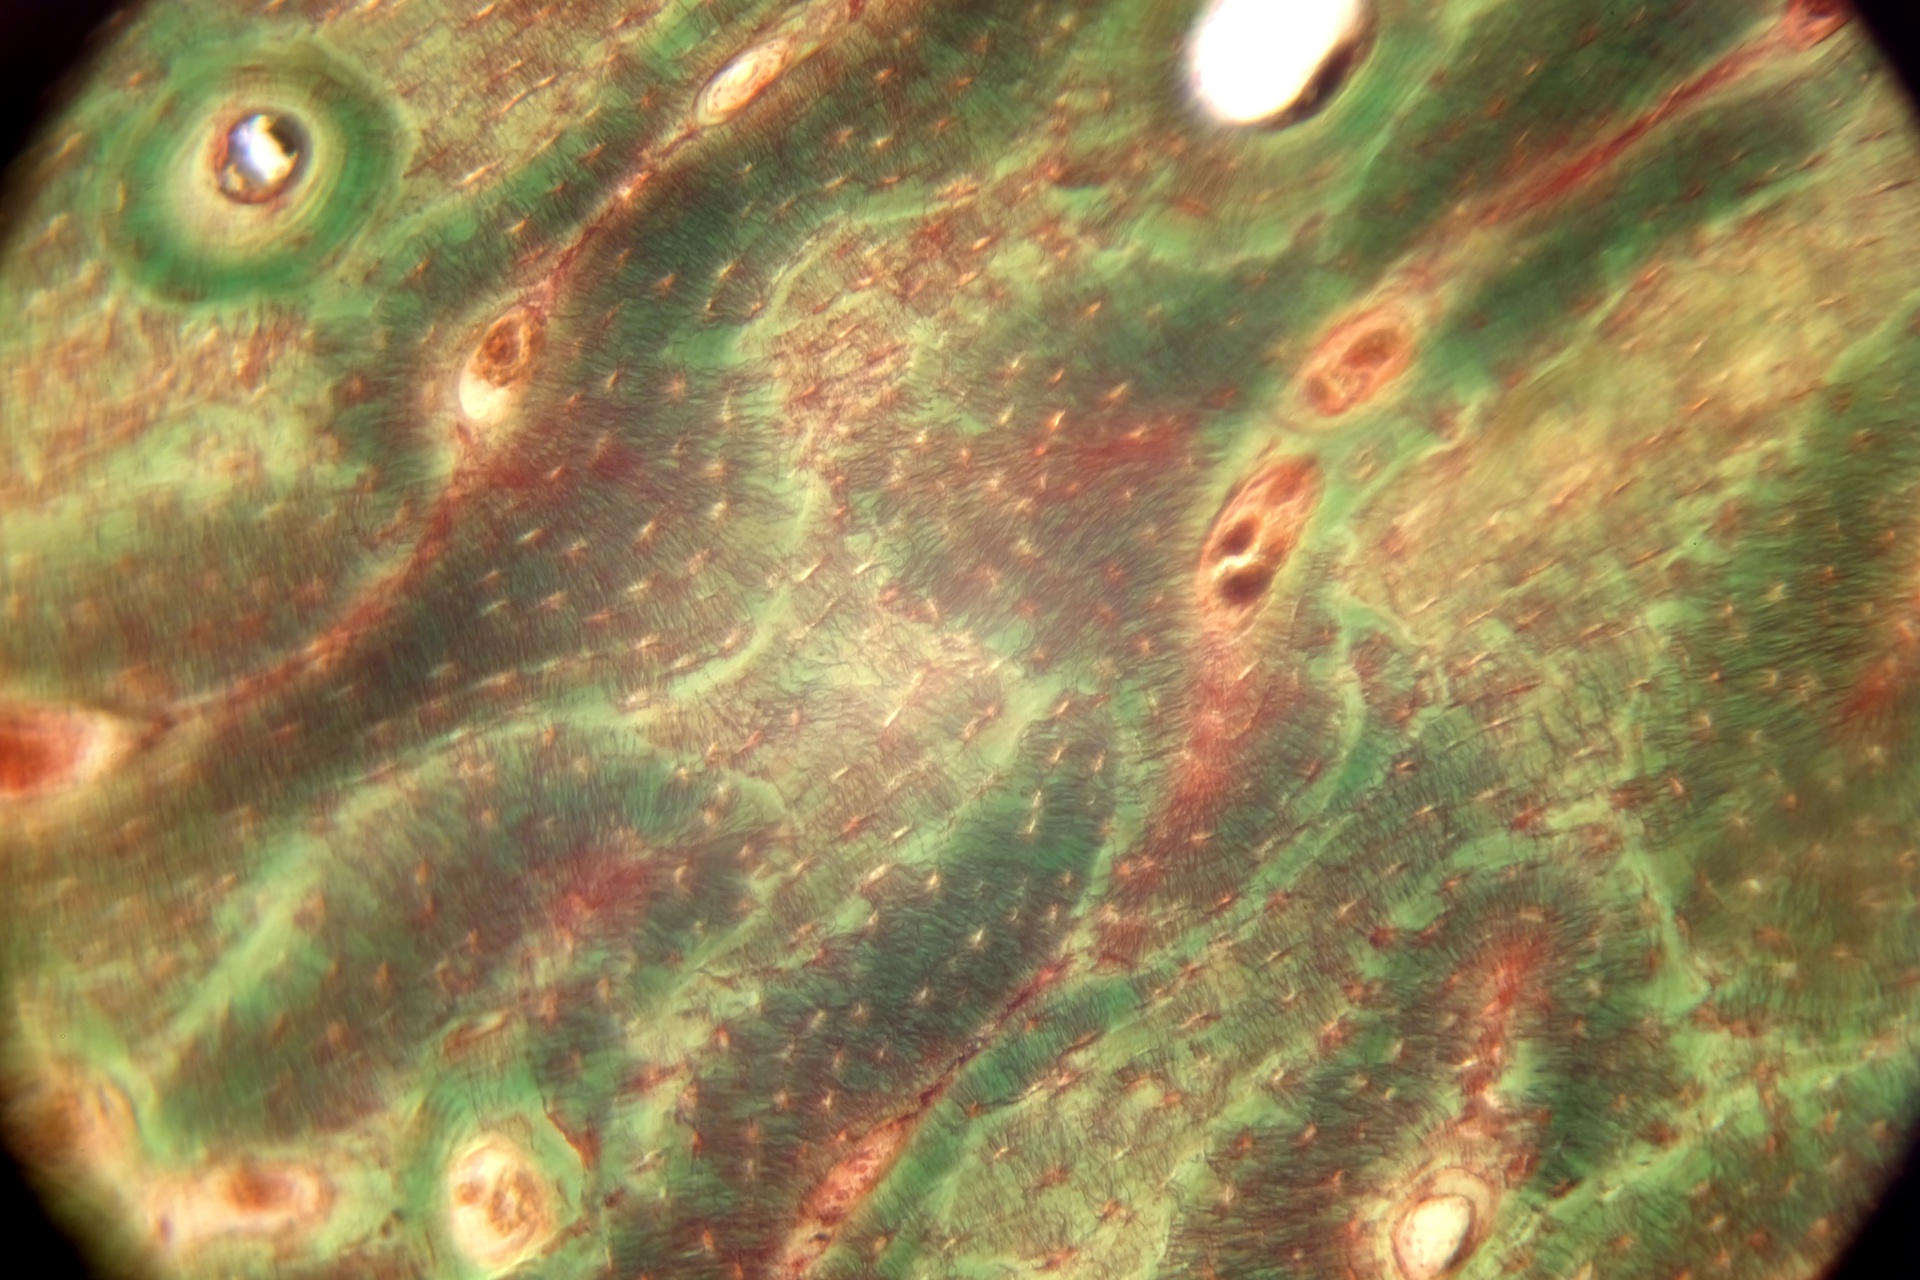
The photograph shows a cross section of roundworm .
Probably not everyone will be interested in how I chose the camera, but I will say a few words under the spoiler.
Take photographs of micropreparations with the UShM-1 microscope , which I already have.
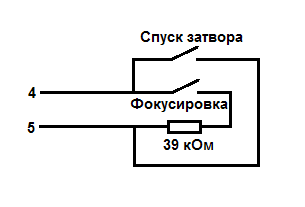
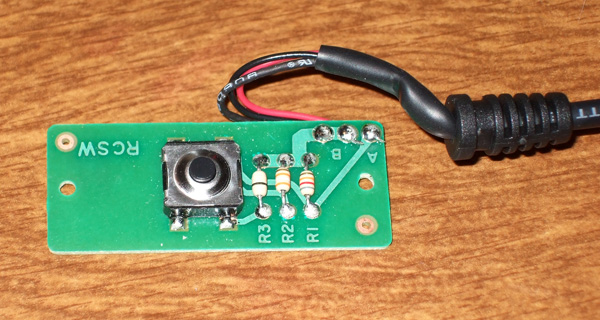
Recently, Wi-Fi has been built into the cameras,because everything is getting better with bluetooth for viewing photos and remote control of the camera. But Fujifilm decided that they needed the ability to quickly get photos for instagram on their phone, but they should not create competition for the trigger cables (although they were fixed in the latest X-T1). I also need a remote shutter release to eliminate lubrication. You can of course buy the original in the store for 1290 rubles or buy at the same price in China with great functionality. But Google suddenly found a remote control circuit and then there was an understanding that Fujifilm is asking for more than 1000 rubles for 3 resistors, button, wire, microUSB connector and a little plastic! Therefore, having pulled out a bunch of resistors, two old Soviet microswitches and a broken microUSB, I made my own remote. Using the selection method, I came to the circuit depicted below. Probably it was worth sticking to the original circuit, but there were no suitable resistors, although it works and it suits me.
I’m a little ashamed of the appearance of the remote control, so I’ll hide his photo ...
To take photographs, somehow connect the carcass of the camera to the tube of the microscope. Various adapters can be found on ebay or in China, but I will try to do it myself. The first thing you need is to connect mechanically, the second is to install a scattering or collecting lens system. Of course, it is not necessary to install lenses, so I only had to figure out how to implement the first point. Just then I met an articleabout OpenSCAD and it turned out to be a great success. Of course I knew about 3D printers, but until that time I had never worked with them and did not make models, so I re-read the article, looked a little about OpenSCAD and downloaded it, got to work. I didn’t find any ready-made models for the mount of my camera on the Internet, or exact sizes, so I had to take measurements myself or, to use the fashionable words, “reverse engineering”.

Next, it was necessary to find a way to print the model. Roboforum.ru helped me with this, where there is an opportunity to find people who could print your model. Gavzi helped me with printing , having made two pieces in excellent quality in a day, printing them in different positions (as in the picture below).
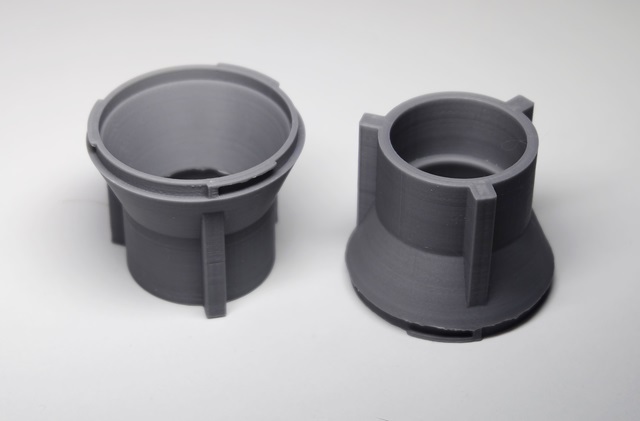
Immediately revealed small subtleties that I did not take into account, namely the horizontal ledges. When printing, there were formed flows and irregularities - in different positions on different surfaces. In general, this does not interfere with their use. Also, when I joined the camera, I found the expected backlash, but in general it turned out to be quite working specimens. In order to fix the adapter to the tube, I decided to just use the screws.

In the photographs, the illumination of the center is obtained due to the fact that the mirror in the microscope is concave.
I also planned to do the same for the telescope and photograph the moon through the Meade NG70-SM telescope , but since for some reason this is not possible, I decided to omit this part. I hope someday I can write about this (and a little bit about pinhole).
The photograph shows a cross section of roundworm .
Probably not everyone will be interested in how I chose the camera, but I will say a few words under the spoiler.
Camera selection
Fujifilm X-A1 copy of the X-M1 model. The only difference is that it has a matrix with a standard Bayer filter and a low-pass filter (AA filter), while in all other fuji cameras a sensor is installed under the sonorous name of X-Trans. In the meantime, marketers say that this same X-Trans is better, sharper, sharper, brighter, cooler and generally incredible on the Internet. You can find notes on the fact that the difference is not really noticeable and it is not at all clear which is better (while X-A1 costs 200 $ less than X-M1).
So for its price, the X-A1 gives an excellent picture, has a convenient menu and fairly convenient controls on the case, a hot shoe, a good screen and an excellent whale lens. And the remnants of the retrodesign from the X-M1 .
So for its price, the X-A1 gives an excellent picture, has a convenient menu and fairly convenient controls on the case, a hot shoe, a good screen and an excellent whale lens. And the remnants of the retrodesign from the X-M1 .
Formulation of the problem
Take photographs of micropreparations with the UShM-1 microscope , which I already have.
Remote Control
Recently, Wi-Fi has been built into the cameras,
I’m a little ashamed of the appearance of the remote control, so I’ll hide his photo ...
... here
Microscope
To take photographs, somehow connect the carcass of the camera to the tube of the microscope. Various adapters can be found on ebay or in China, but I will try to do it myself. The first thing you need is to connect mechanically, the second is to install a scattering or collecting lens system. Of course, it is not necessary to install lenses, so I only had to figure out how to implement the first point. Just then I met an articleabout OpenSCAD and it turned out to be a great success. Of course I knew about 3D printers, but until that time I had never worked with them and did not make models, so I re-read the article, looked a little about OpenSCAD and downloaded it, got to work. I didn’t find any ready-made models for the mount of my camera on the Internet, or exact sizes, so I had to take measurements myself or, to use the fashionable words, “reverse engineering”.
Model code
Not the most beautiful code, as well as its design, and I did not write comments, but I do not recommend using it, except as an example. If you are planning to use it for your own purposes, I recommend making the mounting ledges (I don’t know what they are called correctly) a little thicker and longer by a few millimeters, and the distance between them and the main part is a little (half a millimeter?) Less. Also be careful, this mount is for the Fujifilm x-mount mount, for others you have to change the size (shape)!
$fn=120;
rotate(a=-30, v=[0,0,1]){
union (){
translate(v=[0,0,3/2]){
difference(){
	cylinder(h=3,d=39,center=true);
	cylinder(h=3,d=37,center=true);
	}}
translate(v=[0,0,1/2]){
difference(){
union () {
	difference(){
	cylinder(h=1,d=41,center=true);
	cylinder(h=1,d=39,center=true);}
	}
union () {
	rotate(a=30, v=[0,0,1]){
	translate(v=[-15,17,0]){
	cube([28,28,1], center=true);}
}
	rotate(a=120+30, v=[0,0,1]){
	translate(v=[-15,17,0]){
	cube([28,28,1], center=true);}
}
	rotate(a=240+30, v=[0,0,1]){
	translate(v=[-15,17,0]){
	cube([28,28,1], center=true);}
}
}
}}
union (){
	translate(v=[39/2,0,3/2]){
	cube([2,2,3], center=true);}
	rotate(a=120, v=[0,0,1]){
	translate(v=[39/2,0,3/2]){
	cube([2,2,3], center=true);}}
	rotate(a=240, v=[0,0,1]){
	translate(v=[39/2,0,3/2]){
	cube([2,2,3], center=true);}}
}
translate(v=[0,0,22/2]){
	difference(){
	cylinder(h=16,d=42,d2=28,center=true);
	cylinder(h=16,d=36,d2=22,center=true);
	}}
translate(v=[0,0,39/2]){
	difference(){
	cylinder(h=1,d=28,center=true);
	cylinder(h=1,d=22,center=true);
	}}
translate(v=[0,0,50/2]){
	difference(){
	cylinder(h=17,d=30,center=true);
	cylinder(h=17,d=26,center=true);
	}}
translate(v=[0,0,39/2]){
difference(){
union (){
	translate(v=[30/2,0,0]){
	cube([8,4,28], center=true);}
	rotate(a=120, v=[0,0,1]){
	translate(v=[30/2,0,0]){
	cube([8,4,28], center=true);}}
	rotate(a=240, v=[0,0,1]){
	translate(v=[30/2,0,0]){
	cube([8,4,28], center=true);}}
}
union () {
	cylinder(h=40,d=29,center=true);
	translate(v=[0,0,-14]){
	cylinder(h=16,d=41,d2=27,center=true);}
}
}}
}}
Not the most beautiful code, as well as its design, and I did not write comments, but I do not recommend using it, except as an example. If you are planning to use it for your own purposes, I recommend making the mounting ledges (I don’t know what they are called correctly) a little thicker and longer by a few millimeters, and the distance between them and the main part is a little (half a millimeter?) Less. Also be careful, this mount is for the Fujifilm x-mount mount, for others you have to change the size (shape)!
Next, it was necessary to find a way to print the model. Roboforum.ru helped me with this, where there is an opportunity to find people who could print your model. Gavzi helped me with printing , having made two pieces in excellent quality in a day, printing them in different positions (as in the picture below).
Bonus photos or how to make a macro photo
Using a whale lens does not get a good enough macro, but there is an easy way to take a macro photo. Just flip the lens! For this, there are even revolving rings that are screwed into the filter thread on one side, and on the other hand are attached to the camera mount. I just leaned the lens against the camera and took a couple of photos from my hands. Of course, the quality is low, and a small depth of field is not needed in macro, but it was interesting to try. There are other ways to get macro.
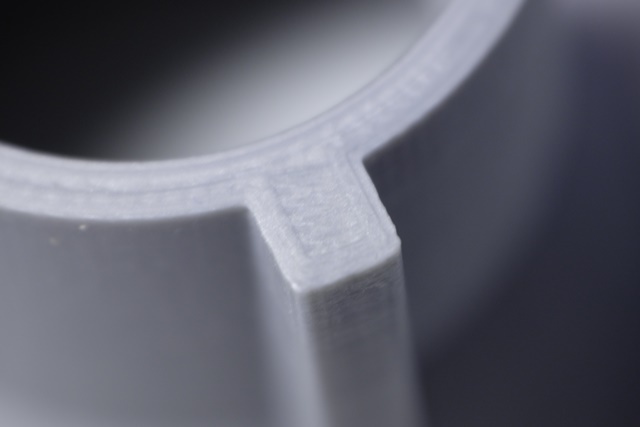
Immediately revealed small subtleties that I did not take into account, namely the horizontal ledges. When printing, there were formed flows and irregularities - in different positions on different surfaces. In general, this does not interfere with their use. Also, when I joined the camera, I found the expected backlash, but in general it turned out to be quite working specimens. In order to fix the adapter to the tube, I decided to just use the screws.
In the photographs, the illumination of the center is obtained due to the fact that the mirror in the microscope is concave.
Eventually
That's what happened
Geranium:
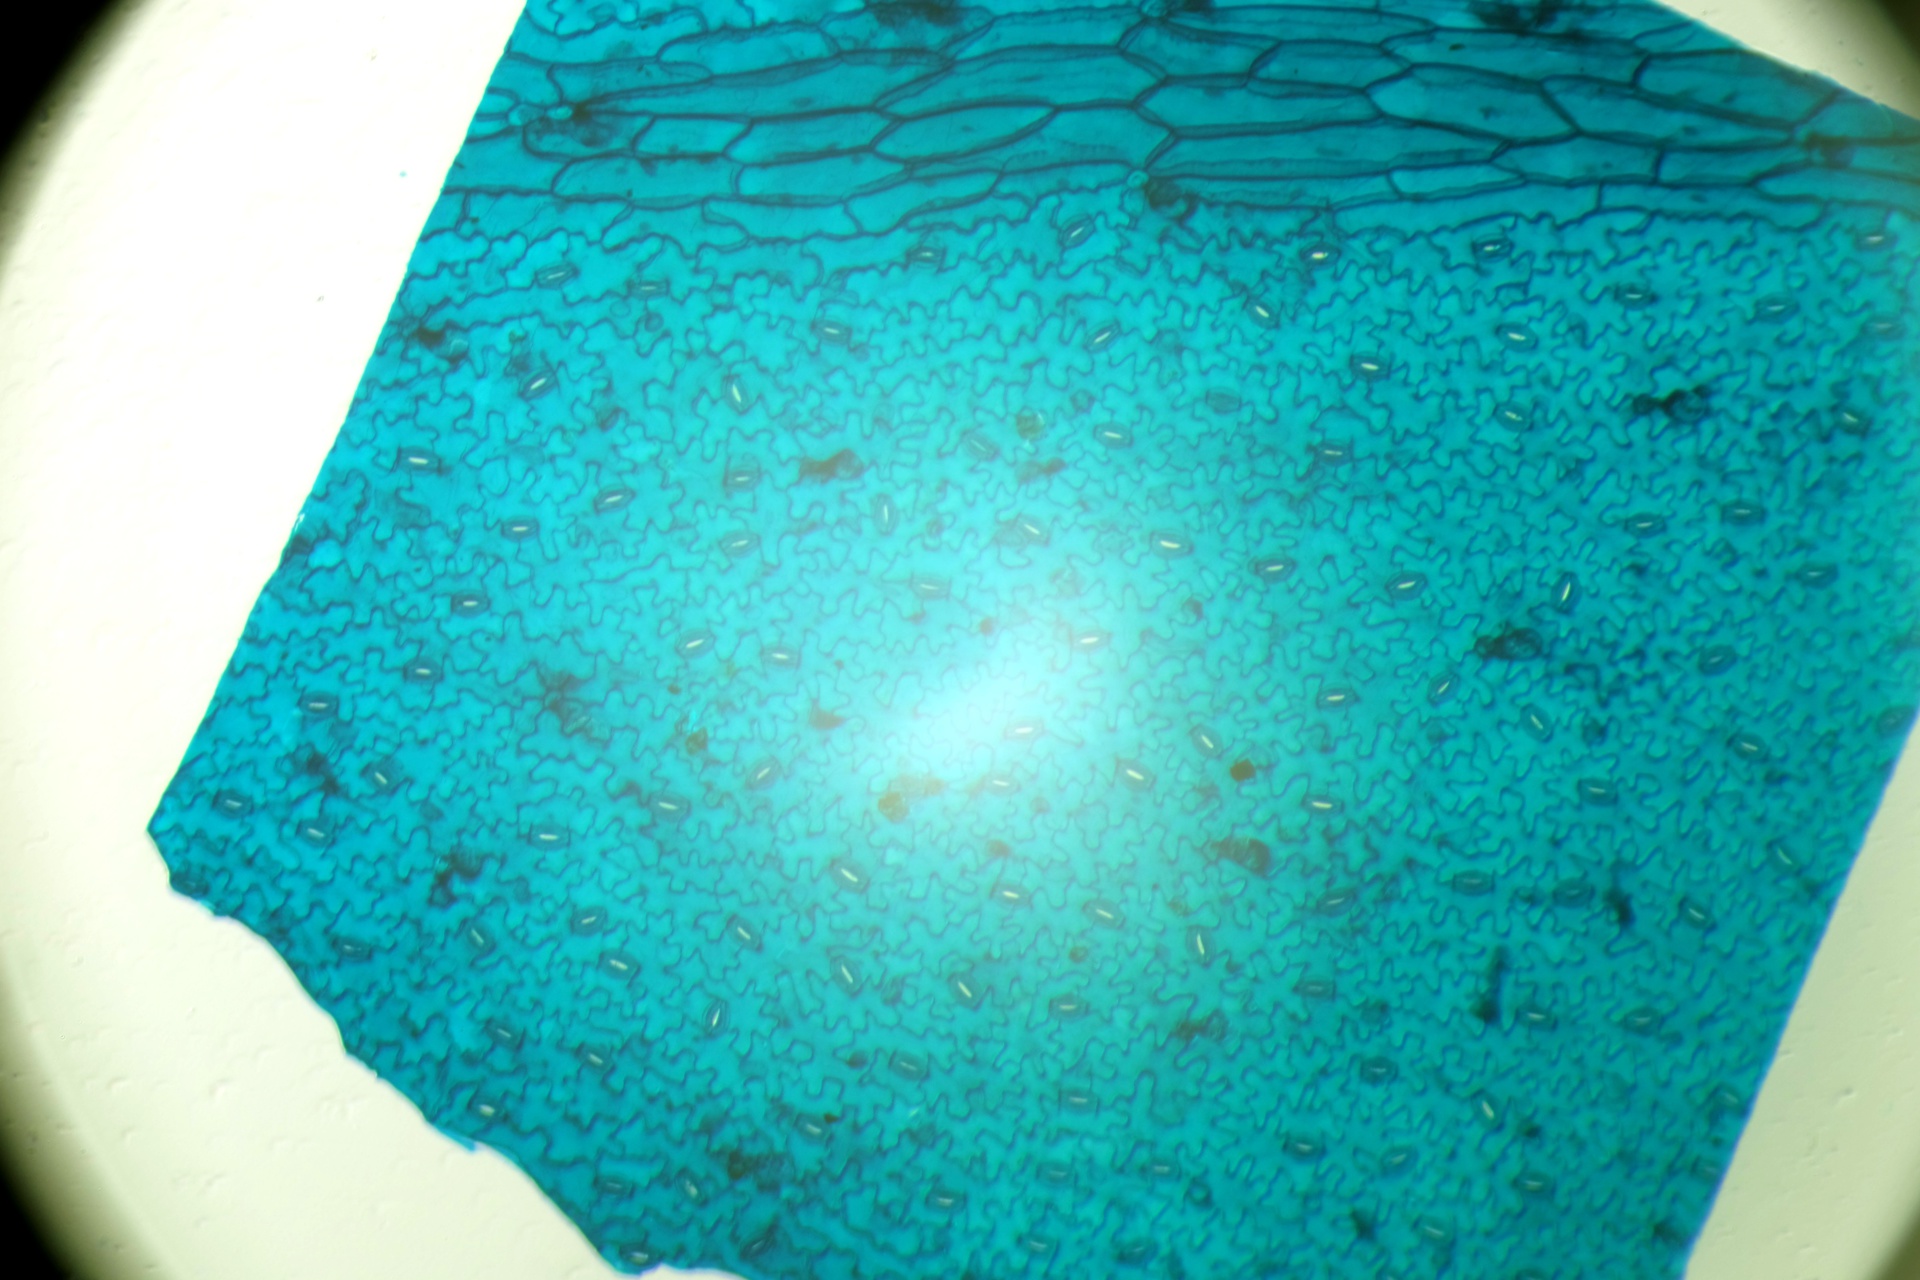
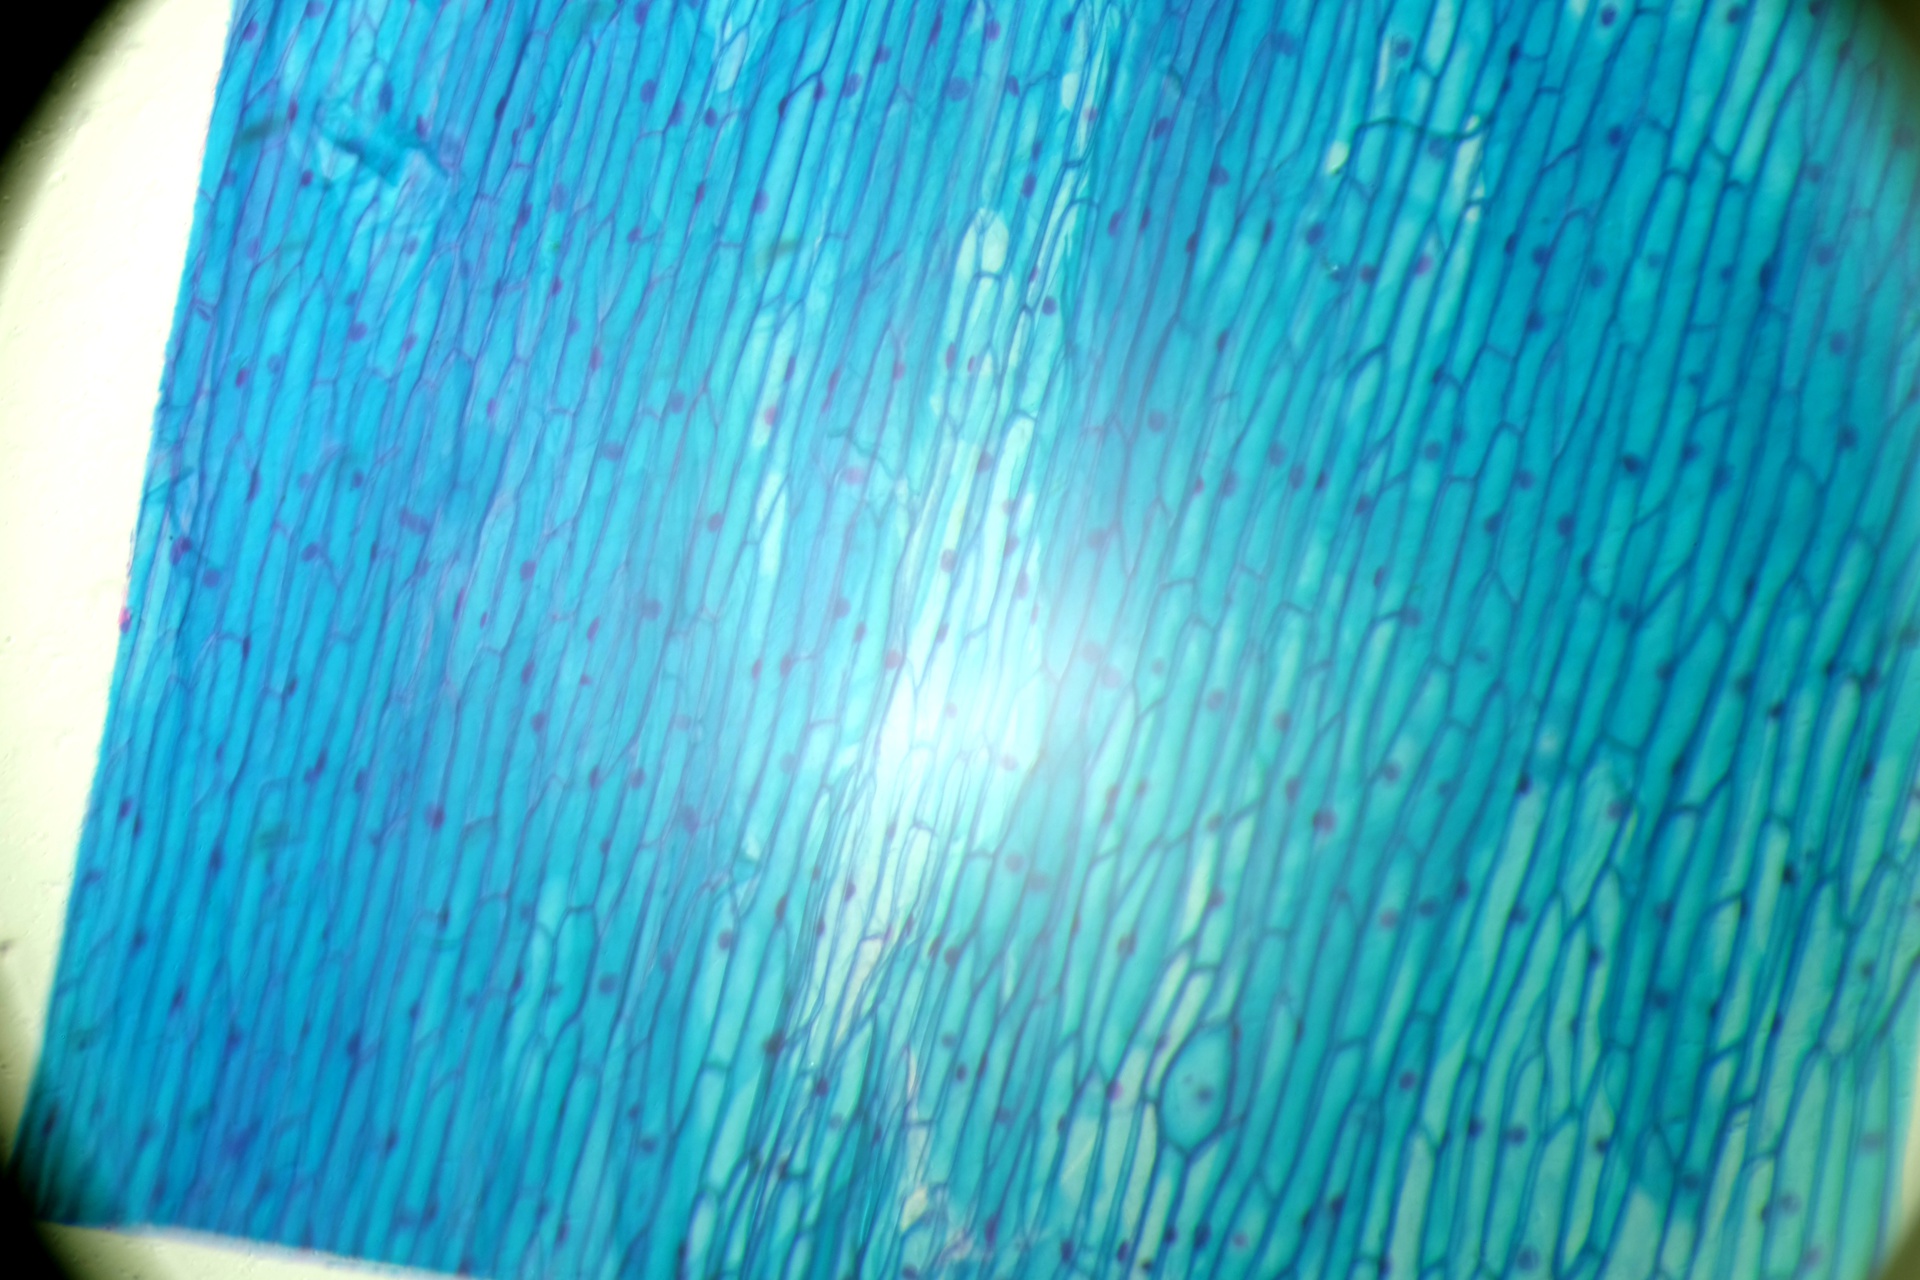
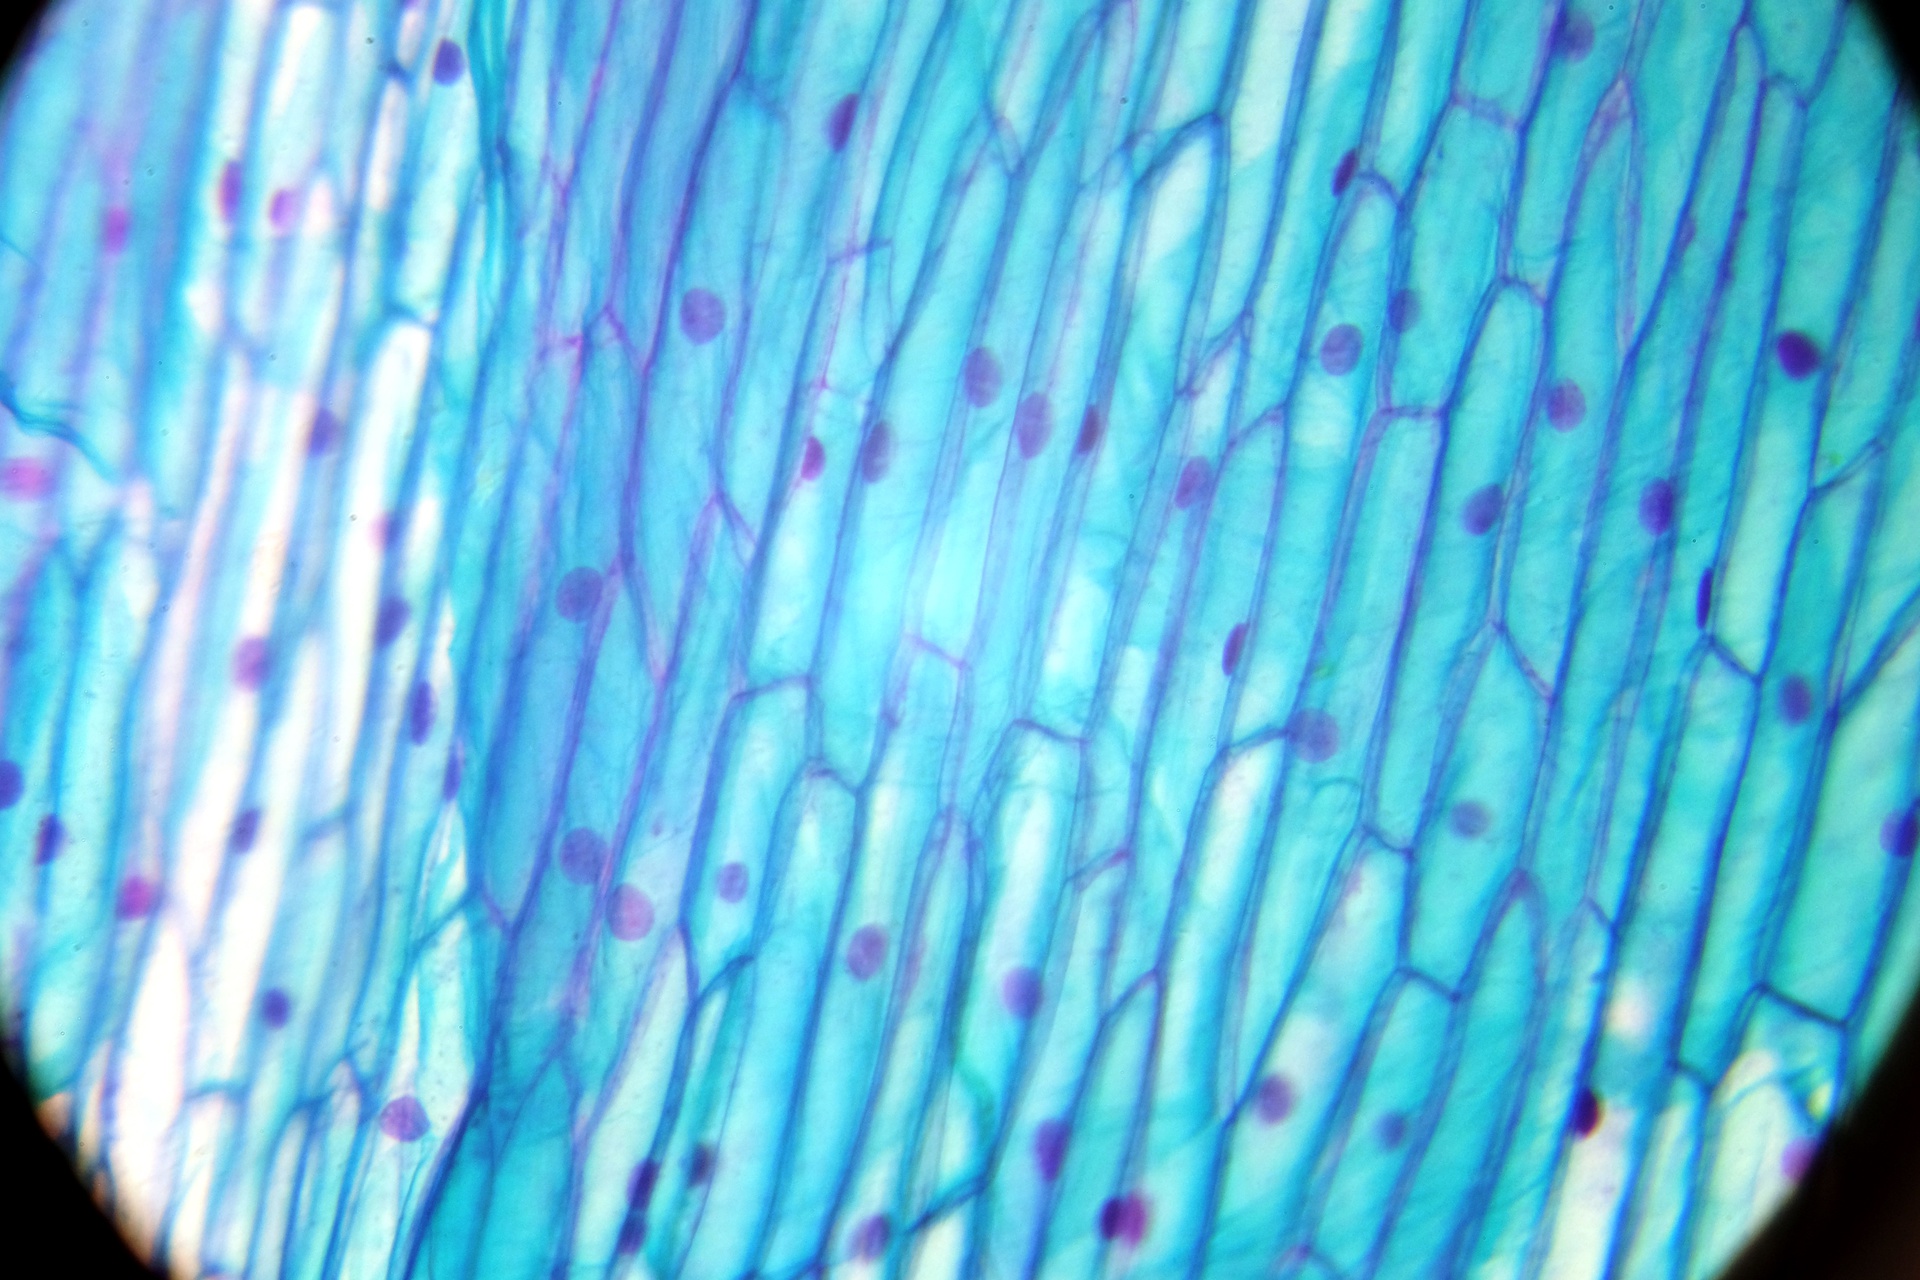
Onion:
Tibia of a person:
Printing with a laser printer:

Onion:
Tibia of a person:
Printing with a laser printer:
Telescope
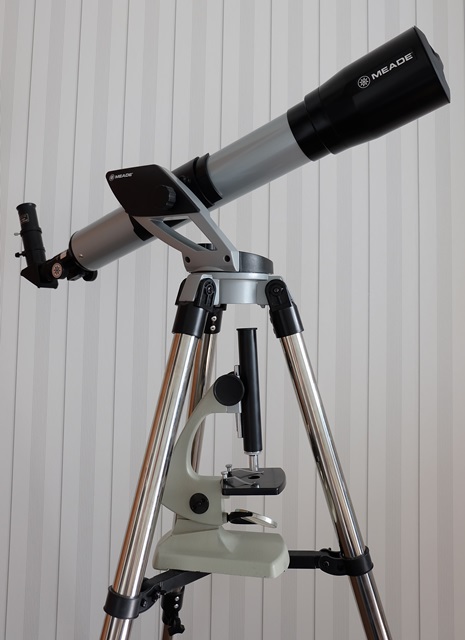
I also planned to do the same for the telescope and photograph the moon through the Meade NG70-SM telescope , but since for some reason this is not possible, I decided to omit this part. I hope someday I can write about this (and a little bit about pinhole).