2GIS on your hand. How we added a map to Apple Watch

Apple Watch quickly gained popularity and became the most popular watch in the world, ahead of Rolex and other manufacturers. The idea of creating an application for watches has been in the office of 2GIS since 2015.
Before us, only Apple itself released a full-fledged application with a map on the clock. The Yandex.Maps application displays only widgets of traffic jams and travel time to home and work. Yandex.Navigator, Google Maps, Waze and Maps.Me are generally not available on the clock.
In fact, due to the many limitations of the system and the complexity of development, companies either do not make applications for watches at all, or make them very simple. You can not just take and make a map on the clock. But we could.
Take a look under the cat to find out how the pet-project has grown into a complete product.
UPD.: Https://github.com/teanet/DemoWatch
We decided to make a map. What was at the start?
- Development experience on the clock - 2 days of work on a test project.
- Experience with SpriteKit - 0 days.
- The experience of writing MapKit is 0 days.
- Doubts that something can go wrong - ∞.
Iteration 1 - flight of thought
We are serious people, so for the beginning we decided to draw up a plan of work. We took into account that we are working in a tightly planned sprint, we have five hundred points for “small-scale tasks” and complete ignorance of where to start.
The map is a very big picture. We can show pictures on the clock, so we can handle the display of the card.
We have a service that can cut a card into pieces:
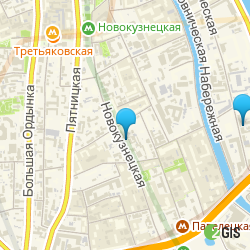
If to cut such picture and to put in WKImage, we will receive the simplest working prototype for five kopeks.
And if we add PanGesture to this image and install a new image for each swipe, we will get a simulation of interaction with the map.
/ We rejoice / It sounds awful, it looks approximately the same, it works even worse, but in fact the task is completed.
Iteration 2 - minimal prototype
Continuous loading of pictures is expensive for the battery in hours. And the boot time itself suffers. We wanted to get something more complete and responsive. By the way, we heard that the clock has support for SpriteKit - the only framework under WatchOS, with the ability to use the coordinates, zoom and customize all this splendor for yourself.
After a couple of hours of StackOverflow Driven Development (SDD), we get the second iteration:
One SKSpriteNode, one WKPanGestureRecognizer.

/ We are happy / Yes, this is MapKit for 6 kopecks, fully working. Urgent release!
Iteration 3 — add tiles and zoom
When emotions were asleep, thinking about where to go next.
Understand what is most important:
- Replace the picture on the tiles.
- Put 4 tiles in the application bundle and connect them together.
- Provide zoom pictures.
Leave 4 tiles in the application bundle, then put them on some:
let rootNode = SKSpriteNode()With the help of simple mathematics we connect them together.
Zoom do through WKCrownDelegate:
internalfunccrownDidRotate(
  _ crownSequencer: WKCrownSequencer?,
  rotationalDelta: Double
) {
  self.scale += CGFloat(rotationalDelta * 2)
  self.rootNode.setScale(self.scale)
}
/ Rejoice / Well, now that's for sure! A couple of fixes, and in the master.
Iteration 4 - we optimize interaction with the card
The next day it turned out that for SpriteKit anchorPoint does not affect the zoom. The zoom completely ignores the anchorPoint and occurs relative to the center of the rootNode. It turns out that for every step of the zoom we need to adjust the position.
It would also be nice to load tiles from the server, and not to store the whole world in the memory of the clock.
Do not forget that the tiles should be tied to the coordinates so that they do not lie in the center of the SKScene, but in the corresponding places on the map.
Tiles look like this:

For each zoomLevel (hereinafter referred to as “z”) there is a set of tiles. For z = 1, we have 4 tiles that make up the whole world.
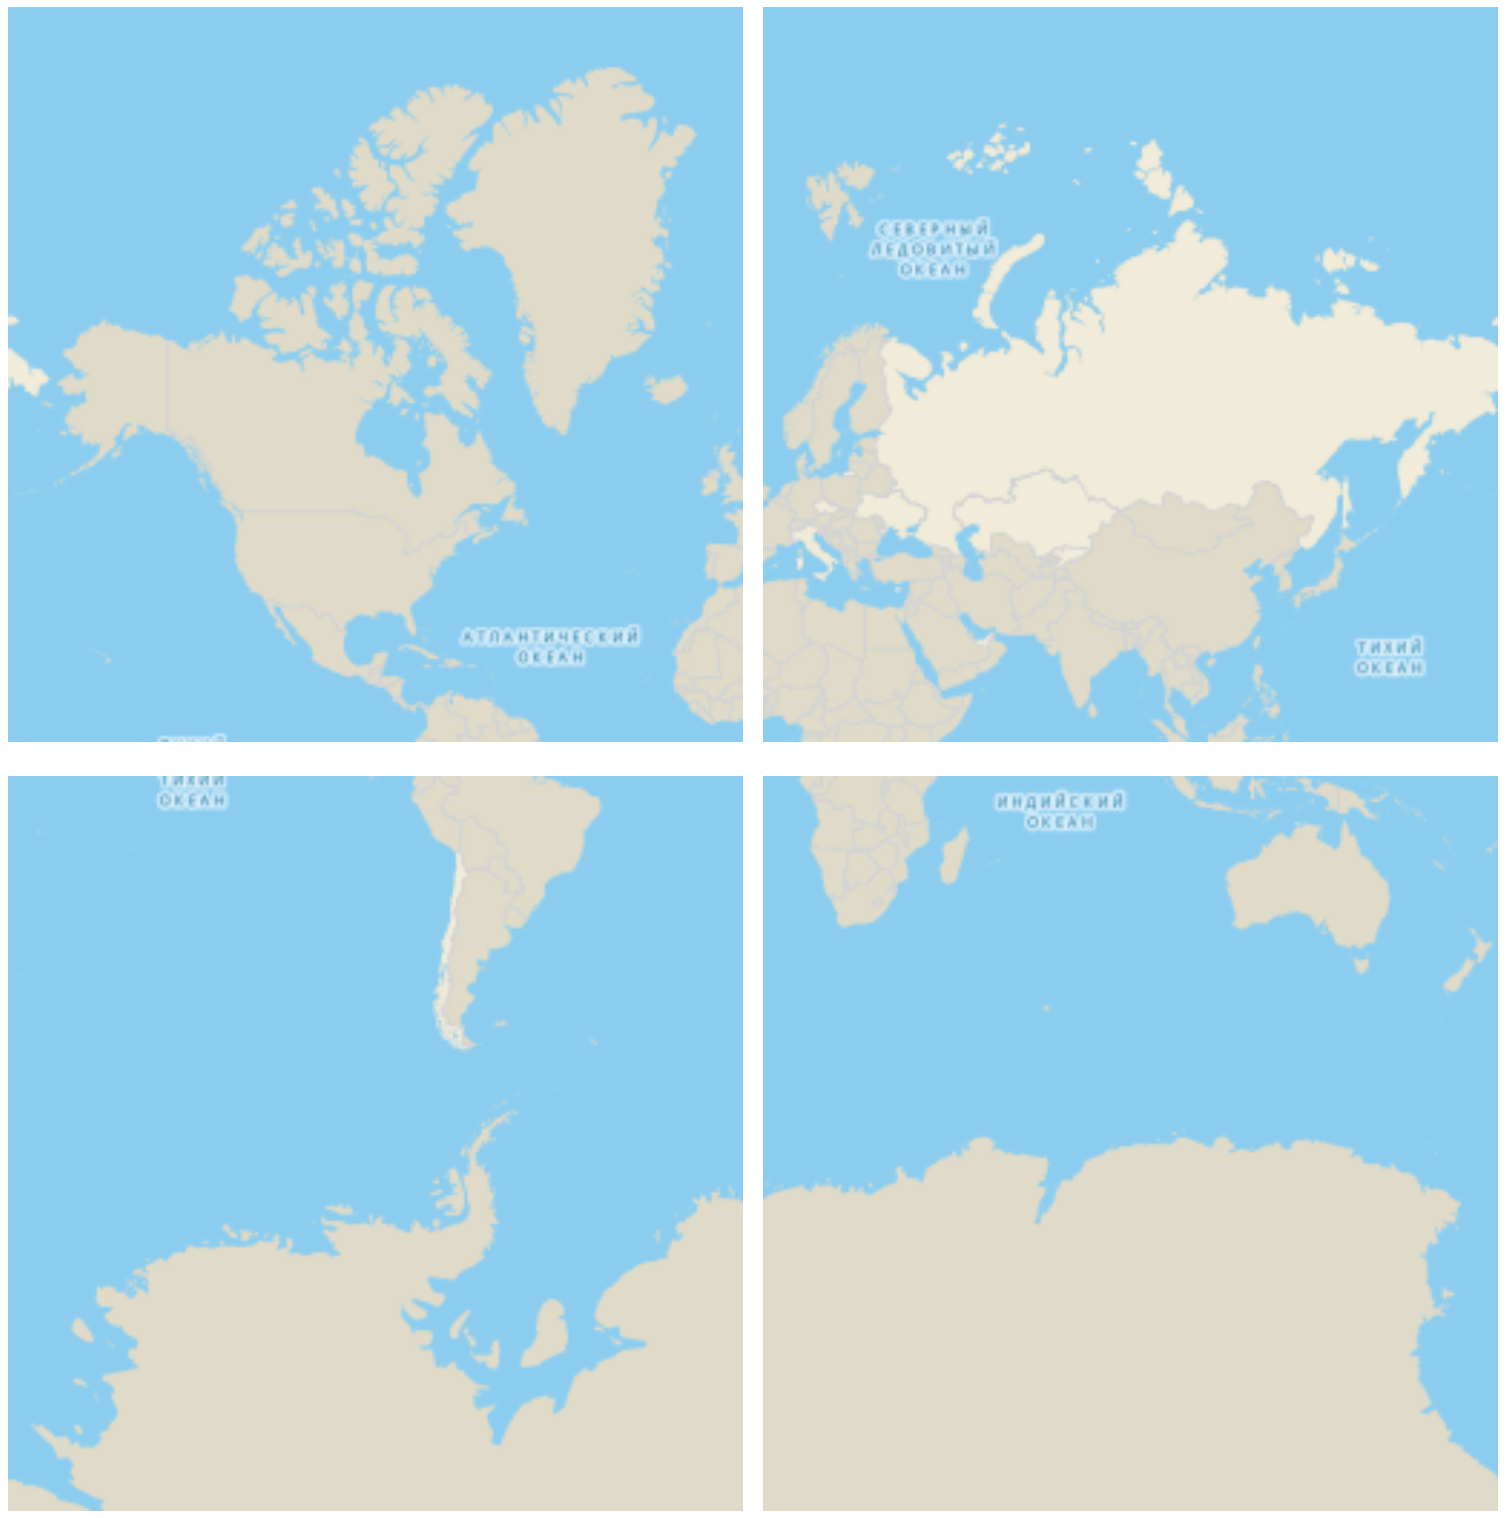
for z = 2 - in order to cover the whole world, you need 16 tiles,
for z = 3 - 64 tiles .
for z = 18 ≈ 68 * 10 ^ 9 tiles.
Now they need to be put into the world of SpriteKit.
The size of one tile is 256 * 256 pt, so
for z = 1 the size of the “world” will be 512 * 512 pt,
for z = 2 the size of the “world” will be equal to 1024 * 1024 pt.
For ease of calculation, we put tiles into the world as follows:

Encode the tile:
let kTileLength: CGFloat = 256struct TilePath {
  let x: Intlet y: Intlet z: Int
}
Determine the coordinate of the tile in this world:
var position: CGPoint {
  let x = CGFloat(self.x)
  let y = CGFloat(self.y)
  let offset: CGFloat = pow(2, CGFloat(self.z - 1))
  returnCGPoint(x: kTileLength * ( -offset + x ),
                        y: kTileLength * ( offset - y - 1 ))
}
var center: CGPoint {
  returnself.position + CGPoint(x: kTileLength, y: kTileLength) * 0.5
}
The location is convenient because it allows you to bring everything to the coordinates of the real world: latitude / longitude = 0, which is exactly in the center of the "world".
The latitude / longitude of the real world is transformed into our world as follows:
extensionCLLocationCoordinate2D{
  // относительное положение в мире ( -1 < TileLocation < 1 )functileLocation() -> CGPoint {
    var siny = sin(self.latitude * .pi / 180)
    siny = min(max(siny, -1), 1)
    let y = CGFloat(log( ( 1 + siny ) / ( 1 - siny )))
    returnCGPoint(
      x: kTileLength * ( 0.5 + CGFloat(self.longitude) / 360 ),
      y: kTileLength * ( 0.5 - y / ( 4 * .pi ) )
    )
  }
  // абсолютное положение в мире для нужного zoomLevelfunclocation(for z: Int) -> CGPoint {
    let tile = self.tileLocation()
    let zoom: CGFloat = pow(2, CGFloat(z))
    let offset = kTileLength * 0.5returnCGPoint(
      x: (tile.x - offset ) * zoom,
      y: (-tile.y + offset) * zoom
    )
  }
}
With the zoom level, there were problems. I had to spend a couple of weekends to put together a whole mathematical apparatus and ensure the perfect merging of tiles. That is, a tile for z = 1 should ideally go into four tiles for z = 2 and, on the contrary, four tiles for z = 2 should go into one tile for z = 1.

In addition, it was necessary to turn the linear zoom into exponential, since the zooms vary from 1 <= z <= 18, and the map is scaled as 2 ^ z.
Smooth zoom is provided by constant adjustment of the position of the tiles. It is important that the tiles are stitched exactly in the middle: that is, the level 1 tile goes into 4 level 2 tiles at 1.5 zoom.
SpriteKit under the hood uses float. For z = 18, we get the scatter of coordinates (-33 554 432/33 554 432), and the float accuracy is 7 bits. At the exit, we have an error in the region of 30 pt. To avoid the occurrence of "cracks" between halves, place the visible tile as close as possible to the center of the SKScene.
/ We rejoice / After all these gestures we got a prototype ready for testing.
Release
Since the application did not really have the TK, we found a couple of volunteers to conduct a little testing. Found no problems, and decided to roll out into the store.
After the release, it turned out that on the clock of the first series the processor does not have time to draw the first frame of the card in 10 seconds and falls on a timeout. I had to initially create a map completely empty in order to fit in 10 seconds, and then gradually load the substrate. First, develop all levels of the map - and then load tiles for them.
It took a lot of time to debug the network, properly setting the cache and a small Memory Footprint, so that WatchOS would not try to kill our application for as long as possible.
After profiling the application, we found out that instead of the usual tiles, you can use Retina tiles, with almost no harm to the load time and memory consumption, and in the new release you have already switched to them.
Results and future plans
We can already display the route on the map with maneuvers built in the main application. The feature will be available in one of the upcoming releases.
The project, which initially seemed impracticable, turned out to be extremely useful for me personally. I often use the app to see if I will soon leave at the right stop. I believe that in winter it will be even more useful.
At the same time, once again I was convinced that the complexity of the project, the belief of others in the success of the task, or the availability of free time at work is not so important. The main thing is the desire to make a project and a tedious, gradual movement towards the goal. As a result, we have a full-fledged MapKit, which is almost unlimited and works with 3 WatchOS. You can refine it as you want, without waiting for Apple to roll out a suitable API for development.
PS For those interested, I can lay out the finished project. The level of code there is far from production. But, according to the military principle, no matter how it works, the main thing is that it works!