Add Cyrillic to Source Sans Pro font for Lumen Bootstrap theme
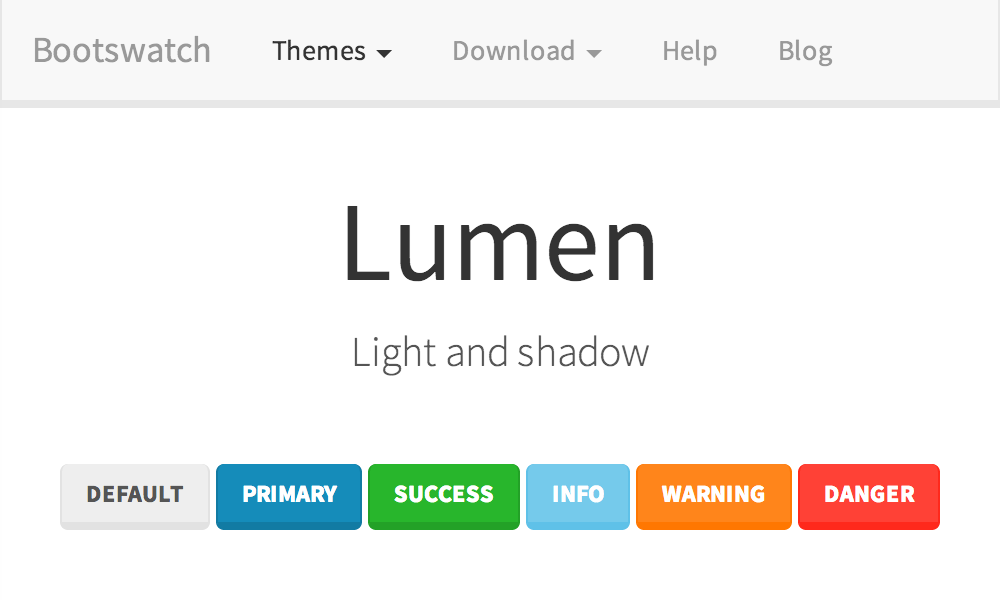
There is a nice Lumen theme in the catalog of free themes for Bootstrap , it uses the font Source Sans Pro, in which there is no Cyrillic alphabet out of the box. This problem can be partially solved independently by compiling the font from the source. Why partially - see the conclusion.
Download the Adobe Font Development Kit for OpenType . Installation boils down to unpacking the archive into some folder whose absolute path does not contain spaces, and running the FinishInstallWindows.cmd script with Administrator rights. After that, you need to log in or reboot.
Download the font source branch from GitHub and unpack it somewhere. This branch contains the Cyrillic and Greek alphabets, which are not yet included in the official release.
Font sources contain many different styles, we will find out which ones we need. Opening the bootstrap.css file of the Lumen theme, in the first line we see that the fonts are imported from the google server:
We go to this address, we get a description:
This means that we need only four styles: Light, Regular, Bold, Italic.
Compilation is done with the makeotf -r command . This command processes one face in the current folder in one call. Instead of going through the folders in the console and running the command manually each time, we will create a script for PowerShell that will compile all necessary files in batch mode. We will take the build.sh script from the font root folder as the basis and save the new file under the name build.ps1 in the same place.
We try to run the script . \ Build.ps1 with administrator rights. If a security error occurs, it means that running PowerShell scripts is prohibited by the policy. To enable execution, enter the command:
After that, everything should work and four .otf files will appear in the target \ otf \ folder.
Download sfnt2woff and save it in a font folder. We write the script convert.ps1 for conversion:
After the script is run, the converted files will appear in the target \ woff \ folder.
In the case of ASP.NET MVC, copy the .woff files to the fonts \ folder of the project and include them in it. In the folder Content \ create a new file bootstrap.lumen.path.css and write the following into it:
Add a new line to the file App_Start \ BundleConfig.cs . It is important that it be lower than bootstrap.lumen.css .
That's all, the problem is partially solved. Partially - because at the moment there is no italics for the Cyrillic alphabet.
The font developer, Paul Hunt , when asked about italics, said that the Cyrillic alphabet will someday appear, but he cannot say when it will happen.
An archive of finished .woff files can be downloaded here .
1. Install the Adobe Font Development Kit for OpenType
Download the Adobe Font Development Kit for OpenType . Installation boils down to unpacking the archive into some folder whose absolute path does not contain spaces, and running the FinishInstallWindows.cmd script with Administrator rights. After that, you need to log in or reboot.
2. Download font sources
Download the font source branch from GitHub and unpack it somewhere. This branch contains the Cyrillic and Greek alphabets, which are not yet included in the official release.
3. Determine the necessary styles
Font sources contain many different styles, we will find out which ones we need. Opening the bootstrap.css file of the Lumen theme, in the first line we see that the fonts are imported from the google server:
@import url("//fonts.googleapis.com/css?family=Source+Sans+Pro:300,400,700,400italic");We go to this address, we get a description:
@font-face {
  font-family: 'Source Sans Pro';
  font-style: normal;
  font-weight: 300;
  src: local('Source Sans Pro Light'), local('SourceSansPro-Light'), url(http://themes.googleusercontent.com/static/fonts/sourcesanspro/v7/toadOcfmlt9b38dHJxOBGNbE_oMaV8t2eFeISPpzbdE.woff) format('woff');
}
@font-face {
  font-family: 'Source Sans Pro';
  font-style: normal;
  font-weight: 400;
  src: local('Source Sans Pro'), local('SourceSansPro-Regular'), url(http://themes.googleusercontent.com/static/fonts/sourcesanspro/v7/ODelI1aHBYDBqgeIAH2zlBM0YzuT7MdOe03otPbuUS0.woff) format('woff');
}
@font-face {
  font-family: 'Source Sans Pro';
  font-style: normal;
  font-weight: 700;
  src: local('Source Sans Pro Bold'), local('SourceSansPro-Bold'), url(http://themes.googleusercontent.com/static/fonts/sourcesanspro/v7/toadOcfmlt9b38dHJxOBGFkQc6VGVFSmCnC_l7QZG60.woff) format('woff');
}
@font-face {
  font-family: 'Source Sans Pro';
  font-style: italic;
  font-weight: 400;
  src: local('Source Sans Pro Italic'), local('SourceSansPro-It'), url(http://themes.googleusercontent.com/static/fonts/sourcesanspro/v7/M2Jd71oPJhLKp0zdtTvoMzNrcjQuD0pTu1za2FULaMs.woff) format('woff');
}
This means that we need only four styles: Light, Regular, Bold, Italic.
4. We compile styles
Compilation is done with the makeotf -r command . This command processes one face in the current folder in one call. Instead of going through the folders in the console and running the command manually each time, we will create a script for PowerShell that will compile all necessary files in batch mode. We will take the build.sh script from the font root folder as the basis and save the new file under the name build.ps1 in the same place.
$family='SourceSansPro'
$romanWeights='Bold', 'Light', 'Regular'
$italicWeights='It'
# clean existing build artifacts
rm -recurse -force target
mkdir target
mkdir target\otf
foreach ($w in $romanWeights)
{
  cd Roman\$w
  makeotf -r -o ..\..\target\otf\$family-$w.otf
  cd ..\..
  rm Roman\$w\current.fpr # remove default options file from the source tree after building
}
foreach ($w in $italicWeights)
{
  cd Italic\$w
  makeotf -r -o ..\..\target\otf\$family-$w.otf
  cd ..\..
  rm Italic\$w\current.fpr # remove default options file from the source tree after building
}
We try to run the script . \ Build.ps1 with administrator rights. If a security error occurs, it means that running PowerShell scripts is prohibited by the policy. To enable execution, enter the command:
Set-ExecutionPolicy -Scope CurrentUser -ExecutionPolicy RemoteSignedAfter that, everything should work and four .otf files will appear in the target \ otf \ folder.
5. Convert .otf to .woff
Download sfnt2woff and save it in a font folder. We write the script convert.ps1 for conversion:
$otfFiles = dir target\otf -Filter *.otf -Name
# clean existing convert artifacts
rm -recurse -force target\woff
mkdir target\woff
foreach ($otf in $otfFiles)
{
  .\sfnt2woff.exe target\otf\$otf
}
mv target\otf\*.woff target\woff
After the script is run, the converted files will appear in the target \ woff \ folder.
6. Connect the font to the project
In the case of ASP.NET MVC, copy the .woff files to the fonts \ folder of the project and include them in it. In the folder Content \ create a new file bootstrap.lumen.path.css and write the following into it:
@font-face {
    font-family: 'Source Sans Pro';
    font-style: normal;
    font-weight: 300;
    src: url(/fonts/SourceSansPro-Light.woff) format('woff');
}
@font-face {
    font-family: 'Source Sans Pro';
    font-style: normal;
    font-weight: 400;
    src: url(/fonts/SourceSansPro-Regular.woff) format('woff');
}
@font-face {
    font-family: 'Source Sans Pro';
    font-style: normal;
    font-weight: 700;
    src: url(/fonts/SourceSansPro-Bold.woff) format('woff');
}
@font-face {
    font-family: 'Source Sans Pro';
    font-style: italic;
    font-weight: 400;
    src: url(/fonts/SourceSansPro-It.woff) format('woff');
}
Add a new line to the file App_Start \ BundleConfig.cs . It is important that it be lower than bootstrap.lumen.css .
bundles.Add(new StyleBundle("~/Content/css").Include(
            "~/Content/bootstrap.lumen.css",
            "~/Content/bootstrap.lumen.path.css",
            "~/Content/site.css"));
Conclusion
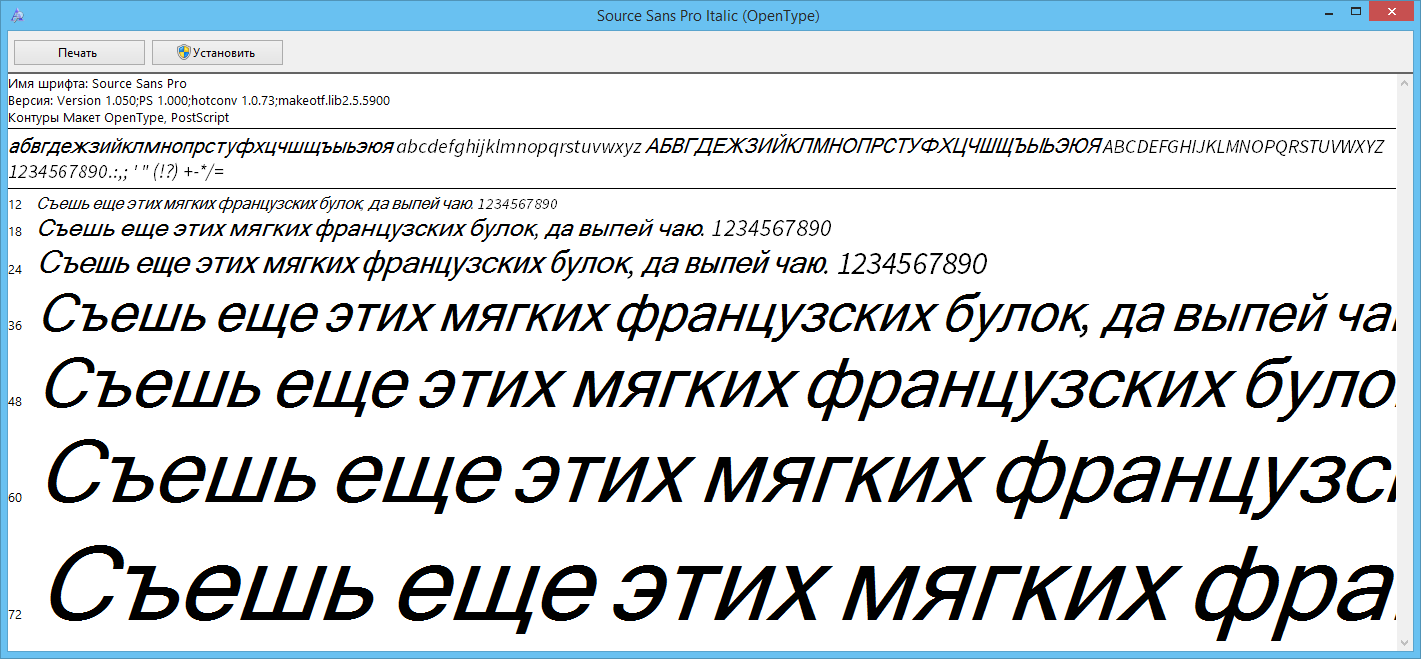
That's all, the problem is partially solved. Partially - because at the moment there is no italics for the Cyrillic alphabet.
The font developer, Paul Hunt , when asked about italics, said that the Cyrillic alphabet will someday appear, but he cannot say when it will happen.
An archive of finished .woff files can be downloaded here .