Netavis Observer - Linux-based IP Surveillance Software. Installation, configuration and a little hack
Netavis Observer is a software product for organizing video surveillance using IP cameras based on a Linux server.
Netavis Observer is written in Java, such products as Apache Tomcat, Webmin, Munin, Mysql are also used.
There are two options for Netavis Observer - Bundled (supplied as an installation iso image based on Centos5 or Centos6) and Unbundled - a set of rpm packages for self-installation on a server running Centos or RedHat.
Main functionality and features:
- Support for popular IP-cameras and video servers, such as AXIS, ArecontVision, D-link, ACTi, Sanyo, Samsung and others (the full list can be found on the Netavis website).
- Support for separation of access rights to cameras, viewing the archive, exporting video, controlling PTZ (PTZ control) with the ability to create groups and users for a specific situation (only viewing online video, viewing online video and archive, but without the right to export video from archive, etc.)
- The presence of a client for Windows, iPhone / iPad.
- Ability to work through a browser (requires JAVA installation).
- Ability to create a cluster to work with a large number of cameras.
- Support for Active Directory (as amended by Enterprise).
- Support for Video Analysis (iCAT - motion detection with variations, sabotage detection, remote object detection, privacy mask).
- Setting the quality of video display online and when recording to the archive.
- Setting the location of cameras and the formation of user sets with the ability to copy these sets to other users.
- Ability to limit bandwidth for cameras and clients when viewing live video and archive.
- Export the archive to AVI or SAFE (an executable .EXE file is created with a primitive player and the video itself, you can export the right number of cameras at once for one period of time, one EXE-shnik will be created).
- Ability to run the graphical shell directly on the server - the LXDE session starts, after which the Netavis client starts.
- Support for separation of access rights to cameras, viewing the archive, exporting video, controlling PTZ (PTZ control) with the ability to create groups and users for a specific situation (only viewing online video, viewing online video and archive, but without the right to export video from archive, etc.)
- The presence of a client for Windows, iPhone / iPad.
- Ability to work through a browser (requires JAVA installation).
- Ability to create a cluster to work with a large number of cameras.
- Support for Active Directory (as amended by Enterprise).
- Support for Video Analysis (iCAT - motion detection with variations, sabotage detection, remote object detection, privacy mask).
- Setting the quality of video display online and when recording to the archive.
- Setting the location of cameras and the formation of user sets with the ability to copy these sets to other users.
- Ability to limit bandwidth for cameras and clients when viewing live video and archive.
- Export the archive to AVI or SAFE (an executable .EXE file is created with a primitive player and the video itself, you can export the right number of cameras at once for one period of time, one EXE-shnik will be created).
- Ability to run the graphical shell directly on the server - the LXDE session starts, after which the Netavis client starts.
Now let's get started
Follow the link and download the Bundled version of Netavis Observer in the form of iso, write to the blank and insert it into the server’s CD-ROM drive.
Immediately after loading, we see a welcome screen with options for further actions, and there are not very many of them:
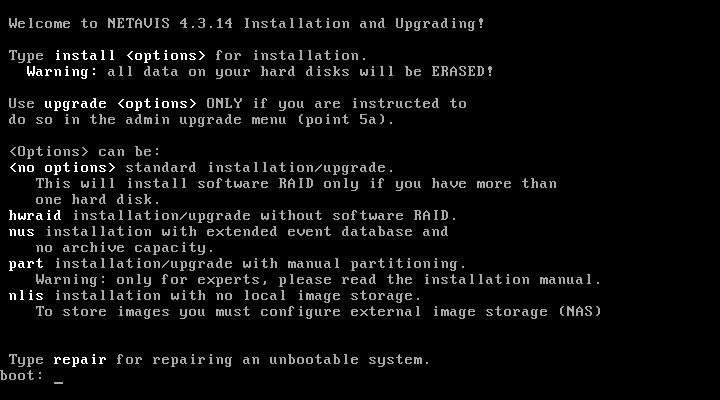
- install options where options :
- without options - standard installation on one hard drive. All data from the hard drive will be deleted.
- hwraid - installation on iron RAID.
- nus - installation of the event server and without archive.
- part - installation with the ability to manually mark up disks.
- nlis- Installation without storing the archive on local disks. Archive stores are mounted by NFS or SAMBA.
- repair - system recovery after a failure.
Our choice is boot: install. Next is the standard Centos5 installation procedure. After the installation is complete, we agree to reboot. After loading the operating system, we are prompted to enter the admin login to complete the installation of the system.
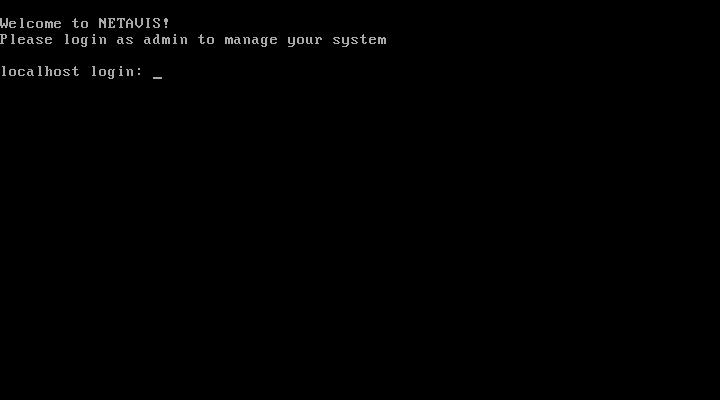
Then press Enter, and then 0 to confirm the installation is completed. We agree to the terms of the license agreement by entering yes .
Next, enter the password for the admin user:

Further down the list:
- We choose in which file system the hard drives for archiving will be formatted (by default, this is xfs).
- Enter the server name.
- Save the parameters by entering Save .
- Enter the name of the configuration (I left the default value - Default configuration).
- Choose whether to use DHCP to configure the network or set parameters statically.
- Enter the IP address, netmask, IP address of the gateway, IP address of the DNS server (only if the static network setting is selected).
- Enter the IP address of the mail server (to send system events to mail).
- Enter the domain name.
- Save the parameters by entering Save .
- Choose whether the server will also be a time server.
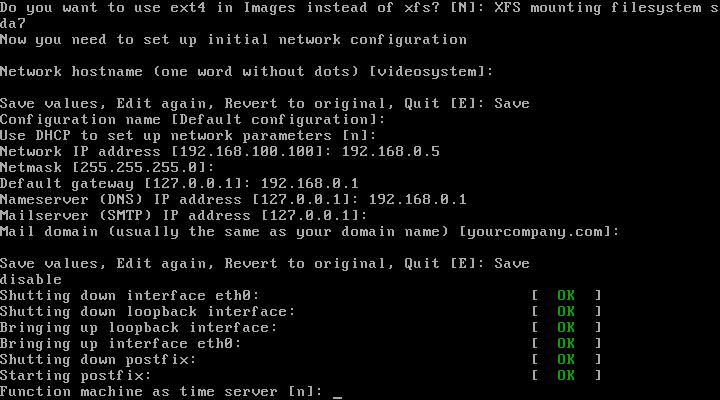
- We decide on time servers for synchronization and save the parameters by entering Save.
- Enter the administrator's mailing address.
- Enter the credentials of the so-called customer-user (name, address, organization name).
- We decide whether to launch the client to view the video and archive on the server (by default - do not start).
- Enter the server name.
- Save the parameters by entering Save .
- Enter the name of the configuration (I left the default value - Default configuration).
- Choose whether to use DHCP to configure the network or set parameters statically.
- Enter the IP address, netmask, IP address of the gateway, IP address of the DNS server (only if the static network setting is selected).
- Enter the IP address of the mail server (to send system events to mail).
- Enter the domain name.
- Save the parameters by entering Save .
- Choose whether the server will also be a time server.
- We decide on time servers for synchronization and save the parameters by entering Save.
- Enter the administrator's mailing address.
- Enter the credentials of the so-called customer-user (name, address, organization name).
- We decide whether to launch the client to view the video and archive on the server (by default - do not start).
This completes the installation and you can reboot by first remembering or writing down the address where the administrator and client interface are located:
- 192.168.0.5 : 8000 - administrator interface - heavily trimmed version of WEBMIN (for login, use the username admin and the password specified at the beginning of the installation).

- 192.168.0.5 - the interface of the Netavis Observer client (for login we use the admin login and the password specified at the beginning of the installation).
We launch the browser (verified in fresh Firefox and Chrome, as well as in IE7) and enter the address of the Netavis Observer client - in this case - 192.168.0.5
Important!- the client requires installed Java and its support must be activated in the browser settings.
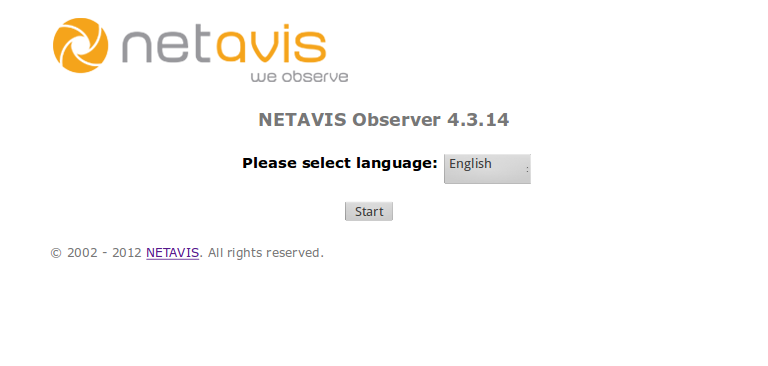
Accordingly, when you enter the Netavis interface, this page first appears:
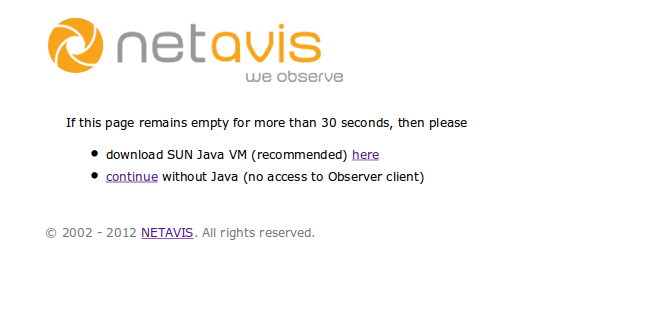
and if everything is OK with Java, you can select the interface language and click Start.
In the next screenshot, everything is clear - you can start the client from a browser, install the client on a local computer running Windows, as well as on smartphones under iOS (I have not tested this feature), as well as look at the documentation or go to the Customizer interface with the username admin and password admin.

But let's go back and launch (or install locally) the Netavis Observer client. And the first thing we see is a window that offers to license the program - and there are four points in it:
- Launch without a license - trimmed functionality, you can’t even add a camera.
- Launch with a demo license - you can add a camera, but will periodically be thrown out of the program.
- Request for a license depending on the number of cameras, users and other goodies from the official site.
- Direct entry of a license key.
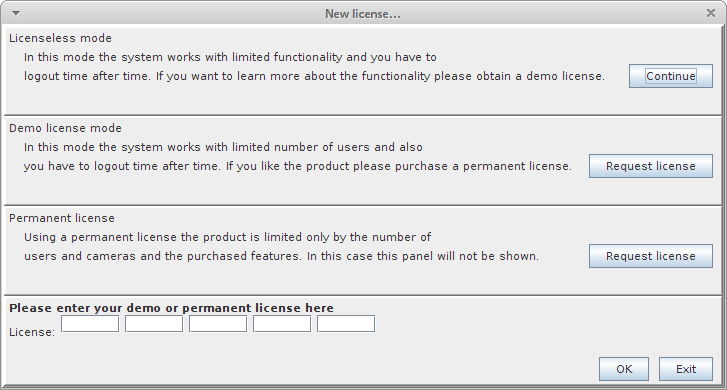
We are interested in the last item, since the license key is available. We enter the key, click OK and a message appears under the key input fields that the key has been saved on the server. We close the licensing window and restart the client.
After starting, an authorization window appears - login and password according to the documentation: admin / admin
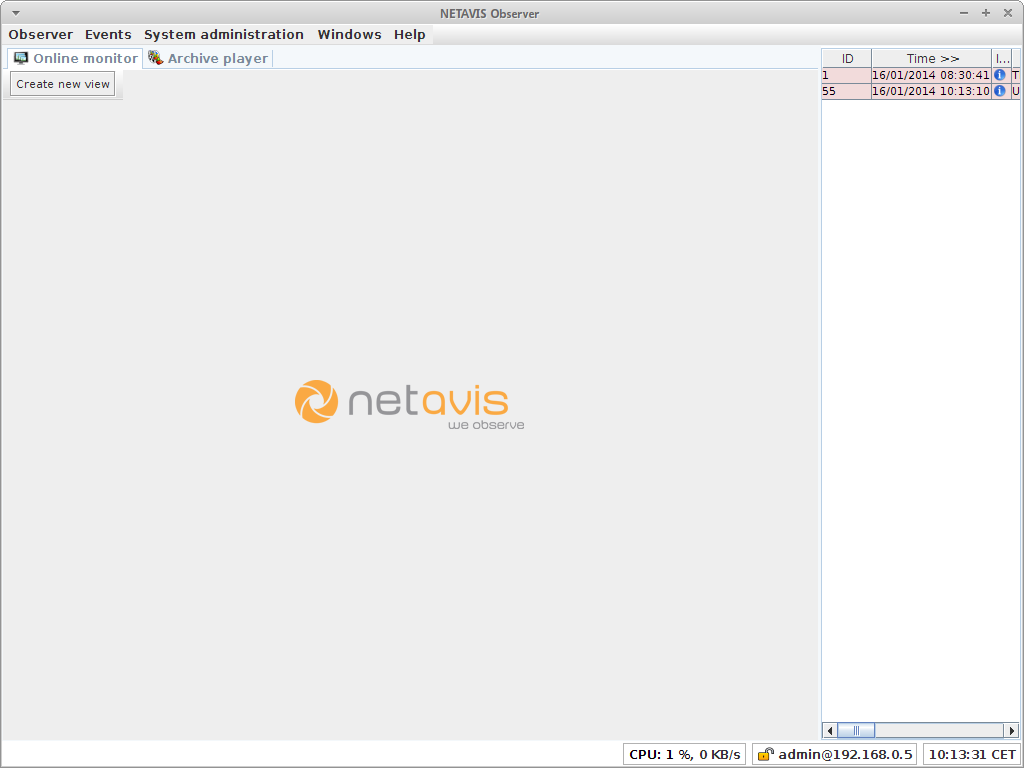
and finally the Netavis Observer client interface:
At some point it turned out that the hard drives installed in the server were not enough to record the archive for each camera for 1 month.
Hard drives of the required capacity were purchased and after reading the documentation, the process of adding and replacing hard drives to the system was understood. To do this, it is not enough to have access to the client interface, you need access to the system management console - according to the documentation, you need to log in to SSH using the admin user and for him with a password.
This can be done with the command ssh -l admin 192.168.0.5and enter the password. You can also just log in to the console locally.
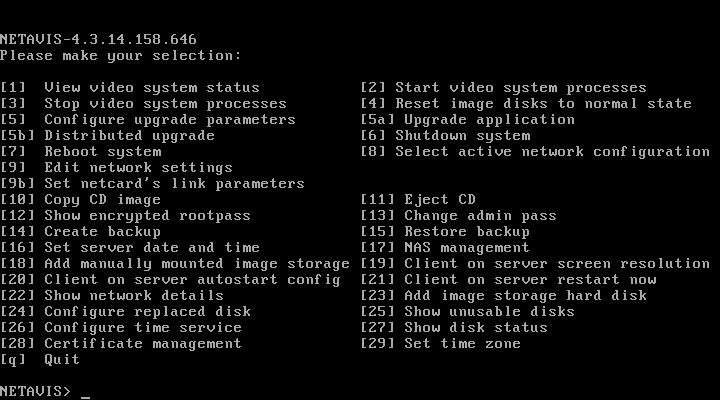
According to the documentation, the adding procedure is as simple as three rubles - turn off the server, connect a clean, unformatted hard drive, turn on the server and log in to the system.
Next, we type 27 to check whether the hard disk is detected or not, then we type 23 and wait for the end of the procedure to create a file system, create a mount point, etc.
After restarting the server and starting the system, a new hard disk is visible in the system and is ready to write to it archive.
And in case one of the hard drives is out of order and needs to be replaced, we follow another procedure: turn off the server, change the faulty hard drive to a working one, turn on the server and log in to the console. First we look at the status of the hard drives, and then type 24 - Configure replaced disk and wait for the end of the procedure.
Important: The new hard drive must be unformatted, and you must connect it to the same place where the faulty hard drive was.
We are looking for a problem - and we find it
Once it was necessary to add two hard drives and remove one of small capacity. And since the server was already practically in production operation, I wanted to combine two procedures - adding a hard drive and replacing one hard drive with another.
After booting the system and login to the console, I decided to start with the procedure of adding a hard drive instead of replacing one hard drive with another. The system added two new hard drives to the system, and there was nothing to change the hard drive for.
The result of such hasty actions was an error displayed in the client interface next to the processor load - Degraded recording, and the erroneous value of the space available to the system exactly as much as there was a gigabyte on the replaced hard drive. At the same time, this hard drive was displayed as unused in the console - item 25 - Show unusable disks.
No actions in the management console, rollback to the previous configuration, and attempts to restore the system from the installation disk did not lead to success. The documentation on this subject advised to rearrange the system from scratch or contact your dealer.
Solution
It was decided to create a similar problem in a virtual machine. It was easily succeeded.
It did not work under the root in the console - the password is not known. We boot from Xubuntu's live-cd on this virtual machine and start exploring the internals of the system.
The following interesting sections were discovered in the system:
- / - the root section itself.
- / netavis - the section where the Netavis system itself
is located - / var / lib / mysql - the section where the database directory is located.
There are also sections Images1, Images3, Images4 that are mounted in / Images
First of all, we look at the file / etc / shadow for a list of users and their passwords.
We are interested in the following users:
root: $ 1 $ UEe5kAv4 $ nWyqBmcmg3P.kM / ZB / s / 2.: 16086: 0: 99999: 7 :::
arms: $ 1 $ gKURq9W3 $ oYJWwNw9hKtJBmoVpkFju /: 16086: 0: 99999: 7 :::
admin: $ 1 $ 0.3jcW1k $ i6QabIE2yN0hCcTmrQ7j80: 16086: 0: 99999: 7 :::
netavQF99 $ 099 $ 650 $ 0 $ 1pqqbqf6f8 $ 0 : 7 :::
chpass: $ 1 $ CWDhlmfR $ b / IoN0Inx / A6eT04hivM / .: 16086: 0: 99999: 7 :::
It can be seen that there is a root password, but it does not match the password we set for admin .
The only way out is to change the root password to the admin password known to us. Therefore, we erase the root password hash and change the admin password hash , then save the file, unmount all file systems and reboot into Netavis.
Next, log in as root with the password we know from admin and begin to look around from under a live system with root privileges.
We look at which hard drives are connected:
[root @ videosystem ~] # fdisk -l
/ dev / sda1 * 1 13 104391 83 Linux
/ dev / sda2 14 664 5229157+ 83 Linux
/ dev / sda3 665 1315 5229157+ 83 Linux
/ dev / sda4 1316 2635 10602900 5 Extended
/ dev / sda5 1316 1966 5229126 83 Linux
/ dev / sda6 1967 2097 1052226 82 Linux swap / Solaris
/ dev / sda7 2098 2635 4321453+ 83 Linux
/ dev / sdb1 1 1045 8388607+ ee EFI GPT
/ dev / sdc1 1 1045 8388607+ ee EFI GPT
/ dev / sda1 * 1 13 104391 83 Linux
/ dev / sda2 14 664 5229157+ 83 Linux
/ dev / sda3 665 1315 5229157+ 83 Linux
/ dev / sda4 1316 2635 10602900 5 Extended
/ dev / sda5 1316 1966 5229126 83 Linux
/ dev / sda6 1967 2097 1052226 82 Linux swap / Solaris
/ dev / sda7 2098 2635 4321453+ 83 Linux
/ dev / sdb1 1 1045 8388607+ ee EFI GPT
/ dev / sdc1 1 1045 8388607+ ee EFI GPT
3 hard drives are connected - the system (dev / sda) and two archive (dev / sdb dev / sdc) and they are mounted accordingly:
Hidden text
[root @ videosystem ~] # mount
/ dev / sda7 on / Images / Images1 type xfs (rw, noatime, nodiratime, logbufs = 8, logbsize = 256k, allocsize = 256k)
/ dev / sdb1 on / Images / Images3 type xfs ( rw, noatime, nodiratime, logbufs = 8, logbsize = 256k, allocsize = 256k)
/ dev / sdc1 on / Images / Images4 type xfs (rw, noatime, nodiratime, logbufs = 8, logbsize = 256k, allocsize = 256k)
/ dev / sda7 on / Images / Images1 type xfs (rw, noatime, nodiratime, logbufs = 8, logbsize = 256k, allocsize = 256k)
/ dev / sdb1 on / Images / Images3 type xfs ( rw, noatime, nodiratime, logbufs = 8, logbsize = 256k, allocsize = 256k)
/ dev / sdc1 on / Images / Images4 type xfs (rw, noatime, nodiratime, logbufs = 8, logbsize = 256k, allocsize = 256k)
And here is what we have in fstab:
LABEL = Images1 / Images / Images1 xfs noauto 1 0
LABEL = Images2 / Images / Images2 xfs noauto 1 0
LABEL = Images3 / Images / Images3 xfs noauto 1 0
LABEL = Images4 / Images / Images4 xfs noauto 1 0
LABEL = Images2 / Images / Images2 xfs noauto 1 0
LABEL = Images3 / Images / Images3 xfs noauto 1 0
LABEL = Images4 / Images / Images4 xfs noauto 1 0
That is, there is a record of the replaced hard drive, which is actually not in the server. Delete the mount point of Images2 from fstab, save and reboot.
After loading, we launch the client and go to the System administration - System information section and see that the error has not disappeared, so the information about the disks used is stored somewhere ... and this is for sure Mysql.
Understanding Mysql.
So you need to connect to the database server, and for this you need to know the logins and passwords for access. To do this, go to / var / lib / mysql and see what databases are available.
Here is the list of databases:
- arms
- mysql
- test
The mysql database is system, you can see a list of server users and password hashes in it. So - the final path to the file with the information we are interested in - /va/lib/mysql/mysql/user.MYD - open the file in your favorite editor and see that there are not so many users - they have the same root and arms and password hash - 2f36c5e96b75ee48 , besides the old type, as evidenced by viewing the config of the Mysql server, which is located along the path/etc/my.cnf :
...
old_passwords = 1
...
The point is small - either guess the password or brute force, which could take some time. I started by trying to guess the password, substituting well-known passwords, blank passwords, passwords that match logins ... luck smiled almost immediately.
For both logins ( root and arms ), the password is arms.
Next, configure the SSH tunnel between the Netavis server and the computer on which we will run one of the graphical tools for administering the Mysql database, for example MySQL Workbench or Emma or any other that you usually use.
So, we create the tunnel:
- On Linux - with the commandssh -L 3306: localhost: 3306 [email protected] , enter the password that we copied from the admin user .
- A universal option - using Putty:
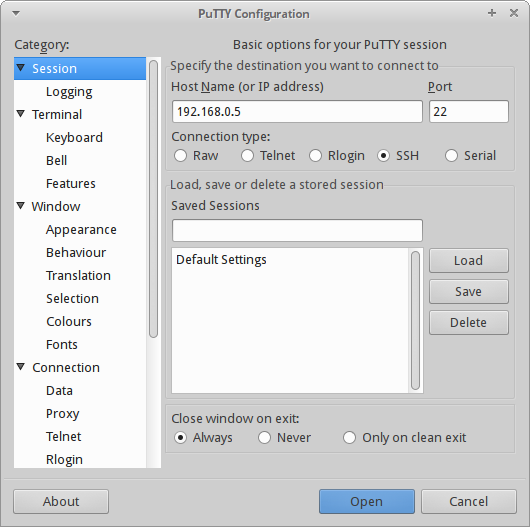
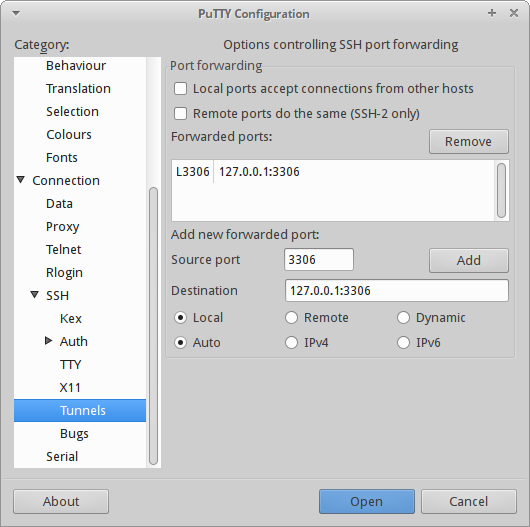
Next, run for example Emma, configure it to connect to localhost: 3306 and login / password arms / arms and go straight to the database with which Netavis - arms works .
Using the text search throughout the database using the “Images2” keyword (we are trying to remove this section from the program settings), we get the result in the form of the Directories table , in which the desired information is stored:
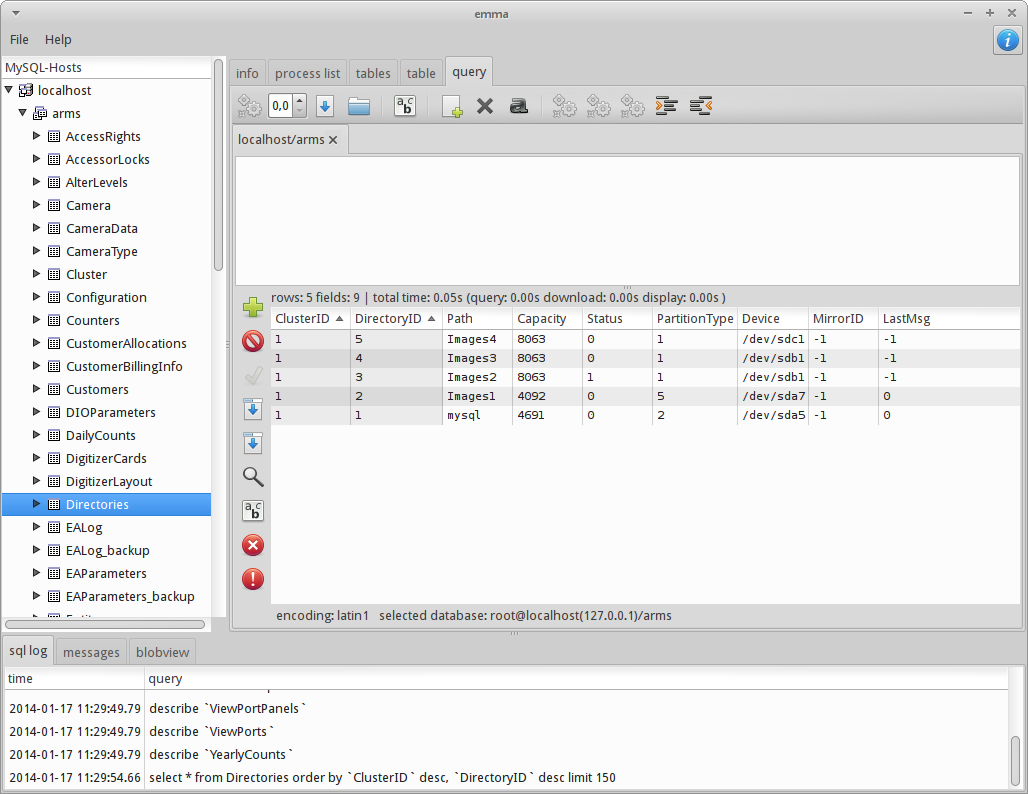
Delete the record with information about Images2 and reboot the server.
After loading, we launch the client and go to the System administration - System information section and see that the error has disappeared!
The archive is written in one piece, the Degraded recording error from the client interface disappeared, as well as information about the unused hard drive in the management console. Available file space is displayed correctly.
References:
Thanks for attention.









