The surveillance system in the car for him on the same Raspberry Pi. Part 1
Introduction
Good afternoon.
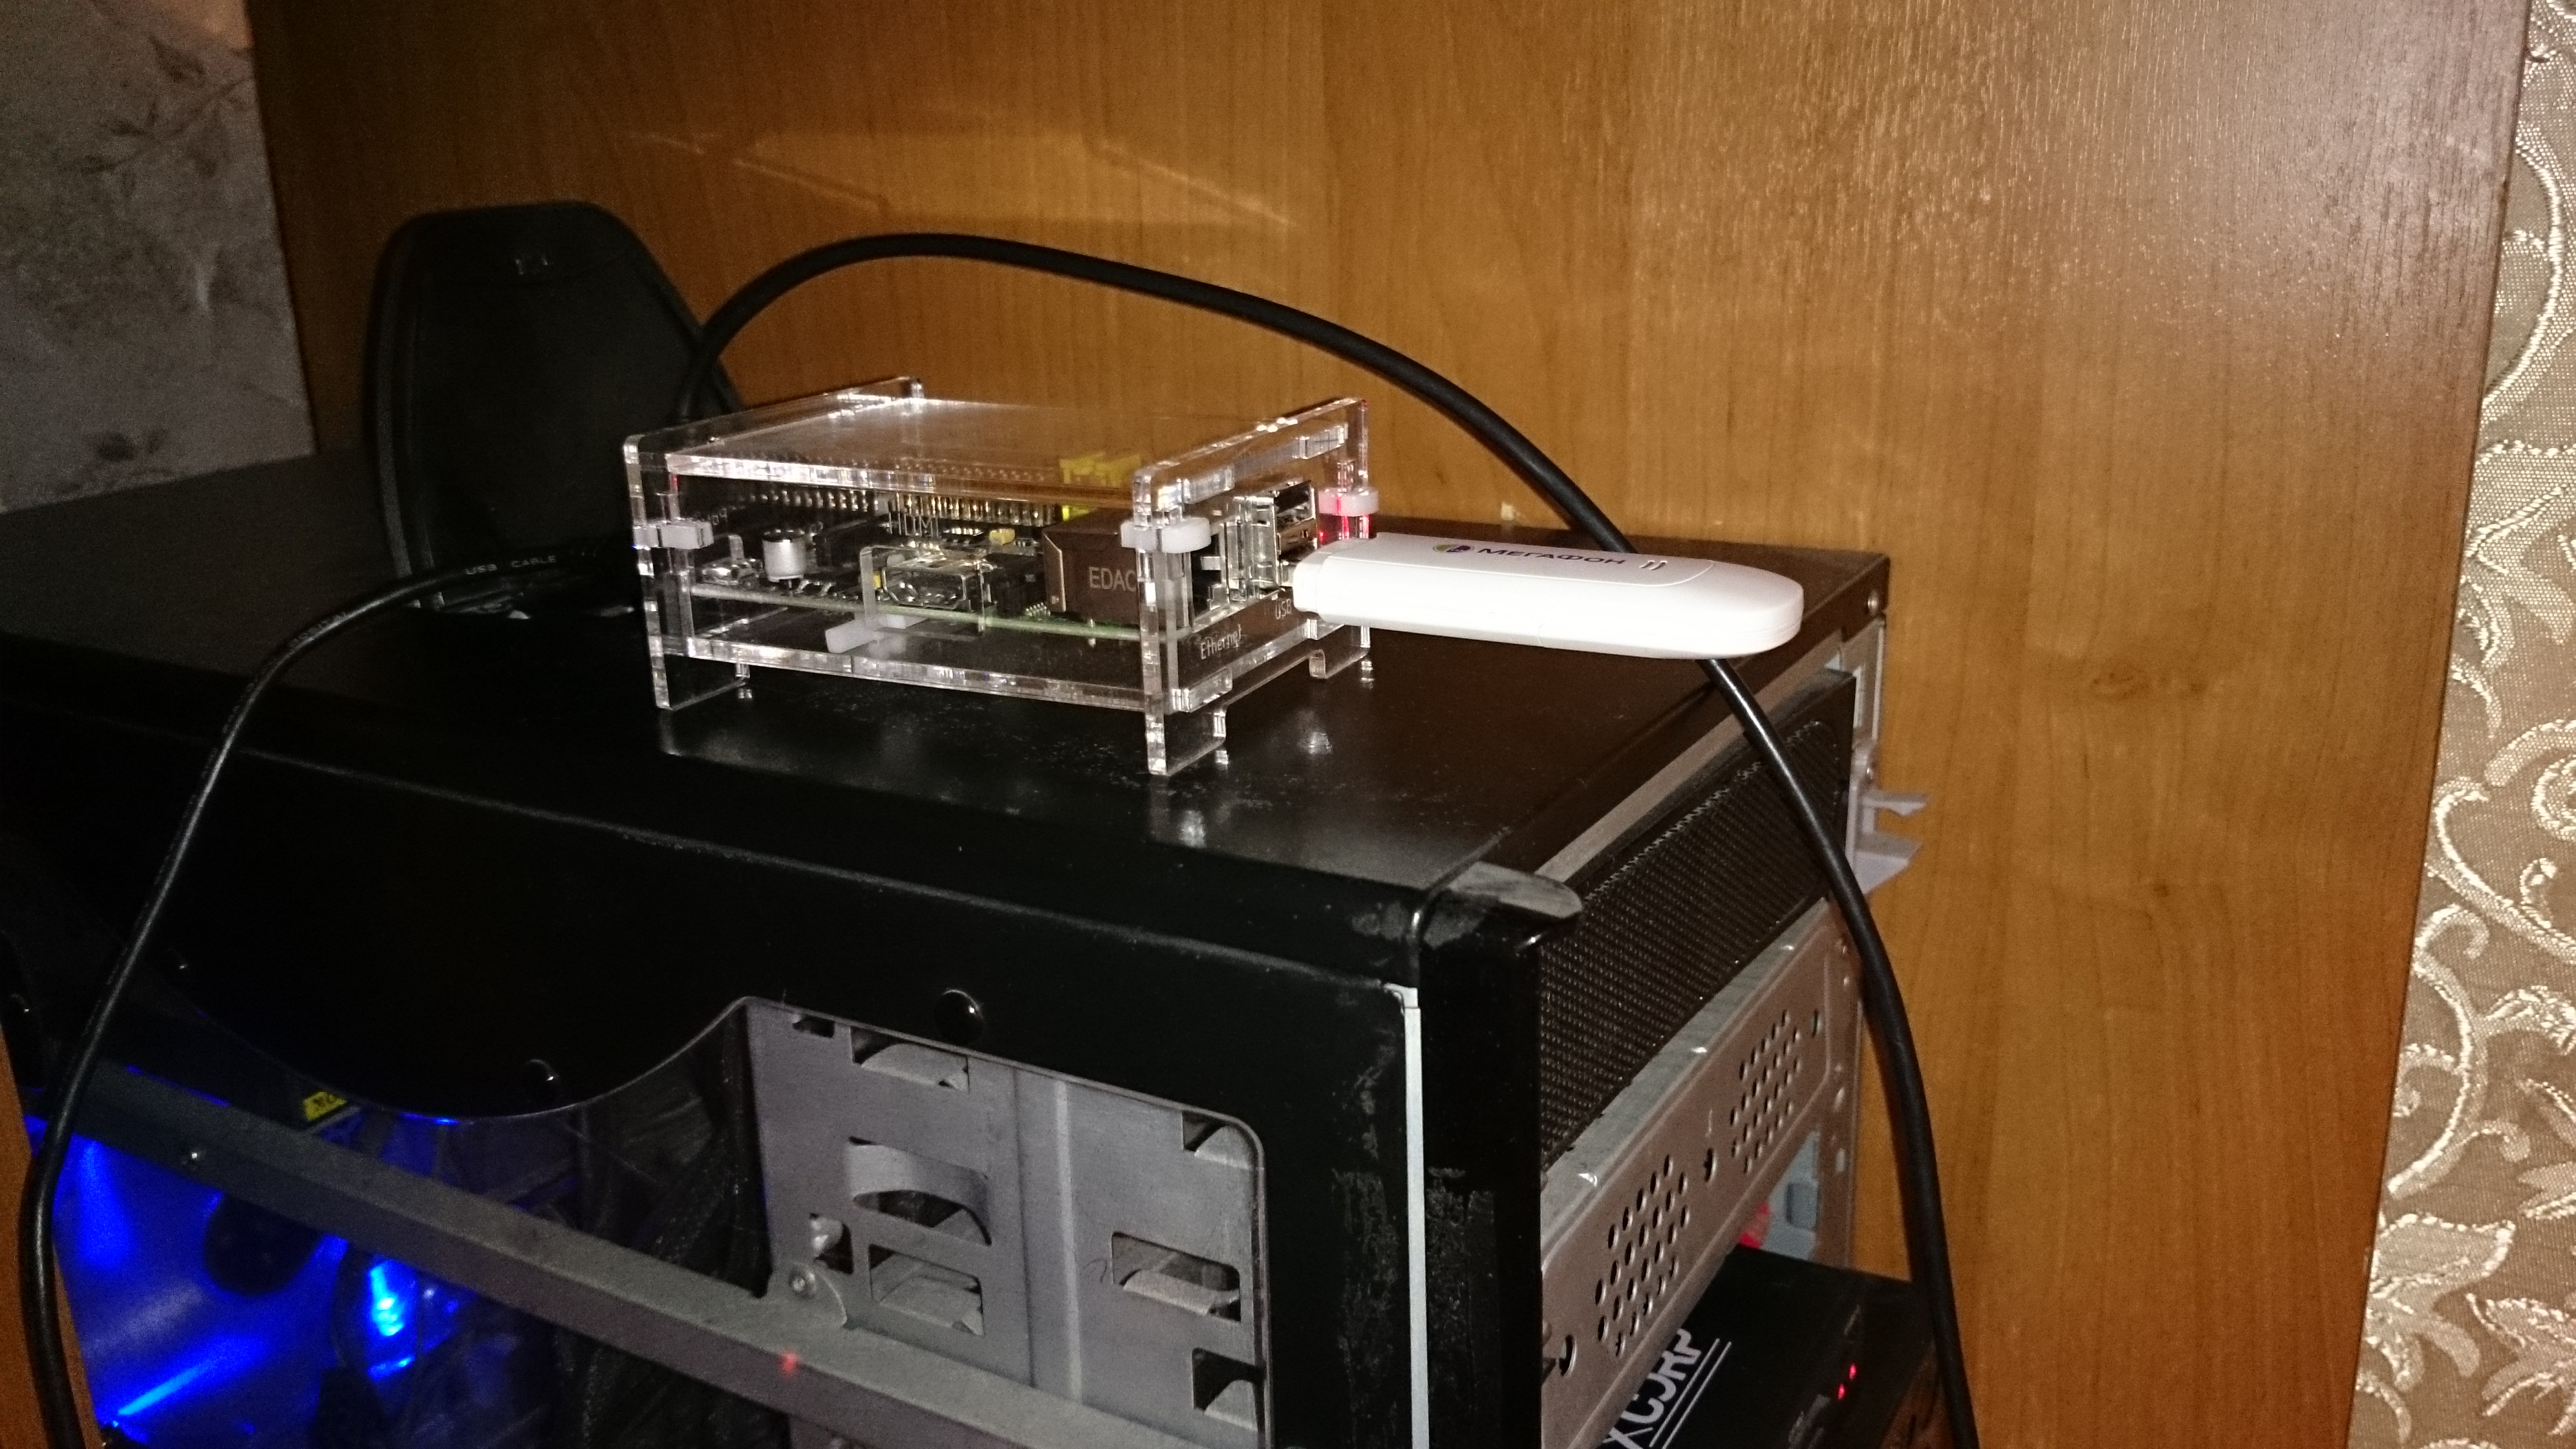
Once I purchased a Raspberry Pi for no reason at all - as soon as the mention of it on the hub began. He started aimlessly starting FTP servers, trying Node.js and other small server affairs, until he bought a new car. Of course, I didn’t do what I could find on the Internet like remotely opening a garage - due to the normal lack of knowledge of the Linux system and server programming languages. The car became dear to me and the idea came up - to put a raspberry in a car with USB devices screwed to it: GPS, Web-camera, 3G-modem - for which the 2nd Raspberry was bought.
In this article I will describe the preparation: installing Node.JS, configuring OpenVPN and 3G.
Plans
It is necessary that Raspberry was installed in the car with a GPS and a webcam connected to it, and so that at any moment I could even see what is happening with my car from my mobile phone.
So let's get started
Install Node.JS
Install Node.JS from the site, since the repository is version 0.6.18.
sudo mkdir /opt/node
wget nodejs.org/dist/latest/node-v0.10.20-linux-arm-pi.tar.gz
tar xvzf node-v0.10.20-linux-arm-pi.tar.gz
sudo cp -r node-v0.10.20-linux-arm-pi/* /opt/node
Now add the path to Node.JS to the environment variables so that you do not have to write a long path. To do this, edit the file:
sudo nano/etc/profile
вставвил строчки:
NODE_JS_HOME="/opt/node"
PATH="$PATH:$NODE_JS_HOME/bin"
As a result, the head of this file will look like this:
# /etc/profile: system-wide .profile file for the Bourne shell (sh(1))
# and Bourne compatible shells (bash(1), ksh(1), ash(1), ...).
if [ "`id -u`" -eq 0 ]; then
  PATH="/usr/local/sbin:/usr/local/bin:/usr/sbin:/usr/bin:/sbin:/bin"
else
  PATH="/usr/local/sbin:/usr/local/bin:/usr/sbin:/usr/bin:/sbin:/bin:/usr/local/games:/usr/games"
fi
NODE_JS_HOME="/opt/node"
PATH="$PATH:$NODE_JS_HOME/bin"
export PATH
We will need to install some modules globally (e.g. npm install -g express), so we will make our user the owner of the node directory:
sudo chown -R pi /opt/node
Проверяем:

Для написания кода в дальнейшем создадим папку:

По правилам поиска модулей сделаем симлинк глобальной директории модулей в home директорию, подробнее об этом можно почитать тут: nodejs.ru/doc/v0.4.x/modules.html#_u0417_u0430_u0433_u0440_u0443_u0437_u043A_u0430_u0438_u0437_u043F_u0430_u043F_u043E_u043A_node_modules_)
ln -s /opt/node/lib/node_modules ~/node_modules

Настройка OpenVPN
Так как нету возможности подключаться по SSH или хоть как-то получить связь с Малинкой через ОпСоСа кроме оплаты услуги за внешний IP, настроим OpenVPN.
Подготовка
- есть роутер со статическим внешним IP-адресом
- одна Малинка подключена к роутера через Ethernet
- есть 2 Малина, которая будет в далеке и доступна только через 3G
To do this, we will issue a physical IP address for Raspberry connected to the router:

Forward OpenVPN requests to the router from outside our "home" Raspberry, and for one SSH and HTTP:
 We will install Node.JS on the home Raspberry in the same way as before.
Installation
sudo apt-get install openvpn -y
A lot has already been written about generation and tuning both on the Habré and outside. I used the following articles: habrahabr.ru/post/188474 , adw0rd.com/2013/01/10/openvpn/#.UmTuCBCpFZQ , www.volmed.org.ru/wiki/index.php/%D0%9D%D0% B0% D1% 81% D1% 82% D1% 80% D0% BE% D0% B9% D0% BA% D0% B0_OpenVPN_% D1% 81% D0% B5% D1% 80% D0% B2% D0% B5% D1% 80% D0% B0 .
I will give the cuts of my settings.
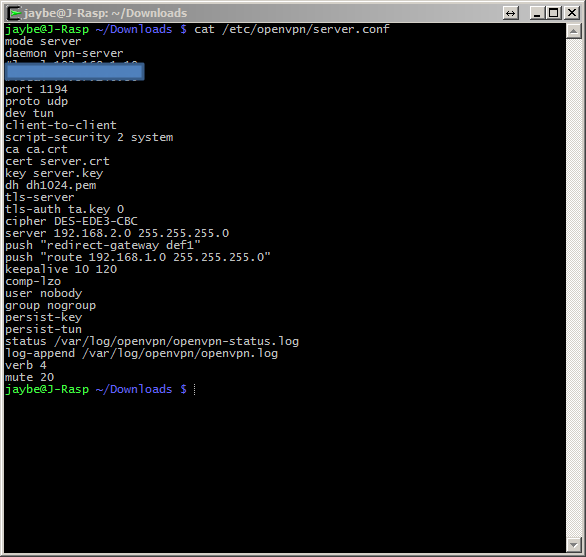

For the client, the remote field contains my external static address on the router.
3G setting
Training
To access 3G, I bought a 3G-modem Huawei E1550 from Megaphone, with its own SIM card.
When connected, the modem is defined as a disk, so you must switch it to modem mode.

To switch it to modem mode, you must install the program and reboot.
sudo apt-get update && sudo apt-get install usb-modeswitch -y
sudo reboot
Let's see our devices:

Actually setting up the connection
Create a directory:
$ mkdir ~/3g && cd ~/3g
Download the 3G connection setup program:
wget http://sourceforge.net/projects/vim-n4n0/files/sakis3g.tar.gz/download
tar -xzvf sakis3g.tar.gz
Download the add-in program on UMTSKeeper (this is an add-on on sakis3g and it was written by the same author =))
UMTSKeeper should lie in the same directory as sakis3G
$ wget http://zool33.uni-graz.at/petz/umtskeeper/src/umtskeeper.tar.gz
$ tar -xzvf umtskeeper.tar.gz
Install PPP Support
sudo apt-get install ppp -y
Now let's try to establish a 3G connection:
sudo /.sakis3g --interactive
In the first option, select
Connect with 3G, and in the second 11th point -
Custom APN.
For a megaphone, the settings are as follows:
- APN: internet
- APN_USER: megafon
- APN_PASS: megafon
If everything is correct, the program will display a message about a successful connection.
In order to reconnect when the connection is broken, we already have UMTSKeeper.
sudo /home/pi/3g/umtskeeper --sakisoperators "USBINTERFACE='0' OTHER='USBMODEM' USBMODEM='12d1:1001' APN='CUSTOM_APN' CUSTOM_APN='internet' APN_USER='megafon' APN_PASS='megafon'" --sakisswitches "--sudo --console" --devicename 'Huawei' --log --silent --nat 'no' &
Instead of the value 12d1: 1001 ', you must specify your device number from lsusb .
Now let's see the magazine:

Everything works, great!
Now we will write this command at startup:
crontab -e

Conclusion
As a result, we have this situation:
There is a router with an external static IP address, to which a “home” Raspberry Pi is connected and acting as an OpenVPN server (and http in the future) and a “car” Raspberry Pi, which connects to a 3G modem with "Home" OpenVPN.
A few pictures for a change:

PS
I do front-end most of the time, so the server side may not be ideal somewhere.
With positive reviews - in the next article I will write about connecting and configuring a GPS receiver and a Web camera via a USB hub.