Configuring Django 1.6 with python 3.3 under Apache2 on Ubuntu 12.04 Server
Have a nice time of day!
There was a need to configure Django support on your server with PHP for Apache. I thought it would not be difficult and everything will go smoothly, but it didn’t work out quite like that. The fact is that I decided to configure the latest version of the freemark with support for the third python. Then pitfalls began to surface.
Actually, mainly because of the third point, I was transported for quite some time and subsequently decided to write this article.
I must say right away that I assume that apache2 and PHP are already on the server. We just add functionality to what we already have.
To begin with, I decided for myself that it would be nice to install the latest version of python - 3.3 (this server is more for educational purposes, but I want to learn from the very latest), but in Ubuntu 12.04, by default, you can install only 3.2. In order to add support for the latest version, add a new repository :
Install python 3.3 and python 3.3-dev (we will need it to compile mod_wsgi a bit later):
The next step is to install mod_wsgi, it is needed for a bunch of python and apache. The distribution available on the aptitude command will not work for us, since it does not support python version 3.3. But the developers of the module are working on this and the necessary code is already in the repository, so we just have to collect the latest version from the sources and add the address to the newly installed python when compiling:
Now let's move on to installing Django 1.6. Once again, installation from the repository is not suitable for us, since there is version 1.3, which is much less than 1.6 and, moreover, does not support python 3, so again we install it not on a straight line:
And so, now we have preinstalled apache, the last python, django is installed, and now we just have to configure all this. First, create a folder for our site and a django application:
Create a virtual host:
Inside this file we write:
Create a WSGI file:
We write the settings for our site:
Now you need to edit the httpd.conf file:
We write in it:
Turn on the virtual host, restart the Apache:
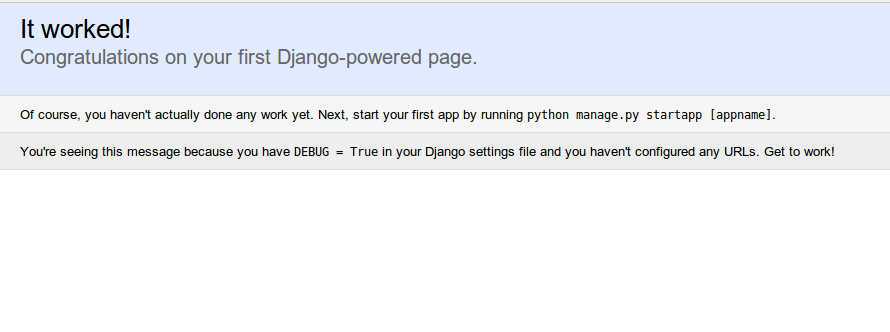
Now your new site should start up and happily inform you that: “It worked!”, And: “Of course, you haven't actually done any work yet. Next, start your first app by running python manage.py startapp [appname]. ".
That's all! I hope you can do it much faster than I did. Have a nice coding!
There was a need to configure Django support on your server with PHP for Apache. I thought it would not be difficult and everything will go smoothly, but it didn’t work out quite like that. The fact is that I decided to configure the latest version of the freemark with support for the third python. Then pitfalls began to surface.
The main problems encountered:
- The python version on Ubuntu Server 12.04 is 2.7, and I wanted to use the third version
- Django supports the python version starting with 3.2, while mod_wsgi in the stable version does not support version 3.2
- Lack of comprehensive guidance to address these issues
Actually, mainly because of the third point, I was transported for quite some time and subsequently decided to write this article.
Let's get started
I must say right away that I assume that apache2 and PHP are already on the server. We just add functionality to what we already have.
To begin with, I decided for myself that it would be nice to install the latest version of python - 3.3 (this server is more for educational purposes, but I want to learn from the very latest), but in Ubuntu 12.04, by default, you can install only 3.2. In order to add support for the latest version, add a new repository :
sudo add-apt-repository ppa:fkrull/deadsnakes
sudo apt-get update
Install python 3.3 and python 3.3-dev (we will need it to compile mod_wsgi a bit later):
sudo apt-get install python3.3
sudo apt-get install python3.3-dev
The next step is to install mod_wsgi, it is needed for a bunch of python and apache. The distribution available on the aptitude command will not work for us, since it does not support python version 3.3. But the developers of the module are working on this and the necessary code is already in the repository, so we just have to collect the latest version from the sources and add the address to the newly installed python when compiling:
hg clone https://code.google.com/p/modwsgi/
cd ./modwsgi/mod_wsgi
./configure --with-python=/usr/bin/python3.3
make
sudo make install
Now let's move on to installing Django 1.6. Once again, installation from the repository is not suitable for us, since there is version 1.3, which is much less than 1.6 and, moreover, does not support python 3, so again we install it not on a straight line:
wget https://www.djangoproject.com/download/1.6/tarball/
tar xzvf index.html
cd Django-1.6
sudo python setup.py install
And so, now we have preinstalled apache, the last python, django is installed, and now we just have to configure all this. First, create a folder for our site and a django application:
mkdir  -p ~/public_html/domain1.com
cd ~/public_html/domain1.com
django-admin.py startproject MyProject
Create a virtual host and WSGI file
Create a virtual host:
sudo nano /etc/apache2/sites-available/domain1.com
Inside this file we write:
<VirtualHost *:80>
        ServerName domain1.com
        ServerAlias www.domain1.com
        WSGIScriptAlias / /home/username/public_html/domain1.com/MyProject.wsgi
</VirtualHost>
Create a WSGI file:
nano ~/public_html/domain1.com/MyProject.wsgi
We write the settings for our site:
import os
import sys
sys.path.append('~/public_html/domain1.com/')
os.environ['DJANGO_SETTINGS_MODULE'] = 'MyProject.settings'
import django.core.handlers.wsgi
application = django.core.handlers.wsgi.WSGIHandler()
Apache setup
Now you need to edit the httpd.conf file:
sudo nano /etc/apache2/httpd.conf
We write in it:
LoadModule wsgi_module /usr/lib/apache2/modules/mod_wsgi.so
WSGIScriptAlias / /home/username/public_html/domain1.com/MyProject/MyProject/wsgi.py
WSGIPythonPath /home/username/public_html/domain1.com/MyProject
<Directory /home/username/public_html/domain1.com>
<Files wsgi.py>
Order deny,allow
Require all granted
</Files>
</Directory>
Almost done
Turn on the virtual host, restart the Apache:
sudo a2ensite domain1.com
sudo service apache2 restart
Now your new site should start up and happily inform you that: “It worked!”, And: “Of course, you haven't actually done any work yet. Next, start your first app by running python manage.py startapp [appname]. ".
That's all! I hope you can do it much faster than I did. Have a nice coding!