How to create a world, hide a corpse and overtake a Persian. Stacks of sandwiched keys. Virtual FMS and FSKN (or who resolves 228 and “powders the nose”)
- Tutorial
Demo based on one video :
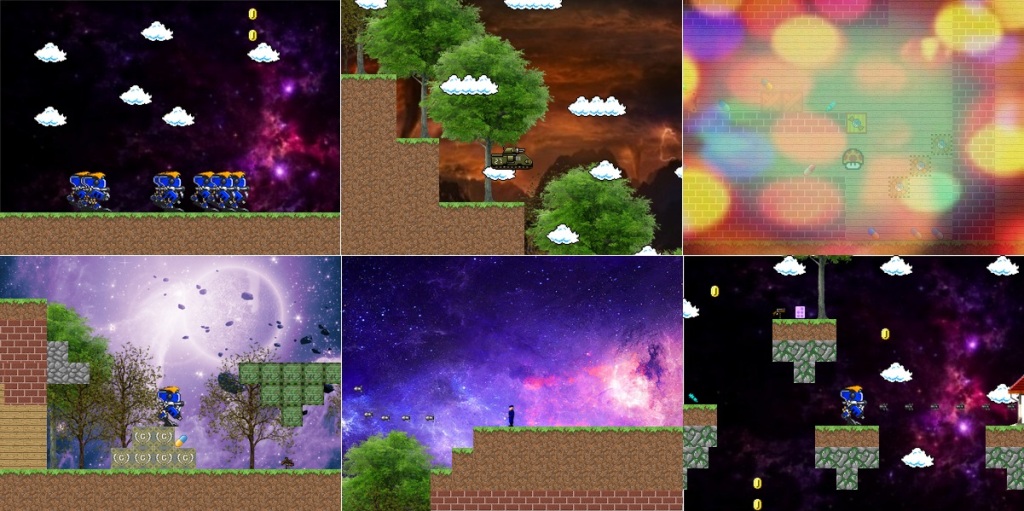
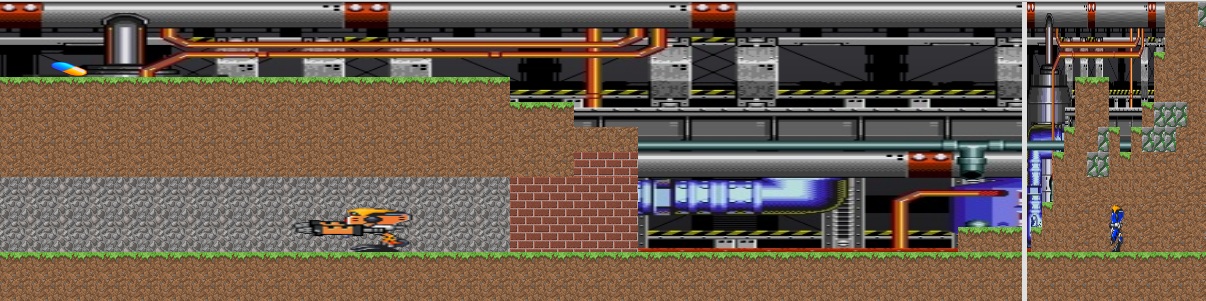
Example 1 - you are a big mushroom, and everywhere there are pills (like at an acid party)
Example 2 - A man drives a truck
Example 3 - Throwing defective bricks into a well
Example 4 - Robot battle (PvP)
Duplicate server: 1 , 2 , 3 , 4
Hi Habra! This is the third article about the StalinGrad game engine. In past articles, you and I have already raped DHTML and a bit of disassembled architecture. This article will be in two parts - practice and theory. If you are not a web developer, you can immediately flip through the theory (maybe it will be interesting to you or write some advice).
What was considered in previous articles:
Improvement to production
JS -> EXE -> CHM -> APK
About architecture
Debriefing a gun
Debriefing a camera
Writing the first game
Example of creating a game:
<divid="TV"><div>var S = StalinGrad, // Сократили слово, чтобы меньше писать
Russia = S.world(), // Создали мир
ORT = S.camera(Russia, "TV"), // Создали камеру
Vova = S.people("robot1"); // Создали персонажа
S.map(Russia, "Moscow"); // Загрузили карту для мира
S.module.controller(Vova); // Привязали управление к клавиатуре
ORT.bind(Vova); // Привязали камеру к персонажу
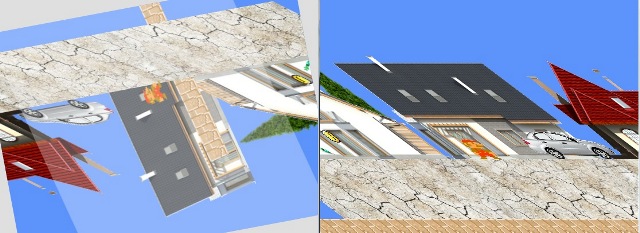
Russia.add(Vova); // Добавили персонажа в мирA demo of what happens can be found here .

Expected more? But the next 10 thousand letters we will analyze what is written here. You can see the demo code in this and past articles. Scripts almost everywhere fit in less than 20 lines. Perhaps some of you will ask why the title of the article is not this: “- How to write a game in JavaScript in a minute?”. Because we all (well, or 95%) are well aware that this is just a demo. For the game to go into production, you also need to connect a bunch of modules, a game interface, menus, missions, videos between levels, screensavers, messages, think over a plot, think through and draw level maps, create a bunch of bots, discuss everything with different managers and designers, get a reprimand from the customer, fix 100 magic bugs, write a bunch of "pasta code" for all sorts of "whistles and fakes." And on the day of release, the customer will ask you to make a small revision and redo half the project (moreover, only with crutches, because there is no other way to be in time). We can say that StalinGrad is not for those who write an HTML5 game in 20 minutes, but for those who mock JavaScript for several days / weeks / months.
We have discussed the general logic of work with you in a previous article, but in this, let's take a close look at each line and API.
How to create a world
StalinGrad.world();Each world has a set of standard parameters, for example: length, height, time of day, gravity, air friction, etc. Here, as when creating objects, you can set your parameters in the following way:
var temp = StalinGrad.world({
    frictionOfTheAir: 0.01,     // трение воздуха
    gravitation: 88.2,          // гравитация
    jiffy: 0.05,                // время "мига" для физ. расчетов
    meter: 10,                  // длина "метра" для физ. расчетов
    max: {
        x: 3300,      // длина мира
        y: 400,       // высота мира
        speed: {
            x: 20,    // ограничение по скорости для X
            y: 20// ограничение по скорости для Y
        }
    },
    respawn: {        // координаты точки респауна, для объектов с нулевыми координатами
        x: 0,         // Если вы загрузите в мир карту — она изменит точку респауна для персонажей
        y: 0
    }
    ... и т.д.
});
Each object in the world has its own API. The most important functions in it are: add () and remove (), for adding objects to the world and removing them, respectively.
How to create an object
The general scheme for creating objects:
StalinGrad.класс_объекта("тип_объекта");For example, characters:
StalinGrad.people("nyancat");
StalinGrad.people("ninja");
StalinGrad.people("mushroom");
Or something different:
StalinGrad.block("brick");
StalinGrad.material("floor");
StalinGrad.weapon("portal");
With this creation, each object receives the coordinates x = 0 and y = 0. Therefore, when creating the object, it is desirable to indicate the coordinates in which it will be located. If you don’t do this and start adding an object to the world, it will give an error to the console: “I can’t add an object. This place is already taken by another object. ” Therefore write like this:
StalinGrad.класс_объекта(x, y, "тип_объекта");For example:
StalinGrad.block(0, 25, "brick");
StalinGrad.material(0, 50, "floor");
The standard width / height of most objects is 25 by 25. Why do I need to set the initial coordinates at the time the object was created, and not later? Because objects have start and end coordinates. If you specify the initial x and y when creating the object, the final x and y will be obtained automatically (x maximum = x minimum + length). If you decide to ask them later, then you will consider the maximum coordinates yourself. For example:
vav cat = StalinGrad.people("nyancat");
cat.x.min = 50;
cat.x.max = cat.x.min + cat.width;
And even better - do not go into the coordinates at all, because most likely your task can be solved through the API.
If for some reason you need to change even more of the initial properties of an object, then you can use this syntax:
var temp = StalinGrad.block({
x: 0, // начальная координата по X
y: 25, // начальная координата по Y
type: "brick", // тип
width: 400, // длина
height: 200// высота
... и т.д.
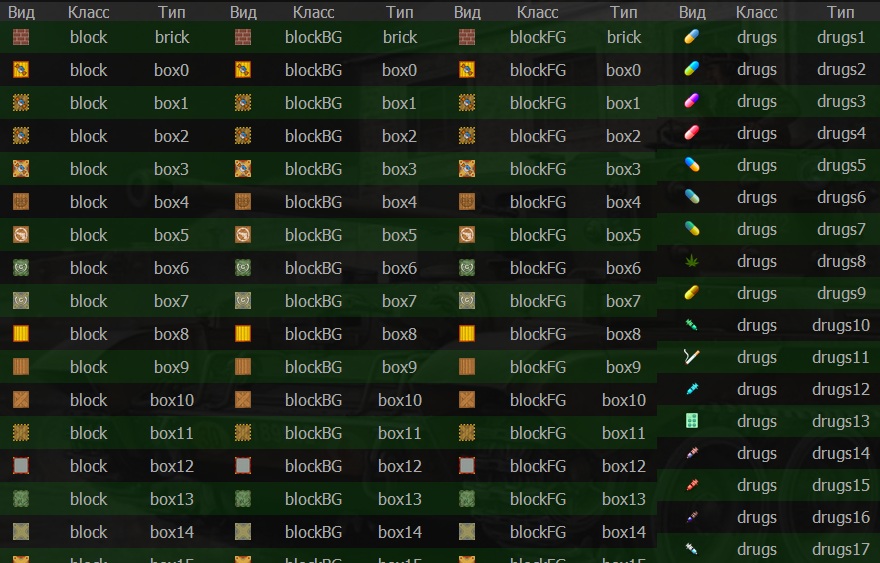
});Information on all available types you can see in this table . The game engine Cocos2D is widely known on the Internet. I really liked it too, so I decided to import its base into StalinGrad. Unfortunately, after refactoring the code, the essence of the coconut has changed a lot (only the name remains). You can get it with the following command:
StalinGrad.grugs("cocos");And add it to the world, for example, like this:
var cc = StalinGrad.grugs("cocos");
	Russia = StalinGrad.world();
Russia.add(cc);
And characteristically, coconut is also in 2D. You can see detailed information about other objects of the drugs class in the catalog.
Many of you probably had the following question about the API: “- Why are the different functions in the API not separated by their type with additional words?” For example, it is more logical to make the following schemes:
StalinGrad.object.people("nyancat");
StalinGrad.object.grugs("cocos");
Then it immediately becomes clear that people and grugs are methods for working with objects. But this is obvious for the experienced, but for the juniors - on the contrary. In addition, we need to remember an additional word in the construction, which can be shortened. Perfectly reveal the essence of jQuery and Backbone. In jQuery, many methods are so intuitive that you can even guess if they are available without reading the documentation. But Backbone without documentation is not at all obvious.
How to cheat a Persian
Let's analyze the work with the personal belongings of the character. Honestly, I did not come up with an adequate API, so at the moment the scheme is as follows:
персонаж.bag.одна_из_функций_API(персонаж);Imagine a guy with a backpack and look at the API:
left(cat);           // взять предыдущую вещь из рюкзака
right(cat);          // взять следующую вещь из рюкзака
show(cat);           // достать вещь (активна, её можно использовать)
hide(cat);           // спрятать вещь (если оружие, то оно в кабуре — использовать нельзя)
set(cat, index);     // сделать вещь с номером ... активной
get(cat);            // получить ссылку на выбранную вещь
add(cat, id);        // добавить вещь с id ... в рюкзак (ниже написано про Реестр объектов)
remove(cat, index);  // удалить вещь с номером ... из рюкзака
For example:
cat.bag.left(cat);The API is crooked and I don't like it. So I will rewrite in the future. You have to throw the character every time, because due to nesting, I can’t get a link to the original object from which the call chain began from the prototype. If you have ideas on how to implement the backpack API in a more adequate way, write in the comments.
How to create a camera
The time has come to create a camera and look at the world:
var NTV = StalinGrad.camera("id_div_элемента"); // эта камера просто заставляет DIV держать пропорцию сторонvar RTVi = StalinGrad.camera(экземпляр_мира, "id_div_элемента"); // эта камера смотрит на мир и выводит изображение в DIVAs always, when creating an object, you can specify additional settings:
var MTV = StalinGrad.camera({
    world: Russia,         // мир, который будем показывать
    maxRendering: {        // дальность отрисовки
        x: 400
        y: 300
    },
    screenResolution: {    // разрешение экрана
        x: 400
        y: 300
    }
    x: 0,                  // координата по Х
    y: 0// координата по Y
});
Each camera also has an API, like a joystick: left (), right (), up (), etc. See the documentation in the last section. For example:
RTVi.left();    // сдвинем камеру влево
RTVi.resize();  // подгоним экран под размер окна
Well, the most important bind () method for us, which is necessary to attach the camera to the character. For example:
ORT.bind(Vova);By the way, you can tie a camera to a character, including, and only along one axis. For example:
ORT.bind({
    object: Vova,      // персонаж, к которому привязываем камеру
    type: "x",         // ось, к которой привязываем
    correction: {      // пропорции координат
        x: 2,
        y: 3
    }
});
You probably already asked yourself the question: “- What is the proportion of coordinates ?!” The fact is that if the character is ideally located in the center of the frame, it looks strange. Therefore, a small offset is specified. In this example, the character will be shifted to the left of the beginning of the frame in X half a screen, and one third from the beginning of the frame. You can change the settings and make sure that the position in the center hurts the eyes (correction x = 2, y = 2).
The demo with the lost settings

How to create a joystick
As I wrote in a previous article, to control a character, we need a joystick. Let's create it:
var joystick = StalinGrad.controller(Vova);Any joystick has a standard API: left (), right (), attack (), use (), turn (), up (), down (). It’s through this API that you should control the character, but don’t get into the coordinates;)
But we won’t control the character from the code? Therefore, we do not really need a joystick. And we need a controller module. We will throw a character at him. The module will create a joystick for the character and attach the joystick to the keyboard.
StalinGrad.module.controller(Vova);Object registry
Any factory, of those that were considered above, before returning to you an object will add it to a single register of game objects. This is necessary in order to remove direct links to each other between objects. We have already touched on this topic in a previous article. Referring to each other is bad. This creates problems with scalability, when deleting objects, when trying to stop memory leaks, etc. In addition, when nesting objects, it is completely impossible to convert them to a string through JSON.stringify. Therefore, the things of the character are only the ID of things, the passengers inside the transport are only the ID of passengers, etc. You need to convert everything to a string for save / load functions. But about them another time.
The registry of objects is like the FMS, only virtual. You can refer to it like this:
StalinGrad.registry.get("id_объекта");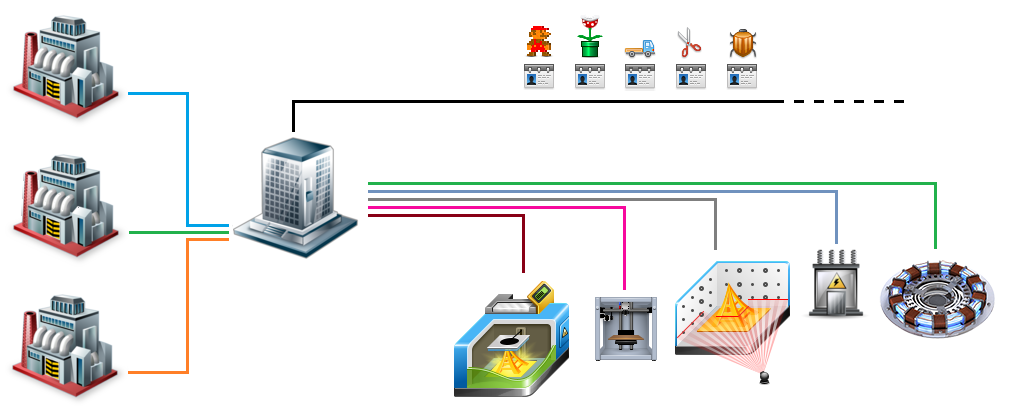
Through it, all third-party modules work that do not have the right to store a link to the instance at home, because this can create unexpected problems like memory leaks, etc.
How the controller module works
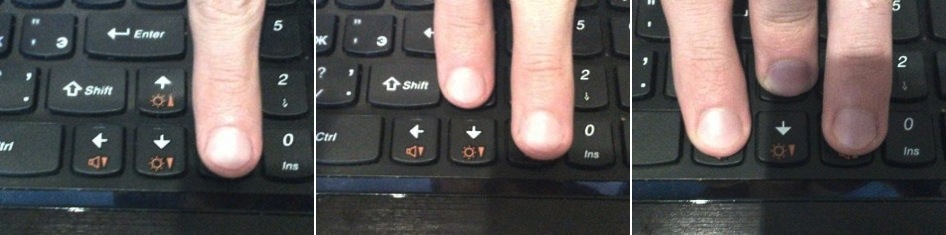
In almost every game we make, we have the main character controlled by the player. Management in all games is standard, so over and over we have to solve the same problem - to attach the joystick to the keyboard. To get rid of this, the code is taken out in the module, and the module is used in 99% of cases, therefore it is included in the engine core. As for the control itself, it is this: AWSD or arrows, E - use, Enter - shoot, e - switch mode (for example, the gravity gun mode). In addition, a bunch of duplicate buttons are also attached so that the player can immediately take and start controlling, regardless of where he pokes his finger. Misunderstanding of control was a common problem of old JavaScript games (and new ones too). You sit, watch the demo, poke all the buttons on the keyboard, and the character just stands still. And the game seems to be good, but it's impossible to play. What guided me when choosing the buttons? Here's a situation:
You can try, it's funny. Well, of course, there are obvious bugs that need to be addressed. For example:
“Push left, then pinch up. We release it up (the button to the left is still clamped) and ... everything, the character no longer runs to the left. ”
The same problem with the combination of left + right - right. Many, of course, will advise you to better deal with keypress, but no, this does not work in JavaScript or does not work as you feel.
The way out of the situation was suggested by the algorithm of the old snake, in which sticky keys were used: when a key was pressed, direction information was simply written into a variable, followed by a timer. In fact, an intermediary appeared between the game and the keyboard in the form of a variable that remembers the last direction. And what to do in our case? And if we want two players to play the game at the same time? But what if it is necessary for one person to be able to control an entire army of bots at once? Then we start to think ...

At the entrance, we have a joystick with configs (or without them, then he will get default configs). We create a keyboard map and mark the buttons that we will follow. Next, create an event stack and an array of joysticks. If any button has been clamped, the module looks at who has been subscribed to it and enters the event information into the necessary stacks. In parallel with this, on a timer, a stack check is triggered. A special function goes around all the stacks, looks at what recent events are recorded in them. Next, for each stack, an array of joysticks (which are listed behind this stack) is sorted. And for each joystick, an event belonging to him is heard. If the player releases the keyboard button, the module removes it from all the stacks that subscribed to it. So, when the timer comes to the stacks, it will take the previous event that worked on the previous button.
The scheme is complex on the one hand, and on the other hand, provides excellent prospects for scalability. We can set configs and list the buttons that we want to subscribe to. So you can make a game for two or more players.
A few demos:
- Two player game
- We manage a bunch of characters (PLs and KLs will appreciate it, especially if they farm castles in several windows)

Substance register
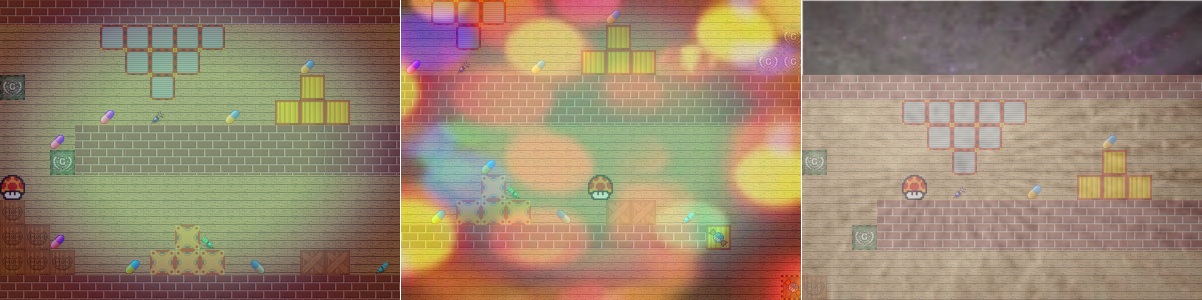
Examples of substances in GTA, Stalker and Fallout showed that with them the game can become more interesting. The task arose to add substances to the engine. Initially, everything was simple - you use the drug and the camera adds an additional class to the display. A trip is created using CSS3 tools (rotation, transformation, etc.). But the circuit turned out to be completely inoperative in older browsers.

Then it was decided to leave CSS3 and write effects by other methods and means. I divided the effects of all the trips into two types: applying a filter to the display and reverse control. To filter the image, I created an additional div (transparent trip screen) with a z-index higher than that of all other objects. The trip screen accepts a class with background-image, and there is a transparent png image with effects like instagrams. Further, the transparency of the trip screen changes from 0 to 1, depending on whether the character is rotated or not. In addition, this screen carries another function - the function of a protective screen for devices with a touchscreen. If the owner of the touchscreen will persistently click on the picture, he may pop up an offer from the system to save the picture. If there is a transparent div on top of this picture, there will be no messages.
The task with reverse control was not so obvious. In addition, for each trip it was necessary to create a timer in order to later turn off the action of the trip and make the trip screen transparent again. When scaling (creating a bunch of worlds, characters and simultaneous trips), this scheme was completely ineffective. Not only was a bunch of timers created, but also the connections between the objects of the character / camera / joystick intensified, which contradicted the logic of modularity. There was only one way out - to write an additional kernel module, which will resolve everything related to trips (we have our own FSKN with a timer and a database).
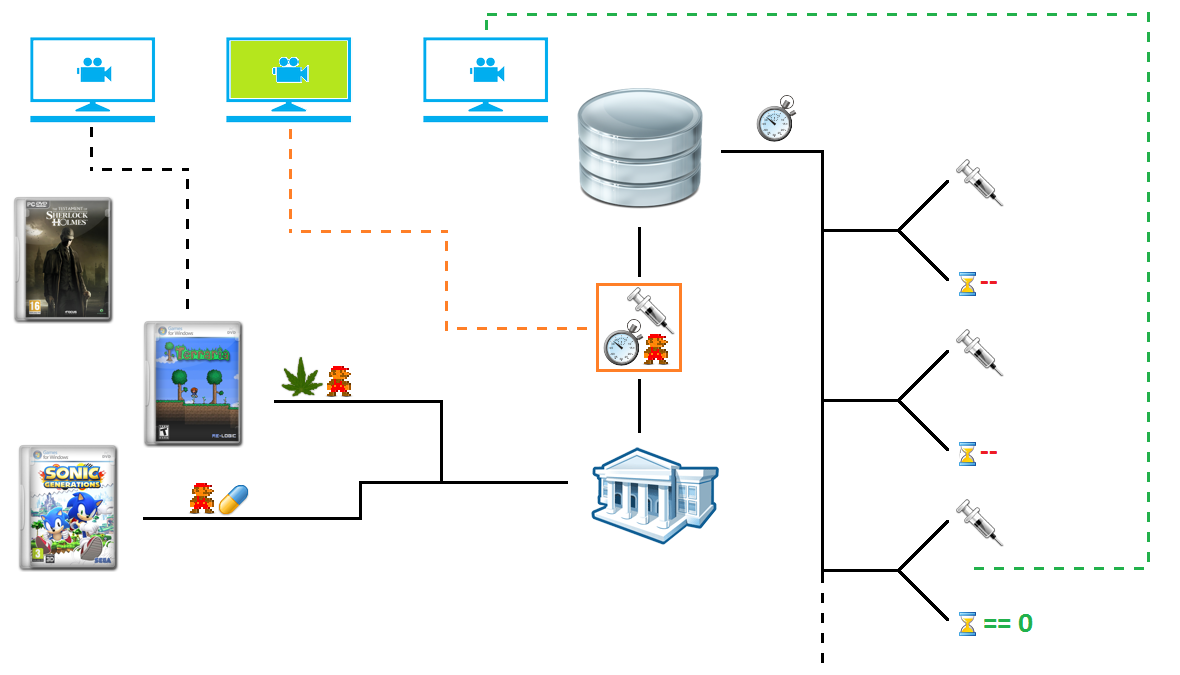
Let's analyze the module diagram:
There is an nth number of worlds with m characters in them. If someone takes the substance somewhere, then information about it is sent to the register of substances. There she is entered into the database, and all the cameras that followed the character are sent a command to add a trip. There is only one timer in the registry, which once per second bypasses all entries and minus the time spent in the registry. If the recording time is zero, it is deleted from the registry, and a message is sent to all cameras that were associated with this recording that the trip should be disabled. In addition, the register of substances can indicate whether the character is listed in it or not, and if it is listed, then in what state it is at the moment. For example, joystick objects use this API to find out information about their client. If the joystick sees that the client is going round and round,
How to hide a corpse
Everything seems to be clear with how to kill a character, but what to do with his corpse is completely unclear. The first thing that comes to mind is to immediately remove the carcass from the world. But this is not scalable logic. But what if we make a game about zombies and around there are only dead bodies? Or do we have an immortal, sort of Duncan MacLeod who cannot die? Or we are writing a game about Chuck Norris, and Chuck Norris should not die, even if his life is at zero. Therefore, the carcass cannot be removed. On the other hand, they usually remove it and do it beautifully.

But we cannot know in advance what kind of death animation the developer wants to implement.
Then, perhaps, the solution will be to simply leave it as it is. Suppose that each developer writes a cycle that will check the lives of characters on a timer. If the character roams, the developer himself will be able to come up with an action with a corpse. But with this logic of reasoning, it turns out that all developers will again and again write the same search function for blind men. Then you can include it in the engine and get rid of code duplication.
Ladies and Gentlemen, we meet - the "function of death":
world.dead();The function is called every time when in our copy of the world someone suddenly “glues fins”. As an argument, the function expects a callback function to be called. An object that “played in the box” will be passed to the callback function. For example:
world.dead(function(man) {
    alert("Мужик с ID " + man.id + " свое отыграл");
});
Just in case, I’ll clarify that world is a world in which we will monitor death.
But we were a little distracted. The question “How to hide a corpse?” Has not yet been resolved and there are several options.
Classic version
The character who gave the oak flies up. A good option, but if our level consists of concrete floors (for example, the main character runs around the building), the carcass will not be able to go through the ceiling. Let me remind you that no one has yet canceled the counting of collisions and physics, and for a corpse all forces continue to be considered. Then you can change the type of object to "scenery". Scenery in our physical. calculations are not involved and can be located as you like. But you must first remove the object from the world, because he is listed in objects that can move. And then add it to the world again, as a decoration. There is also an option with a blinking object.
Flashing option
If someone is killed, he stops, blinks, and disappears altogether. For this effect, we need to take an array of sprites and replace each even element with a transparent picture. Well, and of course, on top of everything, a timer is added, which at the end of the animation removes the dead character from the world. The old game "Worms" in a hurry to offer us a third option.
Option with tombstones We
remember the coordinates of the corpse, remove it from the world, and in its place we create the object of “tombstones”.
In general, the choice is yours. Only if the protagonist has accumulated in you, do not forget to immediately disable the joystick so that the player does not interfere with the animation. If you linked control to the keyboard through a standard controller module, you can disable the keyboard like this:
StalinGrad.module.controller.remove();As an argument, the function expects the character object on which the controller was created. For example:
StalinGrad.module.controller.remove(man);Two simple examples of death animations can be seen here and here.

Questions and answers
This section contains questions that various developers asked me.
Comrade guyfawkes asked:
“- And where is the non-minified version of your engine?”
Nowhere. This is not an open source startup about HTML5 with a profile on github. If I show the source code - normal guys who write on the pluses and Java, at first they will laugh for a very long time, and then "they will beat me with pissed rags." The implementation of collisions is inefficient, the architecture of the properties of objects is incorrect, and the construction algorithm is generally shit and should be completely rewritten. Hoping that others will fix it is a myth.
- On the one hand, people in web development are not worried about the architecture, and therefore can fix bugs incorrectly.
- On the other hand, everyone looks at the project from their bell tower. Third-party developers may begin to modify the engine in the wrong direction I need.
- But on the third hand, I just don’t like someone else’s code, and in this “home project” he never gave up on me. You can download all sorts of configs and change them.
Because the code is modular, you can, in an emergency state, rewrite some kernel function or make a wrapper for it, for example like this:
StalinGrad.brain = function() {
}
Or add the module and put it on your website:
StalinGrad.module.YouModule = function() {
}
Use StalinGrad - as is, out of the box. If you do not like it - choose something else at your discretion (thousands of these engines here and here ). Anything else is less buggy. Well, or gash yours with canvas and WebGL;)
Citizen s1im pointed out the following fact:
“- It will work much faster if you do not change the src of the picture, but show one long sprite with a series of frames, rendering it in the background of some div and changing the background-position ”
I thought about this scheme, and it seemed to me inoperative (although I admit that in terms of performance s1im is absolutely right, the scheme will give a very good gain).
First, look at the character config object:
    left: [
        "partizan_left_1.png",
        "partizan_left_2.png",
        "partizan_left_3.png",
        "partizan_left_4.png"
    ],
    right: [
        "partizan_right_1.png",
        "partizan_right_2.png",
        "partizan_right_3.png",
        "partizan_right_4.png"
    ]
Any developer will immediately understand that this is an array of addresses. Will be able to correct the address of the picture or the order of frames. At the same time, nakosyachit and break the code is very difficult. If we describe this in the form of coordinates on the sprite, the code will look something like this:
    image: "partizan_left_1.png"
    left: [
        [ 0, 40 ],
        [ 40, 80 ],
        [ 80, 120 ],
        [ 120, 160 ]
    ],
    right: [
        [ 0, 40 ],
        [ 40, 80 ],
        [ 80, 120 ],
        [ 120, 160 ]
]- The code became unobvious at first sight
- You can easily make a mistake, and specify a coordinate greater than the length of the sprite
- If we need to redo someone else's game (for example, replacing characters) - it will be tough. We will constantly need to look at Paint in the drawing, and substitute the coordinates. And this is still a good option (for example, the step is clearly 40px).
Two years ago, I redid one game into another, and the designers sent sprites with a different shift between the characters (and the size of the characters themselves has changed). It was a long persistent hours of counting coordinates. The coordinates looked something like this:
    left: [
        [ 0, 34 ],
        [ 34, 56 ],
        [ 56, 89 ],
        [ 89, 112 ]
    ],
Secondly, we are losing the rubber interface.
You can of course get out and set the background-size, but on some devices the background-size does not work. Not that I would like to support the “govnoveysov zoo”, but it so happened that with the already existing architecture and the selected solutions, it is very easy for me to support it. It takes too little effort. Fix CSS and voila a bit:
- An example of scalability loss I described above. Remember the death function? On such configs, you can easily make a blinking animation (replacing every second picture with a transparent void). What additional benefits to get from sprites - I could not come up with.
- We are breaking the logic of separating CSS and JS. All divs will look like this
<divclass="something"style="background-position: 50px 50px;"></div>
But on the other hand, we all see how the demos slow down under load and how many 404's the server sends. Therefore, it would be most logical to add the ability to render animations with sprites, as s1im suggested (while leaving the existing render). Then, depending on the situation, the developers themselves will be able to choose an implementation that will be optimal for a specific task. And also, during these two weeks of reflection on the issue, I realized that there is not enough module for caching camera resources. I will try to implement it and explain it in the following articles.
And you, dear readers, there have been cases when it was necessary to fix the appearance of a jQuery plugin, and he set his style through JavaScript somewhere inside himself? How much did you get mad at that moment?
User VoVanJinnI wanted to know, "how to make a cat poop like a rainbow"
Answer: "- No way." I think this is a task for a one-time game, which is solved by crutches, because it’s not natural to poop objects with a rainbow. Because I write primarily for myself, I can not solve problems that I do not like or seem to be wrong. It is clear that in real life there is a manager or a hellish client who may want anything. That's why they are crutches to solve insane inadequate tasks. The right universal solution, at least I don’t see. If you come up with something, write in the comments to this article (first, think about additional bugs that a decision can bring for itself).
“- Canvas works faster than layout !?”
Special thanks to SerafimArts comrades andjetman , for their argument about the 2012 LG Smart TV and the FPS Canvas test. Result: LG Smart TV 2012 (Netcast 3.0, model LM640T): 0-1 FPS, which gives another vote for distortion with layout.
In the end
As promised, I post the developer package. There are graphics, not compressed CSS and a couple of open configs. I duplicate the links in order to avoid the habraeffect:
Download from the 1st server
Download from the 2nd server
Download from the 3rd server
In addition, there are a bunch of demos in the same place (in case you had the demos in this article and did not manage to load) .
The developer package will be updated. In the next article I will talk about game modules and open a few more configs. In addition, when you make a few bots - they will be motionless, and will not shoot at the player. How to revive them and incite hatred in the game world will be described in the next article.
To summarize:every time I write an article and make demos, I find so many new bugs that it’s just awful. And it happens that when I write an article, I realize that some kernel module does not work at all, and you have to rewrite it or rewrite the API to a more adequate one. Therefore, for the next article, some little things can change (for example, you need to set the correction for the camera as a percentage, and not in some strange parts of the screen).
And about the bugs - a lot of people told me that my jump is not working correctly. I’ll tell you a secret - I don’t have a jump at all. It’s just an up button, for moving along the Y axis (on the basis of this, I’m still going to make a top view, like in tanks - for this you just need to turn off gravity and increase friction). And how to make the jump button adequately - I never came up with. Write your ideas in the comments (and also about the stairs, because the essence of this object is completely incomprehensible, and according to what scheme to implement it)
The engine site is here .