Install and configure XBMC on the Raspberry Pi
 About 2 months ago I bought a toy called Raspberry Pi. I could not resist buying, as I was going to put on it an emulator of old game consoles (Sega, Dendy, etc.), which I did in the end. But, in connection with a recent post on the hub about the media center for this computer, it was decided to install a media server at home.
What do we have
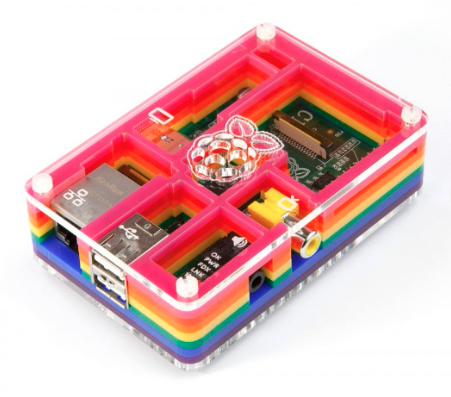
At the time of reading the post about the XBMC port on Raspberry, I had the board itself, the Rainbow Pibow case, the ASUS RT-N13U router, a 23 "monitor and a macbook.
What we want to see
This router was bought meaningfully, since it has a USB 2.0 connector with the ability to connect a hard drive. As I understand it, you can connect an external hard drive to the router, make a couple of swings with a magic wand and this same drive will be available in a networked environment (you already realized that everything will not be so simple). Raspberry board will have to take video and music from a network drive and play it. In addition, I would like to teach her to download torrents to the hard drive in the router.
To install and work with a media server, my equipment was not enough. It is advisable to connect the board to the home network without wires, in case you need to connect the console in another room and not be tormented by pulling a twisted pair cable around the apartment. To store files, you need a hard drive, it must be either an external hard drive or a full network storage, but I'm not ready yet to upload a large amount of money and settled on a USB HDD. Also, it was necessary to solve the issue of managing the board, because connecting a full keyboard to it is rather ridiculous, given the size of the raspberry. There is an option to control the TV remote control via HDMI-CEC, but I have a monitor, not a TV. I decided to find a miniature keyboard with a touchpad so that it would be convenient to use the media server and, if anything, it would be possible to work comfortably in other distributions.
As a result, I bought a ASUS N13 Wi-Fi adapter, which is on the list of supported Raspberry devices (I found out about the list after the purchase, so I was just lucky), an external hard drive Seagate Backup Plus Desk 2 TB USB 3.0, Trust Tocamy mini-keyboard and another SD card (on each card on the distribution, so that it is possible to include both raspbmc and raspbian).

All purchases cost me 5,500 rubles, which in my opinion is not so much.
Installing the distribution kit and connecting the adapter
The installation itself is quite simple, and a good wiki has been made to help users . To install the distribution package with Mac OS X, you need to insert a memory card into the card reader, execute 2 commands in the console and the image is successfully recorded. Next, a memory card is inserted into the raspberry, we plug in the power cord, HDMI and a power cord into it. After following the instructions on the screen, we see the start screen of the system.

I apologize, the screenshot is not mine, I borrowed from Google.
With the Wi-Fi adapter, everything was also quite simple. Without removing the power cord, you need to insert the adapter into the USB connector of the board. In the distribution interface, go to the program - Raspbmc Settings - Network Configuration. Change Network Mode to Wireless (WIFI) Network, scan the network and set a password. Perhaps the "raspberries" will ask you to reboot. During the reboot, you can remove the network cable and the board will be connected to the Internet wirelessly.
And here's another nuance, quite often the system downloads updates (everything works for me for 2 days and 2 times downloaded updates), and this is minus 10-15 minutes of watching movies. In the settings, you can disable the auto-update system if it annoys anyone.
HDD installation
I could not imagine that there would be so many problems with this item. Yes, on the one hand, my router works with external hard drives, but it cost two nights of dancing with a tambourine around it. Fortunately, the HDD has its own external power supply. And so, after connecting the hard drive, the router detected it. A 2 terabyte USB HDD was defined in the web interface. Asus has its own functions for working with hard drives and printers, but on native firmware they work “strange”, if at all. After several hours of torment, it was decided to upgrade to the adapted firmware “from Oleg” . The router voluntarily did not allow this through the web-face and had to use the firmware recovery utility from Asus.
I managed to configure the FTP server on Oleg’s firmware. All computers at home perfectly saw the contents of the hard drive via FTP, but there was nothing in the network environment. The problem turned out to be the wrong DDNS configuration. Another hour or two and on the network on all computers appeared the long-awaited HDD.
From the side of Raspberry, everything was set up very easily. We go into the video files - add the video, indicate the location of the files by clicking the browse button, go to the bottom in the drop-down list and click on Windows Network (SMB), and there we already find our shared folders. We also do it with music and photos.
Unfortunately, I was not happy for long. In the morning I opened the router’s web face to configure the torrent-rocking chair (yes, there is such a thing in the asus) and here connection errors got in. A few more hours of torment, and it was decided to abandon the idea of connecting an external drive to the router directly.
The external drive has a USB 3.0 interface, like my MacBook. I decided to connect the disk to it and share it for the entire network already from the laptop. There was another problem. On Mac OS X, starting with version 10.7, the SMB protocol is backward incompatible with Windows, which puzzled me. Shared folders on the PC are visible to everyone, including the macbook, but on the contrary, problems already appear - the PC does not see the macbook folder. A bit of searching and a solution is found - this is the SMBUp program. It is installed in 2 steps, reminded the directx web installer in Windows. After installation, you need to select the folders that you want to share, and turning on the program and saving the changes occurs when you click on the close button of the program, which also surprised me a lot. In general, it worked. All heavy files are now downloaded to an external drive, Raspberry takes files from it (in the settings you need to add the media source again, using the same protocol, but in a different location).
To summarize
Raspberry Pi is for me a toy that has finally found practical application. Using it as a media server is quite convenient: you upload files to the hard drive in one room, and look in another - a kind of SMART-TV connected to your home network. But this smart tivi is not without problems.
- Firstly, there is absolutely not enough power. First of all, I advise everyone to do overclock (in the settings you can either manually change all the characteristics of the board, or select one of the profiles)
- The second problem is applications that are additionally downloaded from the Internet. The download process itself is very simple and convenient, but working with them is like mockery. I tried youtube: a long application download, then through a few menus you can get to the video search itself, a long search, video download and viewing. It’s good that at least the video does not slow down, but to watch it you need to spend 2-3 minutes on the previous actions (this is not a tab in the browser to open)
- The third - it’s convenient to use my keyboard, but still the remote control from the TV would be much more familiar. I saw wireless keyboards in Chinese online stores that resemble TV remotes in shape and size, and on the bottom there are all the buttons corresponding to this

- Fourthly, I want to say about the hard drive and network. Maybe other routers are doing better, but I concluded for myself that it’s better to go broke and buy a normal network drive connected to the network via cable
I hope that someone my post was useful and interesting, thank you all!