Creation of an autonomous robot Frank. Part one
For the second month I have been collecting an autonomous robot in the evenings, whose name is Frank. Why? Do not ask! I know that every robot should have a beautiful name, but I haven’t come up with anything yet. If you have any ideas, write in the comments. It all started a long time ago. My passion for neuroscience, cognitive science, artificial neural networks and artificial intelligence has led me to the fact that research into computer algorithms is a rather fascinating process, but sometimes I want to touch my creation with my hands and see how it behaves in real life.
All this did not fit very well with the existing knowledge, since by profession I work in the film industry. I had to learn everything from scratch, read a huge amount of literature, websites and conduct a large number of experiments in order to achieve the desired results.
Since half of the time I live in Los Angeles and half in Moscow, some links may not be very relevant. On the other hand, I had to find stores for the purchase of electronics both here and there, since my constant trips do not affect the desire to study robotics. Therefore, if possible, I will publish links to both our and Western resources. Perhaps this will help both Russian readers and those who read Habré abroad.
It all started with the choice of a platform on the basis of which it would be possible to build a robot. At that time, I didn’t care whether he would have legs, wheels or other means of transportation. I decided to start with one of the Lynxmotion platforms, but they did not have enough servo motors to send me an order. At that moment I met Russian comrades from the Brain Corporation company, which is located in San Diego, and having visited their office, I realized that I had to start with a simple one - Lego Mindstorms. This is a fairly simple platform, understandable to adolescents, but allows you to program, if desired, in Python and C ++.
I had a week in Los Angeles until I left for Moscow. Just in case, I ordered a couple of Lego Technic kits and the Lego Mindstorms NXT2.0 kit itself. After reading some interesting articles about Arduino and other similar systems, I ordered several kits that included components for beginners, servo motors and mounting servo motors for Lego.
All the details came, and packing them in a suitcase, I flew to Moscow to collect my first robot.
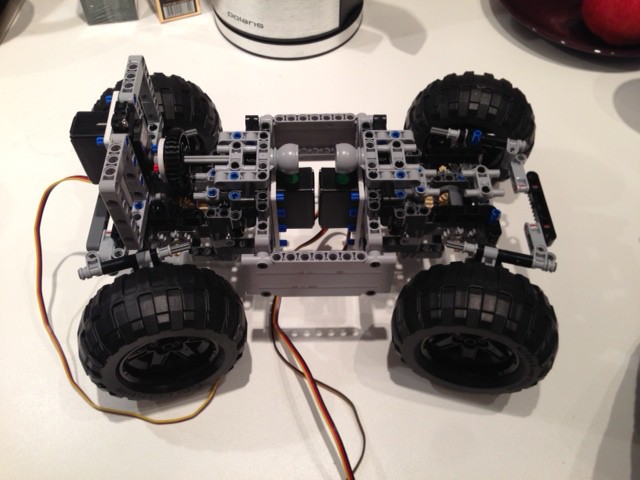
At first, everything seemed to be very simple, but in practice, I failed to assemble a four-wheeled monster with the ability to steer all-wheel drive, all-wheel drive and suspension, which allows off-road driving, for three weeks. The motors that go in Lego Technic kits are quite compact. You can really assemble an all-terrain vehicle with them, but connecting it to Mindstorms is not so simple - you need additional cables and adapters. Mindstorms motors are so huge that it was simply impossible to assemble a compact Frank. I had to make it even harder and more interesting.
I decided to use HiTech motors instead of those that came with Lego, and instead of NXT Brick use another controller - Arduino Uno. Having connected the servo motors to the PWM outputs of Arduino, and having verified that everything works, I began to reassemble my Frank. The motors along with the mount were still quite large, but the changed form factor allowed them to be placed in the body of the SUV. I had to sacrifice the suspension, but in the future, when it comes time to ride on the street, I’ll come up with something.
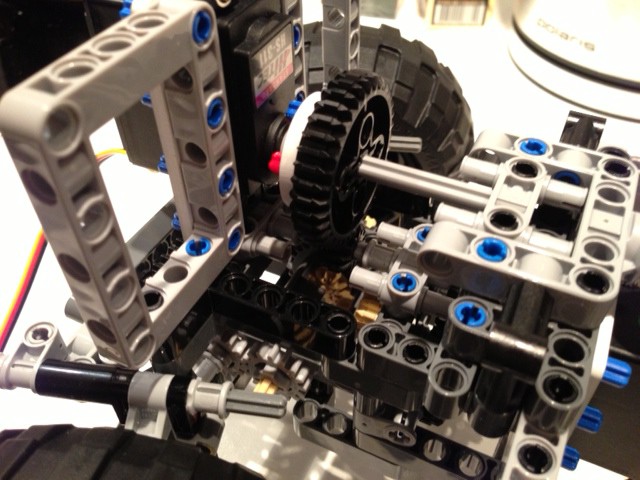
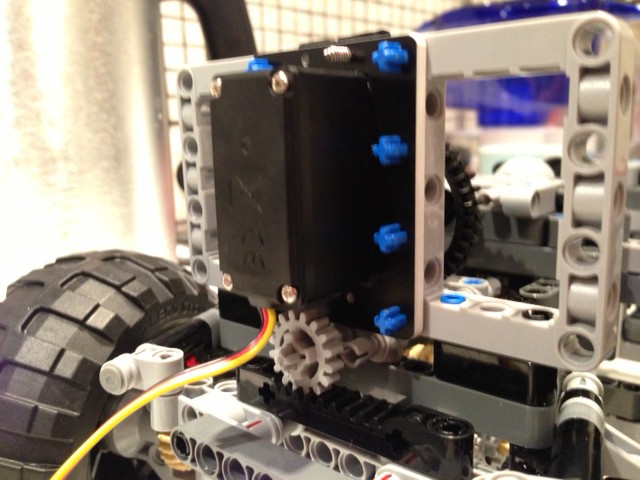
And so, the platform is assembled. The time has come to do the most interesting thing - to stuff Frank with electronics and make him move. To test that all components work as expected, I took Arduino, the usual prototyping board. Each servo motor has three cables - red, black and yellow. The black cable is earth. When connecting the Arduino, it is necessary that the ground of the Arduino and the servo motors be closed to each other. Therefore, all the black cables from the servo motors, grd output from the Arduino and the min of the battery that powers the servo motors we connect together. Further, plus the servo motors (red cable) and plus the batteries we connect together, but do not connect to the Arduino. In order for the Arduino to function without problems, it is necessary to isolate the power of the servo motors and the power of the Arduino. For this, I use different power supplies for motors and Arduino.
After making sure that the “Servo-> Sweep” preset in Arduino works, I started soldering a small circuit based on the Arduino Proto Shield. Of course, due to the fact that this was my first experience with a soldering iron in my hands - I safely ditched the board without noticing that some of the contacts are connected to the “ground”, and therefore to each other. Now I'm waiting for new boards for experiments to come.
At the moment, this is where progress with my experiments has stopped to date. What do I plan to do next when additional components come?
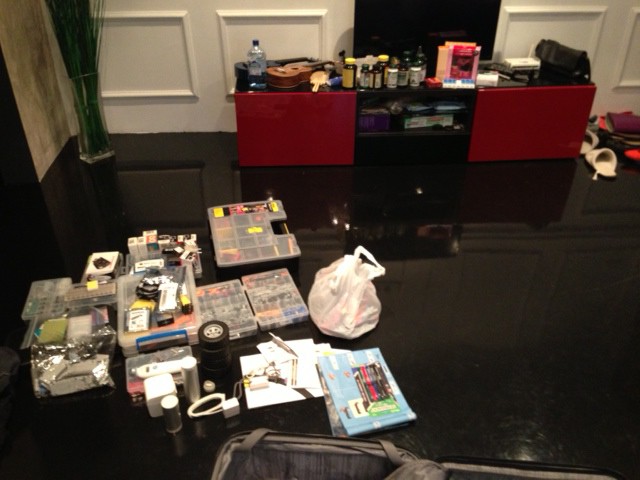
So! This week I have to deliver 3 solar panels of 3W each, two Arduino Proto Shield (in case I destroy another board), Li-Po battery 2LIR18650-PCB-LD, Seeedstudio Lipo Rider.
Also, I still have various ultrasonic sensors, 2 CMOS cameras and BeagleBone Black. What can come of all this?
Solar panels, a Li-Po battery and a Lipo Rider will provide battery life. When the voltage drops, the robot can be put into "sleep" mode while the batteries are charging.
Two cameras, ultrasonic sensors and possibly a laser rangefinder (when I come up with a reasonably cheap solution) will be processed by BeagleBone Black to build a "picture of the world." Considering that the process of visual perception in people is multi-level (different levels of our neural networks process different image properties), I came up with the idea of using several BeagleBone Black or Parallela boards connected hierarchically. Each board will perform its own algorithm, maximally utilizing the processor power and the amount of free memory, transferring data further down the chain for further processing. Thus, other sensors can also be processed. As a result, we get a large network of components, which, like a living organism, controls an autonomous robot.
Ahead of an exciting journey to assemble the robot. As soon as the remaining components come and everything works, I will write another article.
Now, with regard to various resources, where I buy parts, electronics and the like.
USA:
1) The main resource in America, as it is not surprising, is Amazon.com . You can buy anything there.
2) Newark.com - here you can buy any components for microcircuits.
3) Lynxmotion - here you can buy spare parts and ready-made robots.
4) Mindsensors - various sensors for Lego and other platforms. There are a lot of things for Arduino.
5) Trossen Robotics- Perhaps the coolest platform for developing robots. Here you can buy servo motors, spare parts, microcircuits and so on.
Russia. Everything is a little worse here - I really hope for your help and recommendations, since in addition to one store I could not find anything worthy, with a large selection and delivery.
1) Electronshik - The only thing I have not gone yet. There is not everything here, but everything that I needed at the moment.