Raspberry Pi based remote control machine
Raspberry Pi is very popular. The site already has many articles on creating various projects based on it. As soon as it became available for sale, I also immediately wanted to buy one. Model B was purchased (with 256Mb more memory) and accessories for it. And, of course, I wanted to construct something on its basis. There was a desire to work with GPIO and use it as a controller. It was then that the idea came up to make a controlled machine on wheels.
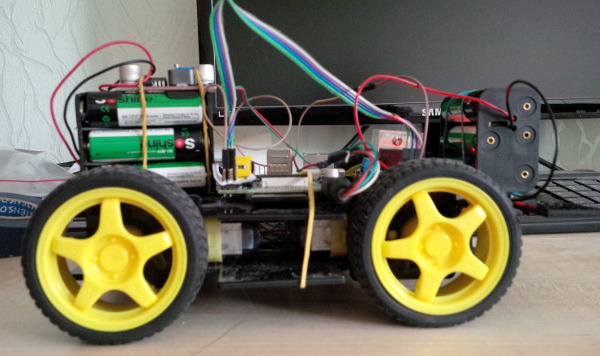
Iron part
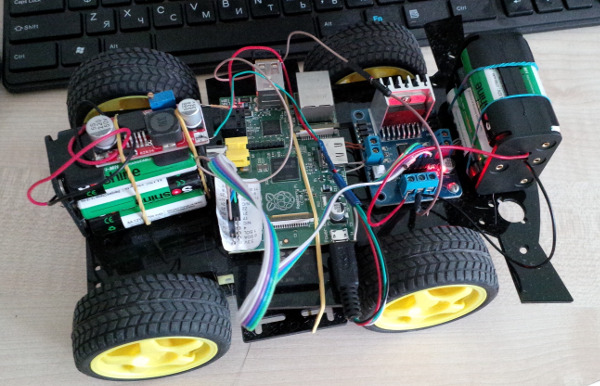
The first thing on ebay was to find a chassis for a future model. Each wheel in it has a separate engine. The design cost $ 33 and came to me in the mail disassembled. Naturally, the production is Chinese, so I had to work with a file so that the parts fit into the grooves.

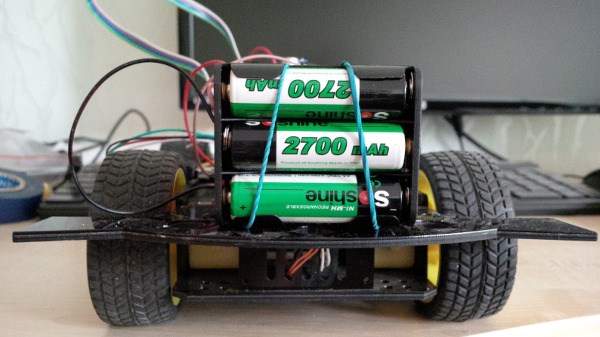
Some components were purchased at dx.com. The site turned out to be very convenient and inexpensive, a good selection of different pieces on it pleasantly surprised me, and free delivery to Ukraine came in handy. A dozen batteries with a capacity of 2700mAh and several chargers for them were ordered there.
As controllers for engines, a motherboard based on the L298N chip was purchased.
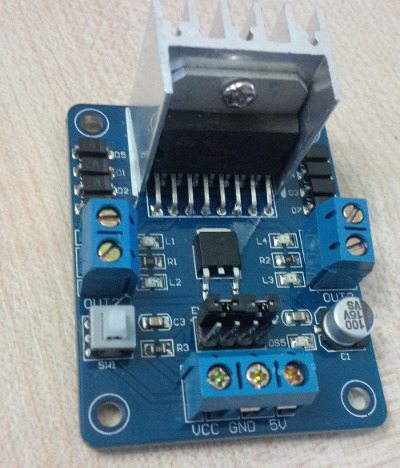
One such board allows you to control two electric motors with different directions of motion. I decided to get by with one such board and connected two left and two right engines in pairs. When you turn on all the engines, depending on the direction of rotation, the machine goes forward or backward. To turn left - only two right engines are turned on, when turning right - only two left engines.
Power is supplied to the motors through this controller. Six batteries of 1.2 volts each were used.
Next, the Raspberry Pi self-powered problem was resolved. For this purpose, a similar battery pack of 6 pieces was also used. I connected the power to the board through a DC-DC converter based on the LM2596 chip.
To connect the board to the network, the Edimax EW-7811UN Wi-Fi adapter was used. It is recommended as compatible equipment at elinux.org/RPi_VerifiedPeripherals , is commercially available, small in size and easy to configure.
Software part
And now move on to the software part. All the code used in the project was written in C.
In the process of controlling the engines, the GPIO0 - GPIO3 connectors are used, which are directly connected to the controller. The following order of signals to the controller is used:
| Engines | Direction | GPIO 0 - IN1 | GPIO 1 - IN2 | GPIO 2 - IN3 | GPIO 3 - IN4 |
|---|---|---|---|---|---|
| Left | forward | 1 | 0 | ||
| back | 0 | 1 | |||
| Stop | 0 | 0 | |||
| Rights | forward | 1 | 0 | ||
| back | 0 | 1 | |||
| Stop | 0 | 0 |
It was very convenient to use a cheat sheet to indicate GPIO outputs. You can find and print it from this page - www.doctormonk.com/2013/02/raspberry-pi-and-breadboard-raspberry.html .
To work with GPIO, a very convenient wiringPi library is used. Information on how to install it in the system and API can be found here - projects.drogon.net/raspberry-pi/wiringpi . The library also contains utilities with which you can initialize and send a signal to the GPIO output without programming.
The code that feeds the GPIO output looks something like this:
...
pinMode(0, OUTPUT);
digitalWrite(0, 1);
...
In this case, a signal is output to GPIO 0.
Next, an initial test of the machine was carried out.
The next step was to write a server that receives a connection from a client, receives and executes engine control commands. The protocol is quite simple:
“forward” - forward, “back” - backward, “stop” - stop, “left” and “right” - turn off the left or right engines (depending on the direction), “quit” - closes the connection with the client .
And finally about the client. To control the machine from a remote console, the keyboard of a computer, I found it uninteresting. I decided that it should be controlled from the tablet, I spied the idea in the NFS Undercover game.
The client was written under the Playbook using the Native SDK. There are enough examples and documentation on the official website to understand the platform. The SDK is installed with the Eclipse-based QNX Momentics IDE. The most difficult part for me was creating a user interface using OpenGL ES, since I had never worked with graphics before. Images of controls were found on the Internet. The interface is very simple - I launched the program, entered the IP address of the Raspberry Pi, connected to the server (the switch at the top right of the screenshot) and went.
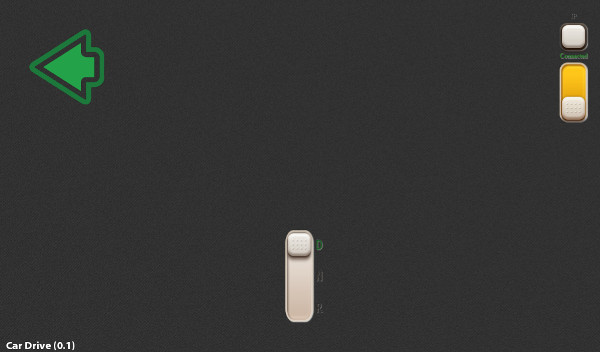
In the middle of the screen is a switch forward, stop, back. When the tablet is tilted to a certain angle to the left or right, commands are sent to turn left or right, respectively.
And, actually, a video showing the machine in action.
Immediately a shortage of the chassis was revealed - the grip on the floor was not very good, and the wheels sometimes slipped when cornering. And the design with rigidly fixed individual axes I did not really like right away. I wanted to change the chassis for something more serious.

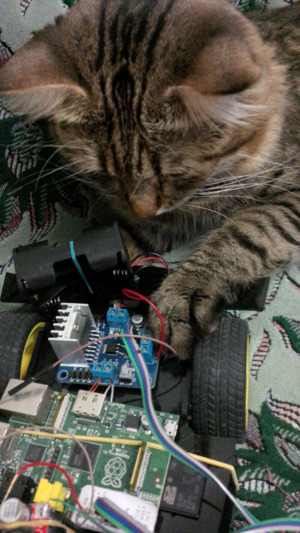
The cat, by the way, is also interested in projects based on the Raspberry Pi.