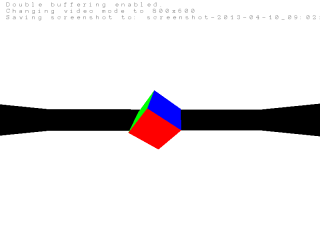
Saving an image using libpng
- Tutorial

Having fun at my leisure with OpenGL, I decided to learn how to take screenshots using the program, not the system. Googled glReadPixels pretty quickly, but there was a problem with saving the picture. I remembered the old days when I saved it completely in bmp with my code, found the save function in tga, I realized that all these options smell like bicycles and decided to use a widespread library. The choice fell on libpng.
Next went the rake.
It turned out that there is no description of the library in Russian (which is why I am writing this post now), and the English documentation is not written in the most convenient way and does not even contain a simple full-fledged example of use.
Below I will try to explain how libpng can save the image in the simplest case.
First of all, you need to include the header file.
#include In the function / method in which we will save the image, open the file into which we will save and create the png structure.
void
Renderer::screenshoot(const std::string& name) {
    FILE *fp = fopen(name.c_str(), "wb");
    if (!fp) {
       return;
    }
    png_structp png_ptr = png_create_write_struct(PNG_LIBPNG_VER_STRING, nullptr, nullptr, nullptr);
    if (!png_ptr) {
        goto close_file;
    }
Now you need to create a structure of information about png, call setjmp, in case of errors, and initialize the output to a file.
    png_infop png_info;
    if (!(png_info = png_create_info_struct(png_ptr))) {
        goto destroy_write;
    }
    if (setjmp(png_jmpbuf(png_ptr))) {
        goto destroy_write;
    }
    png_init_io(png_ptr, fp);
Next, you need to set the image parameters (sizes, number of colors, the number of bits per color channel, interlacing and compression. And also create an image and an array of pointers to individual lines of the image.
Here the rake begins.
Rake No. 1: the glReadPixels function gives the image, the lines in which from bottom to top, although usually when working with graphics we mean the reverse order.
Rake number 2: if we specify the glReadPixels functions that we want to get RGBA colors, we actually get them in ARGB order. It’s annoying, but to find out, at Enja left an hour, during which I did not understand why I did not correctly displayed in the screenshot.
We will declare the data array, in which there will be data for libpng, and the argb_data array, in which there will be data from OpenGL, well, we will not forget about the array of rows pointers.
    png_set_IHDR(png_ptr, png_info, width, height, 0, PNG_COLOR_TYPE_RGB,
        PNG_INTERLACE_NONE, PNG_COMPRESSION_TYPE_DEFAULT,
        PNG_FILTER_TYPE_DEFAULT);
    unsigned char data[width*height*3], argb_data[width*height*4];
    unsigned char *rows[height];
    render();
    glReadPixels(0, 0, width, height, GL_RGBA, GL_UNSIGNED_INT_8_8_8_8, argb_data);
    for (int i = 0; i < height; ++i) {
        rows[height - i - 1] = data + (i*width*3);
        for (int j = 0; j < width; ++j) {
            int i1 = (i*width+j)*3;
            int i2 = (i*width+j)*4;
            data[i1++] = argb_data[++i2];
            data[i1++] = argb_data[++i2];
            data[i1++] = argb_data[++i2];
        }
    }
Now it's up to you to save the image, complete the input, and process the errors.
    png_set_rows(png_ptr, png_info, rows);
    png_write_png(png_ptr, png_info, PNG_TRANSFORM_IDENTITY, nullptr);
    png_write_end(png_ptr, png_info);
destroy_write:
    png_destroy_write_struct(&png_str, nullptr);
close_file:
    fclose(fp);
}
Thus, in a relatively simple way, you can save the image in png. However, do not think that this is all that this library is capable of. You can follow the saving process, apply filters, use interlacing, compression ... But to understand this, you should read the original documentation .
UPD Thanks to MrGobus for the remark regarding glReadPixels and row order.
