Bitcoin: How to get 25+ Mhash / s for free without SMS
- Tutorial

Good afternoon, dear % username% !
Surely you have already heard about Bitcoins . Perhaps you have already managed to use them! Sumptuously. How about, without straining, to start cryptocurrency mining at 25 (50, 75, 100, ..., 25n) Megahashes per second? Do you already have a supercomputer for generating blocks? How about adding 25n Megahashes to your processing power right now?
There is an excellent Windows Azure service from Microsoft. In short, we are given the opportunity to use a remote virtual machine with 20 cores for various server solutions, computing, etc. But for us, fans of free, of course, the free trial for 3 months is important. Naturally, there are certain restrictions for the free version, but they will not particularly affect us. What we need to do (and what I will describe step by step in this article) is:
- Create 3 virtual machines (8 + 8 + 4 cores)
- Connect to virtual machines using the virtual desktop
- Register on a public pool (in the article I will use Slush's Pool as an example)
- Install and configure the software you need for mining
- Run this software
- Wait
- Receive bitcoins
I ask everyone interested under cat.
Update: added a description of how to mine Litecoin on Windows Azure. It turns out much more efficient than mining Bitcoin.
0. Introduction
It is worth making a couple of clarifications:
- There is no GPU on Azure, so we will only mine using the CPU (therefore, the power is so low, although we use 20 cores)
- I’m not sure whether it will be possible to mine for 3 months: maybe there are limitations on computing power
1. Let's get started!
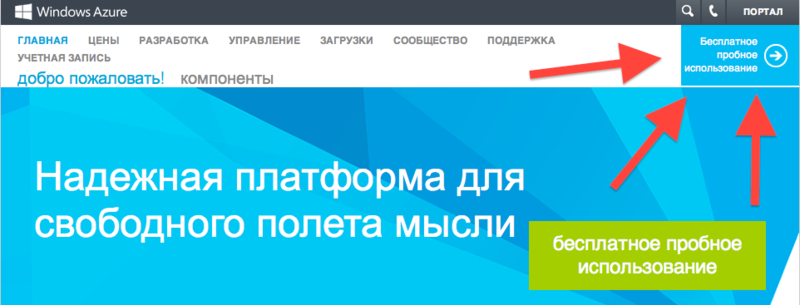
We go to Windows Azure , click on "Free Trial Use", register the trial version. You will need credit card information to verify your identity. They promise not to withdraw money without permission.
Microsoft account is also needed. If it is not, you will have to register here.
Next, go to the Azure Manager , in the "Virtual Machines" section.

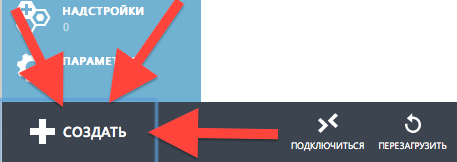
Click on "Create" at the bottom of the screen.
Fill in the data:
- DNS name: will need to connect to Remote Desktop
- Image: I usually choose Windows Server 2012, but maybe Linux machines will be faster
- Size: for the first two machines, select 8 cores, for the third - 4 cores (since the limit is up to 20 cores for free accounting)
- Password: will be needed to connect to the remote desktop. I did not find where after creating the virtual machine it will be possible to peep it again, be careful!
- Location: to your taste
It will take about 10 minutes to fully start the virtual machine. Be patient.

2. Connect to remote desktops
Install Microsoft Remote Desktop Control . There are versions for Windows, Mac. I don’t know anything about the Linux version, but if you have Linux installed, then you can find a way to connect to RDC yourself, right? ;)
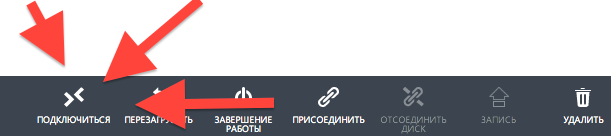
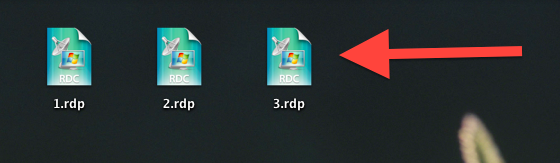
Select the desired virtual machine in the list and click on "Connect". * .Rdp format file will be downloaded - with it we will connect to the remote desktop.
Open the downloaded file for one virtual machine. I already have three of them, since I downloaded files for all three virtual machines.
In the “Password” field, enter the password that was used when creating the virtual machine. The "Domain" field can be left blank. You can save a password.
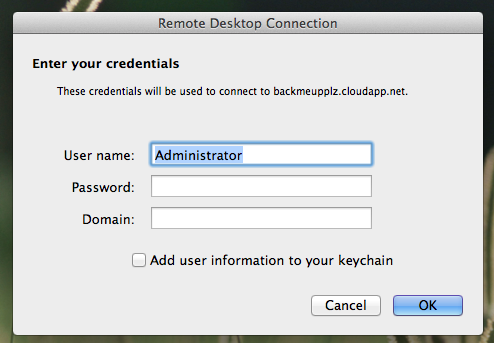
You will need to wait a bit until the RDC service starts. If you have a black screen, you just have to wait a bit. Perhaps the RDC will swear on the security of the connection. Can be ignored.
And here is our server running on Windows Azure!

IE works with a bunch of restrictions, Chrome didn’t work for me to install, so I immediately installed firelis. In the control panel, I immediately advise you to chop off the firewall and control over the account (so that the “confirm” windows do not constantly jump out).
3. Register in a public pool
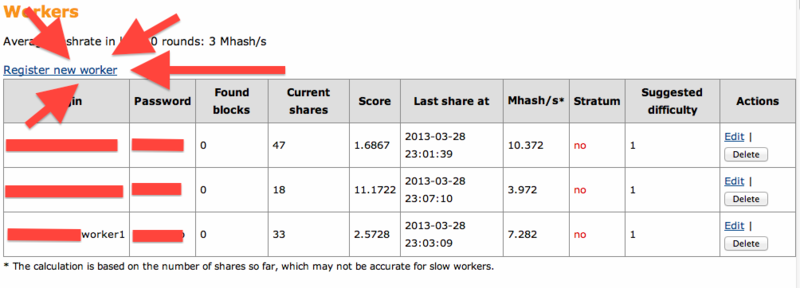
We go to mining.bitcoin.cz and register. We go into “My account” and create two additional workers for two additional virtual machines (remember, we have 8 + 8 + 4?).
4. We put software!
Download RPCMiner from here ( official thread ). Create a new folder “New Folder”. All contents (not the folder itself) of the downloaded archive must be moved to “New Folder” so that “rpcminer-cpu.exe” is in the “New Folder” folder.

Open the notebook and write in it:
start /b /d "C:\Users\Administrator\Desktop\New folder" rpcminer-cpu.exe -url=http://api.bitcoin.cz:8332 -user=%username% -password=%pass%
Where% username% is the username of one of your workers on the public pool, and% password% is the password corresponding to this worker. You can add your arguments for RPSMiner'a, I did not bother much. All 8 processor cores are used by default.
We save the text document as "miner.bat" on the desktop. It should turn out as in the screenshot below.

You need to install software on all used virtual machines.
5. Let's start the process!
We launch "miner.bat". A console window should appear. After some time, if you did everything correctly, you will see something similar to the screenshot below. By the way, one of my workers just found a hash.

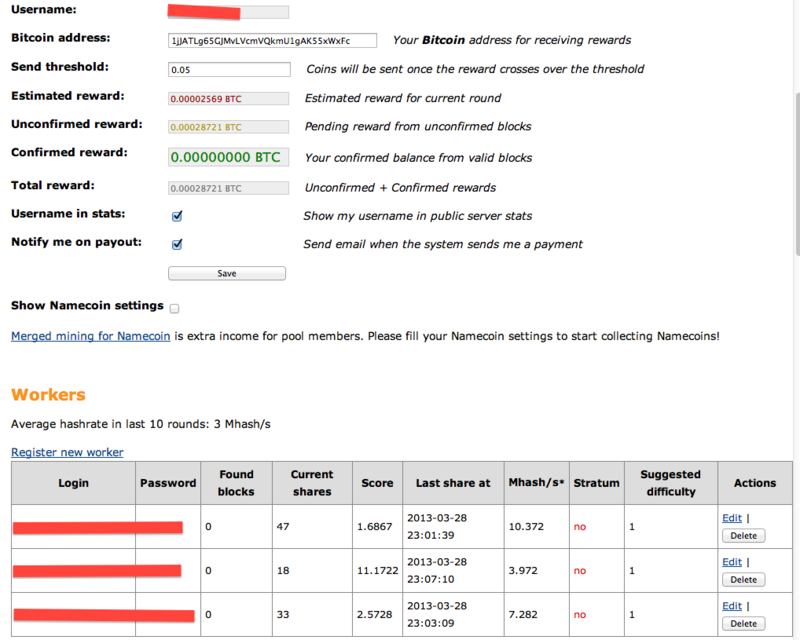
On the website of our public pool in the section "My account" there are some statistics, and you can also specify the threshold, reaching which, the funds will be transferred to your Bitcoin wallet.
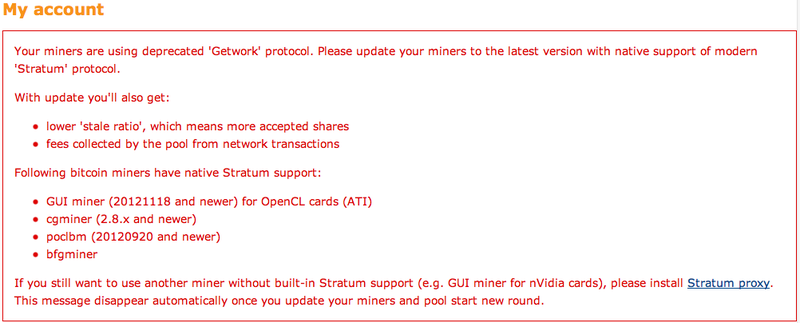
My clients constantly get the following legacy protocol error. I tried to fight it (it’s not difficult - you just need to install and run the proxy on a virtual machine in a couple of clicks). But this proxy just didn’t work for me. I started it, the hash selection went through it, but the statistics on the pool were zero. So I decided it was better a little less, but at least something.
6. Conclusion
I want to thank Microsoft for such an excellent service as Azure and for the possibility of free use.
Let me remind you again that we use a CPU, which does not compare with GPU mining capacities. But for want of more, as they say.
I won’t talk about how to use more than 20 cores (suddenly this is illegal).
A couple of interesting facts from life:
- On many sites, you can create more than one account (although this is against the rules, but technically not prohibited)
- Different family members have bank cards
- Banks provide the opportunity to issue a decent amount of virtual cards that you can use and immediately remove
But to be honest , I don’t see any connection between these random facts.
Thank you all for your attention! If you find any inaccuracies or errors in the article, you are welcome to PM .
Update:
Habrauser psykrab suggested mining Litecoin, since it is more profitable to use CPUs just for this cryptocurrency. Instructions for replacing Bitcoin miner with Litecoin miner on our Azure servers under a spoiler.
Push me!
We go to the Suprnova pool , click the "Register" button at the top. Attention, write down or remember the PIN! You will need it.
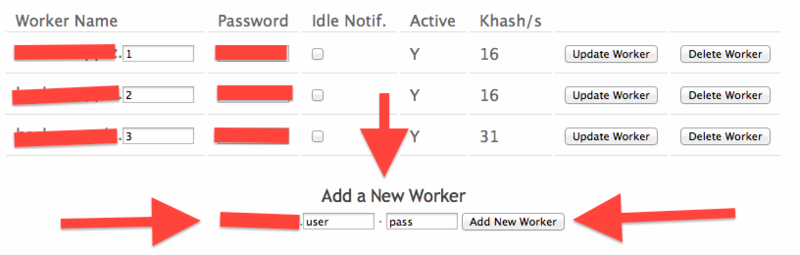
After registration, log in to the left (“Dashboard”) and go to My Workers. As with Bitcoin, we need to add 2 more workers.
Download the miner - Pool's Miner (links for Linux, Mac can be found here )
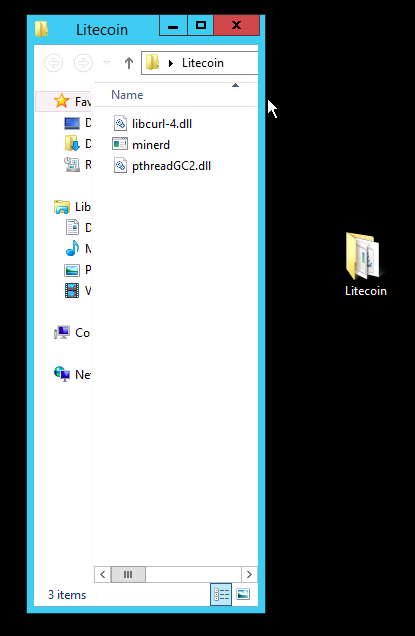
Unpack it on the desktop in the Litecoin folder so that the minerd.exe file is in the Litecoin folder.
Open the notebook and write the following line in it:
Where% username% is the username of one of your workers on the public pool, and% password% is the password corresponding to this worker. You can add your own arguments. All 8 processor cores are used by default.
We save the text document as “Lite Miner.bat” on the desktop. It should turn out as in the screenshot below.

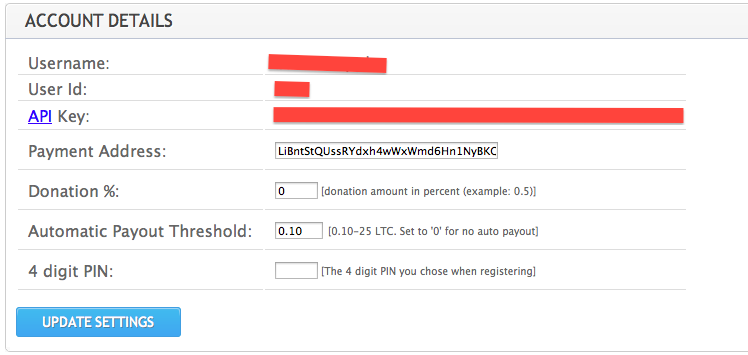
We go to Suprnova , log in (if not already logged in), go to "My Account -> Account Details". We enter in the field “Automatic Payout Threshold” a threshold at which the funds will be automatically transferred to the wallet, and in the field “Payment Address” we enter your wallet. The wallet must be a Litecoin wallet (Bitcoin will not work!), So you need to download the client for Litecoin.
We launch on the servers "Lite Miner.bat". We are engaged in daily affairs. If everything is done correctly - Litecoins are dripping.
1. Register on a public pool
We go to the Suprnova pool , click the "Register" button at the top. Attention, write down or remember the PIN! You will need it.
After registration, log in to the left (“Dashboard”) and go to My Workers. As with Bitcoin, we need to add 2 more workers.
2. We put and configure software
Download the miner - Pool's Miner (links for Linux, Mac can be found here )
Unpack it on the desktop in the Litecoin folder so that the minerd.exe file is in the Litecoin folder.
Open the notebook and write the following line in it:
start /b /d "C:\Users\Administrator\Desktop\Litecoin" minerd.exe -a scrypt -o http://de1.suprnova.cc:8336 -O %username%:%pass%
Where% username% is the username of one of your workers on the public pool, and% password% is the password corresponding to this worker. You can add your own arguments. All 8 processor cores are used by default.
We save the text document as “Lite Miner.bat” on the desktop. It should turn out as in the screenshot below.
3. Small settings in the pool and launch!
We go to Suprnova , log in (if not already logged in), go to "My Account -> Account Details". We enter in the field “Automatic Payout Threshold” a threshold at which the funds will be automatically transferred to the wallet, and in the field “Payment Address” we enter your wallet. The wallet must be a Litecoin wallet (Bitcoin will not work!), So you need to download the client for Litecoin.
We launch on the servers "Lite Miner.bat". We are engaged in daily affairs. If everything is done correctly - Litecoins are dripping.