March 22, 2013 at 08:36
Install the second hard drive in the Samsung 300V laptop
- From the sandbox
- Tutorial
Good day.
I heard a lot about the speed qualities of modern SSDs, but I managed to buy it only recently. After a simple installation of it in my work laptop, open spaces for quick work and a lot of joy. But after a while, I realized that with 128GB I could not stretch for a long time and still have to somehow increase the disk space. The Internet prompted me to put my former HDD into a laptop as a second medium, which is exactly what I did.
I’ll immediately warn you that I’m writing a similar article for the first time, I’ll try not to make mistakes, but still.
Also, you do everything at your own peril and risk.
Let's start.
We will need:
How to make your tester:
We take a small light bulb or speaker from the motherboard, if available, and solder the wires to the battery. If there is contact, there will be light / sound.

I think everything is clear here.
We disassemble the laptop.
He has bolts under three rubber legs (which are on non-drying glue) and on the cover of RAM.
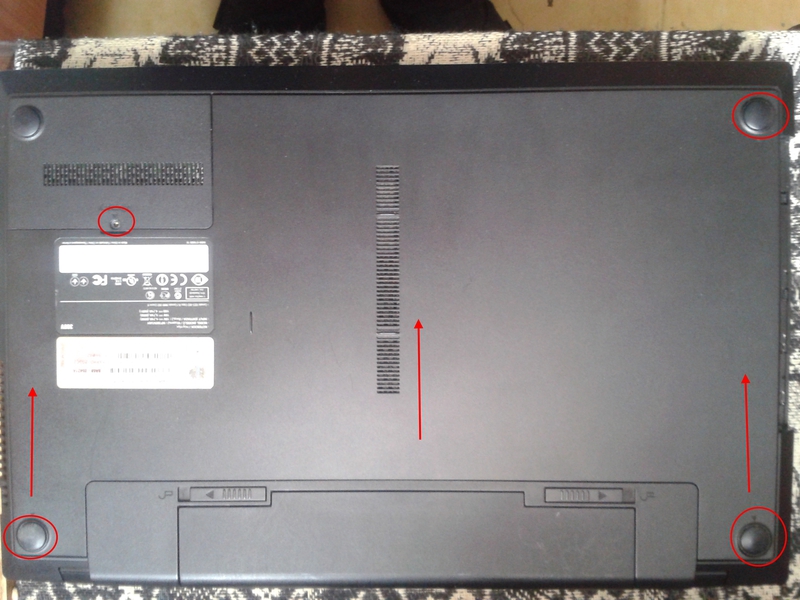
We unscrew all 4 bolts, pry the cap over a small ledge and pull it out of the case. Next, we pull the main cover up in the direction of the arrows and with a small click it is disconnected from the case.
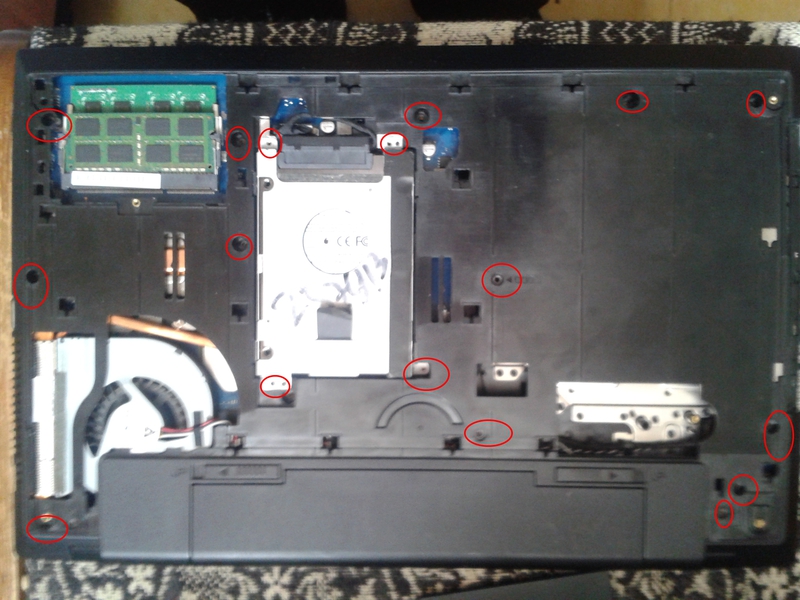
Next, we see our hard drive, unscrew it and all the other visible bolts.
In the center near the inscription "ODD" there is a bolt that holds the drive, unscrewing it with a little effort we take it out of the case, it is held in it by connecting the drive plug and the connector on the motherboard.
Then you need to remove the outer part of the housing. Gently, without unnecessary efforts, we pry the edges of the case with a flat screwdriver and snap it off. The plastic in the case is durable and flexible, so that none of the holders will break.
Be careful when you release external connectors from the chassis. It is better to go around them, and not push them inside.
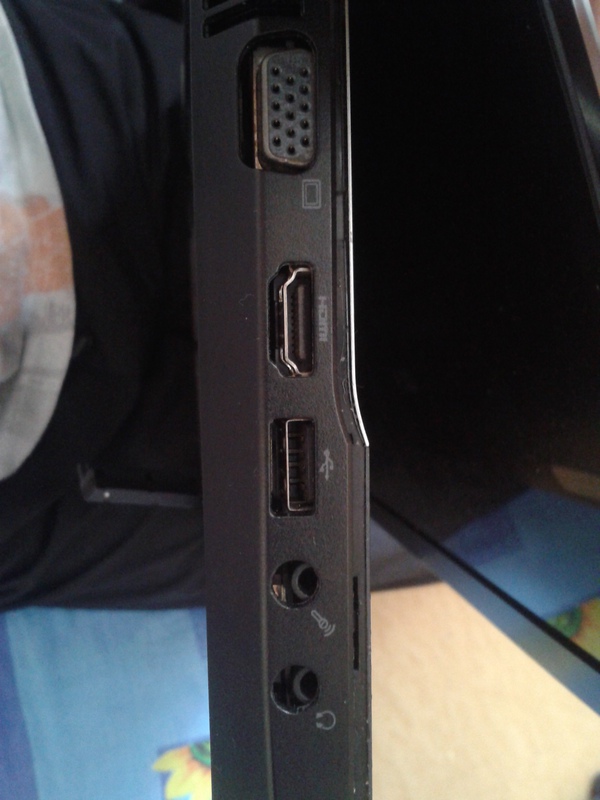
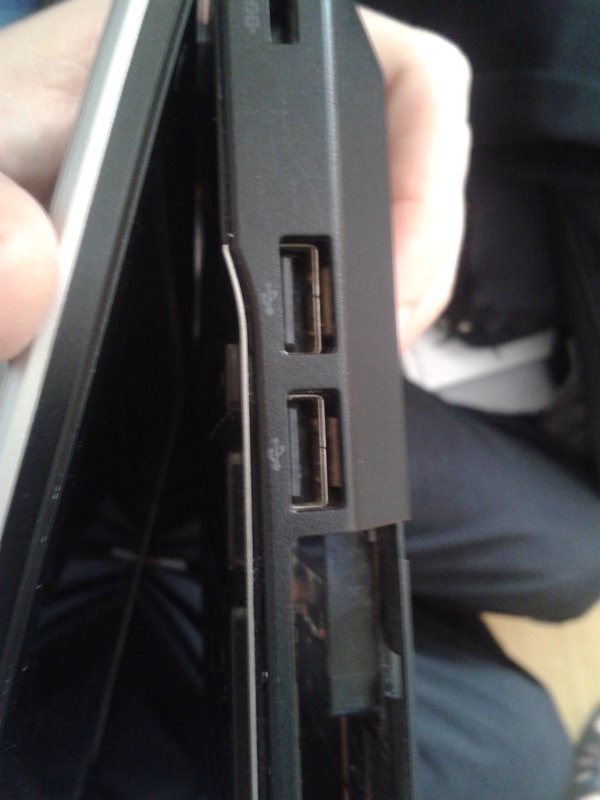
Also under the battery there are 5-6 hard-to-reach “latches”. There you can easily scratch the monitor if you miss it, so we act with a sober head.

Almost a “bare” laptop with a connector for the HDD and the drive, which we unscrew and remove from the motherboard (carefully remove it vertically, insert it back in the same way, if you forgot to insert it, look at the HDD connector next to it)

we will place the HDD in the case from under an unnecessary drive, which they gave me in the service center for free. We unscrew all visible bolts on the case, and then press to the right of the button into the recess with a flat screwdriver so that the drive opens.

We need this board, or rather the connector itself.
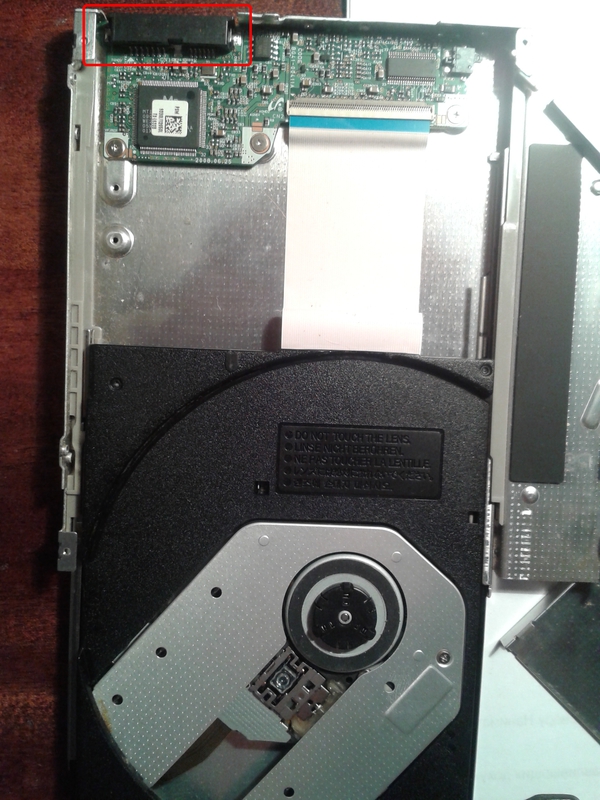
The front of this drive is also useful to mask our activities.
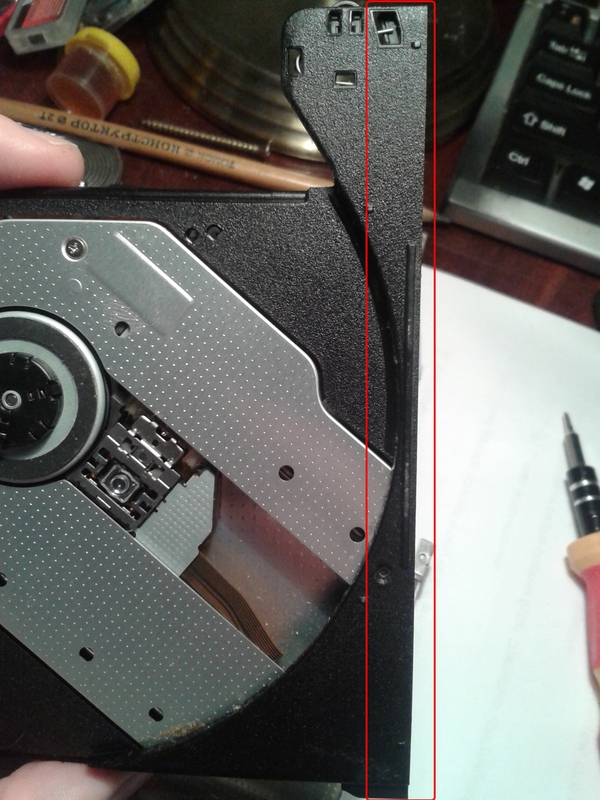
We take out the rest, clean it off with a file or simply hammer in the protruding parts at the bottom of the case and glue the front of the drive to the edge with hot-melt adhesive.

Next, we measure how our HDD will be located. I chose this arrangement.
After trying on the bottom, I made 4 holes for the bolts for mounting the hard drive.
We make an adapter.
For power we need a molex-SATA wire.

To pull out the wires from molex we need to bend the “holders” inside, which look like this:
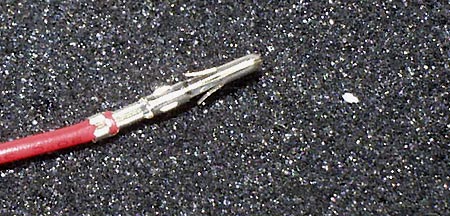
either cut to the root if laziness (you still have to cut it)
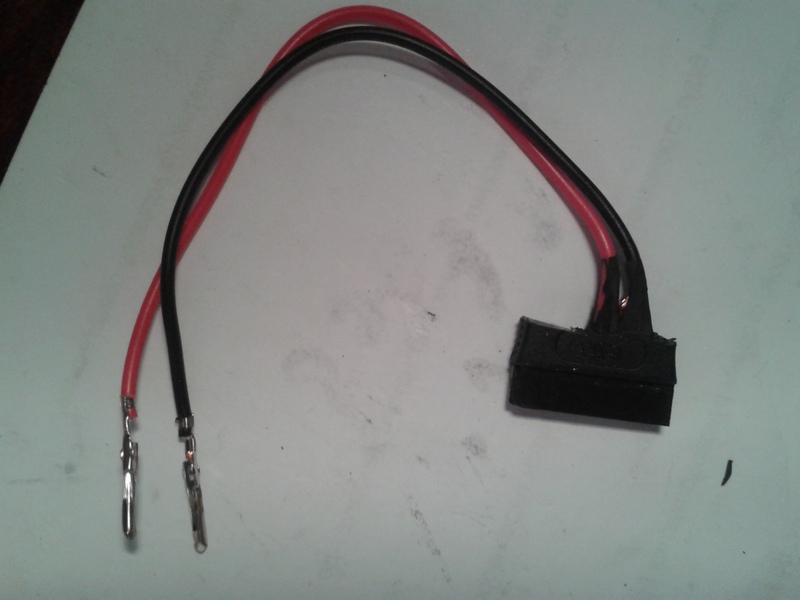
We need only 2 wires: red and any of the black (t .k. on the disk, the earth is most likely common to all), the voltage is + 12V on yellow, our disk can work without it.
Due to the lack of space in the case, I had to cut off half and carefully strip the wires from external insulation.
I try on to the body and fill it with hot glue.

I also had to cut the SATA plug to the desired size.


After trying it, he bent over and also filled it with hot glue.

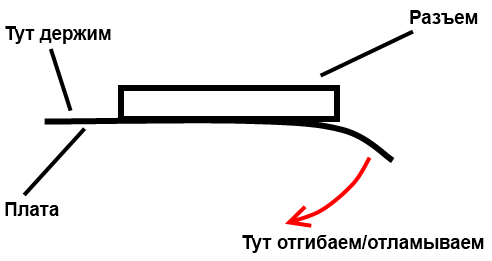
Next, we break and remove the connector from the drive board. I did this on this principle.
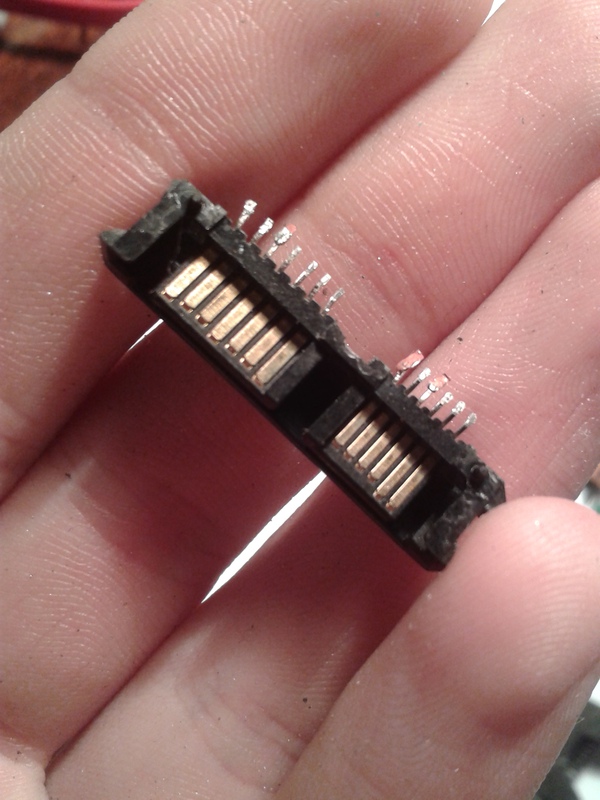
We get this input with 13 contacts. Because I no longer had the strength to solder; I connected the wires more

simply : Having bent from the back of the wire, under them I found half-millimeter holes into which I carefully pushed the wires with thin pliers until they were visible from the outside. For reliability, filled with hot glue.
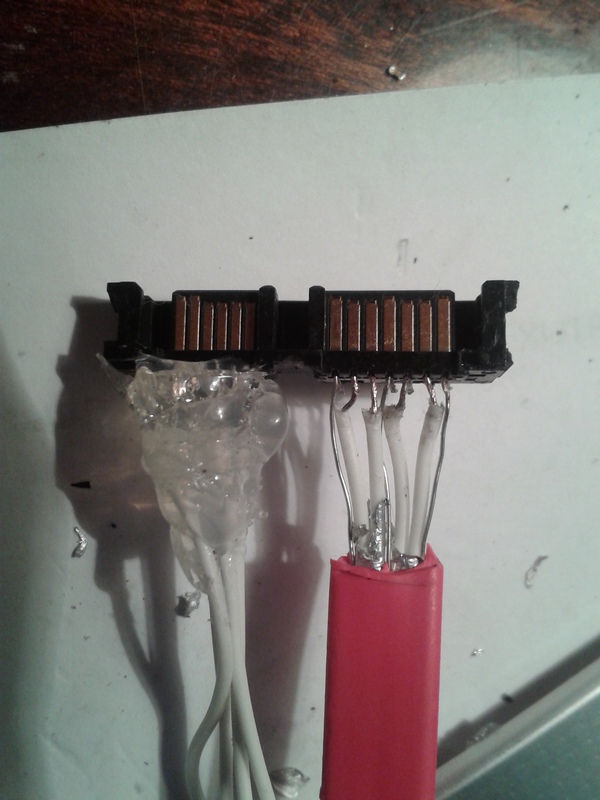
We make the connections as follows:

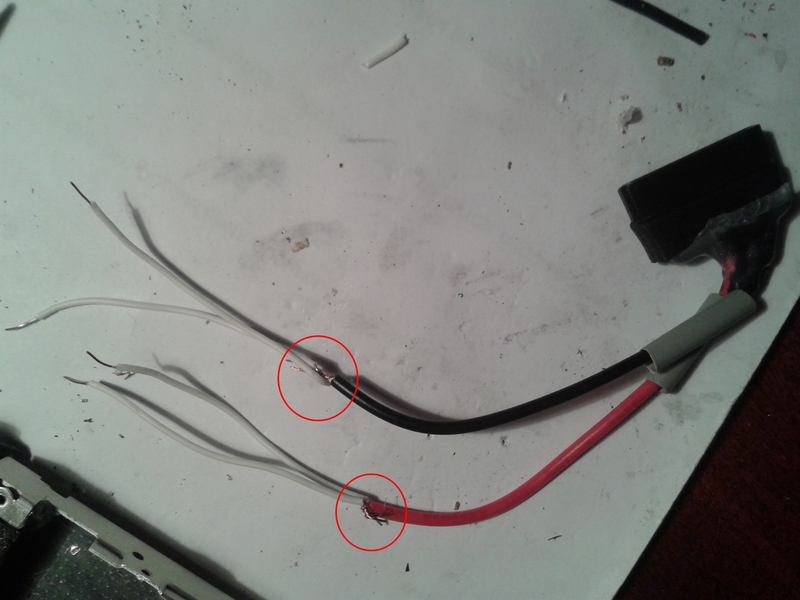
Because the wires for power were inside the “hairs”, I soldered them to two wires that I cut off from SATA, which hold great in the holes in the connector. According to the scheme above, we put them in there and again hot glue.
Verification
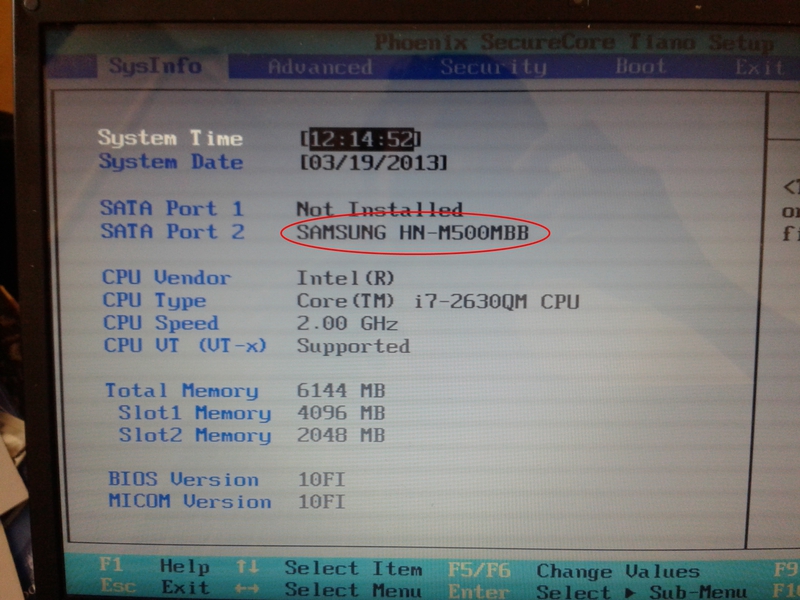
We connect, turn on the laptop, check in the BIOS.
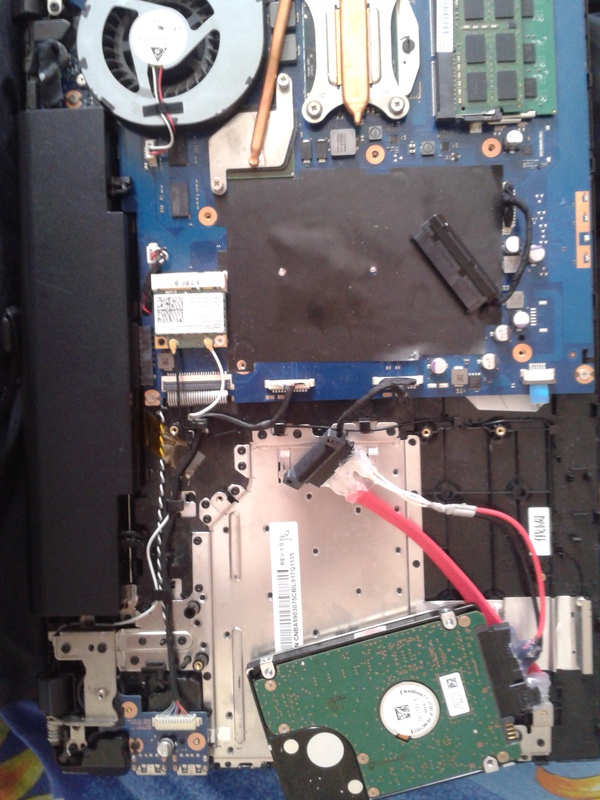
Everything works. Getting to the assembly.
We put everything inside, we fasten the HDD with bolts from below.

Due to lack of space, I had to lose one of the mounts of my native adapter (the already cut off area was circled). Of
course, I could make the adapter more authentic, but I miscalculated.
Close the drive cover and twist a couple of bolts. The distance from the HDD to the top cover is about 3-4mm, plus I found a hole in it that freed from the sticker, excessive ventilation will not hurt (of course, it will have little effect, but still) We

snap the front panel that was torn off from the native drive earlier to hide our activity and insert the box from the HDD all the way to the inside of the case, insert the wire into the connector on the motherboard, then snap the case and fasten it for reliability. Pay attention to the external connectors, they must be inside the case, if they get stuck then insert a screwdriver in them not deep and pull down, they with a characteristic click will enter the case in the desired position.
Once again we check in the BIOS and set the boot priorities if they have changed, first we put the hard drive with the system.

We start the system. Railway works.

Performance test of our second hard drive, which suits me perfectly.
Thanks for attention.
List of links:
www.allpinouts.org/index.php/Serial_ATA_(SATA,_Serial_Advanced_Technology_Attachment)
spvd.ru/page/slim-sata-power
ru.wikipedia.org/wiki/Electrical_connectors_Molex
ru.wikipedia.org/wiki/SATA
habrahabr. com / post / 155769
habrahabr.ru/sandbox/50275
adminnew.blogspot.ru/2011/07/5.html
I heard a lot about the speed qualities of modern SSDs, but I managed to buy it only recently. After a simple installation of it in my work laptop, open spaces for quick work and a lot of joy. But after a while, I realized that with 128GB I could not stretch for a long time and still have to somehow increase the disk space. The Internet prompted me to put my former HDD into a laptop as a second medium, which is exactly what I did.
I’ll immediately warn you that I’m writing a similar article for the first time, I’ll try not to make mistakes, but still.
Also, you do everything at your own peril and risk.
Let's start.
We will need:
- Screwdrivers
- Office knife and / or small nail clippers
- Nail and hammer / drill / Phillips screwdriver / any other hole making tool
- Soldering iron, solder, flux (optional, but desirable)
- Hot glue
- Tester (I will tell you how to make an owl if not)
- Thermotubes / electrical tape / adhesive tape (one thing is possible)
- SATA Interface Cable
- Molex-SATA power adapter (say “molex-SATA to power the hard drive” in the store, we only understood what to bring)
- Second hard drive
- Waste laptop drive with SATA connector
- Tweezers or thin pliers
How to make your tester:
We take a small light bulb or speaker from the motherboard, if available, and solder the wires to the battery. If there is contact, there will be light / sound.
I think everything is clear here.
We disassemble the laptop.
He has bolts under three rubber legs (which are on non-drying glue) and on the cover of RAM.
We unscrew all 4 bolts, pry the cap over a small ledge and pull it out of the case. Next, we pull the main cover up in the direction of the arrows and with a small click it is disconnected from the case.
Next, we see our hard drive, unscrew it and all the other visible bolts.
In the center near the inscription "ODD" there is a bolt that holds the drive, unscrewing it with a little effort we take it out of the case, it is held in it by connecting the drive plug and the connector on the motherboard.
Then you need to remove the outer part of the housing. Gently, without unnecessary efforts, we pry the edges of the case with a flat screwdriver and snap it off. The plastic in the case is durable and flexible, so that none of the holders will break.
Be careful when you release external connectors from the chassis. It is better to go around them, and not push them inside.
Also under the battery there are 5-6 hard-to-reach “latches”. There you can easily scratch the monitor if you miss it, so we act with a sober head.
Almost a “bare” laptop with a connector for the HDD and the drive, which we unscrew and remove from the motherboard (carefully remove it vertically, insert it back in the same way, if you forgot to insert it, look at the HDD connector next to it)
we will place the HDD in the case from under an unnecessary drive, which they gave me in the service center for free. We unscrew all visible bolts on the case, and then press to the right of the button into the recess with a flat screwdriver so that the drive opens.
We need this board, or rather the connector itself.
The front of this drive is also useful to mask our activities.
We take out the rest, clean it off with a file or simply hammer in the protruding parts at the bottom of the case and glue the front of the drive to the edge with hot-melt adhesive.
Next, we measure how our HDD will be located. I chose this arrangement.
After trying on the bottom, I made 4 holes for the bolts for mounting the hard drive.
We make an adapter.
For power we need a molex-SATA wire.
To pull out the wires from molex we need to bend the “holders” inside, which look like this:
either cut to the root if laziness (you still have to cut it)
We need only 2 wires: red and any of the black (t .k. on the disk, the earth is most likely common to all), the voltage is + 12V on yellow, our disk can work without it.
Due to the lack of space in the case, I had to cut off half and carefully strip the wires from external insulation.
I try on to the body and fill it with hot glue.
I also had to cut the SATA plug to the desired size.
After trying it, he bent over and also filled it with hot glue.
Next, we break and remove the connector from the drive board. I did this on this principle.
We get this input with 13 contacts. Because I no longer had the strength to solder; I connected the wires more
simply : Having bent from the back of the wire, under them I found half-millimeter holes into which I carefully pushed the wires with thin pliers until they were visible from the outside. For reliability, filled with hot glue.
We make the connections as follows:
Because the wires for power were inside the “hairs”, I soldered them to two wires that I cut off from SATA, which hold great in the holes in the connector. According to the scheme above, we put them in there and again hot glue.
Verification
We connect, turn on the laptop, check in the BIOS.
Everything works. Getting to the assembly.
We put everything inside, we fasten the HDD with bolts from below.
Due to lack of space, I had to lose one of the mounts of my native adapter (the already cut off area was circled). Of
course, I could make the adapter more authentic, but I miscalculated.
Close the drive cover and twist a couple of bolts. The distance from the HDD to the top cover is about 3-4mm, plus I found a hole in it that freed from the sticker, excessive ventilation will not hurt (of course, it will have little effect, but still) We
snap the front panel that was torn off from the native drive earlier to hide our activity and insert the box from the HDD all the way to the inside of the case, insert the wire into the connector on the motherboard, then snap the case and fasten it for reliability. Pay attention to the external connectors, they must be inside the case, if they get stuck then insert a screwdriver in them not deep and pull down, they with a characteristic click will enter the case in the desired position.
Once again we check in the BIOS and set the boot priorities if they have changed, first we put the hard drive with the system.
We start the system. Railway works.
Performance test of our second hard drive, which suits me perfectly.
Thanks for attention.
List of links:
www.allpinouts.org/index.php/Serial_ATA_(SATA,_Serial_Advanced_Technology_Attachment)
spvd.ru/page/slim-sata-power
ru.wikipedia.org/wiki/Electrical_connectors_Molex
ru.wikipedia.org/wiki/SATA
habrahabr. com / post / 155769
habrahabr.ru/sandbox/50275
adminnew.blogspot.ru/2011/07/5.html