Cook MVVM for Windows Store-applications
When we started working on applications for Windows 8, we were looking for the Model-View-ViewModel (MVVM) template support library for this platform. We spent some time on the Internet in search of one, but in the end we accepted the fact that such libraries do not exist in nature yet (maybe we searched poorly, but now this is not so important). The answer to the question "what to do?" begs for himself ...

In the bowels of our company EastBanc Technologies a special library was created (codenamed EBT.Mvvm ). The purpose of creation is to save time in the future when developing complex applications for Windows 8. The library includes both our own developments, as well as some ideas and examples that we encountered during our searches.
So, what do we have: everyone remembers that the main idea of the template is to weaken the connection between the ViewModel (we will call the view model) and the View itself (view). The ideal state is when the code-behind view contains only a constructor with InitializeComponent and, possibly, code supporting visual behavior that cannot be defined through XAML. Thus, the developer gives the presentation to the designer, and he focuses on the work and testing the application logic.
This article is aimed at developers who are already familiar with programming in C # and XAML under Windows 8. Below we provide descriptions of the main features of our library as examples of code for their use and comments. So, let's go:
The first thing to start when talking about the MVVM template is the base class for our view models. The main purpose is to support the INotifyPropertyChanged interface and convenient functions for automatic notification when properties change. Usage example:
Everything should be clear here without comment. It should be added that there is a set of overloaded functions for automatic notification when a property changes. There is also a way to avoid writing a field at all. This refers to the so-called backing field. An example is the _number field in the code example above. At the same time, properties can continue to be created with support for automatic notification. This is convenient enough if in the view model we have many properties for binding. The example below shows how to make a property based on this feature (field is not required).
A familiar and necessary RelayCommand command handler. It is bound to the Command property of the ButtonBase base class (buttons, menu items, hyperlinks) and supports the ICommand interface. An irreplaceable thing and has been implemented for a long time. However, the following should be mentioned:
We added the ability to conveniently bind event handlers. MVVM implies that UI event processing must take place on the view model side. It is impossible to do this without a little trick. It consists in binding the attached property of the user interface element. Currently, the library supports the processing of a large number of events. The list, if necessary, can be expanded by the developer himself. As an example, here is the handling of the Tapped event of a TextBlock element:
Here it is worth paying attention to the line with TappedCommand.PreventBubbling = point.X <100. The fact is that we have provided the ability to cancel further processing of events (Handled) by setting the corresponding flag.
Currently there is support for events: SelectionChanged, Click, ItemClick, KeyDown, KeyUp, PointerReleased, PointerPressed, PointerMoved, PointerCanceled, PointerEntered, PointerExited, PointerCaptureLost, Tapped, RightTapped, PointerWheelChanged, ManipulationStartted, ManipulationStarttedt, Loaded.
In our opinion, this is the most interesting feature of the library. For targeted tablet-oriented applications, it’s indispensable! Remember that there are four screen modes and that supporting them all is a good tone. We have two mechanisms for changing the display of user interface elements depending on the current screen mode.
The following example changes the orientation of the list depending on the screen mode.
The method of changing the style of an element is a very convenient and powerful feature. When using it, you must remember the following:
A nice consequence of using the style change method is that with this approach, using the ContentControl / ContentPresenter, you can change the view template completely! The following shows how to do this:
For example, in this way, you can switch to snapped mode without unnecessary problems.
Sometimes it is necessary to call user interface methods from a view model. An example is the need to set the input focus on a given field. This can be done using our ControlWrapper:
This mechanism allows you to start an animation when an event occurs in a view element. And again, not a single line of code in code-behind! The method is based on binding event handlers. In XAML, you need to define a special TriggerCommand command:
ContextMenuBehavior allows you to quickly and conveniently display the context menu by right-clicking or tap on the touchscreen. In view it is only necessary to make a binding on the element for which the context menu will be called. And in the model, define a list of commands and handlers:

PopupBehavior allows you to create popup display functionality when you click the right mouse button or tap on the touchscreen. Everything should be clear from the code example below:

One of the problems for the developer is page navigation - it is not very convenient to maintain code-behind cleanliness if the transitions are made through calls to Frame from the view. And almost always there is a need for handling Navigating and Navigated events in the view model.
To achieve our goals, we create the main model of our application:
When starting the application, we set the main model as the context of the top-level element of the visual tree of objects and associate the NavigationState wrapper class with frame.
Now, our HomePageModel view model can handle OnNavigating and OnNavigated events. And also navigate to other pages through a saved link to _rootModel. Note that OnNavigating supports transition cancellation (ref bool cancel parameter).
In XAML, set the correct DataContext page for the binding to work correctly.
Everything, the result has been achieved. Now you can create pages and link them with view models. The latter will handle OnNavigating and OnNavigated events and control navigation.
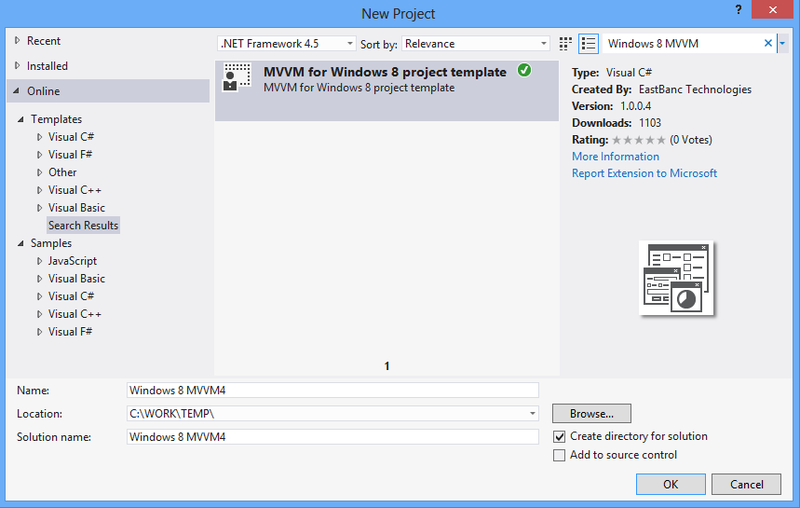
We have provided the opportunity to quickly create a framework for the project using our library. The project template is embedded in Visual Studio and appears in Windows Store projects. The template is also available in the Visual Studio project template online library.
Well, it seems that this is enough for one article. In fact, although most, but not all of the features of our library were listed. There are also converters, saving and restoring state, an assistant for the charm-panel. Habrachitateli will be able to learn the rest, having directly installed and used this project. So smoothly proceed to the next item:
Interested habitura will want to see the described library in action. It is very easy to do. Our library is available for download as a Nuget Package . Our project is also launched on CodePlex .
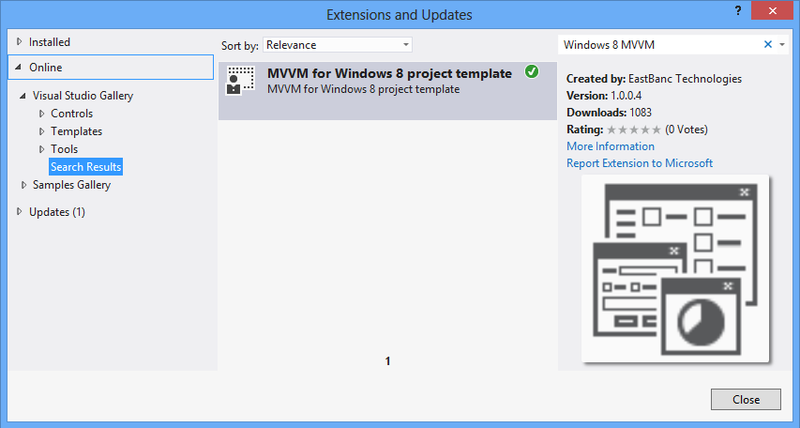
The fastest way to install it in the studio is to use the search in 12 studios through Tools-> Extensions and Updates. Select Online and in the search bar type Windows 8 MVVM keywords .
“The EBT.Mvvm library is distributed on an“ as is ”basis, the developer is not responsible for the possible consequences ...”
But seriously, we will be glad if our library helps application developers for the young Windows 8 platform save time on overcoming the problems with which we had to face ourselves. To the best of our abilities and capabilities, we are constantly correcting and improving this software project. Your suggestions and comments can help us with this.
I would like to wish good luck to all the developers involved in the development. Let's create more applications for the Windows Store!
In the bowels of our company EastBanc Technologies a special library was created (codenamed EBT.Mvvm ). The purpose of creation is to save time in the future when developing complex applications for Windows 8. The library includes both our own developments, as well as some ideas and examples that we encountered during our searches.
So, what do we have: everyone remembers that the main idea of the template is to weaken the connection between the ViewModel (we will call the view model) and the View itself (view). The ideal state is when the code-behind view contains only a constructor with InitializeComponent and, possibly, code supporting visual behavior that cannot be defined through XAML. Thus, the developer gives the presentation to the designer, and he focuses on the work and testing the application logic.
This article is aimed at developers who are already familiar with programming in C # and XAML under Windows 8. Below we provide descriptions of the main features of our library as examples of code for their use and comments. So, let's go:
1. Base class ViewModel
The first thing to start when talking about the MVVM template is the base class for our view models. The main purpose is to support the INotifyPropertyChanged interface and convenient functions for automatic notification when properties change. Usage example:
public class SimpleViewModel : ViewModel
{
    private int _number;
    public int Number
    {
        get { return _number; }
        set { OnPropertyChange(ref _number, value); }
    }
}
Everything should be clear here without comment. It should be added that there is a set of overloaded functions for automatic notification when a property changes. There is also a way to avoid writing a field at all. This refers to the so-called backing field. An example is the _number field in the code example above. At the same time, properties can continue to be created with support for automatic notification. This is convenient enough if in the view model we have many properties for binding. The example below shows how to make a property based on this feature (field is not required).
public string Text
{
	get { return GetPropertyValue(() => Text); }
	set { SetPropertyValue(() => Text, value); }
}
2. Teams
A familiar and necessary RelayCommand command handler. It is bound to the Command property of the ButtonBase base class (buttons, menu items, hyperlinks) and supports the ICommand interface. An irreplaceable thing and has been implemented for a long time. However, the following should be mentioned:
public class SimpleViewModel : ViewModel
{
	public SimpleViewModel()
	{
		SampleCommand = new RelayCommand(OnSample);
	}
	public RelayCommand SampleCommand { get; private set; }
	private void OnSample()
	{
		// TODO Do something here.
	}
}
3. Binding event handlers
We added the ability to conveniently bind event handlers. MVVM implies that UI event processing must take place on the view model side. It is impossible to do this without a little trick. It consists in binding the attached property of the user interface element. Currently, the library supports the processing of a large number of events. The list, if necessary, can be expanded by the developer himself. As an example, here is the handling of the Tapped event of a TextBlock element:
public class SimpleViewModel
{
	public SimpleViewModel()
	{
		TappedCommand = new EventCommand(OnTapped);
	}
	public IEventCommand TappedCommand { get; private set; }
	private void OnTapped(Point point)
	{
		TappedCommand.PreventBubbling = point.X < 100;
	}
}
Here it is worth paying attention to the line with TappedCommand.PreventBubbling = point.X <100. The fact is that we have provided the ability to cancel further processing of events (Handled) by setting the corresponding flag.
Currently there is support for events: SelectionChanged, Click, ItemClick, KeyDown, KeyUp, PointerReleased, PointerPressed, PointerMoved, PointerCanceled, PointerEntered, PointerExited, PointerCaptureLost, Tapped, RightTapped, PointerWheelChanged, ManipulationStartted, ManipulationStarttedt, Loaded.
4. Support various screen modes
In our opinion, this is the most interesting feature of the library. For targeted tablet-oriented applications, it’s indispensable! Remember that there are four screen modes and that supporting them all is a good tone. We have two mechanisms for changing the display of user interface elements depending on the current screen mode.
- Visibility management. It is based on changing the visibility of each specific element and is convenient for simple scenarios.
- Change of style. Sometimes, in terms of performance, this is a more efficient method for complex user interface scenarios.
The following example changes the orientation of the list depending on the screen mode.
The method of changing the style of an element is a very convenient and powerful feature. When using it, you must remember the following:
- When using this feature, we cannot use the Style property for elements.
- If applied to one of the screen modes, then at least this style will be applied in all modes unless others are specified.
- For each of the screen modes, each of these styles takes precedence. For example, if there is a style for portrait orientation and for snapped, then portrait style will be applied for landscape and filled mode. If only one style is specified, it will be applied in all modes.
A nice consequence of using the style change method is that with this approach, using the ContentControl / ContentPresenter, you can change the view template completely! The following shows how to do this:
For example, in this way, you can switch to snapped mode without unnecessary problems.
5. Calling View methods from ViewModel
Sometimes it is necessary to call user interface methods from a view model. An example is the need to set the input focus on a given field. This can be done using our ControlWrapper:
public class SimpleViewModel : ViewModel
{
    public SimpleViewModel()
    {
        TextBoxWrapper = new ControlWrapper();
    }
    public ControlWrapper TextBoxWrapper { get; private set; }
    public void GotoField()
    {
        TextBoxWrapper.Focus();
    }
}
6. Event triggers for animation
This mechanism allows you to start an animation when an event occurs in a view element. And again, not a single line of code in code-behind! The method is based on binding event handlers. In XAML, you need to define a special TriggerCommand command:
7. Binding the context menu
ContextMenuBehavior allows you to quickly and conveniently display the context menu by right-clicking or tap on the touchscreen. In view it is only necessary to make a binding on the element for which the context menu will be called. And in the model, define a list of commands and handlers:
public class MyViewModel : ViewModel
{
    private IList _contextMenuCommands;
    private string _text;
    public string Text
    {
        get { return _text; }
        set { OnPropertyChange(ref _text, value); }
    }
    public IList ContextMenuCommands
    {
        get
        {
            return _contextMenuCommands ?? (_contextMenuCommands = new List
            {
                new UICommand("Copy", OnCopy),
                new UICommand("Paste", OnPaste),
            });
        }
    }
    private void OnCopy(IUICommand command)
    {
        var content = new DataPackage();
        content.SetText(Text);
        Clipboard.SetContent(content);
    }
    private async void OnPaste(IUICommand command)
    {
        var content = Clipboard.GetContent();
        Text = await content.GetTextAsync();
    }
}
8. Snap popup
PopupBehavior allows you to create popup display functionality when you click the right mouse button or tap on the touchscreen. Everything should be clear from the code example below:
9. Interstitial navigation
One of the problems for the developer is page navigation - it is not very convenient to maintain code-behind cleanliness if the transitions are made through calls to Frame from the view. And almost always there is a need for handling Navigating and Navigated events in the view model.
To achieve our goals, we create the main model of our application:
public class RootModel
{
    public RootModel()
    {
        NavigationState = new NavigationState();
        HomePageModel = new HomePageModel(this);
    }
    public NavigationState NavigationState { get; set; }
    public HomePageModel HomePageModel { get; set; }
    public bool CanGoBack { get { return NavigationState.CanGoBack; } }
    public void GoBack()
    {
        NavigationState.GoBack();
    }
    public void GoToHomePage()
    {
        NavigationState.Navigate(typeof (HomePage));
    }
}
When starting the application, we set the main model as the context of the top-level element of the visual tree of objects and associate the NavigationState wrapper class with frame.
sealed partial class App : Application
{
    ...
    public RootModel RootModel { get; private set; }
    protected override void OnLaunched(LaunchActivatedEventArgs args)
    {
        RootModel = new RootModel();
        var frame = new Frame { DataContext = RootModel };
        // Bind the NavigationState and the frame using the ElementBinder class.
        // You can also do this in XAML.
        ElementBinder.SetWrapper(frame, RootModel.NavigationState);
        Window.Current.Content = frame;
        Window.Current.Activate();
        RootModel.GoToHomePage();
    }
}
Now, our HomePageModel view model can handle OnNavigating and OnNavigated events. And also navigate to other pages through a saved link to _rootModel. Note that OnNavigating supports transition cancellation (ref bool cancel parameter).
public class HomePageModel : PageModel // Or implement IPageModel.
{
    private RootModel _rootModel;   // You can call _rootModel.NavigationState.Navigate(…)
    public HomePageModel(RootModel rootModel)
    {
        _rootModel = rootModel;
    }
    public override void OnNavigated()
    {
        // TODO Do something here to initialize/update your page.
    }
    public override void OnNavigating(ref bool cancel)
    {
        // TODO Do something here to clean up your page.
    }
}
In XAML, set the correct DataContext page for the binding to work correctly.
Everything, the result has been achieved. Now you can create pages and link them with view models. The latter will handle OnNavigating and OnNavigated events and control navigation.
10. Template for generating a skeleton project
We have provided the opportunity to quickly create a framework for the project using our library. The project template is embedded in Visual Studio and appears in Windows Store projects. The template is also available in the Visual Studio project template online library.
For now
Well, it seems that this is enough for one article. In fact, although most, but not all of the features of our library were listed. There are also converters, saving and restoring state, an assistant for the charm-panel. Habrachitateli will be able to learn the rest, having directly installed and used this project. So smoothly proceed to the next item:
Where can I download?
Interested habitura will want to see the described library in action. It is very easy to do. Our library is available for download as a Nuget Package . Our project is also launched on CodePlex .
The fastest way to install it in the studio is to use the search in 12 studios through Tools-> Extensions and Updates. Select Online and in the search bar type Windows 8 MVVM keywords .
In the end
“The EBT.Mvvm library is distributed on an“ as is ”basis, the developer is not responsible for the possible consequences ...”
But seriously, we will be glad if our library helps application developers for the young Windows 8 platform save time on overcoming the problems with which we had to face ourselves. To the best of our abilities and capabilities, we are constantly correcting and improving this software project. Your suggestions and comments can help us with this.
I would like to wish good luck to all the developers involved in the development. Let's create more applications for the Windows Store!