Raspberry Pi + Motorola LapDock + Hacks
Good time of the day, dear Habra residents!
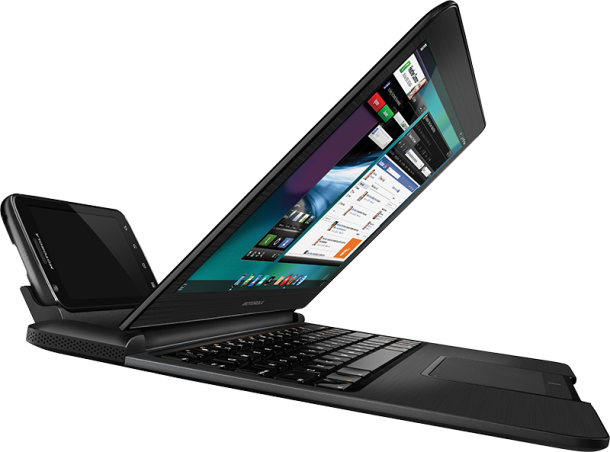
Recently, I raised a question about the meaning of the review of the bundle of Motoroa Atrix 4G + LapDock (therefore, I apologize to those who did not wait for the review and am ready to answer questions), but alas, I did not finish it since my Raspberry came and the dock went to expense. In this article I will tell you how to turn our Raspberry into a full-fledged laptop with minimal cost, as well as a couple of comments and hacks with the board.
Attention! Traffic!
Arrival
A letter arrived from element14 , which I ordered back in early June, in mid-September in a regular cardboard box with a logo.

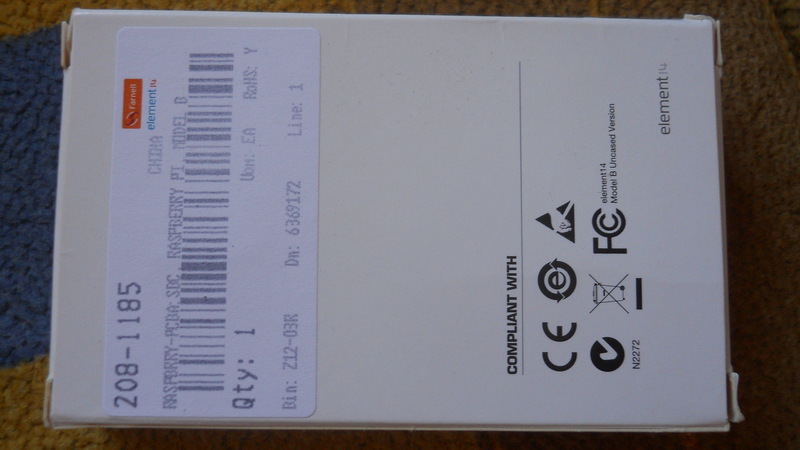
Inside was a scarf without any accessories and other cookies. Yes, I do not need them, since everything is already there.

Connection
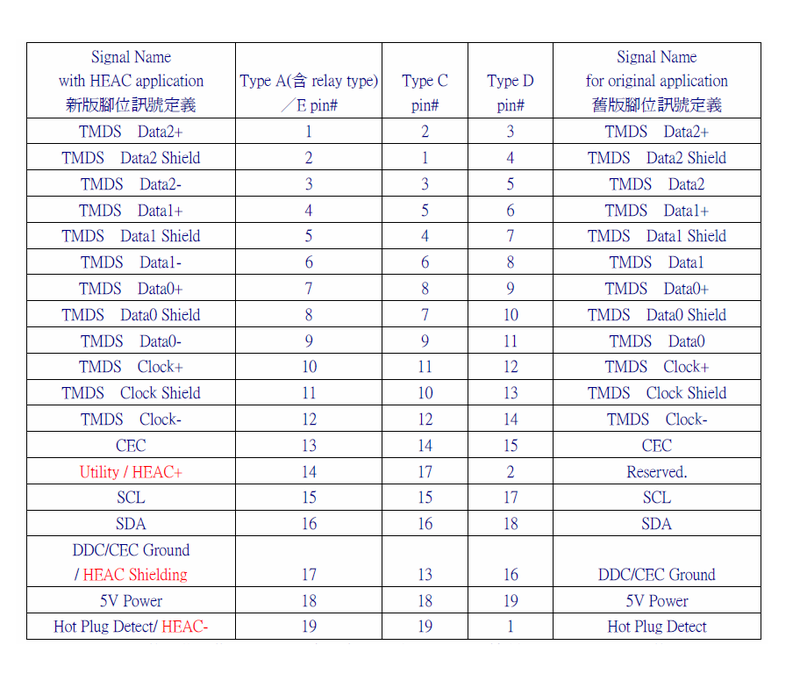
Having received a handkerchief and smoking mana, I hung up because I didn’t have a TV or HDMI monitor, and I fell into despair because Piska was not connected to anything. But it wasn’t there, and my gaze fell on the dock station just purchased for my motorola. This dock station had everything I needed (almost). The presence of HDMI and USB which gave a working touchpad, keyboard and USB 2.0 host for 2 ports. But. Micro HDMI type HDMI D was used in the dock. And by googling I found an alteration option with a table (I’ll say right away that the lad on the blog lied to people that he and Klava’s mouse worked, since it would be necessary to make a raspberry alteration that he didn’t do) . So! After drinking two liters of beer on the floor of the 3rd night and shamanizing with a soldering iron - we get this modification.
Redid Dock:

And the board in the dock from different angles:


General view: I

also attach a table for altering the dock:
And so as a result we got a tight-fitting board in the dock and partly a working beech. That is, food will be supplied, the picture will be, but in order for the keyboard to work and the touchpad you need to make a hack.
Modernization
You in the previous photos noticed the presence of wiring and that the power connector looks girlfriend.
True, I unfortunately took pictures only after the alteration.
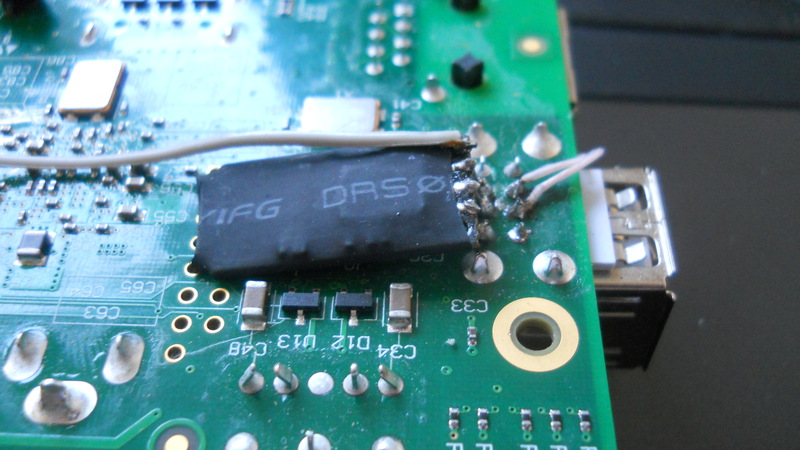
The essence of the alteration is that only the power is output to the micro USB connector, soldering to the D + and D- output is not convenient and will lead to the clipping of the tracks, so it was decided to turn the connector upside down, normally solder the terminals and fill with epoxy stick. By the way! I draw your attention to the fact that the fee costs only $ 25 and the quality of the
Plus, connecting to Micro USB is convenient when using the dock. Therefore, from the socket, I threw two wires to one of the hosts on the board, I do not lose anything since losing one port - I get two.
Here is a photo of the hack:

There is also an A / B / G / N Wifi module attached to the second port here:
Conclusion
So. Having completed all the simple procedures, we get a full-fledged laptop, with working sound, matrix, touchpad, keyboard and Wifi.
I want to add that for the keyboard to work correctly in the configuration, you need to specify 101 keys.
By operating time, the dock works with the board at maximum load of about 27-30 hours. Charges about 3-4 hours.
Also, if interested, I can describe here or in a new article overclocking the board to a frequency of 1.2 GHz.
I hope everything turned out informative and useful, I will be glad to answer all questions