We write the panel for i3 window manager on Qt
i3 is my favorite tile window manager. But more recently, having taken up another repainting of my desktop, I came across one unpleasant thing: the functionality of my native panel is not enough to realize all my fantasies. In particular, she does not know how to resize or change the color of borders. And what does the Linuxoid do when the software does not suit it and there are no alternatives (and there are none)? That's right, patch the existing one, or write your own. I have absolutely no desire to deal with xcb, on which the standard panel is written, so I went the second way. C ++ was chosen as the language. Ask K.O. about the framework
What is a panel in general? Wikipedia on this subject tells us:
“The taskbar (English taskbar) is an application that is used to launch other programs or manage already running ones, and is a toolbar. In particular, it is used to manage application windows. ”
But everything is not so simple in tile window managers. The windows in them do not overlap each other. The manager allocates each window its space (tile), on which this window is stretched. For example:
See? All windows are in sight. So the question of the need for a taskbar in such managers disappears by itself. But on one screen you can’t fit many applications. What to do? And here comes the concept of several desktops. It's damn convenient! There is no need to change the focus of the windows, their size and position every minute. I switched to the first desktop - here is a set of development applications for you, switched to the second - keep the file manager and player next to it. Etc. Theoretically, there can be infinitely many desktops, but using more than 10 at a time can be quite problematic.
So, our panel will not control windows, but desktops. Therefore, I prefer to use just the word “panel” rather than the phrase “taskbar”.
As friendship begins with a smile, so most Qt applications begin with a widget. So we will not depart from tradition and first of all we will write a widget for our future panel. For now, it will be just a class inherited from QWidget. With constructor and destructor.
If you now display this widget, you will see an empty window in painfully familiar # D4D0C8 color. In order to turn this into a panel, we need a little magic and change one flag.
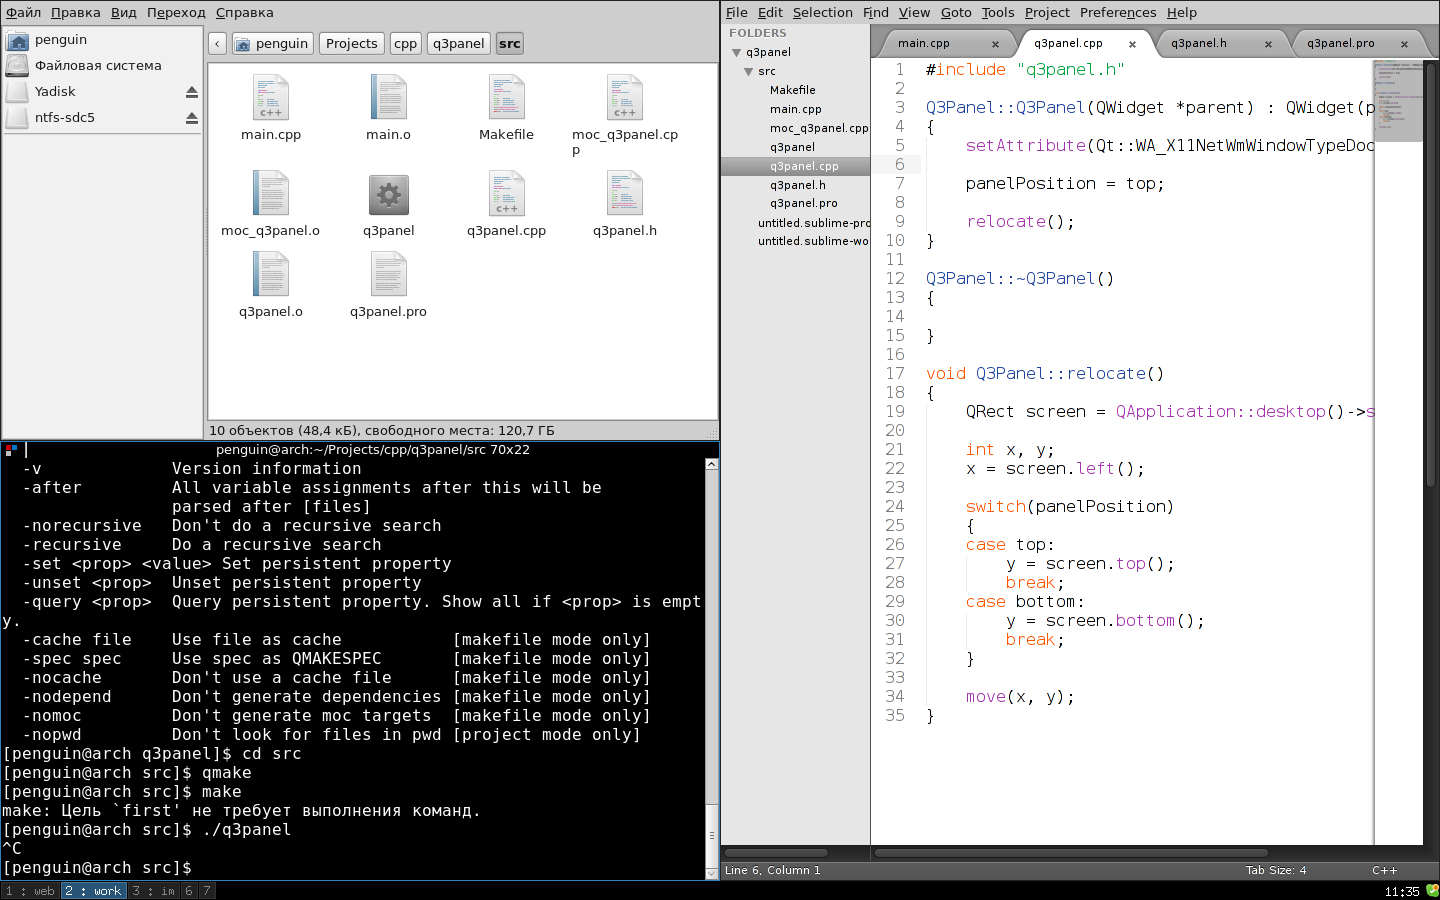
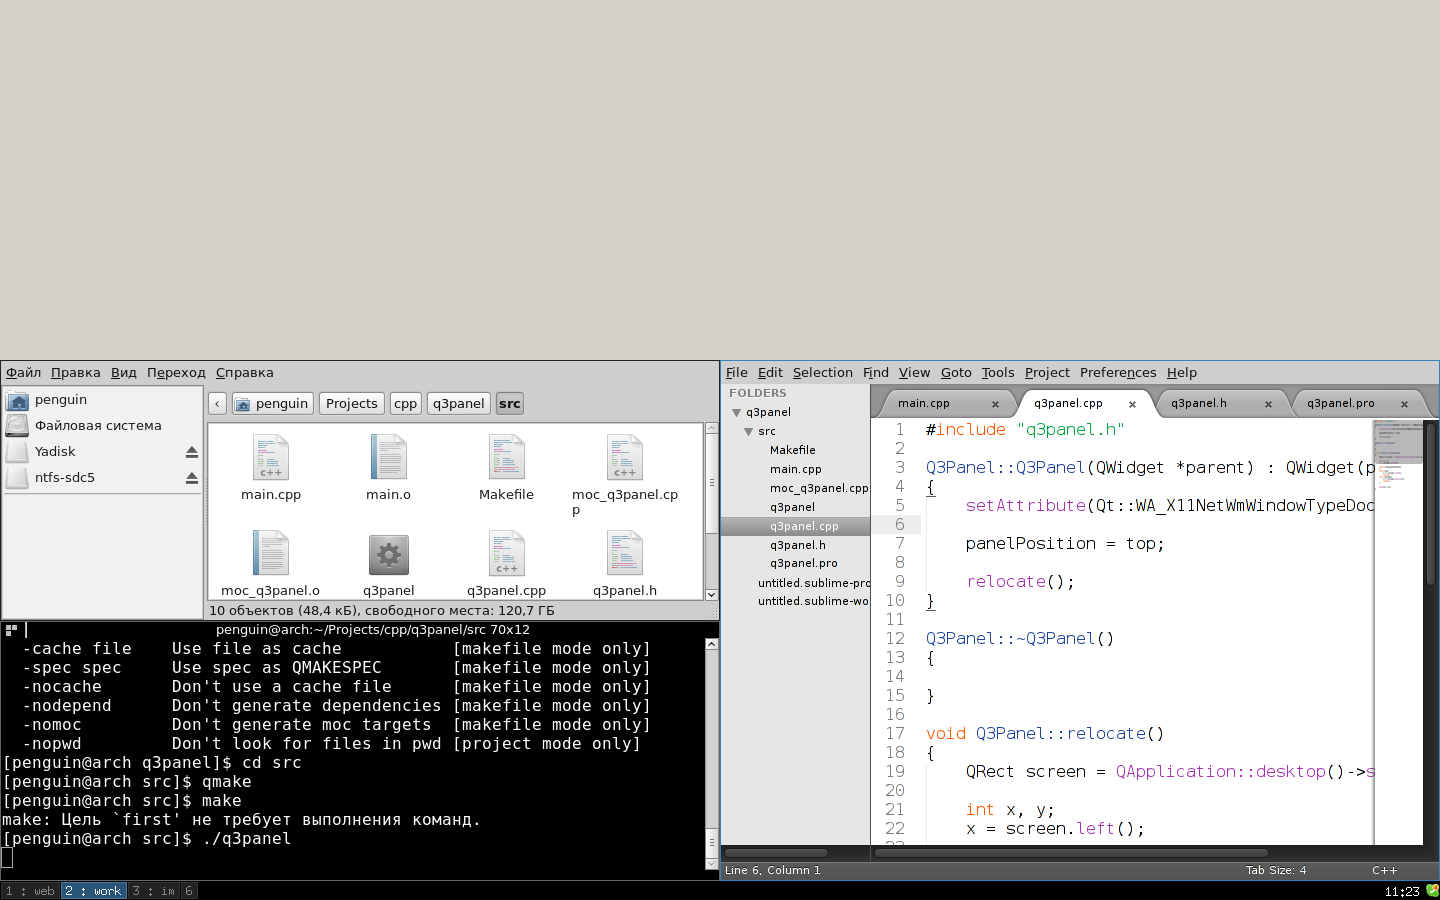
Just add this to our widget constructor. Thus, you set the property of our window _NET_WM_WINDOW_TYPE X11 to the value _NET_WM_WINDOW_TYPE_DOCK. Now this is not just a window, but a dock! Let's see: Here it is, the panel of my dreams, hefty! Too hefty, really. Control of size and position would not hurt us.
In this method, in the variable screen we get the geometry of the so-called root window . Calling the resize () method makes the width of our panel equal to the width of the screen, and the height equal to the passed parameter. In the variable x we write the left coordinate of our screen, and in y - the top or bottom, depending on the position. Then we move our panel along the coordinates (x, y). position (), as you probably already guessed, is one of two methods for working with a hidden property:
Now we can control the size and position of our panel. It's time to move on to the next step.
So we got to the most interesting part. In order to manage our window manager, you need to somehow communicate with him. Fortunately, i3 out of the box supports an IPC method such as unix socket 's. And even more fortunately, Qt has a very convenient class for working with them - QLocalSocket.
But first, a brief description of the protocol. The message is as follows:
Now, first things first. The magic string is “i3-ipc”. Its sole purpose is version control of the protocol. It is followed by a 32-bit number in which the message size is stored. Then exactly the same 32-bit type of message, and then the message itself. The message type can take the following values:
Using all this functionality, you can create a panel with a bunch of features, but as part of this article we will limit ourselves to displaying and switching desktops. For this we need 3 types of messages: COMMAND, GET_WORKSPACES and SUBSCRIBE. Now more about each. Oh yes, I almost forgot. The format of the data that i3 Receives and sends is json.
COMMAND : I will not describe all possible commands - there are too many of them. To switch desktops, we need only one: "workspace number X", where X is the number of the desktop. The response to the command is an associative array that contains only one property - “success”, which can be true or false. Answer example:
GET_WORKSPACES : the message body is empty, the answer is a list of desktops, each of which contains the following properties:
Answer example:
SUBSCRIBE : i3 allows you to subscribe to events. There are 2 types of events in total:
The event message is completely identical to the standard message, with the only difference being that the most significant bit of the message type is set to 1. So, of the two types of events, we are only interested in the first. Its body is an associative array with one string property “changed”, which can take the values “focus”, “init”, “empty” and “urgent”. Answer example:
Armed with knowledge of the protocol, you can begin to implement our client. We will use 2 sockets: one will be subscribed to events, with the help of the other we will send commands and receive a list of desktops. The general algorithm is as follows:
Let me remind you that the identifier for unix socket is a file in the file system. You can get its name either by reading the “I3_SOCKET_PATH” root window property or by calling i3 --get-socketpath. I took the path of least resistance:
Now, knowing the path to the socket file, you can join the server:
And send data:
If you carefully read the protocol part, then this code should be clear to you. We pack the data and write to the socket. I3_IPC_MAGIC - constant from the header filedescribing the protocol.
Regarding setByteOrder (): BigEndian is the standard for QDataStream byte order, and i3 waits for data in native, so either such a crutch or have to abandon QDataStream in favor of char and memcpy () arrays. We learned how to send data, now we will learn how to receive answers:
Here, too, everything is extremely simple: we wait until 14 bytes are accumulated (6 is a magic string and two 4-byte numbers), we skip 6 bytes and read the message size and type into variables. It remains only to wait for the message itself and, depending on the type, send the appropriate signal.
Now after each event we will receive an up-to-date list of desktops in json format. To bring it into a “normal” state, we will use the QJson library. In many distributions, it is in the repositories, and if not, no one bothers to assemble it yourself. So, we connect:
In the .pro file and
In the header file. QJson is extremely easy to use.
workspaces is a hash table in which we store desktop information. Its key is quint16 desktop number, and the value is this structure:
Everything is simple and clear here. We know how to get information about desktops, and also store. There is a trifle left: to display it and by clicking on a specific desktop send a command to the window manager. You can go in different ways, I decided to write my widget based on QHBoxLayout. Nothing complicated, store a hash table where the key is the desktop number and the value is a link to the WorkspaceButton button. WorkspaceButton is inherited from QToolButton and does not represent anything new, except its policy of resizing and style. After each update of the list of desktops, the widget must be updated. It would be possible just to delete all the buttons and create it, but we will go in a slightly different way:
First, we clear the QHBoxLayout and go through the workspaces and, if there is already a button for the current desktop, update the focused property. If there is no button, add it. Then we check all the buttons elements to see if the desktop still exists or not already. And, if exists, add on QHBoxLayout. If not, delete. I don’t know how optimal this method is, but it seemed to me much better than deleting and re-creating all buttons every time.
All! Here it is, our panel: It works properly, displays desktops, switches. But this is just the basic functionality, in order to catch up and overtake the standard panel in terms of functionality, it remains to add settings, tray, menu and clock. About this in the next article, unless, of course, the topic will be interesting. Source code repository

Foreword
What is a panel in general? Wikipedia on this subject tells us:
“The taskbar (English taskbar) is an application that is used to launch other programs or manage already running ones, and is a toolbar. In particular, it is used to manage application windows. ”
But everything is not so simple in tile window managers. The windows in them do not overlap each other. The manager allocates each window its space (tile), on which this window is stretched. For example:
See? All windows are in sight. So the question of the need for a taskbar in such managers disappears by itself. But on one screen you can’t fit many applications. What to do? And here comes the concept of several desktops. It's damn convenient! There is no need to change the focus of the windows, their size and position every minute. I switched to the first desktop - here is a set of development applications for you, switched to the second - keep the file manager and player next to it. Etc. Theoretically, there can be infinitely many desktops, but using more than 10 at a time can be quite problematic.
So, our panel will not control windows, but desktops. Therefore, I prefer to use just the word “panel” rather than the phrase “taskbar”.
Start development
As friendship begins with a smile, so most Qt applications begin with a widget. So we will not depart from tradition and first of all we will write a widget for our future panel. For now, it will be just a class inherited from QWidget. With constructor and destructor.
class Q3Panel : public QWidget
{
Q_OBJECT
public:
	Q3Panel(QWidget *parent = 0);
	~Q3Panel();
};
If you now display this widget, you will see an empty window in painfully familiar # D4D0C8 color. In order to turn this into a panel, we need a little magic and change one flag.
setAttribute(Qt::WA_X11NetWmWindowTypeDock, true);
Just add this to our widget constructor. Thus, you set the property of our window _NET_WM_WINDOW_TYPE X11 to the value _NET_WM_WINDOW_TYPE_DOCK. Now this is not just a window, but a dock! Let's see: Here it is, the panel of my dreams, hefty! Too hefty, really. Control of size and position would not hurt us.
void Q3Panel::setup(int height)
{
	QRect screen = QApplication::desktop()->screenGeometry();
	resize(screen.width(), height);
	int x, y;
	x = screen.left();
	y = position() == top ? screen.top() : screen.bottom();
	move(x, y);
}
In this method, in the variable screen we get the geometry of the so-called root window . Calling the resize () method makes the width of our panel equal to the width of the screen, and the height equal to the passed parameter. In the variable x we write the left coordinate of our screen, and in y - the top or bottom, depending on the position. Then we move our panel along the coordinates (x, y). position (), as you probably already guessed, is one of two methods for working with a hidden property:
public:
	Position position() { return _position; };
	void setPosition(Position position) { _position = position; };
private:
	Position _position;
Now we can control the size and position of our panel. It's time to move on to the next step.
Chatting with i3
So we got to the most interesting part. In order to manage our window manager, you need to somehow communicate with him. Fortunately, i3 out of the box supports an IPC method such as unix socket 's. And even more fortunately, Qt has a very convenient class for working with them - QLocalSocket.
But first, a brief description of the protocol. The message is as follows:
<магическая строка> <размер сообщения> <тип сообщения> <сообщение>Now, first things first. The magic string is “i3-ipc”. Its sole purpose is version control of the protocol. It is followed by a 32-bit number in which the message size is stored. Then exactly the same 32-bit type of message, and then the message itself. The message type can take the following values:
- COMMAND (0) - the message contains a command
- GET_WORKSPACES (1) - get a list of desktops
- SUBSCRIBE (2) - subscribe to a specific event
- GET_OUTPUTS (3) - get a list of output devices
- GET_TREE (4) - get a list of all windows on all desktops
- GET_MARKS (5) - get a list of container identifiers
- GET_BAR_CONFIG (6) - get panel configuration from i3 config
Using all this functionality, you can create a panel with a bunch of features, but as part of this article we will limit ourselves to displaying and switching desktops. For this we need 3 types of messages: COMMAND, GET_WORKSPACES and SUBSCRIBE. Now more about each. Oh yes, I almost forgot. The format of the data that i3 Receives and sends is json.
COMMAND : I will not describe all possible commands - there are too many of them. To switch desktops, we need only one: "workspace number X", where X is the number of the desktop. The response to the command is an associative array that contains only one property - “success”, which can be true or false. Answer example:
{ "success": true }
GET_WORKSPACES : the message body is empty, the answer is a list of desktops, each of which contains the following properties:
- num (integer) - logical desktop number
- name (string) - the name of the desktop in UTF-8 encoding
- visible (boolean) - whether the desktop is displayed. In the case of multiple output devices, multiple desktops can be displayed simultaneously.
- focused (boolean) - whether the desktop is in focus. Only one desktop can be in focus at the same time.
- urgent (boolean) - is there a window on the desktop that requires user attention (here I may be wrong, but I understood it that way)
- rect (map) - desktop geometry containing x and y coordinates, width and height
- output (string) - the output device on which the desktop is displayed
Answer example:
[
 {
  "num": 0,
  "name": "1",
  "visible": true,
  "focused": true,
  "urgent": false,
  "rect": {
   "x": 0,
   "y": 0,
   "width": 1280,
   "height": 800
  },
  "output": "LVDS1"
 },
 {
  "num": 1,
  "name": "2",
  "visible": false,
  "focused": false,
  "urgent": false,
  "rect": {
   "x": 0,
   "y": 0,
   "width": 1280,
   "height": 800
  },
  "output": "LVDS1"
 }
]
SUBSCRIBE : i3 allows you to subscribe to events. There are 2 types of events in total:
- workspace (0) - desktop related events. The body contains only one property - “change”, which can take values:
- focus - when focus switches to another desktop
- init - when creating a new desktop
- empty - when deleting an empty desktop
- output (1) - events associated with output devices.
The event message is completely identical to the standard message, with the only difference being that the most significant bit of the message type is set to 1. So, of the two types of events, we are only interested in the first. Its body is an associative array with one string property “changed”, which can take the values “focus”, “init”, “empty” and “urgent”. Answer example:
{ "change": "focus" }
Armed with knowledge of the protocol, you can begin to implement our client. We will use 2 sockets: one will be subscribed to events, with the help of the other we will send commands and receive a list of desktops. The general algorithm is as follows:
- Connecting
- Updating the list of desktops
- Subscribing to workspace events
- We wait
- Upon the arrival of the event, we update the list of desktops
- goto 4
Let me remind you that the identifier for unix socket is a file in the file system. You can get its name either by reading the “I3_SOCKET_PATH” root window property or by calling i3 --get-socketpath. I took the path of least resistance:
QString I3Ipc::getSocketPath()
{
	QProcess i3process;
	i3process.start("i3 --get-socketpath", QIODevice::ReadOnly);
	if (!i3process.waitForFinished())
	{
		qDebug() << i3process.errorString();
		exit(EXIT_FAILURE);
	}
	return QString(i3process.readAllStandardOutput()).remove(QChar('\n'));
}
Now, knowing the path to the socket file, you can join the server:
void I3Ipc::reconnect()
{
	mainSocket->abort();
	eventSocket->abort();
	QString socketPath = getSocketPath();
	mainSocket->connectToServer(socketPath);
	eventSocket->connectToServer(socketPath);
	if (!mainSocket->waitForConnected() || !eventSocket->waitForConnected())
	{
		qDebug() << "Connection timeout!";
		exit(EXIT_FAILURE);
	}
	subscribe();
}
And send data:
QByteArray I3Ipc::pack(int type, QString payload)
{
	QByteArray b;
	QDataStream s(&b, QIODevice::WriteOnly);
	s.setByteOrder(QDataStream::LittleEndian);
	s.writeRawData(I3_IPC_MAGIC, qstrlen(I3_IPC_MAGIC));
	s << (quint32) payload.size();
	s << (quint32) type;
	s.writeRawData(payload.toAscii().data(), payload.size());
	return b;
}
void I3Ipc::send(int type, QString payload)
{
	send(type, payload, mainSocket);
}
void I3Ipc::send(int type, QString payload, QLocalSocket* socket)
{
	socket->write(pack(type, payload));
}
If you carefully read the protocol part, then this code should be clear to you. We pack the data and write to the socket. I3_IPC_MAGIC - constant from the header file
Regarding setByteOrder (): BigEndian is the standard for QDataStream byte order, and i3 waits for data in native, so either such a crutch or have to abandon QDataStream in favor of char and memcpy () arrays. We learned how to send data, now we will learn how to receive answers:
void I3Ipc::read()
{
	QLocalSocket *socket = (QLocalSocket*)sender();
	if (socket->bytesAvailable() < (int) (qstrlen(I3_IPC_MAGIC) + sizeof(quint32) * 2))
		return;
	QDataStream s(socket);
	s.setByteOrder(QDataStream::LittleEndian);
	quint32 msgType, payloadSize;
	s.skipRawData(qstrlen(I3_IPC_MAGIC));
	s >> payloadSize;
	s >> msgType;
	while (socket->bytesAvailable() < payloadSize)
	{
		if (!socket->waitForReadyRead())
		{
			qDebug() << "Reading timeout!";
			exit(EXIT_FAILURE);
		}
	}
	char buf[payloadSize];
	s.readRawData(buf, payloadSize);
	QByteArray jsonPayload(buf, payloadSize);
	if (msgType >> 31)
	{
		if (msgType == I3_IPC_EVENT_WORKSPACE)
		{
			emit workspaceEvent();
		}
	} else {
		if (msgType == I3_IPC_REPLY_TYPE_WORKSPACES)
		{
			emit workspaceReply(jsonPayload);
		}
	}
}
Here, too, everything is extremely simple: we wait until 14 bytes are accumulated (6 is a magic string and two 4-byte numbers), we skip 6 bytes and read the message size and type into variables. It remains only to wait for the message itself and, depending on the type, send the appropriate signal.
Now after each event we will receive an up-to-date list of desktops in json format. To bring it into a “normal” state, we will use the QJson library. In many distributions, it is in the repositories, and if not, no one bothers to assemble it yourself. So, we connect:
LIBS += -lqjson
In the .pro file and
#include In the header file. QJson is extremely easy to use.
void Q3Panel::workspaceReplySlot(const QByteArray jsonPayload)
{
	bool ok;
	QList workspacesList = jsonParser->parse(jsonPayload, &ok).toList();
	if (!ok)
	{
		qDebug() << "Parser error: " << jsonParser->errorString();
		return;
	}
	workspaces->clear();
	for (int i = 0; i < workspacesList.size(); ++i)
	{
		QMap w = workspacesList.at(i).toMap();
		workspaces->insert(w.value("num").toUInt(),
		                   workspaceInfo(w.value("name").toString(),
		                                 w.value("focused").toBool(),
		                                 w.value("urgent").toBool()));
	}
	emit updateWorkspacesWidget(workspaces);
}
workspaces is a hash table in which we store desktop information. Its key is quint16 desktop number, and the value is this structure:
struct workspaceInfo
{
	QString name;
	bool focused;
	bool urgent;
	workspaceInfo(QString _n, bool _f = 0, bool _u = 0)
	{
		name = _n;
		focused = _f;
		urgent = _u;
	}
};
Everything is simple and clear here. We know how to get information about desktops, and also store. There is a trifle left: to display it and by clicking on a specific desktop send a command to the window manager. You can go in different ways, I decided to write my widget based on QHBoxLayout. Nothing complicated, store a hash table where the key is the desktop number and the value is a link to the WorkspaceButton button. WorkspaceButton is inherited from QToolButton and does not represent anything new, except its policy of resizing and style. After each update of the list of desktops, the widget must be updated. It would be possible just to delete all the buttons and create it, but we will go in a slightly different way:
void WorkspacesWidget::updateWorkspacesWidgetSlot(const QHash *workspaces)
{
	clearLayout();
	QHash::const_iterator wi = workspaces->constBegin();
	while (wi != workspaces->constEnd())
	{
		if (buttons->contains(wi.key()))
		{
			buttons->value(wi.key())->setFocused(wi.value().focused);
		} else {
			addButton(wi.key(), wi.value().focused, wi.value().name);
		}
		++wi;
	}
	QHash::const_iterator bi = buttons->constBegin();
	QList toDelete;
	while (bi != buttons->constEnd())
	{
		if (!workspaces->contains(bi.key()))
		{
			delete bi.value();
			toDelete << bi.key();
		} else {
			mainLayout->addWidget(bi.value());
		}
		++bi;
	}
	for (int i = 0; i < toDelete.size(); ++i)
	{
		buttons->remove(toDelete.at(i));
	}
}
void WorkspacesWidget::clearLayout()
{
	while (mainLayout->takeAt(0));
}
void WorkspacesWidget::addButton(quint16 num, bool focused, QString name)
{
	WorkspaceButton* newButton = new WorkspaceButton(name, focused);
	connect(newButton, SIGNAL(clicked()), this, SLOT(buttonClickedSlot()));
	buttons->insert(num, newButton);
}
First, we clear the QHBoxLayout and go through the workspaces and, if there is already a button for the current desktop, update the focused property. If there is no button, add it. Then we check all the buttons elements to see if the desktop still exists or not already. And, if exists, add on QHBoxLayout. If not, delete. I don’t know how optimal this method is, but it seemed to me much better than deleting and re-creating all buttons every time.
All! Here it is, our panel: It works properly, displays desktops, switches. But this is just the basic functionality, in order to catch up and overtake the standard panel in terms of functionality, it remains to add settings, tray, menu and clock. About this in the next article, unless, of course, the topic will be interesting. Source code repository