Microservices. Versioning in continuous integration and CI / CD deployment systems using TFS as an example
Problematics
For large and technically complex projects, on which many distributed teams usually work at the same time, there is a well-known problem of software versioning, which different companies solve in different ways.
Currently, a number of our clients and partners deliver the latest releases (CI / CD) to Production manually by installing the latest / current versions of their software, having previously tested it with the rest of the environment. For example, by delivering assemblies of iOS, Android, etc., if we are talking about client software, or through updating docker-images in the docker environment, if we are talking about backend. For large and important projects, where the decision to release a new version in Production is every time taken by the Project Manager, such a decision is justified and not too expensive, especially if releases are not frequent. However, for a test development environment (Dev / Stage environment), the use of “hand-held” tools leads to a project’s confusion, possible disruption to the Customer’s display, and so on. The reasons for this may be many
We had to make sure of this personally and experience many difficulties on a large project, in which 6-8 new software versions were released every day on the backend and 2-3 software versions on the frontend in the CI system, where testing engineers objectively could not cope with the load and there was a constant misunderstanding of what version of software on the frontend / backend is considered stable at the current moment.
Our experience
Our company uses various CI / CD systems in its work, the choice of which is often determined by the requirements of the Customer. For example, our specialists often encounter such systems as CI / CD as Jenkins, TeamCity, Travis CI, Circle CI, Gitlab CI, Atlassian Bamboo, where sometimes we work entirely on the infrastructure of the Customer. Accordingly, with this approach, the issue with the decision of versioning rests entirely with the customer.
When developing solutions for clients, when we have the opportunity to do it on our own infrastructure, we use TFS version 2018 as the basis for the Continuous Integration / Continuous Delivery system. This allows us to solve the main task of forming a complete software development cycle, namely:
- Task setting (Issues, Bugs, Tasks) based on the software development approach used in the current project;
- Storing project source code;
- Deploying the infrastructure of build-agents for assemblies for different OS (Windows, Linux, MacOS);
- Build projects in "manual" mode and CI;
- Expand projects in "manual" mode and CD;
- Testing projects;
- Data generation in terms of time spent by employees on the project and a number of additional functions that we implemented using TFS Extensions of our own design and through adding statics to WIT (in this form, TFS replaced our company Redmine and simplified the collection of statistics, reports, etc. in the context of projects ).
In this case, it would be logical to assign the solution of the versioning problem to TFS, modifying the TFS functionality for our tasks and the Customer’s wishes. As a result, the task of building a versioning system for microservice architecture projects was solved by means of TFS by customizing various build scenarios and streamlining test / release environments.
Solution: use TFS and third-party tools
So, we need a versioning system for microservice architecture projects for organizing test environments and releases.
As the initial data we have:
- Orchestration - we use docker swarm mainly in order to reduce the use of other third-party tools. At the same time, there are converters for converting configs - for example, the Kompose utility , which will allow the use of Kubernetes if necessary.
- Build agents - VMs based on Linux servers.
- Source repository - TFS based Git.
- Image storage - docker registry on VM.
To the question of the name of builds
- It will be logical to use the existing norms of the name, for example, such as the Semantic Versioning Specification .
- We follow this name when manually starting the build process of the release version, since otherwise it will not be possible to automatically achieve the correct name (unless manually entered in the code, which, again, does not apply to CI ideology).
- In the CI mode for “debugging” software versions, we use the following names on different projects:
- Embedded TFS internal numbers;
- Numbering based on the current date and build number on that day;
- The commit number for which the build was launched.
A specific solution, for example, can be viewed on the basis of an example of a Calculator service made in Javascript and several publicly available projects.
Algorithm of the decision
1. In TFS2018 we create a project called SibEDGE Semver and import the repository into the local repository.
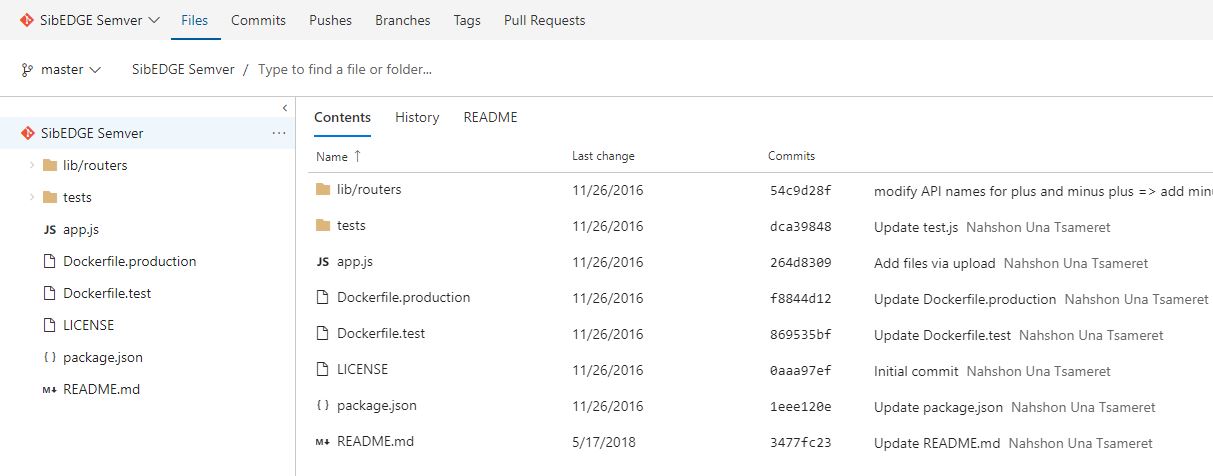
Figure 1 - The SibEDGE Semver project in the repository on TFS 2018
2. Create the Dockerfile file describing the node.js assembly for our needs ( link ).
FROM node:7
WORKDIR /usr/src/app
COPY package.json app.js LICENSE /usr/src/app/
COPY lib /usr/src/app/lib/
LABEL license MIT
COPY tests tests
ENV NODE_ENV dev
RUN npm config set strict-ssl false
RUN npm update && \
   npm install -g mocha
CMD ["mocha", "tests/test.js", "--reporter", "spec"]
Script 1 - Dockerfile to build the build
3. On the test bench (with the docker installed), where we plan to deploy our environment, we create a swarm cluster. In our case it will consist of one server.
$ docker swarm init 4. Create a yml-file with a description of microservices for our needs ( link ).
Note that
vm-docker-registry.development.com:5000 - the internal repository for this project, which we prepared in advance. In order for the test bench to use this repository, it is necessary to register an ssl-certificate in the /etc/docker/certs.d/< folder of the repository name> /ca.crtversion: '3.6'
services:
#---
# Portainer for manage Docker
#---
portainer:
image: portainer/portainer:1.15.3
command: --templates http://templates/templates.json -d /data -H unix:///var/run/docker.sock
networks:
- semver-network
ports:
- 9000:9000
volumes:
- /var/run/docker.sock:/var/run/docker.sock
#---
#----Service Calculator Test#
#---
semver-calc:
image: vm-docker-registry.development.com:5000/calculator:latest
networks:
- semver-network
#---
#----Pminder - Nginx#
#---
nginx:
image: nginx:1.9.6
depends_on:
- mysql
ports:
- "8888:80"
- "6443:443"
networks:
- semver-network
#
#-----------------------------
# START NoSQL - Redis.
#---
redis:
image: redis:4.0
networks:
- semver-network
ports:
- "8379:6379"
#
# END NoSQL - Redis.
#---
#----Pminder - DB#
#---
mysql:
image: mysql:5.7
ports:
- "3306:3306"
environment:
MYSQL_ROOT_PASSWORD: 'ODdsX0xcN5A9a6q'
MYSQL_DATABASE: 'semver'
MYSQL_USER: 'user'
MYSQL_PASSWORD: 'uXcgTQS8XUm1RzR'
networks:
- semver-network
#---
#----PhpMyAdmin #
#---
phpmyadmin:
image: phpmyadmin/phpmyadmin
depends_on:
- mysql
environment:
PMA_HOST: 'mysql'
PMA_USER: 'user'
PMA_PASSWORD: 'uXcgTQS8XUm1RzR'
ports:
- "8500:80"
- "8600:9000"
networks:
- semver-network
#---
networks:
semver-network:
Script 2 - the contents of the semver.yml file, which is the docker-compose project file.
5. Create a build description in TFS2018 (Build Definition).
6. The first action of our script is to build the image of the docker container:
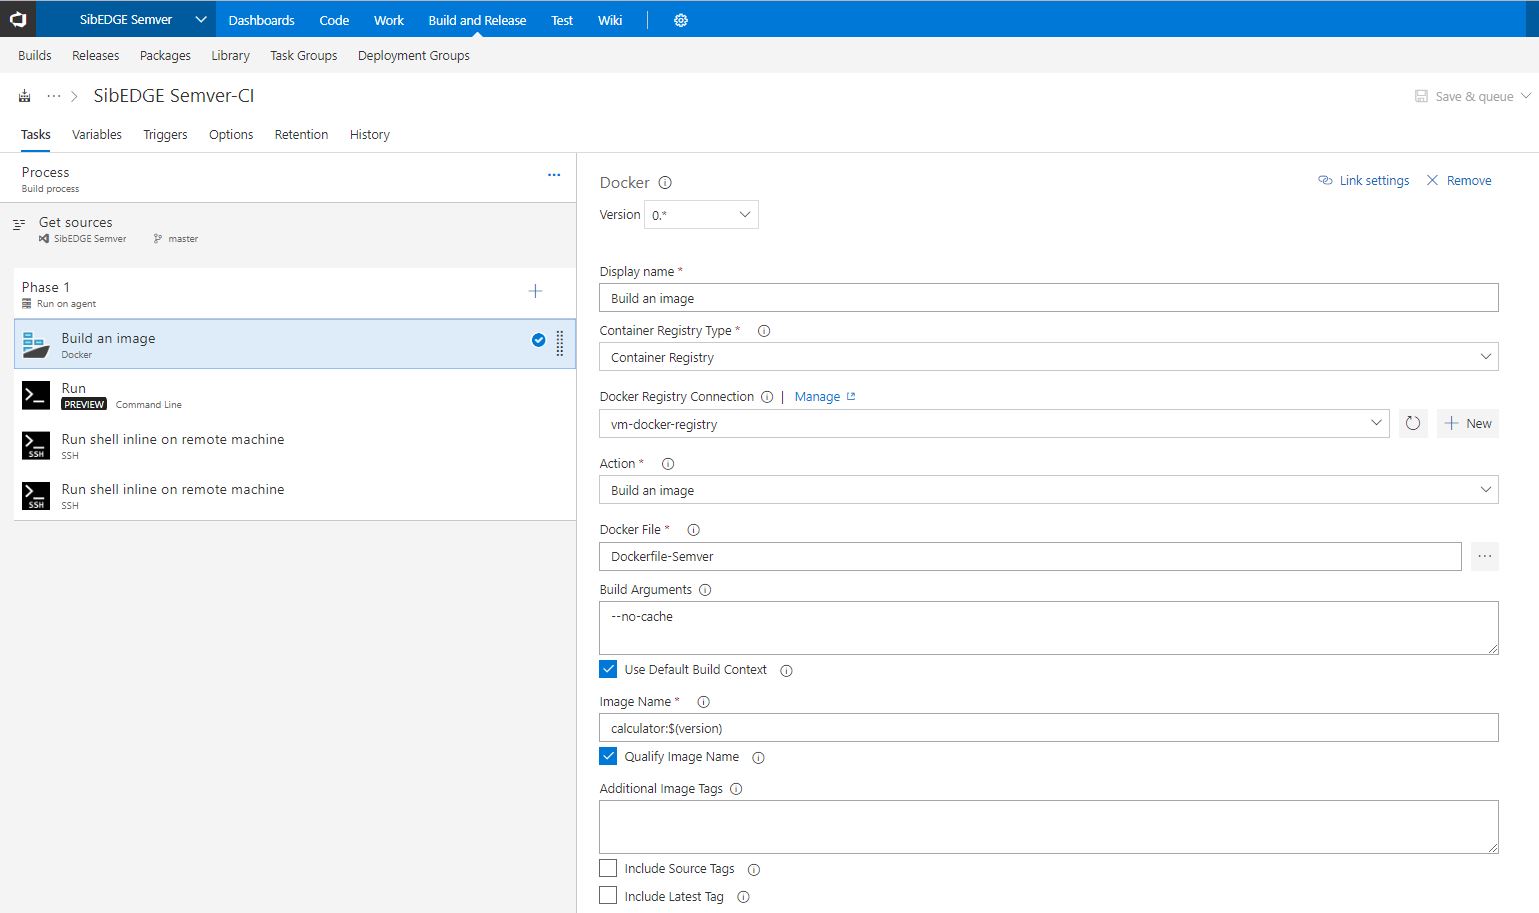
Figure 2 - Building the image for our build in TFS 2018
7. Send the image of the docker container created on the build machine to the internal repository for this project:

Figure 3 - Save docker-image for our build in the TFS 2018 repository
8. For the whole environment on the test bench in the microservice description file, change the image name to a new one:

Figure 4 - Replacing the image name in the build script for our build in TFS 2018
9. Copy the created docker image to the test stand internal repo container Ithor and update service in the docker swarm:

Figure 5 - Deploying the docker-container with the build script of our build from the image in TFS 2018
As a result, we have a yml-file with release versions of the docker-image, which in turn has the release name of the entire project, in the TFS repository.
10. We go to the test bench and check the work of the services and make sure that the Calculator service is updated and uses the new version of the assembly.
$ docker service ls
Figure 6 - Updating the Calculator service and checking its current version on our test bench
Thus, we have a set of images of different versions of microservices in our docker registry image store (in this particular case, the version of only one microservice changes). By running a separate deployment process (through a script that changes the yml-description file), at any time you can get the right environment for testing on the test bench and transfer this configuration to the QA department. After testing (regression, load, etc.) we get information that microservice of such version works stably on a test bench with release versions of other microservice of such versions, and the final decision is already made on whether or not it is possible to update release stand to the new version.
Summary - what they got at the exit
Thanks to the implementation of versioning in projects with micro-architecture architecture, the following result was achieved:
- the amount of chaos in versions has decreased;
- increased rate of deployment of new environments in projects;
- the quality of assemblies has improved and the level of errors in them has decreased;
- increased development transparency for Project Managers and Customer;
- improved interaction between departments;
- There are new directions in the work of DevOps.
PS Thanks to my colleague Cyril B. for help in writing this article.