React Training Course, Part 12: Workshop, Third Stage of Work on a TODO Application
- Transfer
- Tutorial
In today's part of the translation of the course on React, we suggest you perform a practical task on building sets of components using JavaScript and continue working on a TODO application.
→ Part 1: course overview, reasons for the popularity of React, ReactDOM and JSX
→ Part 2: functional components
→ Part 3: component files, project structure
→ Part 4: parent and child components
→ Part 5: starting work on a TODO application, basics of styling
→ Part 6: about some features of the course, JSX and JavaScript
→ Part 7: inline styles
→ Part 8: continued work on a TODO application, familiarity with the properties of components

→ Part 9: properties of components
→ Part 10: workshop on working with properties of components and styling
→ Part 11: dynamic markup generation and the map array method
→ Part 12: workshop, the third stage of working on a TODO application
→ Part 13: components based on classes
→ Part 14: a workshop on class-based components, state of components
→ Part 15: workshops on working with the state of components
→ Part 16: fourth stage of working on a TODO application, event handling
→ Part 17: fifth stage of working on a TODO application modification with standing components
→Part 18: the sixth stage of working on a TODO application
→ Part 19: methods of life cycle of components
→ Part 20: the first lesson on conditional rendering
→ Part 21: the second lesson and practice on conditional rendering
→ Part 22: the seventh stage of working on a TODO application, loading data from external sources
→ Part 23: first lesson on working with forms
→ Part 24: second lesson on working with forms
→ Part 25: practical work on working with forms
→ Original
Taking as a basis the standard project of a React application generated by
Do not forget, creating instances of the component, pass them an attribute
In the process of solving the problem, you can use the following file preparation
Here is the file code
Here is the file code
Please note that the property of
Here is the file code
Here we, in deriving the property containing the price of the product, which is visible in the component as
This is what the application project in VSCode looks like.
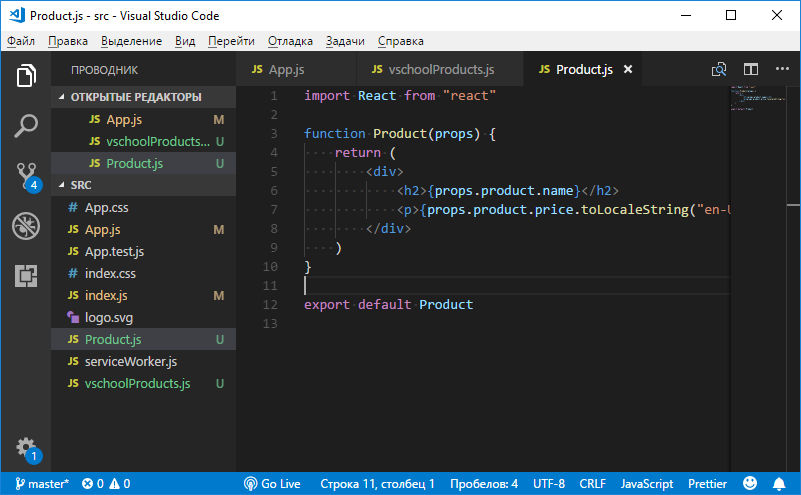
Application in VSCode
But the application page in the browser.
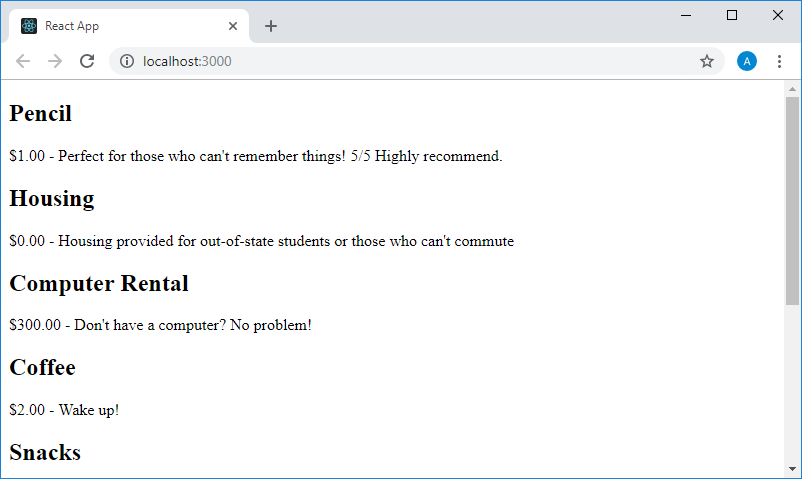
Application page in the browser
Pay attention to the form in which the cost of goods is presented.
→ Original
Here we continue to work on the TODO application, which we have been doing here and here . In particular, here you will be asked to apply knowledge about the dynamic formation of lists of components to create a to-do list displayed by the application.
Using the case file
Here is the contents of the file
Here is the file code
Here is the file code
Here is the application project in VSCode.

Application in VSCode
It should be noted that after the completion of the work envisaged by this practical lesson, we, despite the fact that we will equip the application with new features, will break its functionality. In particular, we are talking about the state of the flags. The checkboxes for setting the state of which the property
The application page in the browser and the warning in the console.
Later we will talk about the forms and correct our training application while continuing to work on it.
In this lesson, you had the opportunity to practice creating component files, working with the properties passed to component instances when creating them, and using the standard JavaScript array method
Dear readers! Have you mastered the technique of using the JavaScript array method

→ Part 9: properties of components
→ Part 10: workshop on working with properties of components and styling
→ Part 11: dynamic markup generation and the map array method
→ Part 12: workshop, the third stage of working on a TODO application
→ Part 13: components based on classes
→ Part 14: a workshop on class-based components, state of components
→ Part 15: workshops on working with the state of components
→ Part 16: fourth stage of working on a TODO application, event handling
→ Part 17: fifth stage of working on a TODO application modification with standing components
→Part 18: the sixth stage of working on a TODO application
→ Part 19: methods of life cycle of components
→ Part 20: the first lesson on conditional rendering
→ Part 21: the second lesson and practice on conditional rendering
→ Part 22: the seventh stage of working on a TODO application, loading data from external sources
→ Part 23: first lesson on working with forms
→ Part 24: second lesson on working with forms
→ Part 25: practical work on working with forms
Lesson 22. Workshop. Dynamic formation of component sets
→ Original
▍Job
Taking as a basis the standard project of a React application generated by
create-react-appusing the following data file code vschoolProducts.js, create an application that displays on the page a list of components Productformed using the standard array method .map()based on data from vschoolProducts.js. Do not forget, creating instances of the component, pass them an attribute
keywith a unique identifier, otherwise the system will issue a corresponding warning. In the process of solving the problem, you can use the following file preparation
App.js:import React from"react"import productsData from"./vschoolProducts"functionApp() {
return (
<div>
</div>
)
}
exportdefault AppHere is the file code
vschoolProducts.js:const products = [
{
id: "1",
name: "Pencil",
price: 1,
description: "Perfect for those who can't remember things! 5/5 Highly recommend."
},
{
id: "2",
name: "Housing",
price: 0,
description: "Housing provided for out-of-state students or those who can't commute"
},
{
id: "3",
name: "Computer Rental",
price: 300,
description: "Don't have a computer? No problem!"
},
{
id: "4",
name: "Coffee",
price: 2,
description: "Wake up!"
},
{
id: "5",
name: "Snacks",
price: 0,
description: "Free snacks!"
},
{
id: "6",
name: "Rubber Duckies",
price: 3.50,
description: "To help you solve your hardest coding problems."
},
{
id: "7",
name: "Fidget Spinner",
price: 21.99,
description: "Because we like to pretend we're in high school."
},
{
id: "8",
name: "Sticker Set",
price: 14.99,
description: "To prove to other devs you know a lot."
}
]
exportdefault products▍Decision
Here is the file code
App.js:import React from"react"import Product from"./Product"import productsData from"./vschoolProducts"functionApp() {
const productComponents = productsData.map(item => <Product key={item.id} product={item}/>)
return (
<div>
{productComponents}
</div>
)
}
exportdefault AppPlease note that the property of
idobjects from the data file is not necessary to display on the screen. This property was useful to us for setting the attribute of keythe .map()component instances created by the method method Product. Here is the file code
Product.js:import React from"react"functionProduct(props) {
return (
<div>
<h2><fontcolor="#3AC1EF">{props.product.name}</font></h2>
<p>{props.product.price.toLocaleString("en-US", { style: "currency", currency: "USD" })} - {props.product.description}</p>
</div>
)
}
exportdefault ProductHere we, in deriving the property containing the price of the product, which is visible in the component as
props.product.price, use the method toLocaleString()by means of which we format the amount of the product. This is what the application project in VSCode looks like.
Application in VSCode
But the application page in the browser.
Application page in the browser
Pay attention to the form in which the cost of goods is presented.
Session 23. Workshop. TODO application. Stage 3
→ Original
Here we continue to work on the TODO application, which we have been doing here and here . In particular, here you will be asked to apply knowledge about the dynamic formation of lists of components to create a to-do list displayed by the application.
▍Job
Using the case file
todosData.jsbelow, create a list of components TodoItemand output this list in the component App. Note that you will need to modify the component code TodoItemso that it can output the properties passed to it. Here is the contents of the file
todosData.js:const todosData = [
{
id: 1,
text: "Take out the trash",
completed: true
},
{
id: 2,
text: "Grocery shopping",
completed: false
},
{
id: 3,
text: "Clean gecko tank",
completed: false
},
{
id: 4,
text: "Mow lawn",
completed: true
},
{
id: 5,
text: "Catch up on Arrested Development",
completed: false
}
]
exportdefault todosData▍Decision
Here is the file code
App.js:import React from"react"import TodoItem from"./TodoItem"import todosData from"./todosData"functionApp() {
const todoItems = todosData.map(item => <TodoItem key={item.id} item={item}/>)
return (
<divclassName="todo-list">
{todoItems}
</div>
)
}
exportdefault AppHere is the file code
TodoItem.js:import React from"react"functionTodoItem(props) {
return (
<divclassName="todo-item">
<inputtype="checkbox"checked={props.item.completed}/>
<p>{props.item.text}</p>
</div>
)
}
export default TodoItemHere is the application project in VSCode.
Application in VSCode
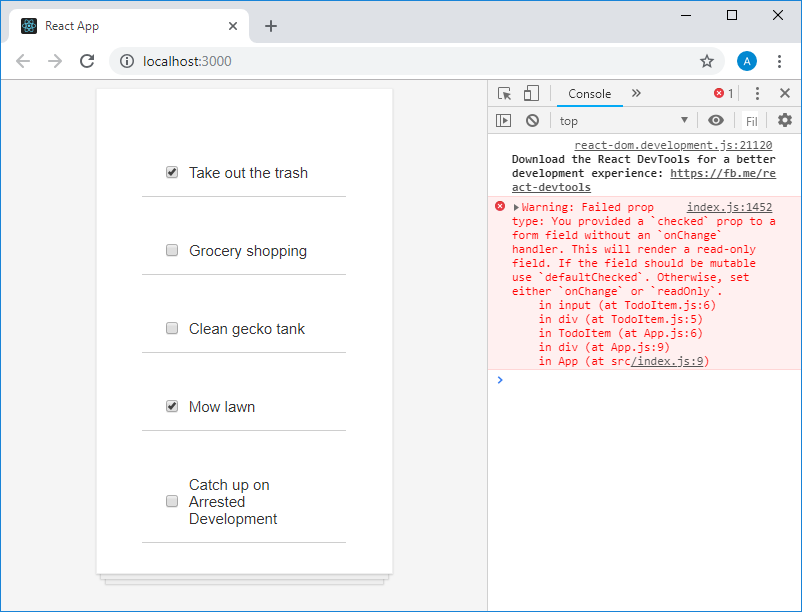
It should be noted that after the completion of the work envisaged by this practical lesson, we, despite the fact that we will equip the application with new features, will break its functionality. In particular, we are talking about the state of the flags. The checkboxes for setting the state of which the property
props.item.completedset to the valuetruewas used will be selected, the checkboxes for which the same property set tofalsebe used will be cleared. But if you click the checkbox on the application page, nothing will happen, as we have incorrectly configured the corresponding HTML element. In the console you can see a warning about this.The application page in the browser and the warning in the console.
Later we will talk about the forms and correct our training application while continuing to work on it.
Results
In this lesson, you had the opportunity to practice creating component files, working with the properties passed to component instances when creating them, and using the standard JavaScript array method
.map(). In addition, here we continued to work on the training application. Next time, let's talk about class-based components. Dear readers! Have you mastered the technique of using the JavaScript array method
.map()to create component sets?