Creating a cat hook in Unity. Part 1
- Transfer

Cat hooks add funny and interesting mechanics to the game. You can use them to move through the levels, battles in arenas and get items. But despite the seeming simplicity, the physics of managing ropes and creating realistic behavior can be challenging!
In the first part of this tutorial, we will implement our own two-dimensional hook-cat system and learn the following:
- Create a sighting system.
- Use render lines and distance joint to create a rope.
- We will teach the rope to turn around around the game objects.
- Calculate the swing angle on the rope and add strength in this direction.
Note : this tutorial is intended for advanced and experienced users, and it does not cover such topics as adding components, creating new GameObject scripts and C # syntax. If you need to improve Unity skills, then learn our tutorials Getting Started with Unity and Introduction to Unity Scripting . Since this tutorial uses DistanceJoint2D , you should also look at Physics Joints in Unity 2D , and only then go back to this tutorial.
Getting Started
Download the project stub for this tutorial, and then open it in the Unity editor. A version of Unity 2017.1 or higher is required.
Open the Game scene from the Scenes folder and see where we start:
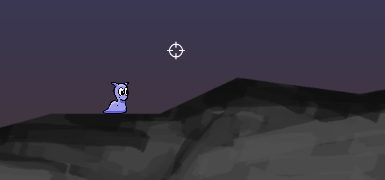
While we have a simple player character (slug) and stones hanging in the air.
The important components of GameObject Player are capsule collider and rigidbody, which allow it to interact with physical objects on the level. Also attached to the character is a simple movement script ( PlayerMovement ), allowing it to slide on the ground and perform simple jumps.
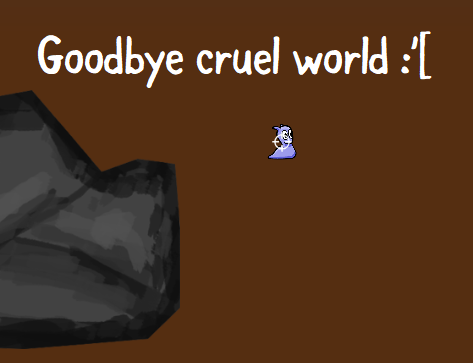
Click on the Play button to start the game, and try to control the character. A and D move it left / right, and when you press the spacebar, it takes a jump. Try not to slip off and not fall off a cliff, otherwise you will die!
We already have the basics of management, but the biggest problem right now is the lack of hooks-cats.
Making hooks and ropes
At first, the cat-hook system seems fairly simple, but for its quality implementation, there are many aspects to consider. Here are some of the requirements for the two-dimensional mechanics of hook cats:
- Line Renderer to display the rope. When the rope is wrapped around objects, we can add more segments to the line renderer and position the vertices at the points corresponding to the rope breaks.
- DistanceJoint2D. It can be used to attach the current anchor point of a hook cat so that our slug can swing. It also allows us to adjust the distance that can be used to lengthen and reduce the rope.
- Child GameObject with RigidBody2D, which can be moved depending on the current location of the hook's reference point. In essence, it will be the suspension / anchor point of the rope.
- Raycast to eject the hook and attach to objects.
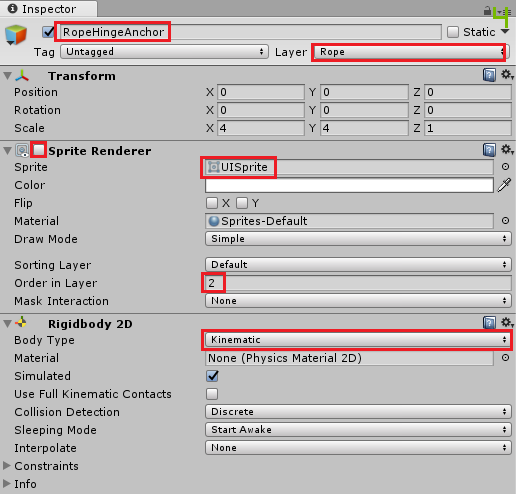
In the Hierarchy, select the Player object and add a new child GameObject called RopeHingeAnchor . This GameObject will be used to position the suspension / pivot point of the hook cat.
Add to RopeHingeAnchor components SpriteRenderer and RigidBody2D .
For SpriteRenderer, set the Sprite property to use the UISprite value and change the Order in Layer to 2 . Disable the component by unchecking the box next to its name.
For the RigidBody2D component , set the Body Type property toKinematic . This point will not be moved by the physics engine, but by the code.
Select the Rope layer and set the X and Y scale values of the Transform component to 4 .
Select the Player again and attach the new component DistanceJoint2D .
Drag RopeHingeAnchor from the Hierarchy onto the Connected Rigid Body property of the DistanceJoint2D component and disable Auto Configure Distance .

Create a new C # script with the name RopeSystem in the Scripts project folder and open it in the code editor.
Remove method
Update. At the top of the script inside the class declaration,
RopeSystemadd new variables, a method, Awake()and a new method Update:// 1public GameObject ropeHingeAnchor;
public DistanceJoint2D ropeJoint;
public Transform crosshair;
public SpriteRenderer crosshairSprite;
public PlayerMovement playerMovement;
privatebool ropeAttached;
private Vector2 playerPosition;
private Rigidbody2D ropeHingeAnchorRb;
private SpriteRenderer ropeHingeAnchorSprite;
voidAwake()
{
// 2
ropeJoint.enabled = false;
playerPosition = transform.position;
ropeHingeAnchorRb = ropeHingeAnchor.GetComponent<Rigidbody2D>();
ropeHingeAnchorSprite = ropeHingeAnchor.GetComponent<SpriteRenderer>();
}
voidUpdate()
{
// 3var worldMousePosition =
Camera.main.ScreenToWorldPoint(new Vector3(Input.mousePosition.x, Input.mousePosition.y, 0f));
var facingDirection = worldMousePosition - transform.position;
var aimAngle = Mathf.Atan2(facingDirection.y, facingDirection.x);
if (aimAngle < 0f)
{
aimAngle = Mathf.PI * 2 + aimAngle;
}
// 4var aimDirection = Quaternion.Euler(0, 0, aimAngle * Mathf.Rad2Deg) * Vector2.right;
// 5
playerPosition = transform.position;
// 6if (!ropeAttached)
{
}
else
{
}
}Let's sort each part in order:
- We use these variables to track the various components with which the RopeSystem script will interact.
- The method
Awakestarts at the beginning of the game and disablesropeJoint(the DistanceJoint2D component). It also assigns theplayerPositionvalue of the current position of the Player. - This is the most important part of the main loop
Update(). First we get the mouse position in the world using the camera methodScreenToWorldPoint. Then we calculate the direction of the view, subtracting the position of the player from the position of the mouse in the world. Then use it to createaimAngle, which is a representation of the angle of aiming the cursor. The value retains a positive value in the if construct. aimDirection- This is a turn that comes in handy later. We are only interested in the value of Z, because we use a 2D camera, and this is the only corresponding OS. We transmitaimAngle * Mathf.Rad2Degthat converts a radian angle to an angle in degrees.- The position of the player is tracked using a convenient variable that allows you not to constantly refer to
transform.Position. - Finally, we have a structure
if..elsethat we will soon use to determine whether the rope is attached to the anchor point.
Save the script and return to the editor.
Attach the RopeSystem component to the Player object and attach the various components to the public fields that we created in the RopeSystem script . Drag Player , Crosshair and RopeHingeAnchor to the appropriate fields :
- Rope Hinge Anchor : RopeHingeAnchor
- Rope Joint : Player
- Crosshair : Crosshair
- Crosshair Sprite : Crosshair
- Player Movement : Player

Now we are just doing all these intricate calculations, but so far there is no visualization that could show them in action. But do not worry, we will deal with it soon.
Open the RopeSystem script and add a new method to it:
privatevoidSetCrosshairPosition(float aimAngle)
{
    if (!crosshairSprite.enabled)
    {
        crosshairSprite.enabled = true;
    }
    var x = transform.position.x + 1f * Mathf.Cos(aimAngle);
    var y = transform.position.y + 1f * Mathf.Sin(aimAngle);
    var crossHairPosition = new Vector3(x, y, 0);
    crosshair.transform.position = crossHairPosition;
}
This method positions the sight on the basis of the transmitted one
aimAngle(the float value, which we calculated in Update()) so that it rotates around the player with a radius of 1 unit. We also include a sprite sight in case this has not yet been done.We Update()change the design if..else, checking !ropeAttachedthat it looks like this:
if (!ropeAttached)
{
	SetCrosshairPosition(aimAngle);
}
else
{
	crosshairSprite.enabled = false;
}
Save the script and run the game. Now our slug should be able to aim with the help of a sight.

The next part of the logic that needs to be implemented is a shot with a cat hook. We have already determined the direction of aiming, so we need a method that will receive it as a parameter.
Add the following variables under the variables in the RopeSystem script :
public LineRenderer ropeRenderer;
public LayerMask ropeLayerMask;
privatefloat ropeMaxCastDistance = 20f;
private List<Vector2> ropePositions = new List<Vector2>();
LineRenderer will contain a link to render lines that draws the rope. LayerMask allows you to customize the layers of physics with which the hook can interact. The value
ropeMaxCastDistancespecifies the maximum distance that a raycast can “shoot”. Finally, the Vector2 position list will be used to track the wrapping points of the rope, which we will look at later.
Add the following new methods:
// 1privatevoidHandleInput(Vector2 aimDirection)
{
    if (Input.GetMouseButton(0))
    {
        // 2if (ropeAttached) return;
        ropeRenderer.enabled = true;
        var hit = Physics2D.Raycast(playerPosition, aimDirection, ropeMaxCastDistance, ropeLayerMask);
        // 3if (hit.collider != null)
        {
            ropeAttached = true;
            if (!ropePositions.Contains(hit.point))
            {
            	// 4// Немного подпрыгивает над землёй, когда игрок к чему-то прицепится крюком.
                transform.GetComponent<Rigidbody2D>().AddForce(new Vector2(0f, 2f), ForceMode2D.Impulse);
                ropePositions.Add(hit.point);
                ropeJoint.distance = Vector2.Distance(playerPosition, hit.point);
                ropeJoint.enabled = true;
                ropeHingeAnchorSprite.enabled = true;
            }
        }
        // 5else
        {
            ropeRenderer.enabled = false;
            ropeAttached = false;
            ropeJoint.enabled = false;
        }
    }
    if (Input.GetMouseButton(1))
    {
        ResetRope();
    }
}
// 6privatevoidResetRope()
{
    ropeJoint.enabled = false;
    ropeAttached = false;
    playerMovement.isSwinging = false;
    ropeRenderer.positionCount = 2;
    ropeRenderer.SetPosition(0, transform.position);
    ropeRenderer.SetPosition(1, transform.position);
    ropePositions.Clear();
    ropeHingeAnchorSprite.enabled = false;
}
Here is what the above code does:
- HandleInput is called from the loop
Update()and simply polls the input of the left and right mouse buttons. - When the left mouse button is registered, the render of the rope line is turned on and a 2D-raycast is fired from the player's position in the direction of aiming. The maximum distance is set so that the hook cat cannot be fired at an infinite distance, and a mask is applied so that you can select the layers of physics that the raycast is capable of colliding with.
- If a raycast hit is detected, it
ropeAttachedtakes a valuetrue, and a list of the positions of the rope vertices is checked to make sure that there is no point yet. - If the check returns true, then a small force impulse is added to the slug so that it jumps over the ground, turns on
ropeJoint(DistanceJoint2D), which is set to a distance equal to the distance between the slug and the raycast hit point. Also included is the base point sprite. - If the raycast hasn't hit anything, then line renderer and ropeJoint are disabled, and the flag
ropeAttachedis false. - If the right mouse button is pressed, a method is called
ResetRope()that disables and resets all parameters related to the string / hook to the values that should be if the hook is not used.
At the very bottom of our method,
Updateadd a call to a new method HandleInput()and pass it the value aimDirection:HandleInput(aimDirection);Save the changes to RopeSystem.cs and return to the editor.
Add rope
Our slug will not be able to fly through the air without a rope, so it's time to give him what will be a visual display of the rope and has the ability to "turn around" around the corners.
The line renderer is ideal for this, because it allows us to transfer the number of points and their positions in the space of the world.
The idea here is that we always store the first vertex of the rope (0) in the player's position, and all other vertices are positioned dynamically when the rope should turn around something, including the current position of the hinge, which is the next point along the rope from the player.
Select Player and add the LineRenderer component to it . Set the Width to 0.075. Expand the Materials list and, as Element 0, select the RopeMaterial material located in the Materials folder of the project. Finally, in the Line Renderer, for the Texture Mode parameter, select Distribute Per Segment .

Drag the Line Renderer component into the Rope Renderer field of the Rope System component .
Click on the Rope Layer Mask drop-down list and select as the layers with which raycast Default, Rope and Pivot can interact . Because of this, when “shooting” a raycast, it will only collide with these layers, but not with other objects, such as a player.

If you start the game now, you will notice strange behavior. When we aim at a stone over the head of a slug and shoot a hook, we get a small jump upwards, after which our friend begins to behave rather erratically.

We have not yet set the distance for distance joint, moreover, the vertices of the line render are not configured. Therefore, we do not see the rope, and since the distance joint is located directly above the slug’s position, the current distance distance distance joint pushes it down onto the stones below it.
But do not worry, now we will solve this problem.
In the RopeSystem.cs script , add a new operator at the beginning of the class:
using System.Linq;This allows us to use LINQ queries, which in our case simply allow us to conveniently find the first or last list item
ropePositions.Note : Language Integrated Query (LINQ) is the name of a set of technologies based on embedding query capabilities directly in the C # language. Read more about it here .
Add a new private variable bool with the name
distanceSetunder other variables:privatebool distanceSet;We will use this variable as a flag so that the script can know that the distance of the rope (for the point between the player and the current reference point where the hook-cat is attached) is set correctly.
Now we will add a new method that we will use to set the position of the rope vertices for the line render and adjust the distance joint distance in the stored position list with the rope (
ropePositions):privatevoidUpdateRopePositions()
{
// 1if (!ropeAttached)
{
return;
}
// 2
ropeRenderer.positionCount = ropePositions.Count + 1;
// 3for (var i = ropeRenderer.positionCount - 1; i >= 0; i--)
{
if (i != ropeRenderer.positionCount - 1) // if not the Last point of line renderer
{
ropeRenderer.SetPosition(i, ropePositions[i]);
// 4if (i == ropePositions.Count - 1 || ropePositions.Count == 1)
{
var ropePosition = ropePositions[ropePositions.Count - 1];
if (ropePositions.Count == 1)
{
ropeHingeAnchorRb.transform.position = ropePosition;
if (!distanceSet)
{
ropeJoint.distance = Vector2.Distance(transform.position, ropePosition);
distanceSet = true;
}
}
else
{
ropeHingeAnchorRb.transform.position = ropePosition;
if (!distanceSet)
{
ropeJoint.distance = Vector2.Distance(transform.position, ropePosition);
distanceSet = true;
}
}
}
// 5elseif (i - 1 == ropePositions.IndexOf(ropePositions.Last()))
{
var ropePosition = ropePositions.Last();
ropeHingeAnchorRb.transform.position = ropePosition;
if (!distanceSet)
{
ropeJoint.distance = Vector2.Distance(transform.position, ropePosition);
distanceSet = true;
}
}
}
else
{
// 6
ropeRenderer.SetPosition(i, transform.position);
}
}
}Explain the code shown above:
- Perform an exit from the method if the rope is not attached.
- Assign the value of the render line of the rope line the value of the number of positions stored in
ropePositions, plus another 1 (for the player's position). - We loop around the list in the opposite direction
ropePositionsand for each position (except the last one), assign the position of the vertex of the line render to the value of the Vector2 position stored by the cycle index in the listropePositions. - We assign to the rope anchor point the second position from the end of the rope in which the current joint / anchor point should be located, or if we have only one rope position, then we make it a reference point. So we set the distance
ropeJointequal to the distance between the player and the current position of the rope, which we go around in a cycle. - The if construct handles the case where the current position of the rope in the loop is second to the end; that is, the point at which the rope connects with the object, i.e. current joint / reference point.
- This block
elsehandles the assignment of the position of the last vertex of the rope to the value of the current position of the player.
Do not forget to add a
Update()call at the end UpdateRopePositions():UpdateRopePositions();Save the changes in the script and run the game again. Make a small jump with the "space", aiming and shooting a hook at the stone above the character. Now you can enjoy the fruits of your labors - the slug quietly sways above the stones.

Now you can go to the scene window, select the Player, use the move tool (the W key by default ) to move it and watch the two vertices of the rope line follow the hook position and the player position to draw the rope. After we release the player, DistanceJoint2D correctly calculates the distance and the slug will continue to swing on the connected joint.

Handling Wrap Points
Playing with a swinging slug is no longer useful as a water-repellent towel, so we definitely need to add it.

The good news is that the newly added method of processing rope positions can be used in the future. For now, we are using only two rope positions. One is connected to the player’s position, and the second to the current position of the hook's reference point when fired.
The only problem is that while we are not tracking all the potential positions of the rope, we need to work a little on this.
To recognize positions on the stones around which the rope should be wrapped, adding a new position of the vertex to the line render, we need a system that determines whether the vertex point of the collider is between the straight line between the current position of the slug and the current joint / anchor point of the rope.
Looks like this is work again for the good old raycast!

First we need to create a method that can find the nearest point in the collider based on the hit point of the raycast and the collider faces.
Add a new method to the RopeSystem.cs script :
// 1private Vector2 GetClosestColliderPointFromRaycastHit(RaycastHit2D hit, PolygonCollider2D polyCollider)
{
    // 2var distanceDictionary = polyCollider.points.ToDictionary<Vector2, float, Vector2>(
        position => Vector2.Distance(hit.point, polyCollider.transform.TransformPoint(position)),
        position => polyCollider.transform.TransformPoint(position));
    // 3var orderedDictionary = distanceDictionary.OrderBy(e => e.Key);
    return orderedDictionary.Any() ? orderedDictionary.First().Value : Vector2.zero;
}
If LINQ queries are not familiar to you, then this code may seem like some complicated C # magic.

If so, do not be afraid. LINQ independently does a lot of work for us:
- This method takes two parameters - the RaycastHit2D object and PolygonCollider2D . All stones on the level have colliders PolygonCollider2D, so if we always use the shapes PolygonCollider2D, it will work fine.
- This is where the magic of LINQ queries begins! Here we convert the collection of points of the polygonal collider into the Vector2 position dictionary (the value of each dictionary element is the position itself), and the key of each element is assigned the distance from this point to the player’s position player (float value). Sometimes something else happens here: the resulting position is converted into the space of the world (by default, the vertex positions of the collider are stored in local space, that is, in the local relative to the object that owns the collider, and we need positions in the space of the world).
- The dictionary is sorted by keys. In other words, by the distance closest to the current position of the player. The nearest distance is returned, that is, any point returned by this method is the collider point between the player and the current hinge point of the rope!
Let's go back to the RopeSystem.cs script and add a new private field variable at the top:
private Dictionary<Vector2, int> wrapPointsLookup = new Dictionary<Vector2, int>();We will use it to track the positions around which the rope can turn.
At the end of the method,
Update()find the construct elsethat contains crosshairSprite.enabled = false;and add the following:// 1if (ropePositions.Count > 0)
{
// 2var lastRopePoint = ropePositions.Last();
var playerToCurrentNextHit = Physics2D.Raycast(playerPosition, (lastRopePoint - playerPosition).normalized, Vector2.Distance(playerPosition, lastRopePoint) - 0.1f, ropeLayerMask);
// 3if (playerToCurrentNextHit)
{
var colliderWithVertices = playerToCurrentNextHit.collider as PolygonCollider2D;
if (colliderWithVertices != null)
{
var closestPointToHit = GetClosestColliderPointFromRaycastHit(playerToCurrentNextHit, colliderWithVertices);
// 4if (wrapPointsLookup.ContainsKey(closestPointToHit))
{
ResetRope();
return;
}
// 5
ropePositions.Add(closestPointToHit);
wrapPointsLookup.Add(closestPointToHit, 0);
distanceSet = false;
}
}
}We will explain this code snippet:
- If
ropePositionsany items are stored in the list , then ... - We shoot from the player's position in the direction of the player looking at the last position of the rope from the list — the anchor point at which the hook-cat clings to the stone — with a raycast distance equal to the distance between the player and the position of the anchor point of the rope.
- If a raycast encounters something, then the collider of this object is safely converted to the type PolygonCollider2D . While it is real PolygonCollider2D, the closest position of the vertex of this collider is returned using the method we wrote earlier as Vector2 .
- Checked
wrapPointsLookupto make sure that the same position is not checked again. If it is checked, then we drop the rope and cut it, dropping the player. - Then the list is updated
ropePositions: the position is added, around which the rope should turn. Also updated dictionarywrapPointsLookup. Finally, the flag is resetdistanceSetso that the methodUpdateRopePositions()can redefine the rope distances taking into account the new rope length and segments.
Add the
ResetRope()following line so that the dictionary is wrapPointsLookupcleared every time the player disconnects the rope:wrapPointsLookup.Clear();Save and run the game. Shoot the cat hook into the stone above the slug and use the Move tool in the Scene window to move the slug behind several stone projections.

That's how we taught the rope to turn around objects!
We add the ability to swing
Slug hanging on a rope is pretty static. To fix this, we can add a rocking ability.
To do this, we need to get a position perpendicular to the swinging forward position (sideways), regardless of the angle at which he looks.
Open PlayerMovement.cs and add the following two public variables to the top of the script:
public Vector2 ropeHook;
publicfloat swingForce = 4f;
The variable
ropeHookwill be assigned to any position in which the rope hook is currently located, and swingForcethis is the value that we use to add the swing movement. Replace method with
FixedUpdate()new:voidFixedUpdate()
{
if (horizontalInput < 0f || horizontalInput > 0f)
{
animator.SetFloat("Speed", Mathf.Abs(horizontalInput));
playerSprite.flipX = horizontalInput < 0f;
if (isSwinging)
{
animator.SetBool("IsSwinging", true);
// 1 - получаем нормализованный вектор направления от игрока к точке крюкаvar playerToHookDirection = (ropeHook - (Vector2)transform.position).normalized;
// 2 - Инвертируем направление, чтобы получить перпендикулярное направление
Vector2 perpendicularDirection;
if (horizontalInput < 0)
{
perpendicularDirection = new Vector2(-playerToHookDirection.y, playerToHookDirection.x);
var leftPerpPos = (Vector2)transform.position - perpendicularDirection * -2f;
Debug.DrawLine(transform.position, leftPerpPos, Color.green, 0f);
}
else
{
perpendicularDirection = new Vector2(playerToHookDirection.y, -playerToHookDirection.x);
var rightPerpPos = (Vector2)transform.position + perpendicularDirection * 2f;
Debug.DrawLine(transform.position, rightPerpPos, Color.green, 0f);
}
var force = perpendicularDirection * swingForce;
rBody.AddForce(force, ForceMode2D.Force);
}
else
{
animator.SetBool("IsSwinging", false);
if (groundCheck)
{
var groundForce = speed * 2f;
rBody.AddForce(new Vector2((horizontalInput * groundForce - rBody.velocity.x) * groundForce, 0));
rBody.velocity = new Vector2(rBody.velocity.x, rBody.velocity.y);
}
}
}
else
{
animator.SetBool("IsSwinging", false);
animator.SetFloat("Speed", 0f);
}
if (!isSwinging)
{
if (!groundCheck) return;
isJumping = jumpInput > 0f;
if (isJumping)
{
rBody.velocity = new Vector2(rBody.velocity.x, jumpSpeed);
}
}
}The main changes here are that the flag is first checked
isSwingingso that actions are performed only when the slug hangs on a rope, and we also add a perpendicular to the corner of the slug, indicating its current anchor point at the top of the rope, but perpendicular to its swing direction.- We obtain the normalized direction vector from the player to the point where the hook is attached.
- Depending on whether the slug swings left or right, the perpendicular direction is calculated with
playerToHookDirection. Also added a debug call draw, so if you want you can see it in the editor.
Open RopeSystem.cs and add the following at the top of the else block inside the
if(!ropeAttached)method Update():playerMovement.isSwinging = true;
playerMovement.ropeHook = ropePositions.Last();In the if block of the same construct
if(!ropeAttached)add the following:playerMovement.isSwinging = false;So we inform the PlayerMovement script that the player is swinging, and we also determine the last (with the exception of the player position) position of the rope - in other words, the anchor point of the rope. This is necessary to calculate the perpendicular angle that we just added to the PlayerMovement script.
Here’s what it looks like if you turn gizmos on in the running game and press A or D to swing left / right:

Add rope descent
While we do not have the ability to move up and down the rope. Although in real life a slug could not easily rise and fall on a rope, but this is a game in which anything can happen, right?
In the upper part of the RopeSystem script , add two new variable fields:
publicfloat climbSpeed = 3f;
privatebool isColliding;climbSpeedwill set the speed at which a slug can move up and down along the rope, and isCollidingwill be used as a flag to determine whether the distance joint of the rope can be increased or decreased. Add this new method:
privatevoidHandleRopeLength()
{
	// 1if (Input.GetAxis("Vertical") >= 1f && ropeAttached && !isColliding)
    {
        ropeJoint.distance -= Time.deltaTime * climbSpeed;
    }
    elseif (Input.GetAxis("Vertical") < 0f && ropeAttached)
    {
        ropeJoint.distance += Time.deltaTime * climbSpeed;
    }
}
This block
if..elseifreads the input on the vertical axis (up / down or W / S on the keyboard), and taking into account the flags ropeAttached iscCollidingincreases or decreases the distance ropeJoint, creating the effect of lengthening or shortening the rope. We hook this method by adding its call to the end
Update():HandleRopeLength();We also need a way to set the flag
isColliding. Add the following two methods to the bottom of the script:
voidOnTriggerStay2D(Collider2D colliderStay)
{
    isColliding = true;
}
privatevoidOnTriggerExit2D(Collider2D colliderOnExit)
{
    isColliding = false;
}
These two methods are the native methods of the base class of MonoBehaviour scripts.
If the Collider currently touches another physical object in the game, the method will constantly trigger
OnTriggerStay2D, assigning a isCollidingvalue to the flag true. This means that when a slug touches a stone, the isColliding flag is assigned a value true. The method is
OnTriggerExit2Dtriggered when one collider leaves the region of another collider, setting the flag to false. Keep in mind: the method
OnTriggerStay2Dcan be very expensive to calculate, so use it carefully.Where to go next?
Start the game again and this time press the arrow keys or W / S to move up and down the rope.
The finished draft of this part of the tutorial can be downloaded here .
We have come a long way - from a slug-slug not able to sway to an acrobatic gastropod-free mollusk!
You have learned how to create an aiming system that can shoot a hook-cat into any object that has a collider, cling to it and simultaneously swing on it, turning around on the dynamic rope around the edges of the objects! Great job.

However, there is no important function here - the rope cannot “unwind” when necessary.
In the second part of the tutorial we will solve this problem.
But if you are willing to take a chance, why not try to do it yourself? For this you can use the dictionary
wrapPointsLookup.