3D scanner Shining 3D Einscan SE. Overview of the 3D scanner
Hello everyone, 3Dtool is with you!
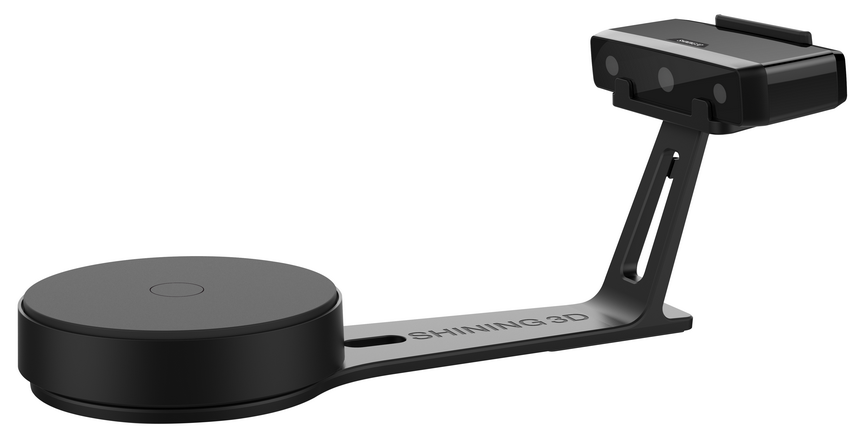
Today we want to talk about inexpensive, but effective desktop 3D scanner from Shining3D - Einscan SE .
This is an updated (improved) model of the 3D scanner Einscan S.
Camera resolution: 1.3 MPix;
Number of cameras: 2;
Light source: white light;
Scan mode: fixed, automatic;
Minimum scanning area: 30 x 30 x 30 mm;
Maximum scanning area (automatic mode): 200 x 200 x 200 mm;
Maximum scanning area (fixed mode): 700 x 700 x 700 mm;
3D scanning speed (fixed mode): 8 seconds;
3D scanning speed (automatic mode): 2 minutes;
Distance to the object: 290-480 mm;
Scanning accuracy: 0.1 mm;
Data format: OBJ, STL, ASC, PLY;
Compatible with OS: Win7, Win8, Win10 (64 bit);
Dimensions: 570x210x210 mm;
Weight: 2.5 kg;
Warranty: 1 year.
PC system requirements:
video: Nvidia series video memory> 1G, dual-core i5 processor and higher, RAM> 8 Gb
We have already looked at this scanner in the general overview, and now we want to talk about the 3D scanning process on this device. And the result that we got.
As a model for scanning, the well-known PICASO Designer X PRO “Monster” advertisement was chosen. By the way on Picaso X PRO, it is printed.

After connecting all the components and cables to the PC, run the Einscan scanning program that comes with the scanner (for free).
First we will be asked to calibrate the scanner.
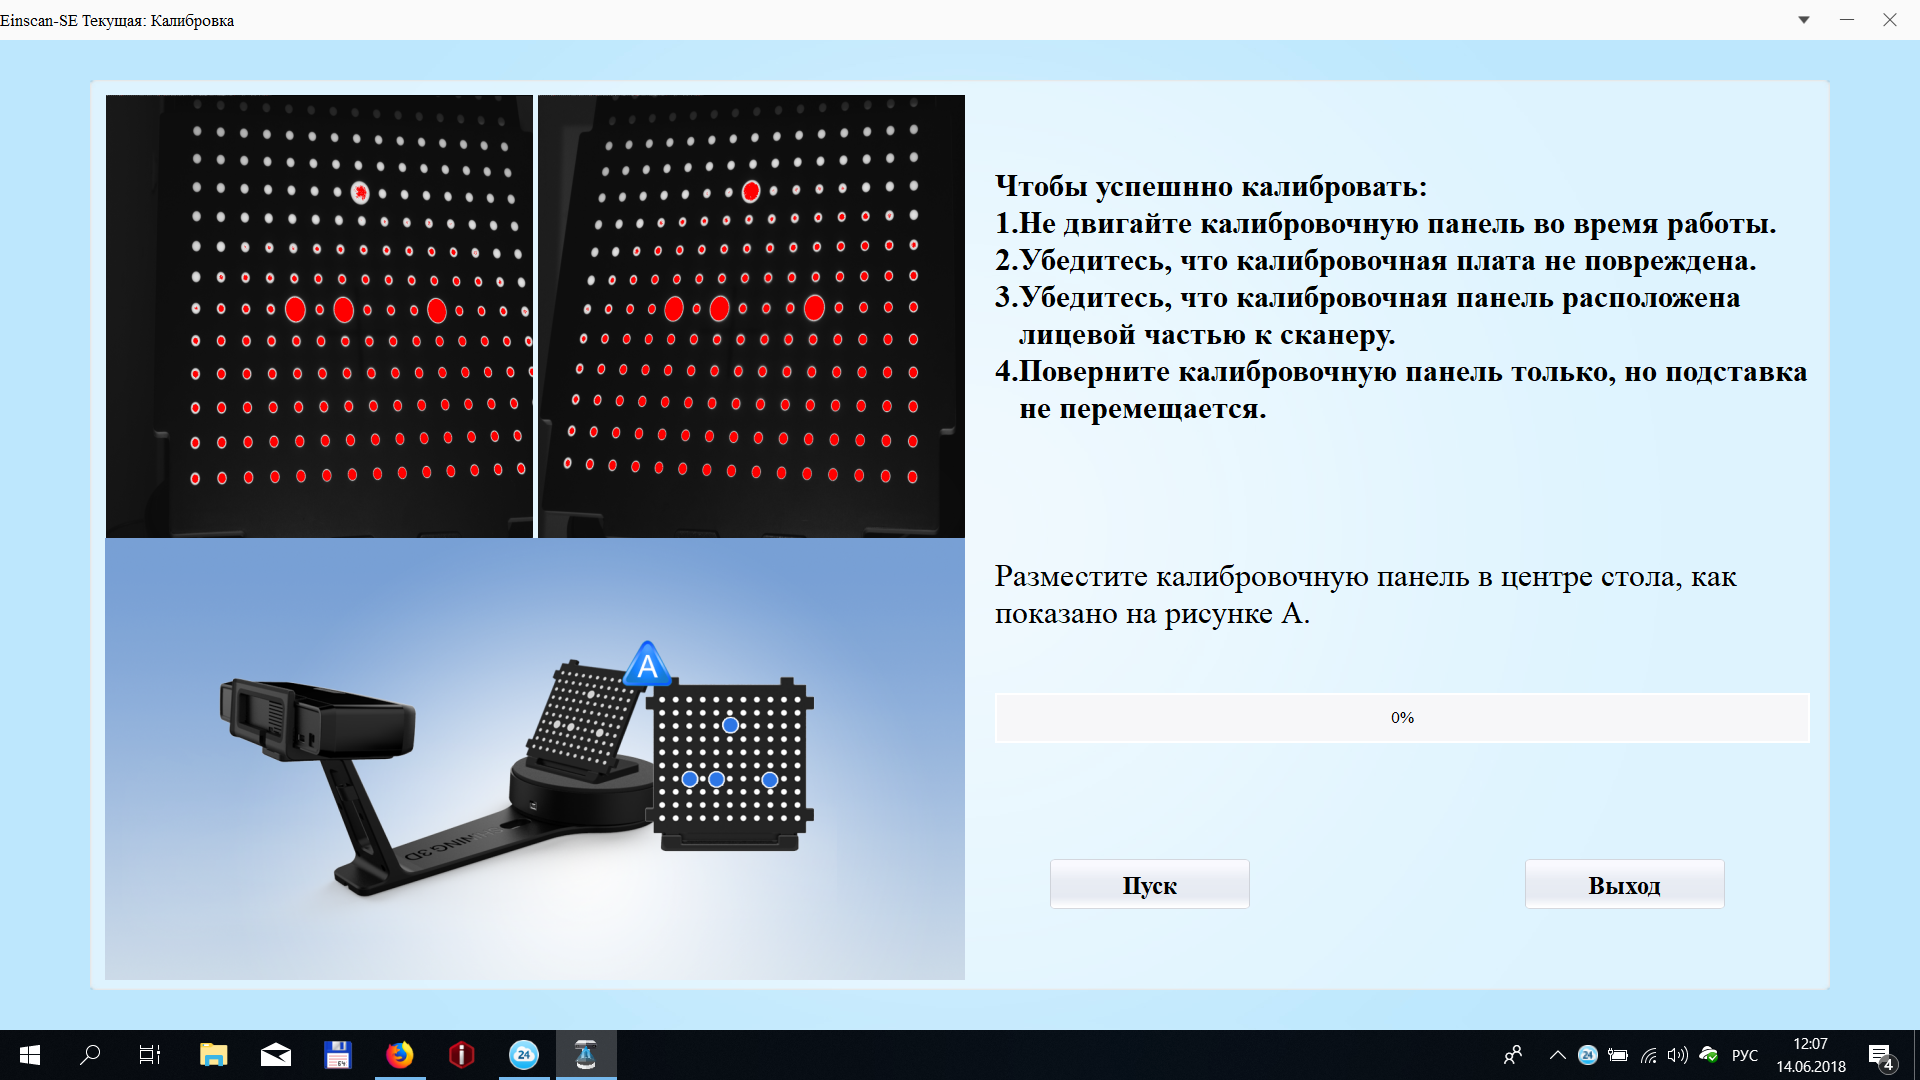
The process is quite simple. At every step, we are told what to do.

Everything is clear and clear.

Several consecutive steps, and the 3D scanner is ready for operation.

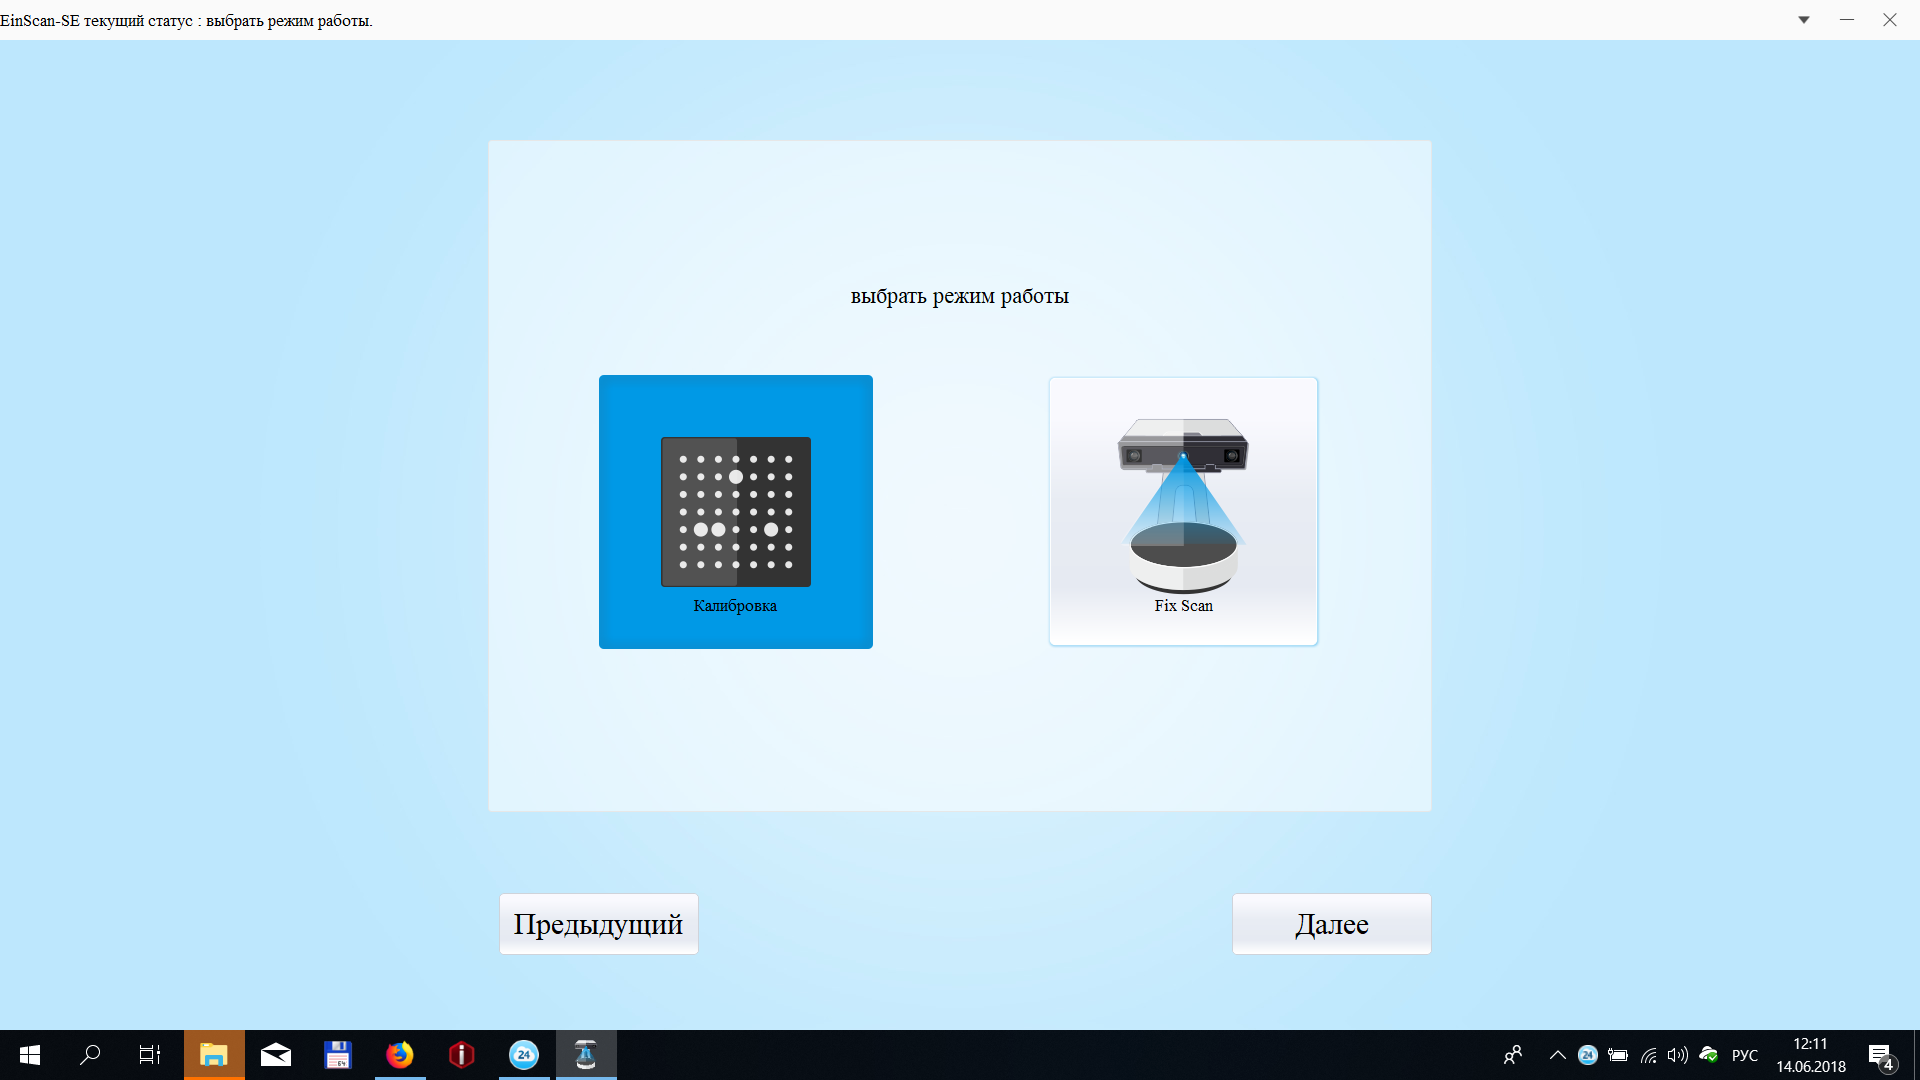
After completing the calibration, the software offers the following: either repeat the calibration, or proceed to the 3D scan.
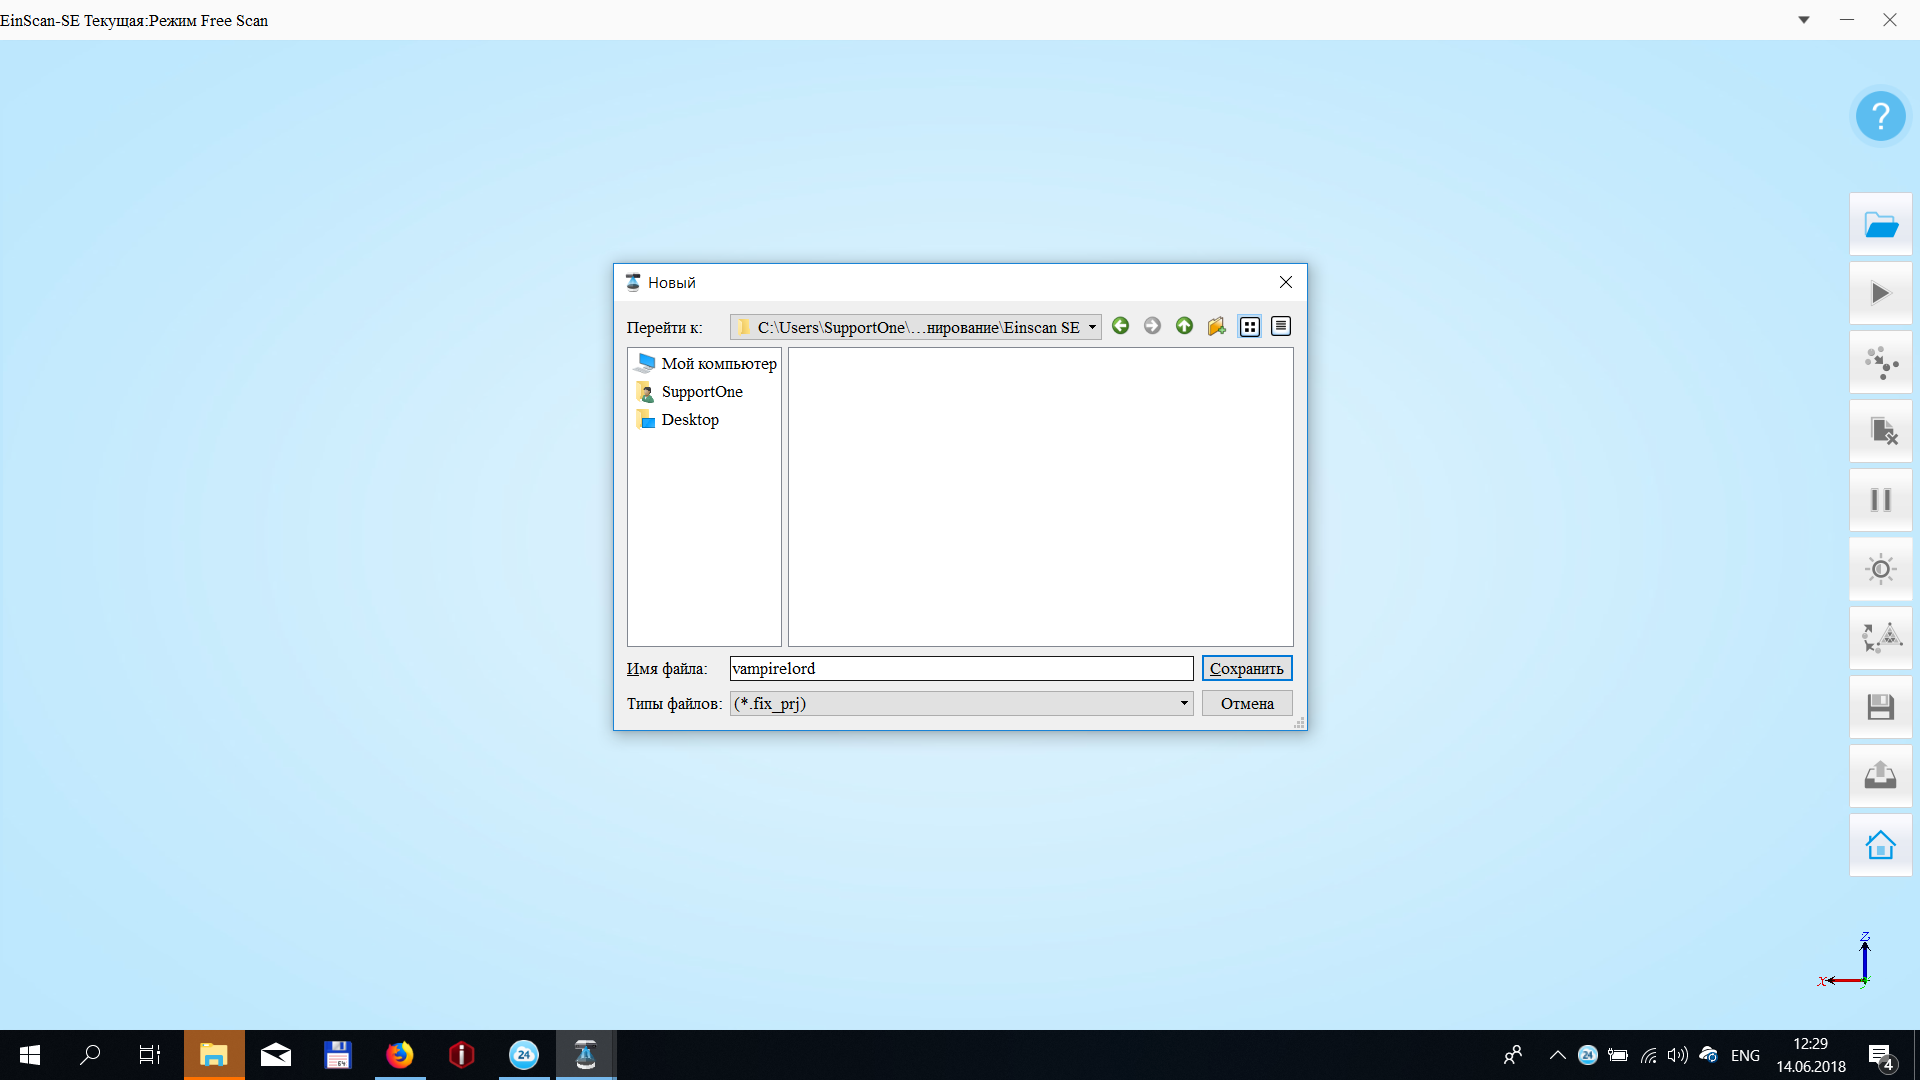
You can start a new or continue the old project.

Enter the name of the project and the path where the files will be saved.
Next we will be offered the option of scanning in the texture capture mode (i.e. in color) or scanning in monochrome mode (no color).

Next, we suggest choosing the brightness of the illumination. This is basically one of the two settings when scanning. Everything is simplified as much as possible, for the user, the software does everything or prompts where to click next.

After choose, the number of scan cycles. The more, the higher the surface detail and quality. Time to scan, too, will take more.

By the way, this is the last setting. Scan quality, except for this parameter is not set. Only when saving a model, you can choose its size and compression.

Everything is ready to scan - proceed.

Here is how this process looks from the outside.

The lighting of the model changes and its relief appears on the screen.
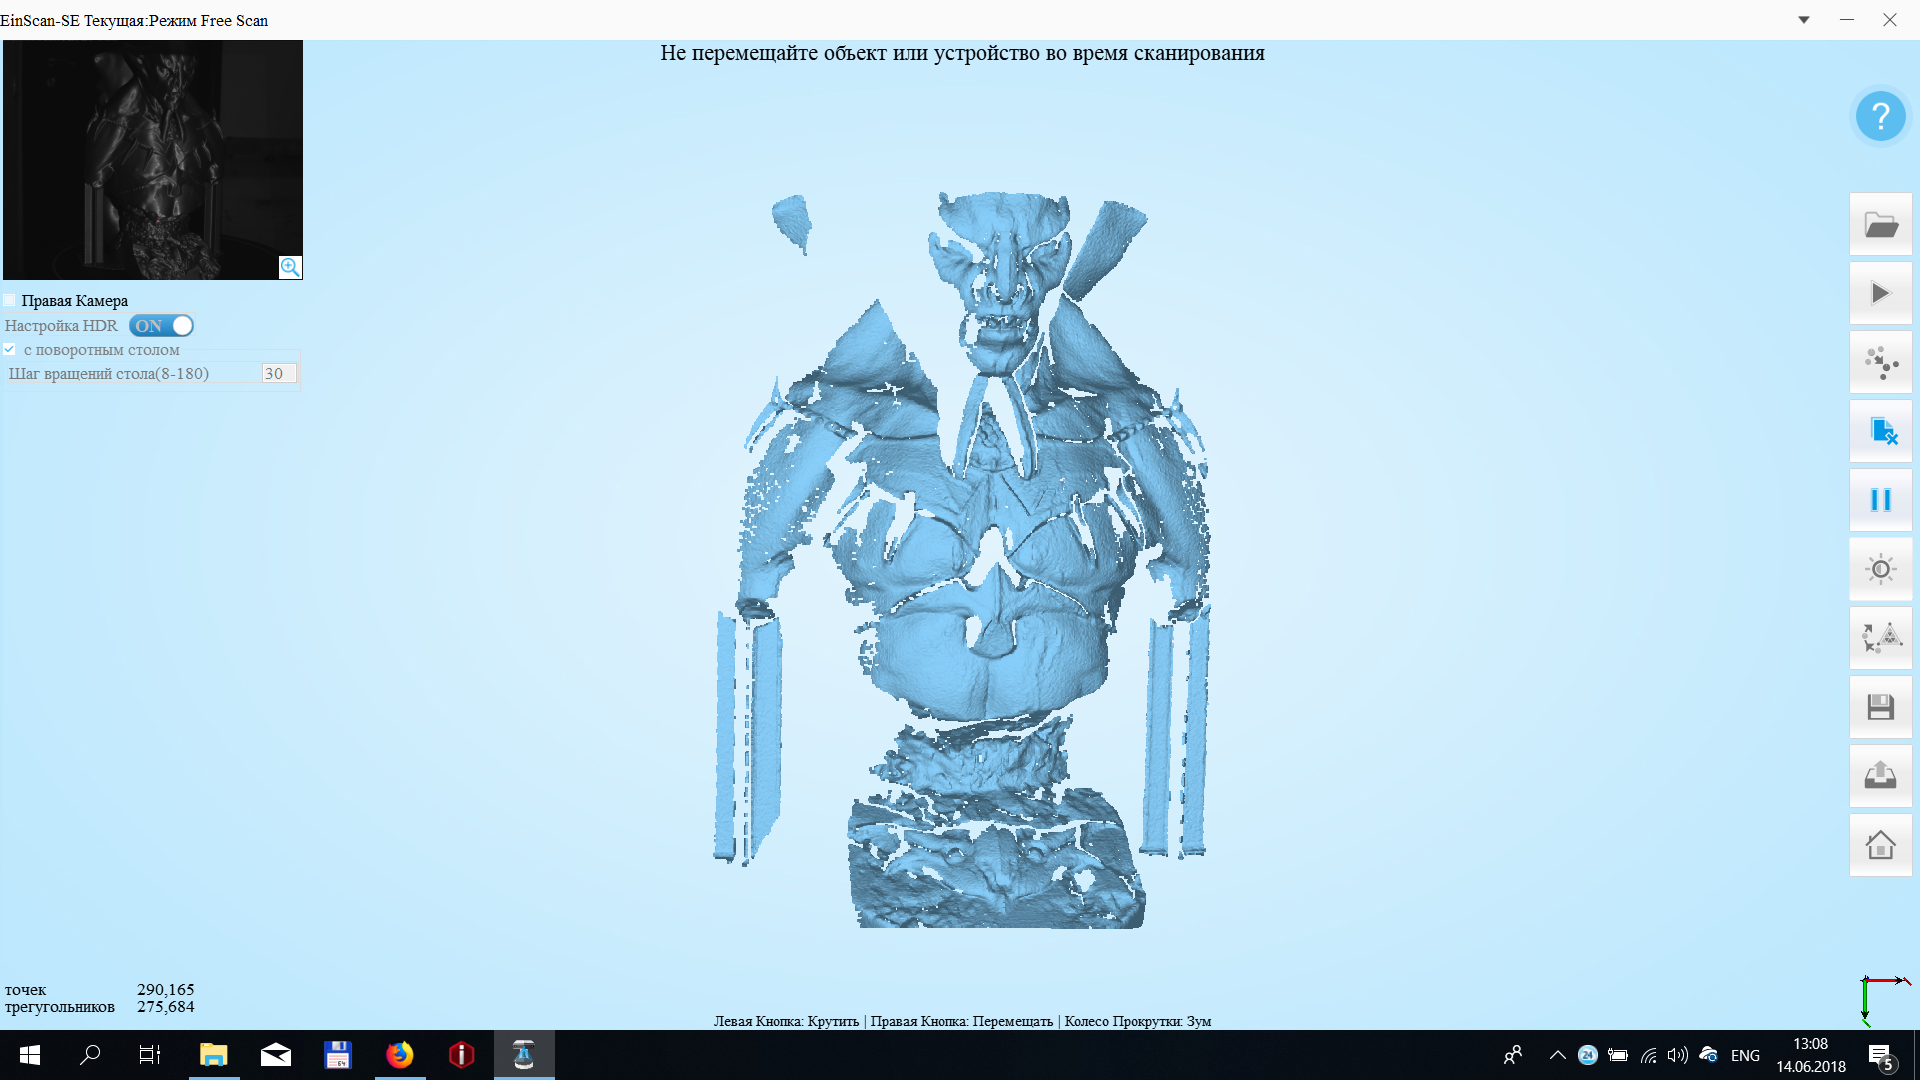
The process is not fast. It took us about 20 minutes. This is what we see closer to the end.

The scanned model can be edited. Remove unnecessary artifacts (noise) that occurred during scanning.

This process is also simple and intuitive. There is always a hint on the screen that click.

After that, you can postprocess. There are two options to leave, as is, immediately after scanning “without filling”. Or, choose the option when the software closes the gaps in the scan and connects the “hanging” planes.

That's what we ended up with:

In our opinion, it is worthy enough for a cheap automatic 3D scanner. The model is not laid out, it “weighs” more than 800MB. The whole process was done only as an example, so the model was not optimized.
The Einscan SE 3D Scanner has a fairly high scan quality and a fully automatic process. Ideal for educational institutions due to the simplicity and clarity of the process. Also, the scanner will be a good helper in a business where accuracy in hundredths of a millimeter is not required (for example, making souvenirs or an artwork product).
The main difference from professional scanners (for example, RangeVision scanners), besides the much lower resolution of 3D scanning and positioning accuracy, is the most simplified software, without the ability to fine-tune the scanning process for a specific object.
Another drawback is the rather high computer requirements, the need for an Nvidia video card.
Buy 3D scannersShining3D is possible in our company:
3dtool.ru/category/3d-skanery/filter/scanermanufactorer-is-shining%203d
General catalog of 3D scanners: 3dtool.ru/category/3d-skanery

Our company on social networks:
Our site
INSTAGRAM
VKontakte
Facebook
Our Youtube Channel
Today we want to talk about inexpensive, but effective desktop 3D scanner from Shining3D - Einscan SE .
This is an updated (improved) model of the 3D scanner Einscan S.
Technical characteristics of the scanner:
Camera resolution: 1.3 MPix;
Number of cameras: 2;
Light source: white light;
Scan mode: fixed, automatic;
Minimum scanning area: 30 x 30 x 30 mm;
Maximum scanning area (automatic mode): 200 x 200 x 200 mm;
Maximum scanning area (fixed mode): 700 x 700 x 700 mm;
3D scanning speed (fixed mode): 8 seconds;
3D scanning speed (automatic mode): 2 minutes;
Distance to the object: 290-480 mm;
Scanning accuracy: 0.1 mm;
Data format: OBJ, STL, ASC, PLY;
Compatible with OS: Win7, Win8, Win10 (64 bit);
Dimensions: 570x210x210 mm;
Weight: 2.5 kg;
Warranty: 1 year.
PC system requirements:
video: Nvidia series video memory> 1G, dual-core i5 processor and higher, RAM> 8 Gb
We have already looked at this scanner in the general overview, and now we want to talk about the 3D scanning process on this device. And the result that we got.
As a model for scanning, the well-known PICASO Designer X PRO “Monster” advertisement was chosen. By the way on Picaso X PRO, it is printed.
Stage 1. 3D scanner calibration
After connecting all the components and cables to the PC, run the Einscan scanning program that comes with the scanner (for free).
First we will be asked to calibrate the scanner.
The process is quite simple. At every step, we are told what to do.
Everything is clear and clear.
Several consecutive steps, and the 3D scanner is ready for operation.
Stage 2. 3D scanning process
After completing the calibration, the software offers the following: either repeat the calibration, or proceed to the 3D scan.
You can start a new or continue the old project.
Enter the name of the project and the path where the files will be saved.
Next we will be offered the option of scanning in the texture capture mode (i.e. in color) or scanning in monochrome mode (no color).
Next, we suggest choosing the brightness of the illumination. This is basically one of the two settings when scanning. Everything is simplified as much as possible, for the user, the software does everything or prompts where to click next.
After choose, the number of scan cycles. The more, the higher the surface detail and quality. Time to scan, too, will take more.
By the way, this is the last setting. Scan quality, except for this parameter is not set. Only when saving a model, you can choose its size and compression.
Everything is ready to scan - proceed.
Here is how this process looks from the outside.
The lighting of the model changes and its relief appears on the screen.
The process is not fast. It took us about 20 minutes. This is what we see closer to the end.
Stage 3. Assembly and formation of a 3D model
The scanned model can be edited. Remove unnecessary artifacts (noise) that occurred during scanning.
This process is also simple and intuitive. There is always a hint on the screen that click.
After that, you can postprocess. There are two options to leave, as is, immediately after scanning “without filling”. Or, choose the option when the software closes the gaps in the scan and connects the “hanging” planes.
That's what we ended up with:
In our opinion, it is worthy enough for a cheap automatic 3D scanner. The model is not laid out, it “weighs” more than 800MB. The whole process was done only as an example, so the model was not optimized.
findings
The Einscan SE 3D Scanner has a fairly high scan quality and a fully automatic process. Ideal for educational institutions due to the simplicity and clarity of the process. Also, the scanner will be a good helper in a business where accuracy in hundredths of a millimeter is not required (for example, making souvenirs or an artwork product).
The main difference from professional scanners (for example, RangeVision scanners), besides the much lower resolution of 3D scanning and positioning accuracy, is the most simplified software, without the ability to fine-tune the scanning process for a specific object.
Another drawback is the rather high computer requirements, the need for an Nvidia video card.
Buy 3D scannersShining3D is possible in our company:
3dtool.ru/category/3d-skanery/filter/scanermanufactorer-is-shining%203d
General catalog of 3D scanners: 3dtool.ru/category/3d-skanery
Our company on social networks:
Our site
VKontakte
Our Youtube Channel