Do-it-yourself super-cheap camera with control

As a preamble, I will say that since there already was a similar article, in the beginning I was not going to write about the camera in Habr.
The camera was made just for the sake of interest, training skills and testing the technology of remote control of physical objects.
A little later, I used this system as a good example accompanying the review on another resource (but in fact, as a cheat, to raise my voices). It was a real beta test that revealed a bunch of flaws. For this, many thanks to all those who care, who helped with advice and some with a piece of code.
At the same time, visitors who played with the camera, in addition to not passing an hour so that they did not remember the hubr, also began to actively interest in the device of this whole thing, technical details, software implementation and, of course, cost.
That is all that prompted me to the article. And in order not to repeat, I decided to focus on the cost, because the author of the previous topic on this topic, as far as I remember, the final cost poured into something in the region of 5000r.
About what is the value of my crafts: read below.
So, “whatever you call a ship, it will sail”, once I wrote a headline about cheapness, I will correspond to prose, so the details will come later, and first about the cost.
Let's go through the prices *
* All prices are given with discounts. About discounts - separately, later.
Required Set :
- Arduino Uno (or nano) - $ 15.29
- Servo (steering machine) SG90 2x2.37 $ = 4.74 $
- Webcam 3.01 $
Additional set (laziness + buns):
- The screen from Nokia 5110 is 250 rubles (complete with Nokia itself and a power supply, purchased a couple of years ago, we assume that for this purpose, you can actually find it is already half as much, or even for free)
- MegaShield v4 to Arduino - $ 5.86
- Wiring connectors - $ 2.86 (40 pieces for this price, 7 actually used)
- Ultra-bright sverhsiny sve
pxtodiod for backlight - 5p / pcs (4 pcs better, I have done wrong.)
.
About implementation
Everything was done from scratch. I didn’t repeat what already happened, firstly for training reasons, and secondly I didn’t have an Ethernet module at that time, I decided that it was all too complicated (MySQL was tied up there) and I decided definitely not suitable.
About tasks
I have identified the following tasks for myself:
- See picture / video
- Have the ability to control the camera
- To be able to control the size and quality of the video or image, and not “already on the client side”, but “still on the server side, at the command of the client”. Such a need arose due to the fact that “large and wide Internet” is not available everywhere.
- Provide acceptable “realtime”
- Have a foundation for the future - 220V load control, etc. Actually, for the sake of this, everything was started, because ready-made solutions are either terribly expensive or do not provide such an opportunity.
About problems
During the implementation, questions arose of such a plan:
- The video either loads the processor in case it is shown to several users, or gives a delay of 5-10, i.e. does not provide "real time", because of which it is impossible to immediately determine the adequacy and overall performance of the management
- Using the translation service, although it greatly relieves the server in case of a large online, does not provide the necessary reliability, and, again, gives a delay
- A special server for broadcasting a video stream requires certain skills, which I don’t have yet
- Using display by changing pictures does not provide high fps, and also constantly accesses the hard disk, which, with a large number of users, can cause picture lags not due to processor loading, but because of disk access
About Solutions
- It was decided to use as a display - pictures
- To exclude the hard drive from the process of issuing images, RamDisk is installed, on which the image from the webcam “lays down” twice a second
- To issue a picture, it was decided to use php and gdlib
- Image updating is initiated by the client through javascript and ajax, and occurs without updating the page itself
Enough lyrics!
What does it look like
Everything looks more than modest.
It works something like this:
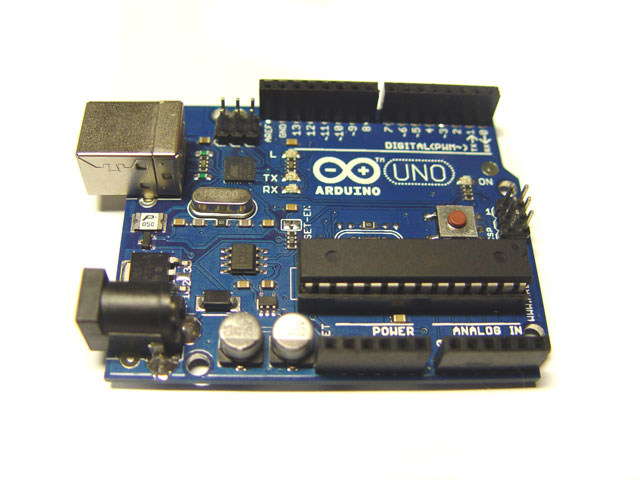
Arduini, if someone has not seen
Megashild with postings

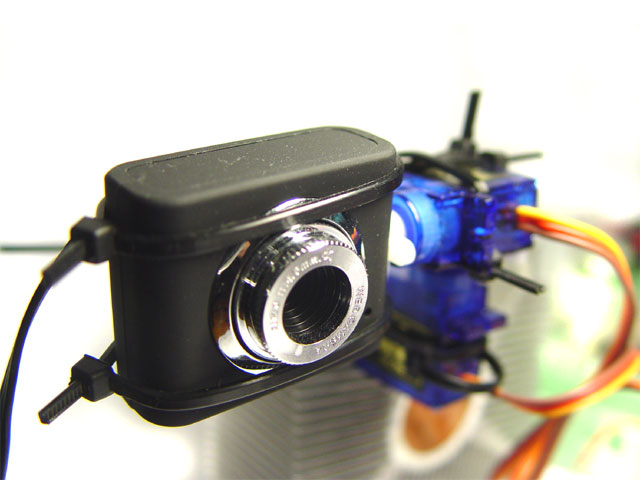
"Sandwich" in profile

"sandwich" frontal

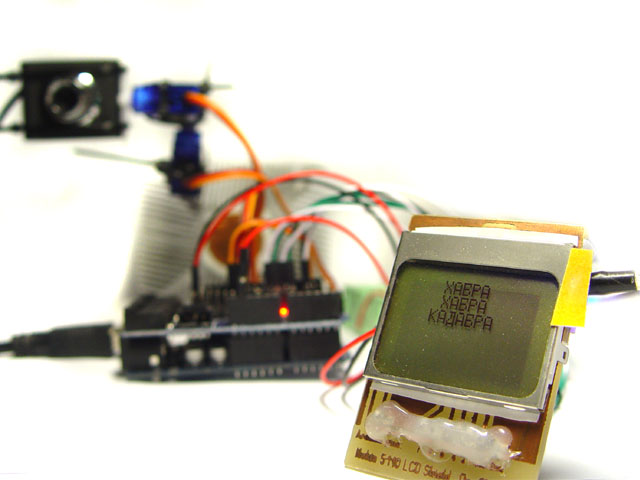
LCDshka

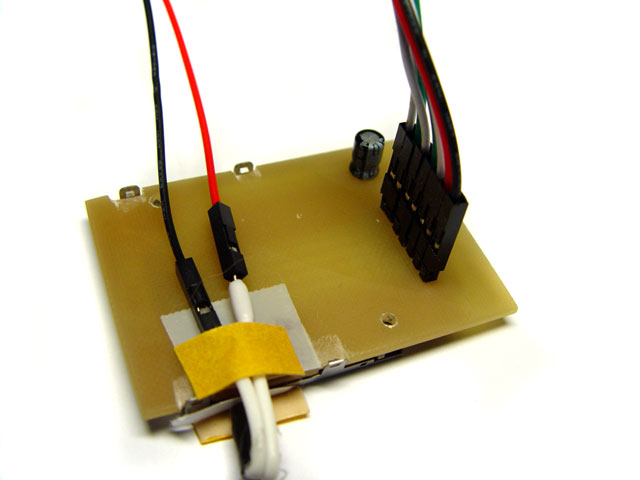
She is a rear view (pins and Conder)
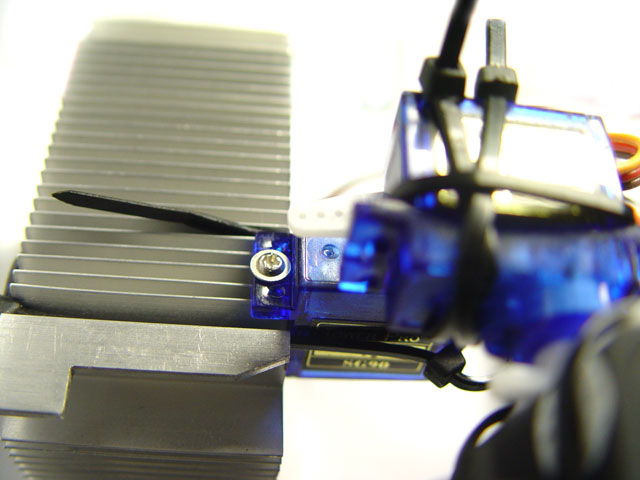
Assembled
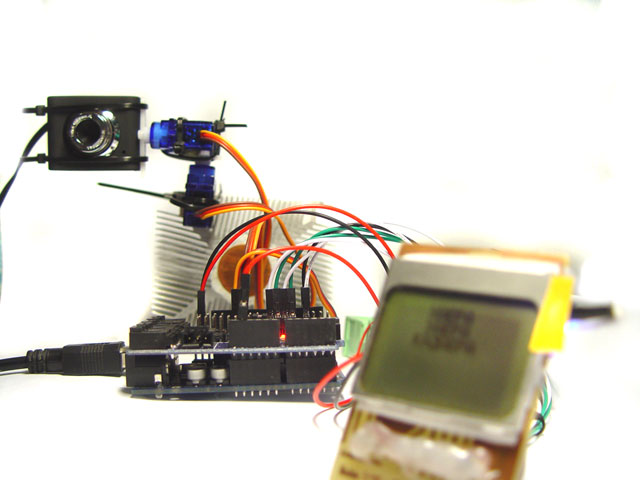
Assembled 2
kolkhoz - wiring system and verovochek (camera mount)


where the same without him

How is it arranged in hardware?
The webcam is connected via USB to the computer.
Arduino is also connected to the computer via USB.
All external devices, due to the extremely low current consumption, are connected directly to the Arduino, it has been working around the clock for a month and a half, with 10 users online at the time of the least load.
How does it work programmatically
On the client side, a clean web interface, without any plugins and lotions. Only html, css, and javascript (+ ajax).
Server side
- Server itself - Apache
- Script handler - php
- Reception of pictures from the camera - any simplest available, free or self-made program for saving pictures from a webcam
- Image storage - RamDisk, a utility for creating a disk partition in RAM (the Russian-language version of RAMDisk "Enterprise" is free for localized systems)
- In order not to register direct local paths in php, the folder with the picture is mounted in the www folder using juction (Mark Russinovich’s free utility)
- Control transfer from the Internet to Arduino is implemented using a proxy program, as follows: php script creates a UDP socket and sends a datagram to a specific port, then the proxy program listens to this port and receives messages coming to it and sends them to the Arduino COM port (you can even without treatment). The choice of UDP was called solely to simplify the system, UDP does not require any confirmations and checks on the delivery-sending neither from the client nor from the server.
On the side of the arduino
- Sam (why "herself"? Because "board") Arduino
- The sketch inside it is the standard examples from the standard set of arduino-0022 servo and serial + library for display found on the Internet, modified to an acceptable form (in terms of Cyrillic and Latin at the same time)
- At the moment, a mega-shield is a plus, purely because of its convenience and cultural appearance - in this version I did not solder a single wiring (except for the board to the display)
The system withstood all invasions and raids, as well as online more than 120 users.
There were cases of control failure that occurred due to my flaws in the proxy program, in particular due to insufficient error handling, while the software part on the part of Apache and Arduino was worthy.
Be mindful of the little things
I want to note the problems with the software that happened due to my own inattention / lack of knowledge / lack of observation:
- The first thing I was seriously tormented with: Arduino receives from the line sent to its virtual COM port separately the first byte and everything else separately. What sophistication I just did not try - and with arrays and with a bunch of checks ... Though you kill. Solution? It came unexpectedly and suddenly, at the moment when I didn’t think about it: Sleep 2 after reading each byte. ALL!
- The second problem - a serious load on the server, it would seem, out of nothing, arose because the picture was updated on a timer, without waiting for the actual fact of the picture loading (or loading error). In this way, a bunch of "extra" requests were sent.
- Third: FireFox turned out to be the most correct and moody browser, and made me learn to write valid code. For example, the OnClick event on the Option element should not work. And it works everywhere except firelice.
- Fourth, completely implicit and rarely pops up: from time to time the picture “broke”. As it turned out, this happened when the file was busy while writing. Those. check file_exists () passed, and the file remained locked. Checking is_writable () did not help either. I had to organize a cycle by the presence of an error and work on reading the file “to the bitter end” inside it.
Remaining flaws
There are some.
- Firstly, these are the “left” characters described in kamenta that sometimes appear at the end of a message on the screen. These are actually management teams. The ears of this bug grow from the fact that if you actively spam or press the buttons, the com-port buffer does not have time to fully read by Arduina and the subsequent messages are scattered at the end of the buffer. There is a solution, but not yet been made.
- Secondly, this is a periodic drop in the UDP socket in the proxy program when it is online. What is the reason - I do not know. It does not appear immediately. Dies and does not "sap." It helps to close the socket and bind in a new way. Perhaps the Widowski winsock.ocx curve is to blame. To rewrite this business on API in a basic, somehow laziness. While one of the “clumsy” decisions I see a reset and rebind of the socket by timer, every, say, half an hour.
About discounts
It is well known that in China it is cheaper. The main thing is to know where exactly it is cheaper, and how to get an additional discount.
There is no point in writing here - too much text with pictures, which is also known to most.
Therefore, in order not to provoke ardent opponents of the fight against spam and other “referral”, I’ll note the necessary minimum - this is a 15% discount on BiC, consisting of a one-time coupon of 10% and a 5% discount on the first purchase when entering the recommender + hint how to use this system repeatedly.
All those interested can read the full information on the link on the page with, in fact, the camera itself.
References
The camera, the working instance , for those who have not yet seen or played enough
Topic in which the link to the camera was leaked to the hub before the time
RAMDisk
juction
Sources (simplified, to avoid) the client part, the server (php) and the web-arduino-proxy program ( VB 6.0)
Apache, php, or some kind of combined assembly, etc. - to your taste.