Arduino in production *
From school age, I have always been interested in the construction of factories. Now I am very sorry that there were so few school trips to existing industrial enterprises. Therefore, in order to take time in the evenings and expand my horizons, I decided to build my own factory.
The factory will be a toy, a kind of layout. And on this layout I can try my hand at developing control algorithms for various technological processes. Someone is building models of railways, and I will build a model of a small factory.
On Habré there were already many wonderful posts in which the authors talk about designing and programming robots based on the Arduino microprocessor-based design platform. These are mainly articles about mobile robots on a wheeled or tracked chassis, autonomous or with remote control. There is almost nothing about industrial applications. In this regard, I offer my "five cents" in the form of a description of the process of designing and programming a small automated system, which is controlled by Arduino.
* - not present.
What should our factory start with? Smart people say that the right logistics in production determines the success of the entire enterprise.
So, the first automatic machine in our factory is a simple conveyor belt that will be used to transport piece goods.
01. Samples of goods that will be moved along the conveyor.

The conveyor is assembled from fischertechnik constructor parts. The tape is driven by an M1 motor. The control system is based on the Arduino UNO controller. Power supply for all electronics from 9V PSU.
02. Conveyor assembled.

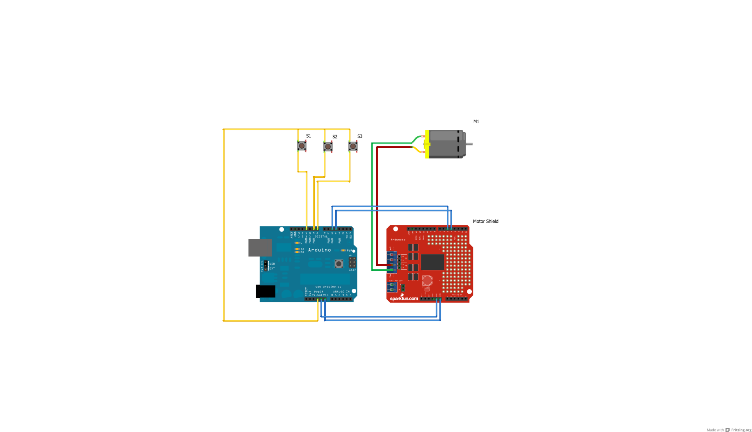
To power the engine, the DFRobot Motor Shield expansion board with power keys is used. The control signals for these keys come from the pins of the Arduino controller. In my case, only one channel of the two existing on this board is used.
03. The circuit is drawn using fritzing.

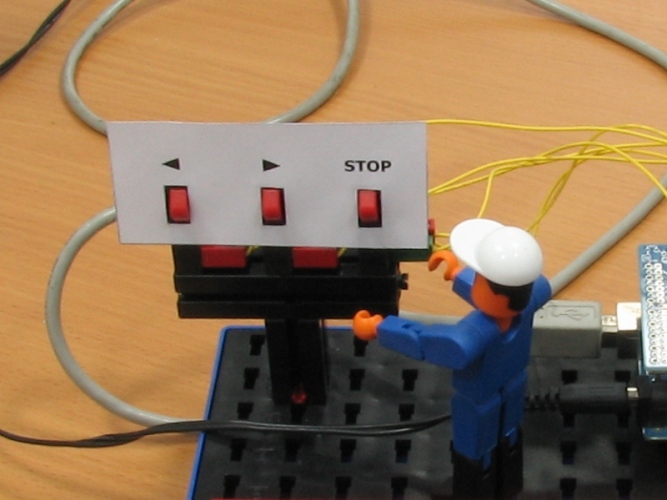
For starters, I implemented a simple manual control of the conveyor. There are 3 buttons on the control panel - S1, S2 and S3. Button S1 enables the belt to move in one direction, button S2 in the other direction, and button S3 stops the conveyor.
04. Remote control with buttons.

Here's what I got (sketch for Arduino UNO, IDE version 1.0):
05. The assembly process.
At the next stage, I have to equip the conveyor with sensors that will enable the movement of the belt only when there are loads to move.
The factory will be a toy, a kind of layout. And on this layout I can try my hand at developing control algorithms for various technological processes. Someone is building models of railways, and I will build a model of a small factory.
On Habré there were already many wonderful posts in which the authors talk about designing and programming robots based on the Arduino microprocessor-based design platform. These are mainly articles about mobile robots on a wheeled or tracked chassis, autonomous or with remote control. There is almost nothing about industrial applications. In this regard, I offer my "five cents" in the form of a description of the process of designing and programming a small automated system, which is controlled by Arduino.
* - not present.
Transport it
What should our factory start with? Smart people say that the right logistics in production determines the success of the entire enterprise.
“High-performance work of any modern enterprise is impossible without properly organized and working means of moving goods - lifting and transporting machines. According to the principle of action, these machines are divided into two groups: machines of periodic and continuous action. The first include cranes, etc., and the second conveyors of various types. "
So, the first automatic machine in our factory is a simple conveyor belt that will be used to transport piece goods.
01. Samples of goods that will be moved along the conveyor.

Design
The conveyor is assembled from fischertechnik constructor parts. The tape is driven by an M1 motor. The control system is based on the Arduino UNO controller. Power supply for all electronics from 9V PSU.
02. Conveyor assembled.

To power the engine, the DFRobot Motor Shield expansion board with power keys is used. The control signals for these keys come from the pins of the Arduino controller. In my case, only one channel of the two existing on this board is used.
03. The circuit is drawn using fritzing.

Algorithm
For starters, I implemented a simple manual control of the conveyor. There are 3 buttons on the control panel - S1, S2 and S3. Button S1 enables the belt to move in one direction, button S2 in the other direction, and button S3 stops the conveyor.
04. Remote control with buttons.

Here's what I got (sketch for Arduino UNO, IDE version 1.0):
	/*
	Conveyor control system
	 */
	// Привязка входов
	int S1Pin = 8;
	int S2Pin = 9;
	int S3Pin = 10;
	// Привязка выходов
	int M1PWMPin = 5;
	int M1DIRPin = 4;
	// Константы скорости
	int motorSlowSpeed = 50;
	int motorNormSpeed = 130;
	int motroFastSpeed = 255;
	// Константы направления
	int motorFwd = LOW;
	int motorRev = HIGH;
	int S1,S2,S3 = 0; // Состояние входов
	int M1PWM = 0; // Скорость мотора М1
	int M1DIR = 0; // Направление вращения мотора М1
	int State = 0;
	void M1Fwd() {
	  M1PWM = motorNormSpeed;
	  M1DIR = motorFwd;
	}
	void M1Rev() {
	  M1PWM = motorNormSpeed;
	  M1DIR = motorRev;
	}
	void M1Stop() {
	  M1PWM = 0;
	}
	void readInputs() {
	  S1 = digitalRead(S1Pin);
	  S2 = digitalRead(S2Pin);
	  S3 = digitalRead(S3Pin);
	}
	void writeOutputs() {
	  analogWrite(M1PWMPin, M1PWM);
	  digitalWrite(M1DIRPin, M1DIR);
	}
	void setup()  {
	  // Дискретные каналы 4 и 5 выходы
	  pinMode(M1PWMPin, OUTPUT);
	  pinMode(M1DIRPin, OUTPUT);
	  // Дискретные каналы 8,9 и 10 входы с включенным pullup
	  pinMode(S1Pin, INPUT);     // set pin to input
	  digitalWrite(S1Pin, HIGH);  // turn on pullup resistors
	  pinMode(S2Pin, INPUT);
	  digitalWrite(S2Pin, HIGH);
	  pinMode(S3Pin, INPUT);
	  digitalWrite(S3Pin, HIGH);
	  Serial.begin(57600);
	}
	void loop()  {
	  readInputs();
	  if (S1 == LOW) {
	    M1Rev();
	  }
	  if (S2 == LOW) {
	    M1Fwd();
	  }
	  if (S3 == HIGH) {
	    M1Stop();
	  }
	  writeOutputs();
	  Serial.println(State, DEC);
	}
05. The assembly process.
Moving on
At the next stage, I have to equip the conveyor with sensors that will enable the movement of the belt only when there are loads to move.
