How I did a completely silent computer
- Transfer
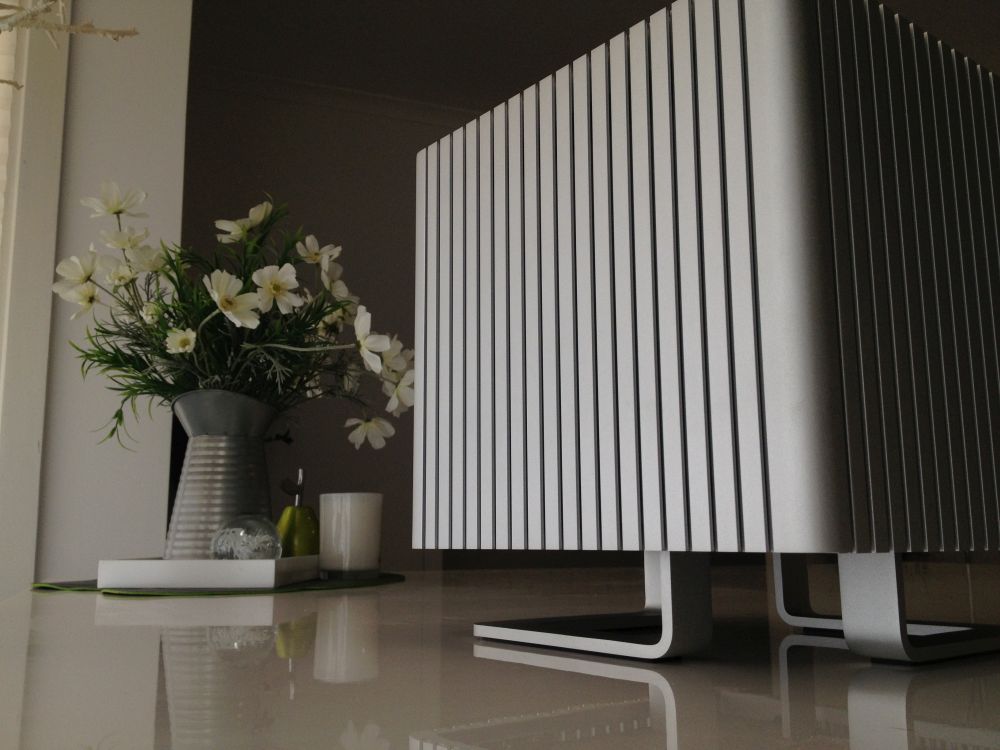
For almost three decades, I've been trying to keep my computers quieter. Self-made liquid cooling, hydrodynamic bearings with magnetic stabilization, acoustic dampers, silicone shock absorbers - I used everything that can be imagined. And last week I finally managed to build a completely silent computer. Without further ado, meet: Streacom DB4 . Case size 26 x 26 x 27 cm without a single fan. He has no moving parts at all. Total silence, 0 dB.
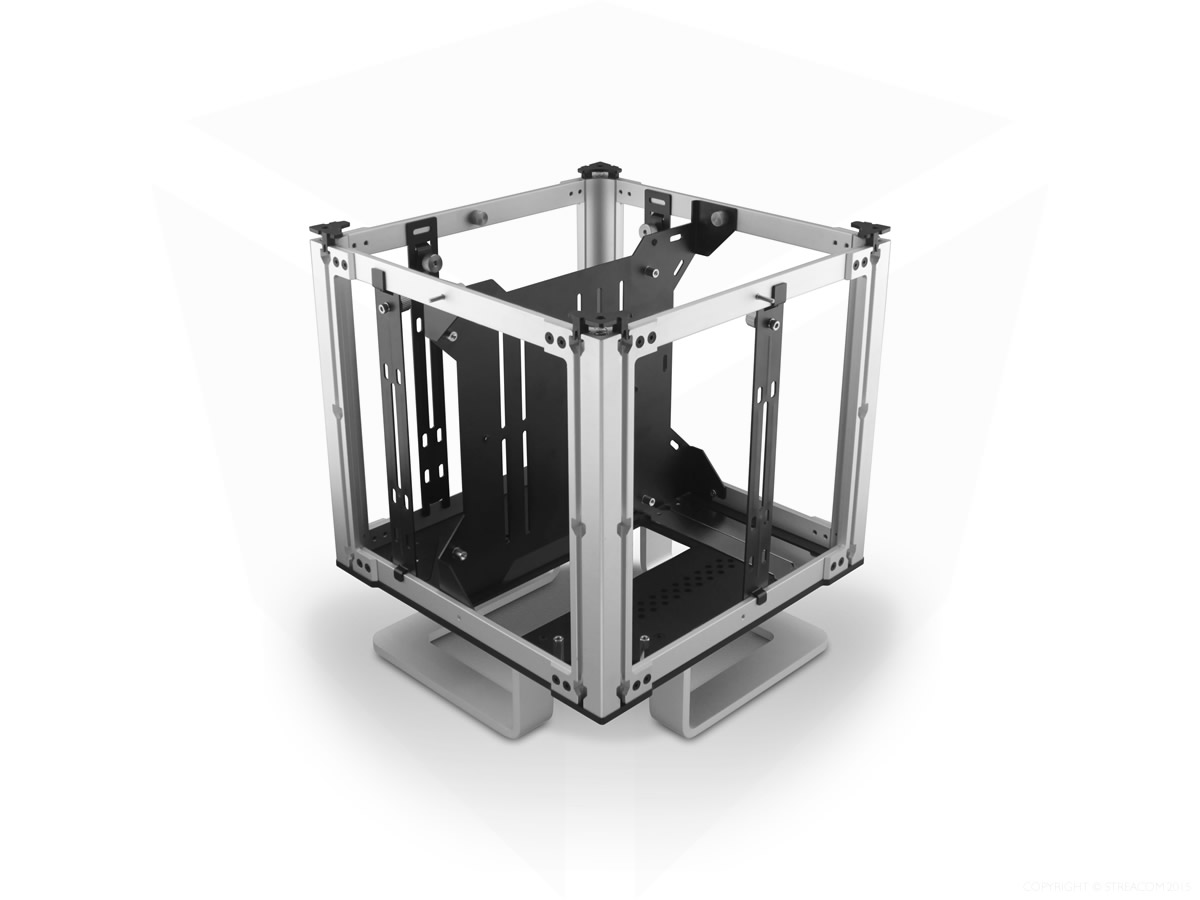
If you remove the top and four side walls (extruded aluminum, wall thickness 13 mm), you will see the minimum frame and the central mounting plate for a mini-ITX motherboard (I / O ports look down through the bottom of the case).
When I selected components, there were only four options for a motherboard of this format:
- ASUS ROG Strix B350-I Gaming
- Gigabyte AB350N-Gaming-WiFi ITX
- MSI B350I Pro AC
- ASRock Fatal1ty AB350 Gaming-ITX / ac
The attentive reader will notice that all motherboards are sharpened for AMD (Socket AM4). All this hype about Meltdown / Specter has caused my previous Intel-based systems to become insecure, and for me this was the last straw - that's all, no more Intel CPUs.
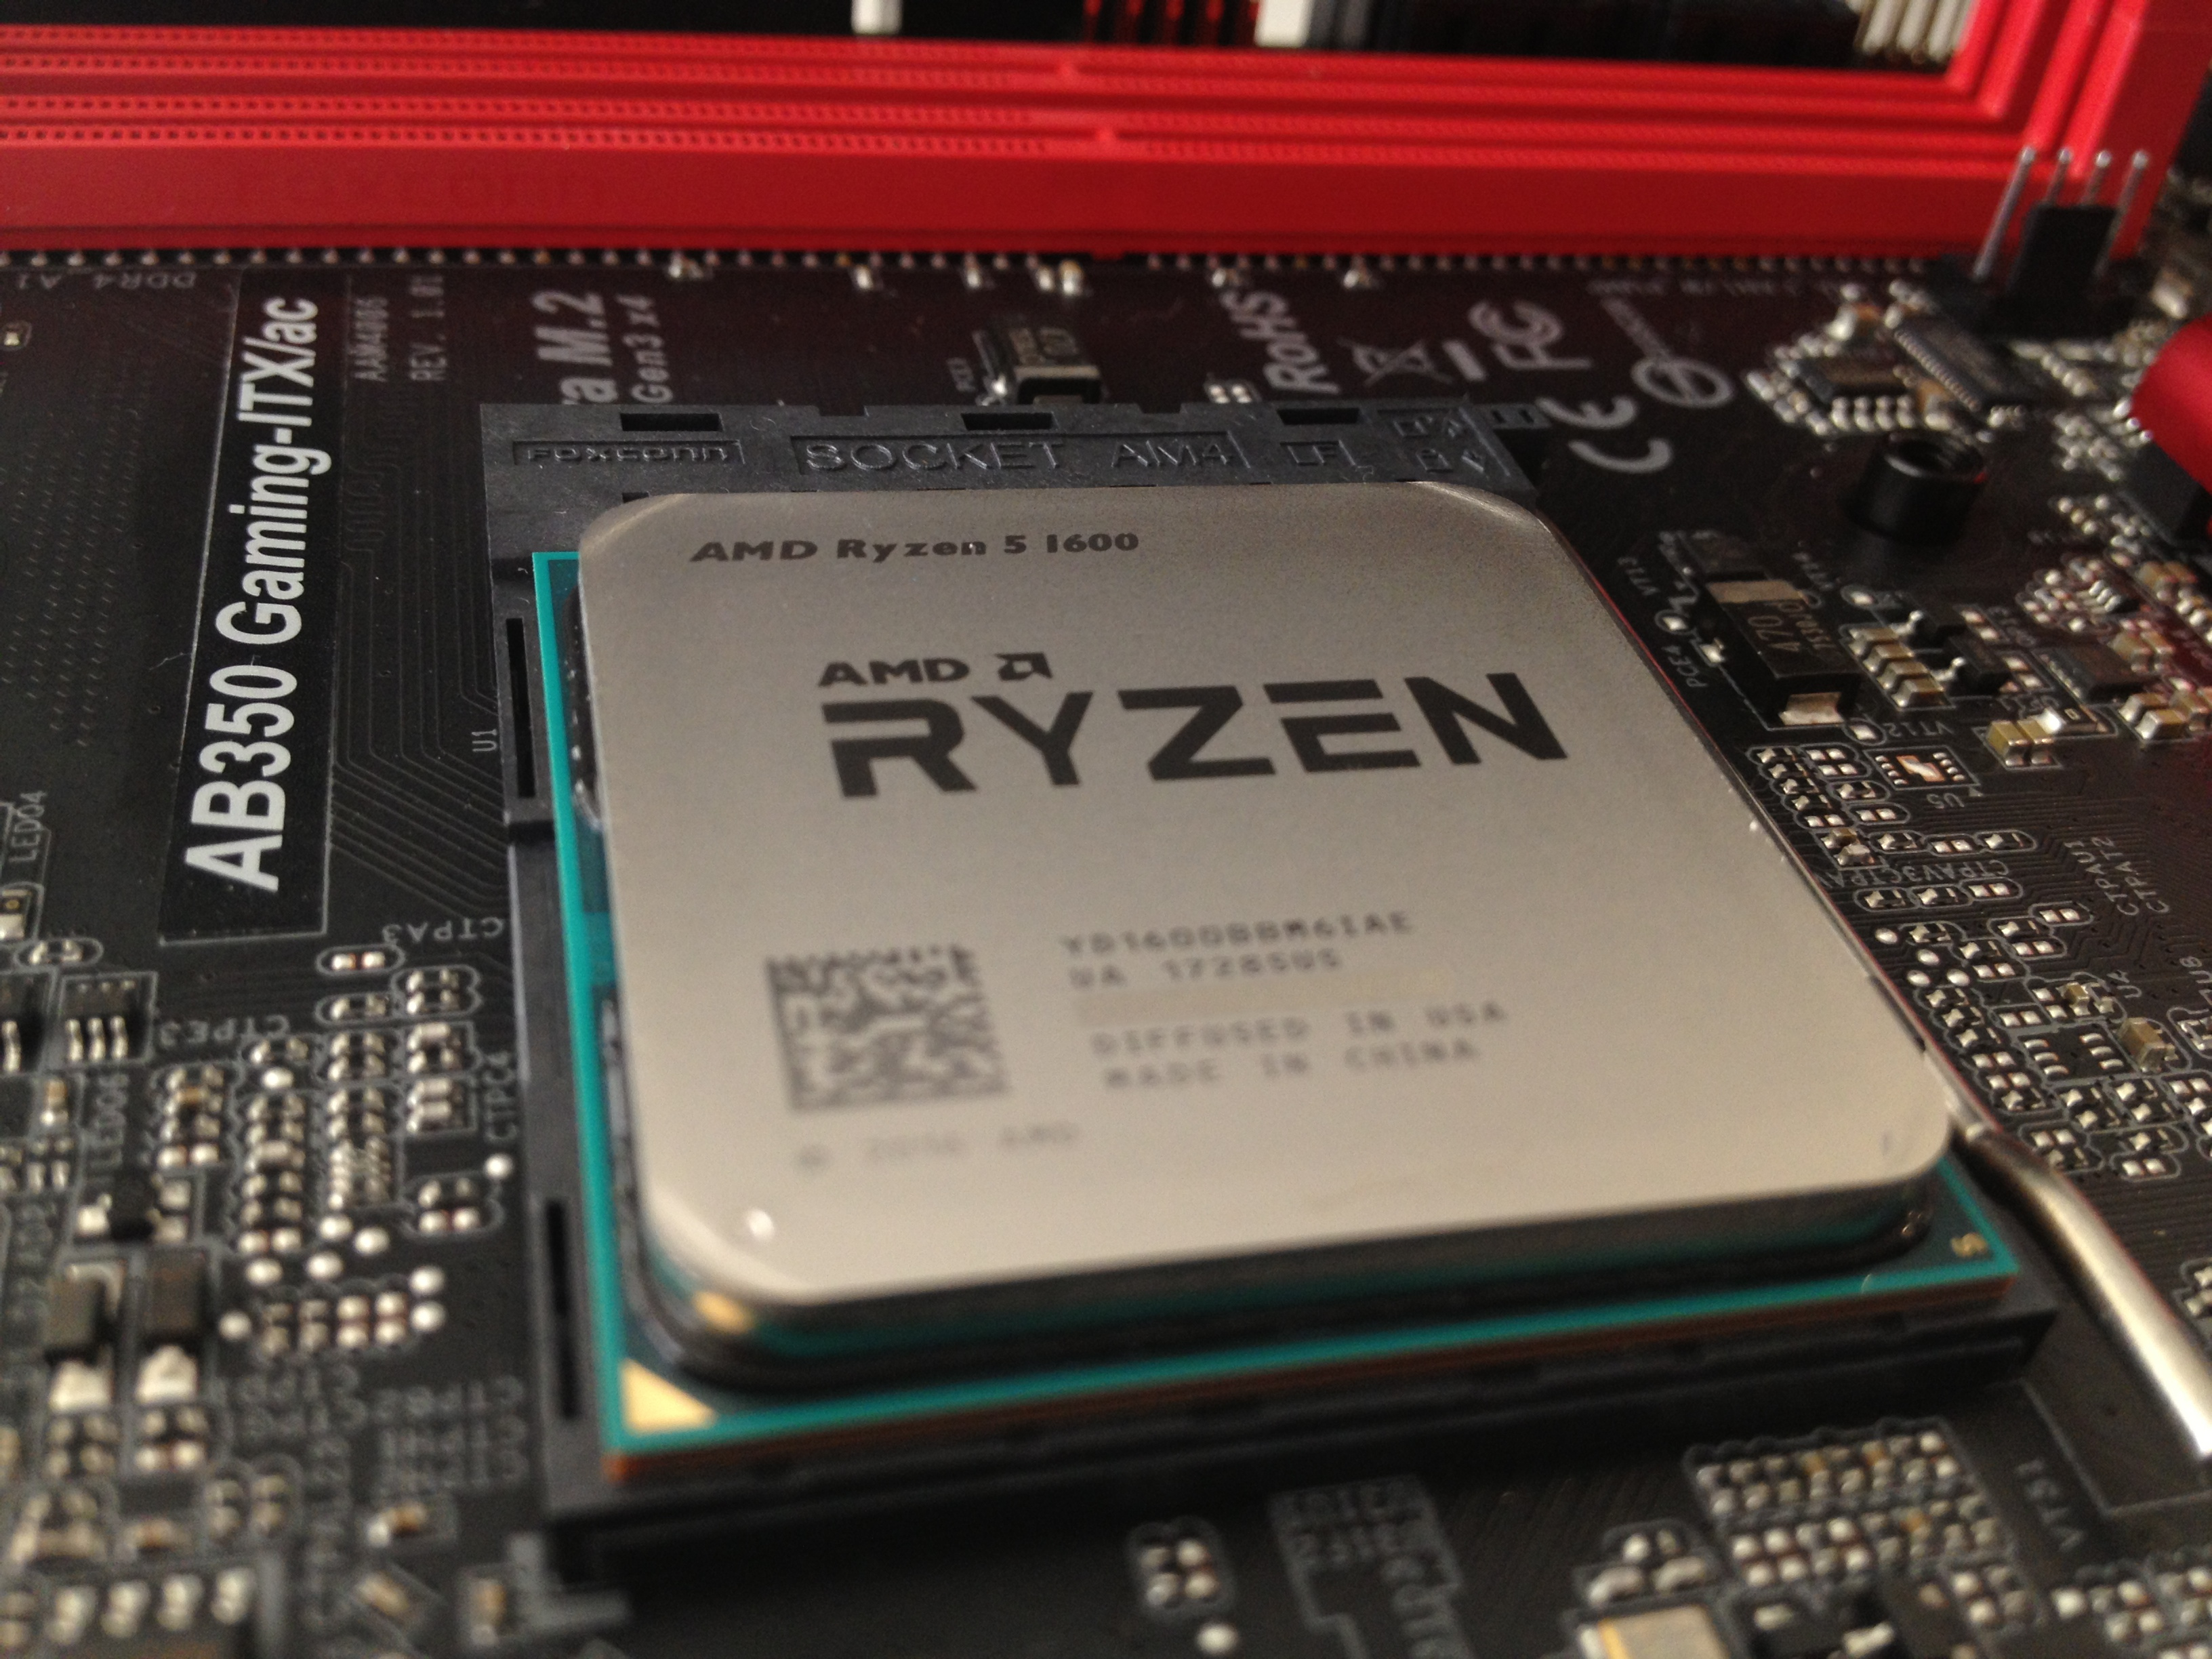
As a result, I stopped at the ASRock AB350 Gaming-ITX / ac board .
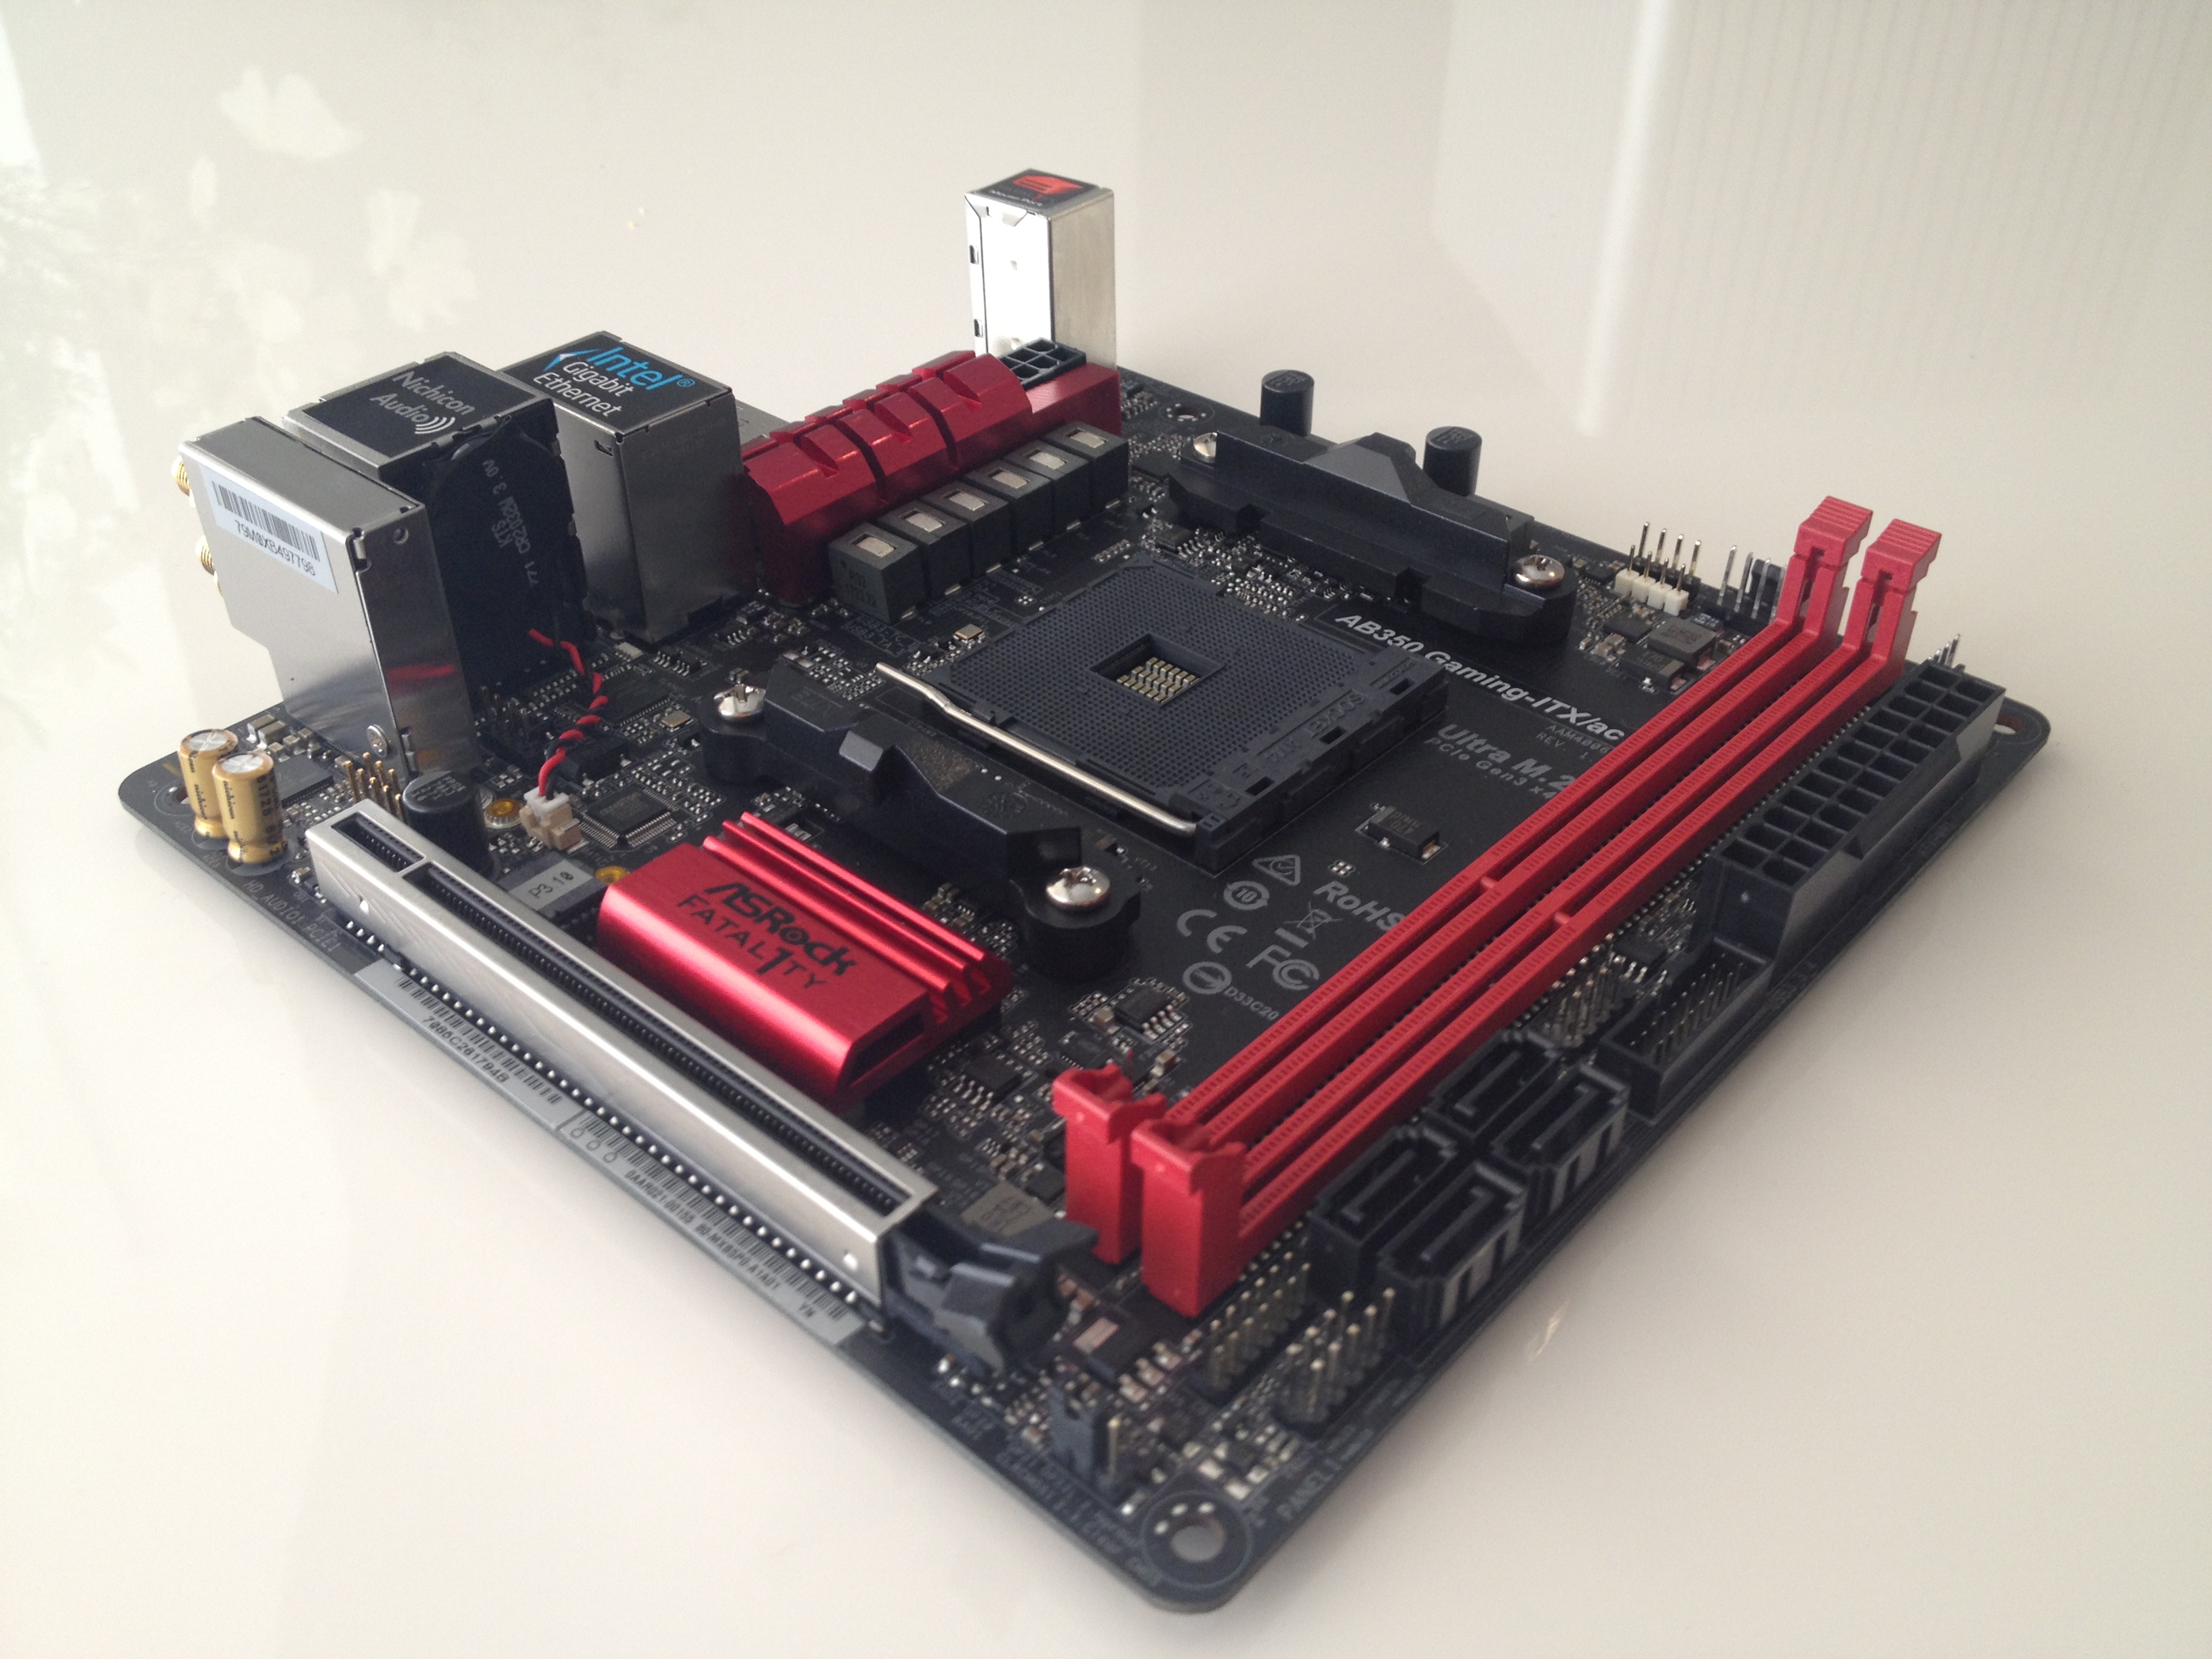
Although theoretically any mini-ITX motherboard can be installed in the DB4, the case is designed for passive cooling with heat pipes transferring the heat generated by the CPU and GPU to the side panels, emitting and removing it using convection. A careful analysis of the pipe laying paths and the necessary clearances showed that certain motherboards would not be suitable for this body - components would interfere.
- At Gigabyte, the ATX power connector for some reason is located at the top of the board, and this obstacle could not be circumvented.
- Asus has a group of voltage stabilizers in which these tubes would abut. Anyone who understands condensers and heat will understand that this would be a road to disaster.
- MSI has a huge radiator for voltage regulators that would interfere with at least one (possibly two) tubes.
ASRock was the only motherboard that fits in the DB4, and will not interfere with the additional set of tubes LH6 Cooling Kit. Perhaps it will be clearer to demonstrate how it looks after installing the tubes:
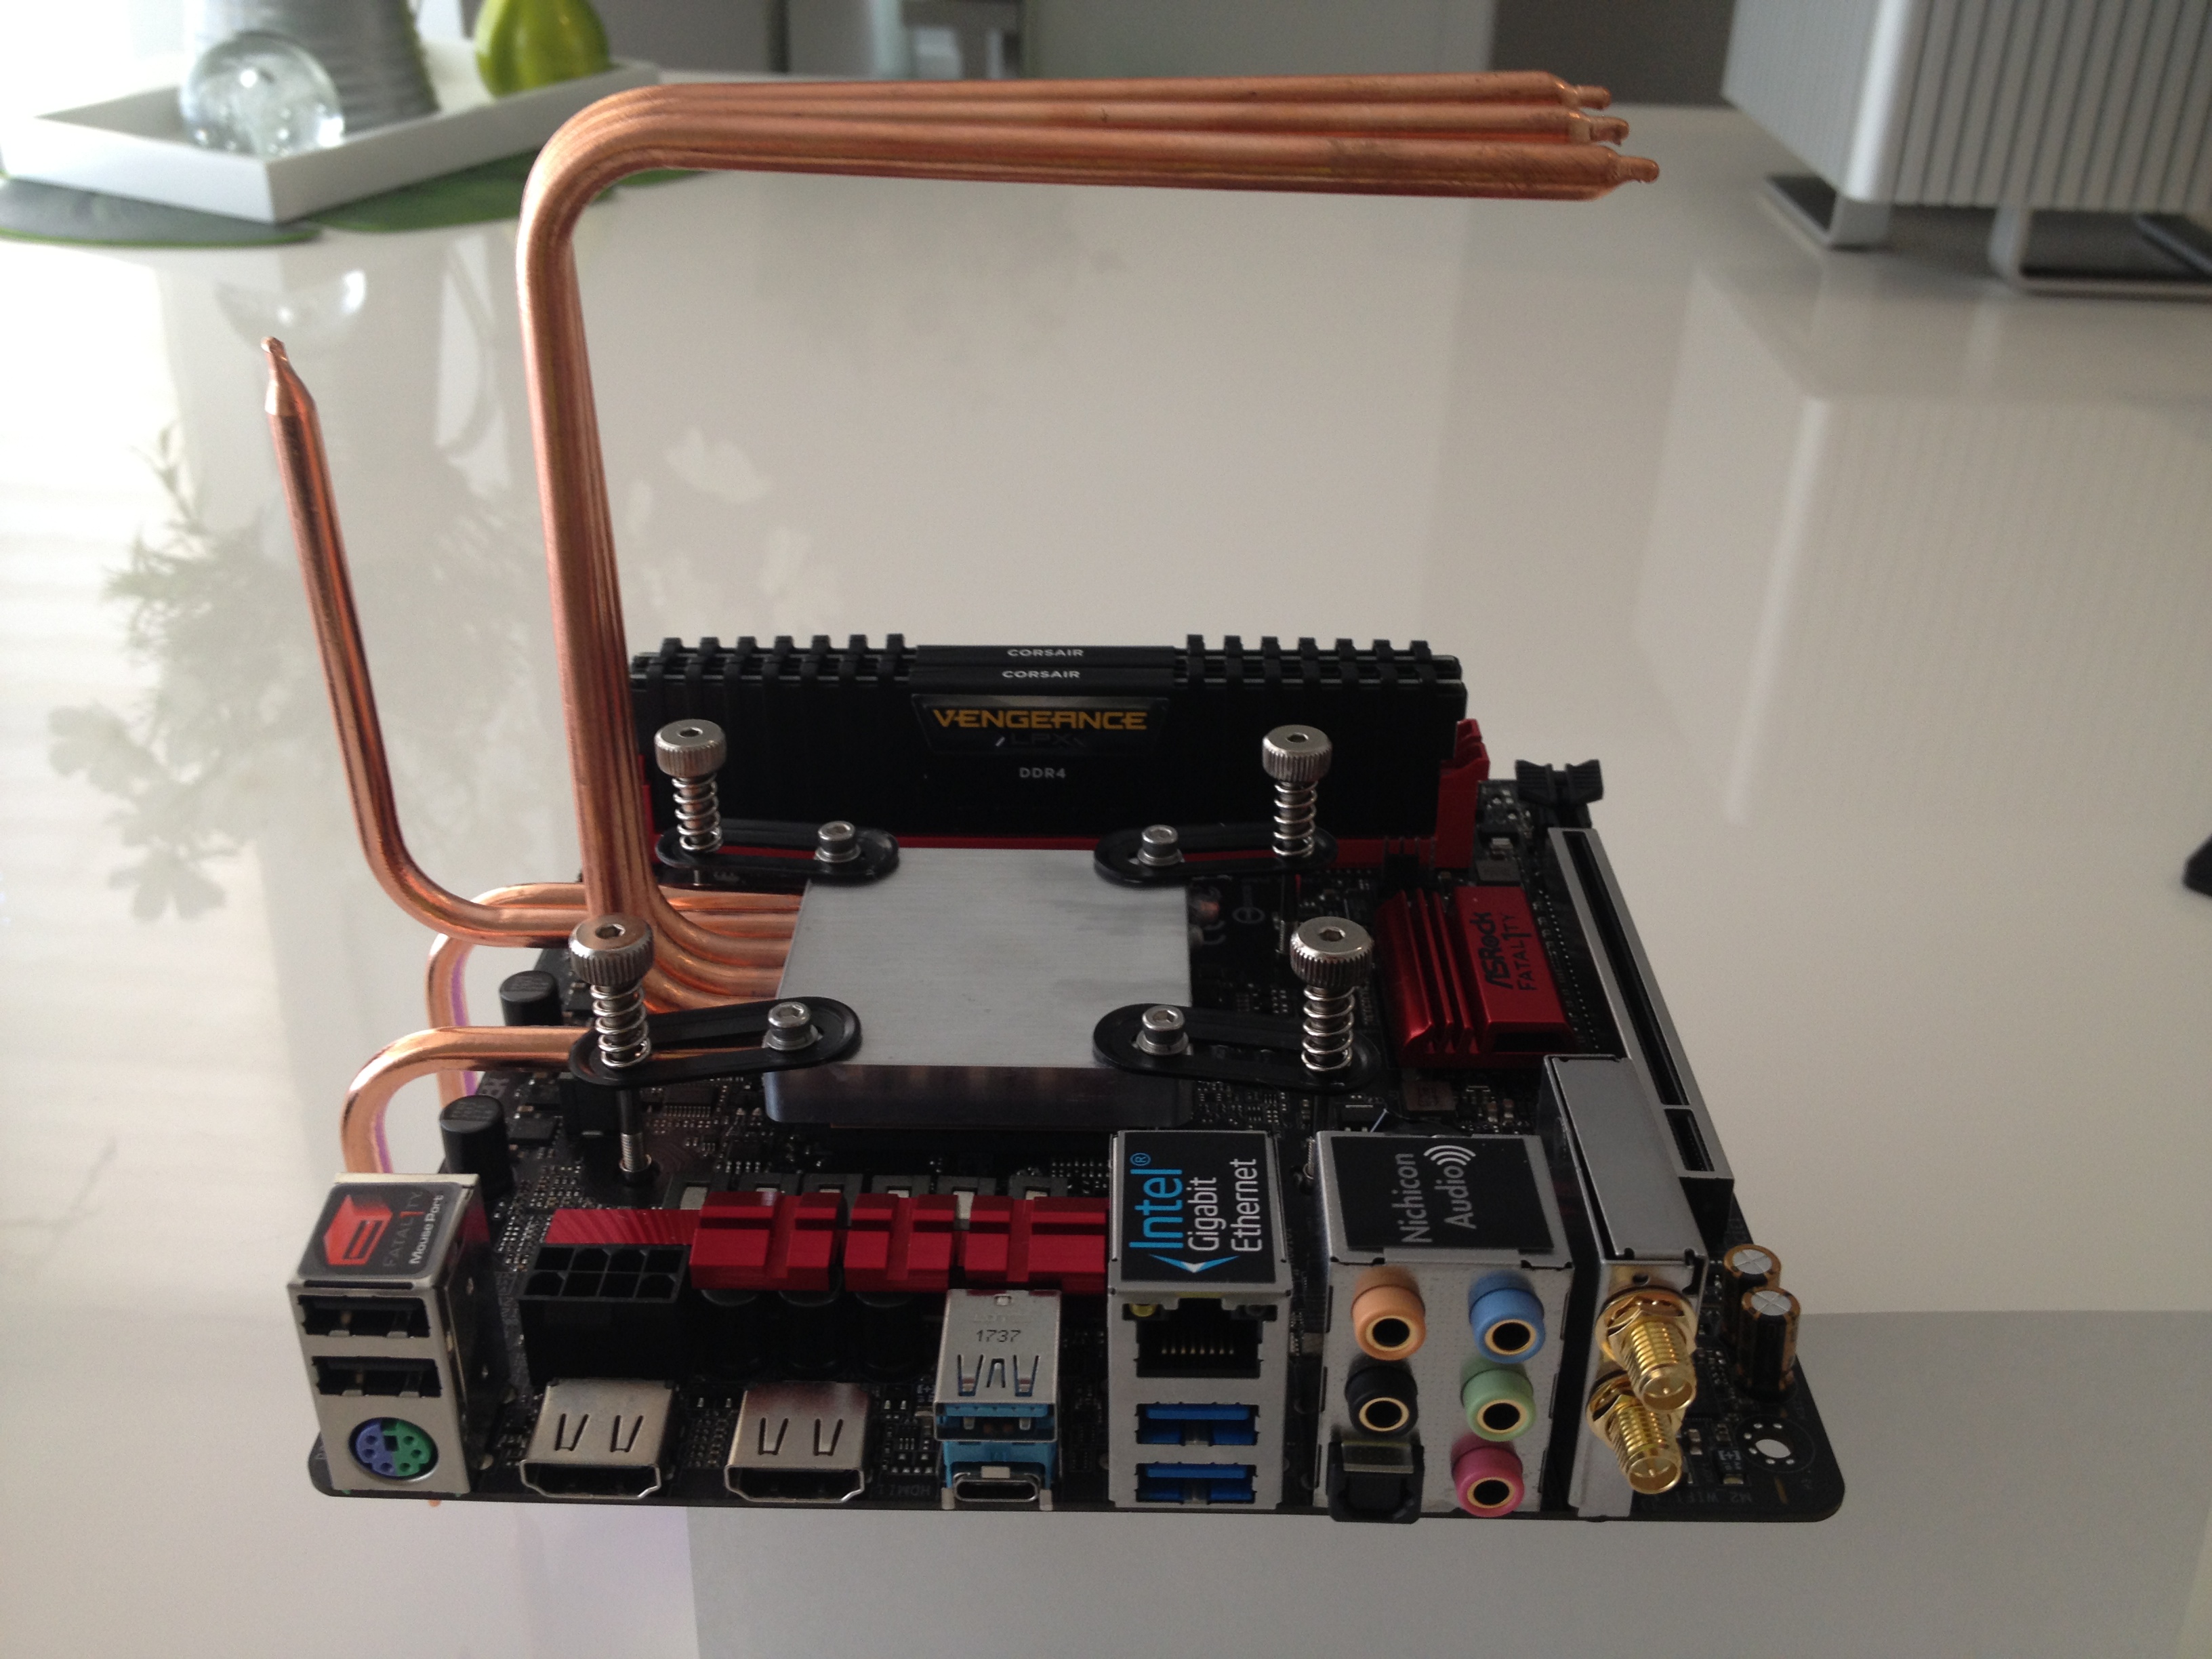
To better understand how small the gaps turned out, here's a photo from a different angle:

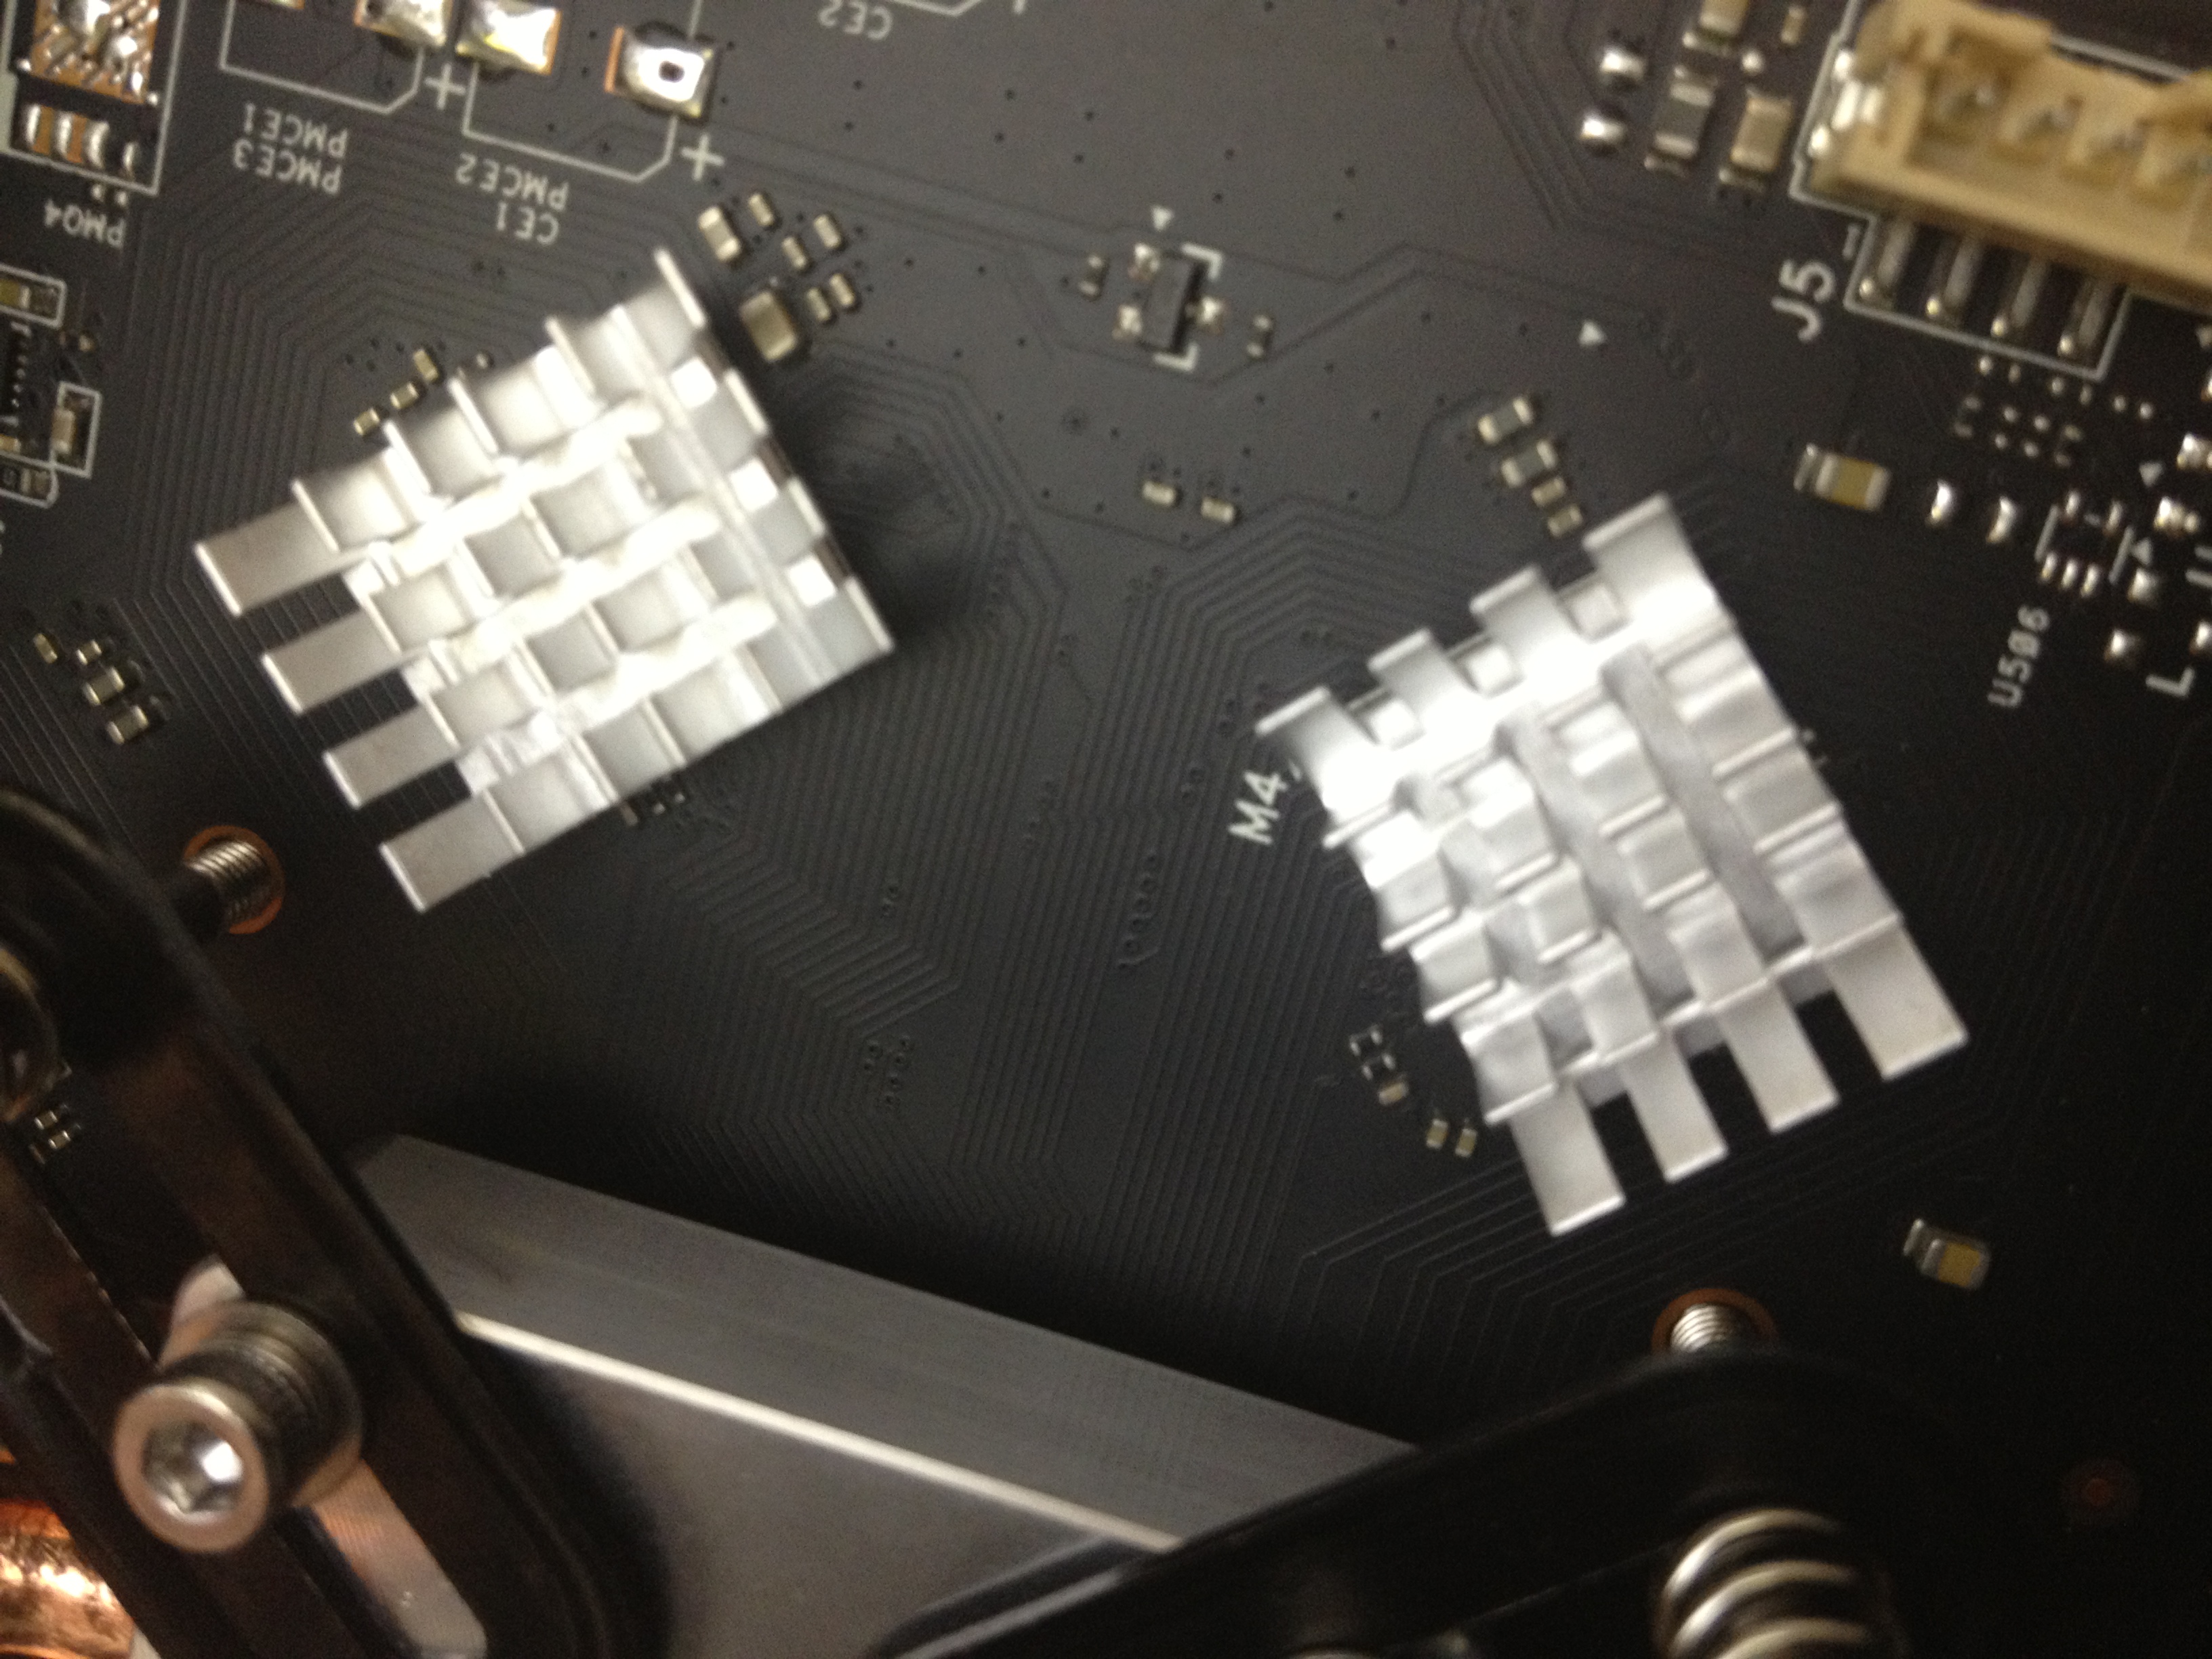
Yes, in some places the gap is literally fractions of a millimeter.
The DB4 comes with equipment that helps heat from The CPU is transferred to one of the side panels - these are four heat pipes and one heat distributor. This configuration supports 65W CPUs. If you add the LH6 Cooling Kit, the CPU can be connected to the two side panels with six handsets and three dispensers, which will allow the use of CPUs up to 105 watts.
In such a system with passive cooling, the power limitations of the CPU are the heat dissipation capabilities. For reference:
- Ryzen 5 2400G 4C8T 3.6GHz - 46-65 W
- Ryzen 5 1600 6C12T 3.2GHz - 65 W
- Ryzen 5 1600X 6C12T 3.6GHz - 95 W
- Ryzen 7 1700 8C16T 3.0GHz - 65 W
- Ryzen 7 1700X 8C16T 3.4GHz - 95 W
- Ryzen 7 1800X 8C16T 3.6GHz - 95 W
So the stock DB4 supports up to 2400G / 1600/1700 - without any overclocking - and the DB4 + LH6 will even support 1600X / 1700X / 1800X - and allow for a bit of overclocking.
Unlike Intel, whose socket support time is comparable to the time needed to decompress the next processor, AMD has much longer socket support time. AM4 will be maintained until 2020. From here, my tricky plan grew - to start in 2018 with a CPU that can cool DB4 + LH6 without problems, which can be accelerated and subjected to stress tests for a couple of years, and then, if the benefits of the upgrade are obvious, add a more efficient CPU when the last processors for AM4 go off the assembly line, based on which it will be possible for another five years.
All this led to the fact that I put Ryzen 5 1600by 65 watts. Since I have a motherboard B350, I have the opportunity to overclock percents to 1600X / 95 W without any problems.
If you lack 65 W and do not need overclocking, you can refuse the LH6 Cooling Kit. The DB4 heat pipes are shorter than the LH6 and do not extend beyond the edge of the motherboard - so you will not have any limitations mentioned in connection with the Gigabyte, Asus and MSI boards.
As for the memory, I only chose the Corsair Vengeance LPX CMK32GX4M2Z2400C16 32GB (2x16GB) DDR4 .

I have never had a problem with Corsair Vengeance LPX RAM. It was listed in the list of compatible modules for my motherboard, and it was also able to overclock it to 3200 MHz for exactly the same mother as me, so I was sure that I could achieve good acceleration with minimal effort - naturally, taking into account Silicon Lottery. I collected the computer not for games and did not use the APU, so for me the memory size was more important than some prohibitive speeds.

SSD is the only option for an absolutely quiet drive, I got rid of the last hard drive more than seven years ago, so the system was initially aimed at using SSD. The only question was - which one.
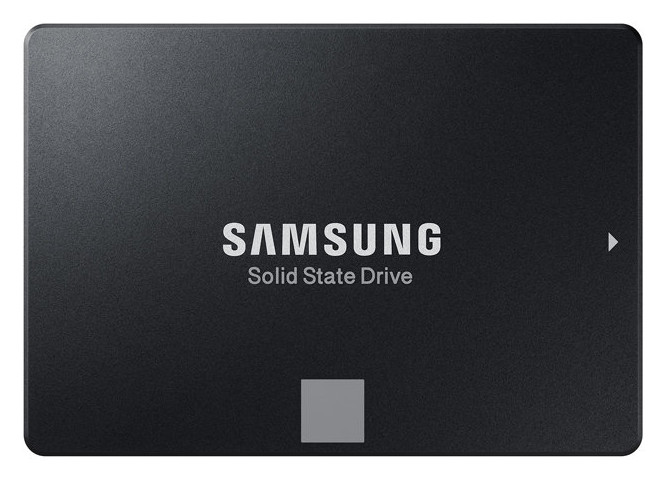
Since there is an M.2 slot on the back of the motherboard, I decided to choose 1 TB Samsung 960 Evo NVMe as the main one and 1 TB Samsung 860 Evo SATA for belay.
I would prefer two NVMe disks (so that there are fewer cables), but the ASRock motherboard has only one M.2 slot. Asus has two such slots, but it is incompatible with the LH6 Cooling Kit. Well, sometimes you have to make compromises.
For my purposes, high data transfer rates and a life expectancy of at least seven years are needed. I need about 600 GB of disk space, so taking a few hundred gigabytes of storage, I can allow the drives some wear and tear and achieve my goal.
Although the system was not designed for gaming, it never hurts to install the best possible GPU that does not melt temperature tubes.GPU Cooling Kit allows you to place a GPU up to 75 W, from which heat will go through the tubes to one of the walls. This limits the choice to a motherboard that is no higher than the GTX 1050 Ti, if you, like me, prefer Nvidia cards.
I wanted MSI GeForce GTX 1050 Ti Aero ITX OC 4GB, but they ended up with my vendor. Because of the frenzy with cryptocurrencies, it was not known how soon they would appear in stock, so I was satisfied with the second card on the list, ASUS Phoenix GeForce GTX 1050 Ti 4GB :
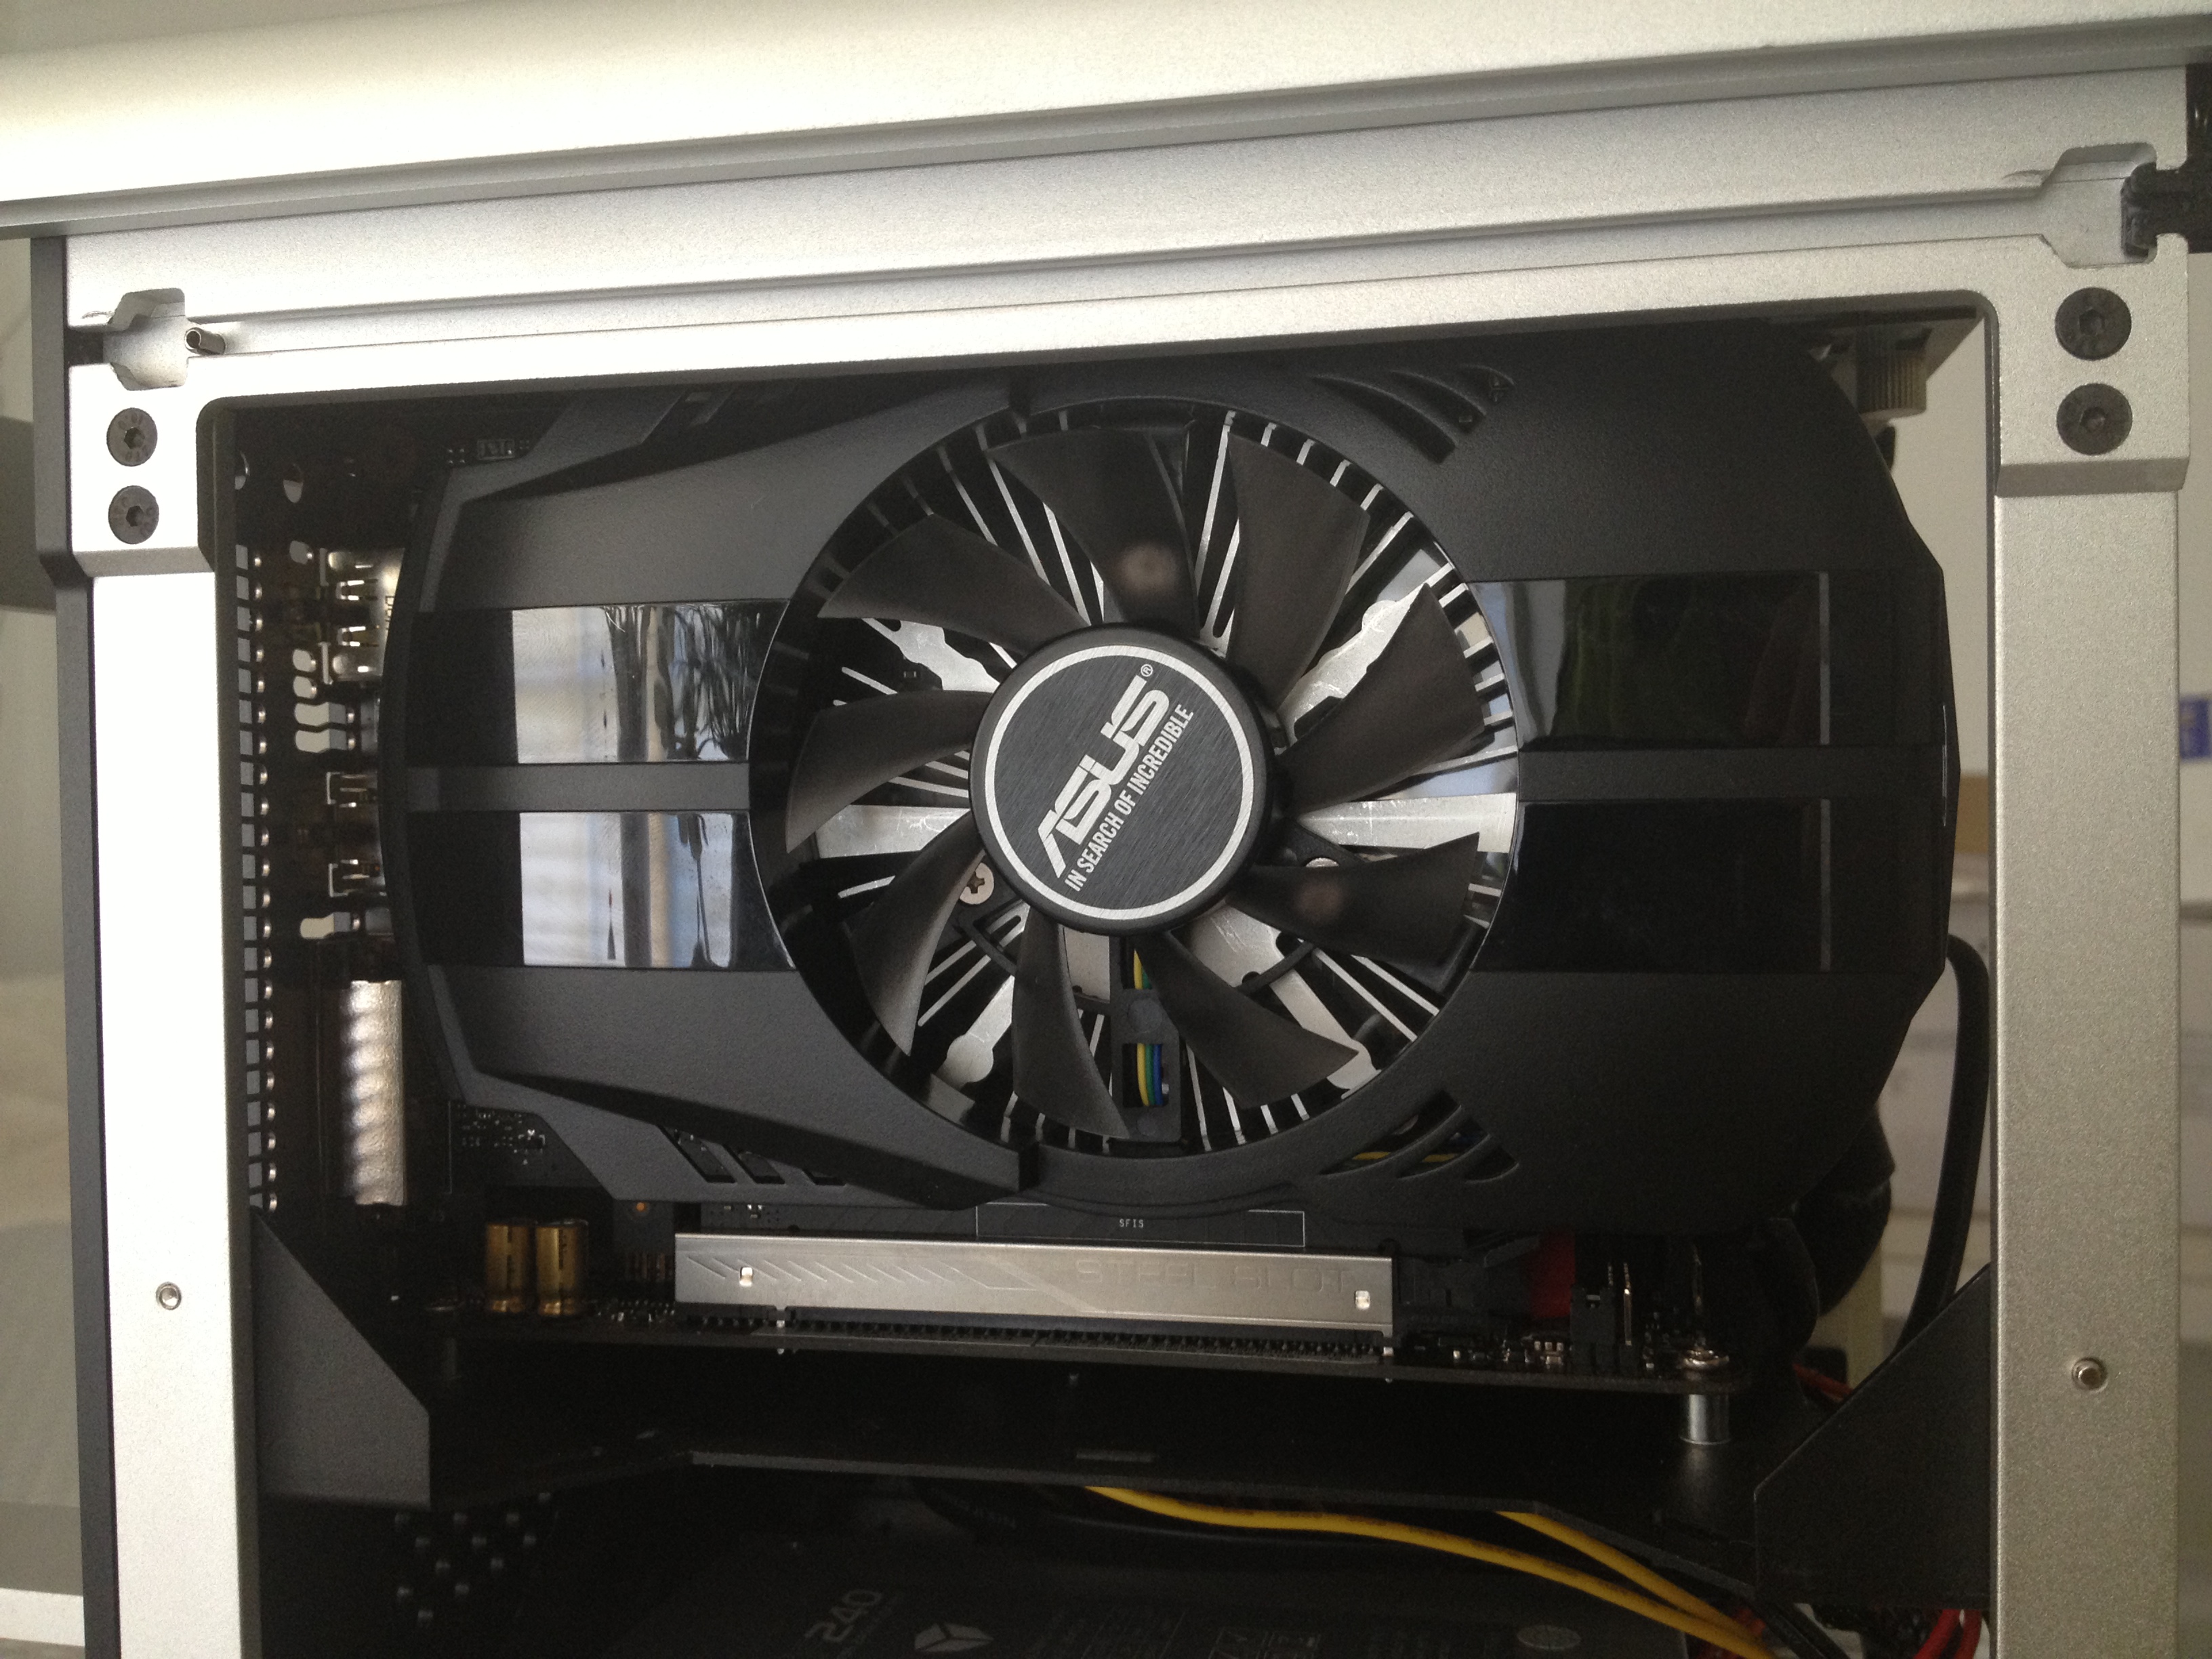
Both of these cards fit into the case, however MSI is several centimeters shorter than Asus. Of course, none of the dual fans of the GPU would ever fit in there.
After removing the fans, the radiator and the case, I cleaned the GPU, added fresh pasta, and then fitted the GPU Cooling Kit:
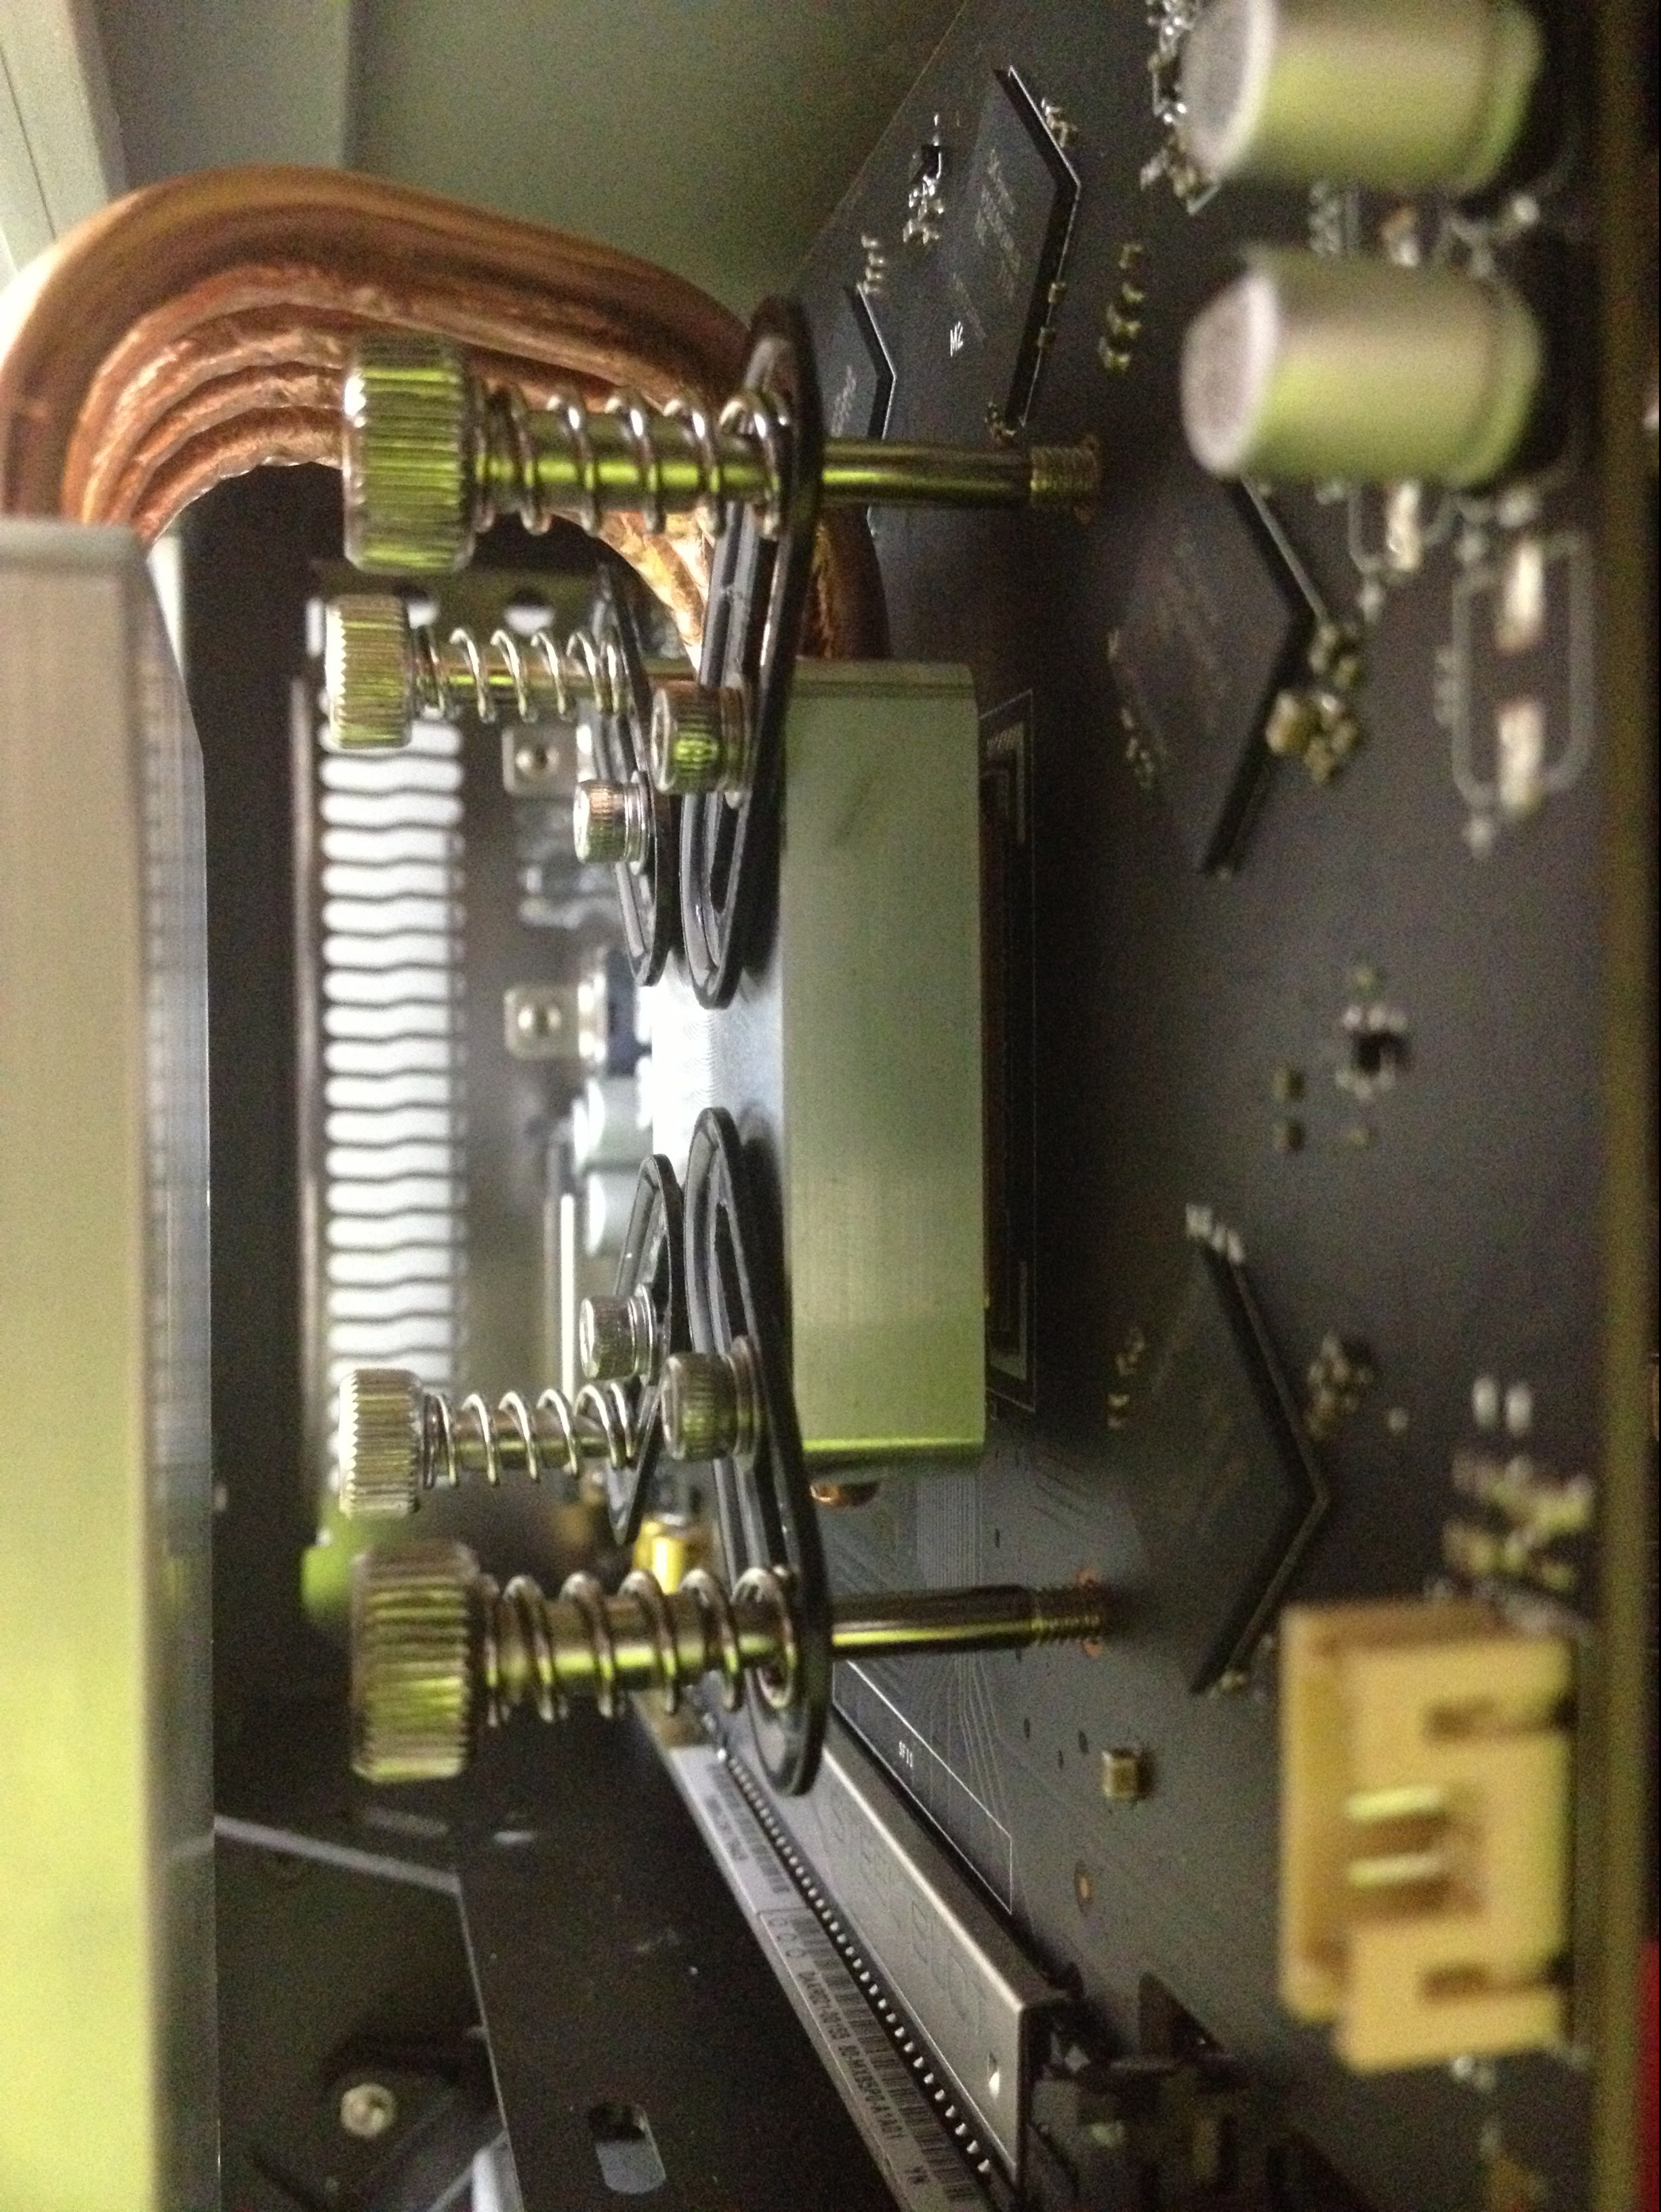
The last step is to add radiators to each of the four VRAM chips:
Testing the consumption of 1050 Ti cards shows that under load, they really eat off 75 watts entirely, so I reach the limits of the GPU Cooling Kit, and no overclocking is expected.
To power all this, I put the Streacom ZF240 Fanless 240W ZeroFlex PSU :
I studied the consumption of all the components and found that all tires, with the exception of 12 V tires, have a rather large margin. The 12-volt bus, theoretically, can reach up to 85% of the load at 168 W, if the CPU and GPU will simultaneously work at 100%. I usually prefer to keep the stock bigger, but since the system is not designed for games, and there are no other options in which I would take both processors at the same time, I don’t see it, I don’t care much. If this becomes a problem, I can easily install an SFX BP and add stock.
Over the years, I began to realize the importance of power supply efficiency curves and realized that a system with a large power supply was a huge waste of energy. To get the maximum benefit from your BP, its typical use should be within 25-75 %%. The efficiency rating of the ZF240 is at 93%, and I think my choice of components will allow it to regularly reach this level - given how I think the computer will be used.
Low power consumption is especially important if you plan to work in places where there is no constant power supply.

Summary notes
The pursuit of silence can cost a pretty penny, and this project has become just that - in the end, it cost almost $ 3,000. If the miners had not inflated the prices of equipment, it would have been possible to keep within 2400 - it is still a lot, but not so painful. Nevertheless, this is less than the three previous systems I have assembled, and the new computer is capable of what they could not do - to ensure complete silence.
The computer does not make noise at the start. It does not make noise when turned off. It does not make noise when idle. No noise with a large load. No noise when reading and writing. You will not hear him in a normal room during the day. You will not hear him in an absolutely quiet house at night. You will not hear it from one meter. You will not hear it from one centimeter. He just can not hear. It took 30 years to achieve this effect, and finally I achieved it. The journey is over and that's great.
If you are trying to assemble a silent one - not just a quiet, but a silent computer, I highly recommend the case with passive cooling, heat pipes and solid-state drives. Eliminate all moving parts (fans and hard drives), and you eliminate noise - it's not that hard. And this will not necessarily be very expensive (my system requirements were not average, so don’t think that all DB4-based systems are so expensive). Silence (and a very decent computer) can be obtained at half the price indicated.
I draw your attention to the fact that this is a translation. The link to the original is at the top, under the heading [approx. transl.]