Read and write NFC Tag on MeeGo Harmattan
- Tutorial
This post participates in the competition “ Smart Phones for Smart Posts ”
 According to Wikipedia, NFC (Near Field Communication) is a short-range wireless high-frequency communication technology that enables the exchange of data between devices located at a distance of about 10 centimeters.
There are three most popular options for using NFC technology in mobile phones:
card emulation - the phone pretends to be a card, for example, a pass or payment card;
reading mode - the phone reads a passive tag (Tag), for example, for interactive advertising;
P2P mode - two phones communicate and exchange information.
We will consider the second method of use, namely, reading a passive tag, moreover, we will also learn how to record information on such tags using a telephone
I will talk not only about the methods of working with NFC, but also about the user interface developed by me specifically for this article. That is, during the reading process, you will go the full way to create an application for working with the NFC Tag for MeeGo Harmattan.

UPDATE: Today, 12/20/2011 , a letter came that the application was accepted in Qt Ambassador
UPDATE: Last night and the project was published in the program: Qt Ambassador Showcase
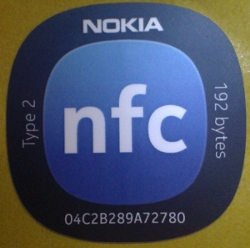 NFC Tag - this is our passive tag. The picture shows the appearance of how it might look, that is, as a rule, it is a sticker made of thick paper, in which a microchip and a foil antenna are built-in. NFC tags come in several types; the maximum allowable data size also depends on the type. I am the lucky owner of several Type 2 tags, 192 bytes brought from Qt Developer Days 2011 . Well, 192 bytes is not a lot, but enough for our experiments.
So, in order to start processing tags, we need an object of the QNdefManager class
Let's create it in the constructor of our NfcManager class , which we will use to work with NFC. We definitely need to connect the targetDetected and targetLost signals of this object to our slots, which, in fact, will be the main handlers of the event the tag appears in the phone’s field of vision. In the third line of the constructor, we set the read and write mode so that we can not only read, but also write tags.
Now consider the described slots:
When a tag is found, just in case, we save a pointer to an object of type QNearFieldTarget , which is the program interface to the tag itself.
Two conditions follow and, depending on the mode (read or write), call the corresponding processing methods. From the point of view of beautiful architecture, this is not the best solution, but I did it intentionally so as not to complicate the code.
When the tag is lost, we simply free up the resources that are used up.
Now consider the tag reading methods:
Reading occurs in asynchronous mode, therefore, in this method, we simply connect the error processing signal and the read completion signal, which is called only if the reading occurred without errors.
After that, we simply call the method to read:
If the reading was successful, then we will end up in this slot, where we will get the first record from the list of entries present on the tag.
Yes, according to the specification, a tag can have several records, but as the documentation says, for Symbian and Harmattan only one record can be read and written.
And so, after several transitions on auxiliary methods, we got to the most important method, which turns information encoded into tags into letters familiar to us.
At the moment, Qt Mobility out of the box supports only two types of entries: links ( Uri ) and text ( Text ), we will return to the third type - Smart Poster below.
As you can see, the data from the record is immediately placed in a new object, these are simple objects that I specially created to facilitate the transfer of data to QML.
At the end, a signal is called containing the object with data. In the future, we will catch this signal in QML.
This method must be called before attempting to write in order to set new Uri and / or Text values. If you do not call it on the tag, the previous data will be written (this approach is useful if you need to write a lot of tags of the same type)
The main writing method is no more complicated than the reading method. In the condition block, we simply select the type of record. If only Uri or Text is present, then the corresponding type is created; if both fields are filled, then a Smart Poster type record is created.
After that, we reconnect the error handler. But, pay attention, since in the backend we do not need any logic for processing the successful completion of reading, we forward the signal to the signal, which we will later catch in QML.
So, Smart Poster is a special type of NFC recording that can contain both a link, a text heading (in several languages), graphic icons in jpeg or png formats, and even an animated icon in mpeg format.
In addition, two more fields may be present:
Action - tells the phone which application and how to open uriRecord
Size for processing — a simple integer that displays the size of the downloaded content by reference.
Below I will tell you how to create your own NDEF record type using the example of creating a type for a Smart Poster record.
Immediately make a reservation that my type is simplified. It supports neither Action nor Size nor even icons, but it allows you to store text and a link at the same time.
This is how the announcement for our Smart Poster class looks:
So, the developers of Qt Mobility have already taken care of making it easier for us to live, and have created two special macros that do all the rough work.
Parameters for macros are: class name, record type (for Smart Poster it is QNdefRecord :: NfcRtd ) and “Type Name” - an abbreviation for recognition in a tag. And also the last parameter in Q_DECLARE_NDEF_RECORD is the data for the initial data initialization, in our case it is an empty byte array.
Now let's look at the implementation of reading and writing methods.
Simple structure for storing the parsed part of the record:
First, consider the methods for reading:
An array of different uri prefixes supported by the spec.
The uri reading method is quite simple at first glance - we load all the bytes read from the record into p , and then read the parts in the array until we find the part of the Uri type (according to the specification, there can be only one) We will consider the
“magic” readPart method a little lower.
The method for title differs only in that there can be many titles in different languages. Therefore, we first select them all, and then try to find the right one.
All the magic happens in the readPart method, which turns the internal recording format into a simple and understandable RecordPart structure
The header of each block consists of:
1 byte, technical flags, in our simplified class we will not check the integrity, etc., so we just skip this byte;
2 bytes, the length of the string with "Type Name";
3 bytes, the length of the main field with information;
4-n bytes, a string with "Type Name" - a string type identifier, for Text it is 'T', for Uri it is 'U'.
Next comes the main data block.
For Uri, these are just two fields of
1 byte per prefix number from the array above and everything else to the link body.
For Text, these are three fields:
1 byte status field, which contains additional flags and the length of the locale.
Locale string, such as " en " or "ru-RU "
And, in fact, the text itself.
Note that this method accepts offset by a non-constant link, and modifies it, thus allowing us to move from one record to another in a loop.
Now let's talk about recording methods. For simplicity, we only consider setUri The method for the title is relatively identical.
The complexity of the installation methods is that it is necessary to take into account the case when some part of Smart Poster (for example Text) is already installed, and now you need to install Uri as well. And this means that we must save the old payload and add a new one. It would seem that there can be no problem in concatenating two QByteArray , but here the very first bytes with flags come into play, the fact is that we need to modify the flag of the first part ( MB ) when adding a new one.
This line of code does this:
As you can see, we add a new part before the old, and not after. This is only because if we added at the end, we would have to run around the old payload to search for the flag of the last part and its modification ( ME )
.
That's all about Smart Poster and about NFC in general.
The main idea of mobile applications in QML is to switch screens in the queue. In terms of Qt components, screens are called pages, and the main container is a window.
main.qml creates a container window here and the main page is specified as the initialization page.
This is the description of the page. By the way, if you noticed, then all standard applications from Nokia have a neat color header. So there is no standard component for this header, despite the fact that they encourage the use of it everywhere in their UI Guidelines .
To navigate between pages, an object of type PageStack is used ; any Page has a pointer to an instance of this class named pageStack . Thus, to go to a new page, we must use the construction
and to return to the previous one:
By the way, if you set the identifier of a specific page for the pop method, you can go back not only to the page, but also to any arbitrary one on the stack.
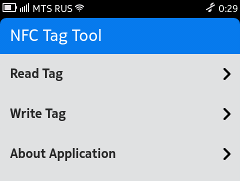 On the main screen, we can observe a list of actions that can be performed, a similar list is done like this:
The ListView element is the list itself, which has two key
delegate properties - the delegate for rendering one list item and model - the data model for the list.
The com.nokia.extras package contains a ready-made ListDelegate component for creating a simple delegate. The ListModel element allows you to specify a simple data model. And ListElement is nothing more than one record of this model.
 For various actions, a mobile application may also have a Toolbar with icons, my application is simple and the toolbar on the internal pages contains only a back button
In order to connect the toolbar to the page, you need to assign it to the tools property , which by default is null
 To display text, you can use the Label component - this is nothing more than a stylized wrapper over a standard Text element.
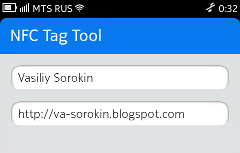 And for the input field, you should use TextField - this is an advanced wrapper over the standard TextInput
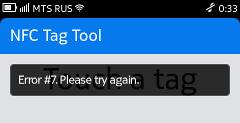 If an error occurred while reading / writing a tag, we must somehow inform the user about it and ask to bring the tag to the phone again, you can use the InfoBanner element
We examined separately all the main QML components that are required for our application, as well as all the necessary program logic. It is time to tie both sides together.
In order for our QML code to see our class for reading and writing control, we must inform the declarative engine about the existence of an object of this class, so in main.cpp we write:
That is, we create an NfcManager object and tell the engine that we should have access to it from QML.
By the way , something broke in the latest QtSDK update , and in order for this code to work correctly, you need to use the workaround described in the bugtracker .
As you, of course, remember, after the label has been read, we emit a signal containing the object with the received data. In order for this object to become available in QML, we must register the class of this object in QML
Having inserted this code in main.cpp , we register data classes for all types of data we have.
However, we prohibit the creation of such objects directly from QML.
When a user lands on a page to write or read a tag, we must execute the following code:
To read
The Component.onCompleted method is executed when the page is fully created. In this method, we hook handlers for errors and for a successful result to our signals from NfcManager (note the syntax for connecting a C ++ signal to the QML slot)
After, we set the reading mode and inform our manager that we should expect the tag to be applied.
Also note the push call
the second parameter allows us to pass the container with the data to the next page, which simply processes the
example:
To record
Very similar, isn't it? The only difference is the call to the setDataForWrite method , which passes the data for writing.
Thus, we got a simple but functional application for the MeeGo Harmattan platform. However, with minimal effort you can turn it into an application for Symbian. As far as I know, some Symbian phones ( C7 for example) also have a built-in NFC chip.
I also want to add that formally on the NFC Tag you can write information in any format that will make it understandable only for your application. Thus, you can come up with many more ways to use this technology.
If you are interested in this topic, I recommend that you familiarize yourself with the official specifications of NFC and NDEF. They can be downloaded on demand absolutely free from this page .
The Qt Connectivity documentation is included in the QtSDK, but sometimes, for example, when developing your own QNdefRecord format, it is not enough, then you are welcome to the Qt Mobility sources - a lot of interesting things can be found there.
According to MeeGo Qt Components, the official documentation in QtSDK also coexists, but sometimes it leaves much to be desired. I recommend that you read the qt-components-examples code that can be found here .
I am going to continue to develop the application, and this is probably not the last post on the NFC Tag.
To stay up to date you can watch the project on gitorius
Or subscribe to my blog, a link to which can be found in the profile.
In the near future, I plan to put the application on the Nokia Store , so look for it there.
Now deb package can be downloaded here .
I express my gratitude for the proofreading of the text of the article for errors and typos for habrapuserov:
dreary_eyes and tass .
Introduction
What is NFC?
According to Wikipedia, NFC (Near Field Communication) is a short-range wireless high-frequency communication technology that enables the exchange of data between devices located at a distance of about 10 centimeters. There are three most popular options for using NFC technology in mobile phones:
card emulation - the phone pretends to be a card, for example, a pass or payment card;
reading mode - the phone reads a passive tag (Tag), for example, for interactive advertising;
P2P mode - two phones communicate and exchange information.
We will consider the second method of use, namely, reading a passive tag, moreover, we will also learn how to record information on such tags using a telephone
What a story?
I will talk not only about the methods of working with NFC, but also about the user interface developed by me specifically for this article. That is, during the reading process, you will go the full way to create an application for working with the NFC Tag for MeeGo Harmattan.
Table of contents
UPDATE: Today, 12/20/2011 , a letter came that the application was accepted in Qt Ambassador
UPDATE: Last night and the project was published in the program: Qt Ambassador Showcase
What is an NFC Tag?
NFC Tag - this is our passive tag. The picture shows the appearance of how it might look, that is, as a rule, it is a sticker made of thick paper, in which a microchip and a foil antenna are built-in. NFC tags come in several types; the maximum allowable data size also depends on the type. I am the lucky owner of several Type 2 tags, 192 bytes brought from Qt Developer Days 2011 . Well, 192 bytes is not a lot, but enough for our experiments.Program logic
Making the application intercept NFC Tags processing
So, in order to start processing tags, we need an object of the QNdefManager class
NfcManager::NfcManager(QObject *parent)
    : QObject(parent), m_manager(new QNearFieldManager(this)), m_cachedTarget(0), m_mode(NfcManager::Read)
{
    connect(m_manager, SIGNAL(targetDetected(QNearFieldTarget*)), this, SLOT(targetDetected(QNearFieldTarget*)));
    connect(m_manager, SIGNAL(targetLost(QNearFieldTarget*)), this, SLOT(targetLost(QNearFieldTarget*)));
    m_manager->setTargetAccessModes(QNearFieldManager::NdefReadTargetAccess | QNearFieldManager::NdefWriteTargetAccess);
}
Let's create it in the constructor of our NfcManager class , which we will use to work with NFC. We definitely need to connect the targetDetected and targetLost signals of this object to our slots, which, in fact, will be the main handlers of the event the tag appears in the phone’s field of vision. In the third line of the constructor, we set the read and write mode so that we can not only read, but also write tags.
Interceptor
Now consider the described slots:
void NfcManager::targetDetected(QNearFieldTarget *target)
{
    if (m_cachedTarget)
        delete m_cachedTarget;
    m_cachedTarget = target;
    if (m_mode == Read)
        readTarget(m_cachedTarget);
    if (m_mode == Write)
        writeTarget(m_cachedTarget);
}
When a tag is found, just in case, we save a pointer to an object of type QNearFieldTarget , which is the program interface to the tag itself.
Two conditions follow and, depending on the mode (read or write), call the corresponding processing methods. From the point of view of beautiful architecture, this is not the best solution, but I did it intentionally so as not to complicate the code.
void NfcManager::targetLost(QNearFieldTarget *target)
{
    m_cachedTarget = 0;
    target->deleteLater();
}
When the tag is lost, we simply free up the resources that are used up.
Reading
Now consider the tag reading methods:
void NfcManager::readTarget(QNearFieldTarget *target)
{
    connect(target, SIGNAL(error(QNearFieldTarget::Error,QNearFieldTarget::RequestId)), this, SLOT(errorHandler(QNearFieldTarget::Error,QNearFieldTarget::RequestId)));
    connect(target, SIGNAL(ndefMessageRead(QNdefMessage)), this, SLOT(readRecords(QNdefMessage)));
    target->readNdefMessages();
}
Reading occurs in asynchronous mode, therefore, in this method, we simply connect the error processing signal and the read completion signal, which is called only if the reading occurred without errors.
After that, we simply call the method to read:
void NfcManager::readRecords(const QNdefMessage &message)
{
    if (message.isEmpty())
        return;
    QNdefRecord record = message.at(0); // Read only first
    readRecord(record);
}
If the reading was successful, then we will end up in this slot, where we will get the first record from the list of entries present on the tag.
Yes, according to the specification, a tag can have several records, but as the documentation says, for Symbian and Harmattan only one record can be read and written.
void NfcManager::readRecord(const QtMobility::QNdefRecord &record)
{
    DataContainer *result = 0;
    if (record.isRecordType()) {
        QNdefNfcUriRecord uriRecord(record);
        result = new UriDataContainer(uriRecord.payload(), uriRecord.uri().toString());
    }
    else if (record.isRecordType()) {
        QNdefNfcTextRecord textRecord(record);
        result = new TextDataContainer(textRecord.payload(), textRecord.text());
    }
    else if (record.isRecordType()) {
        NdefNfcSmartPosterRecord smartPosterRecord(record);
        result = new SmartPosterDataContainer(smartPosterRecord.payload(), smartPosterRecord.uri().toString(), smartPosterRecord.title());
    }
    else {
        result = new DataContainer(record.payload());
    }
    emit tagReadFinished(result);
}
And so, after several transitions on auxiliary methods, we got to the most important method, which turns information encoded into tags into letters familiar to us.
At the moment, Qt Mobility out of the box supports only two types of entries: links ( Uri ) and text ( Text ), we will return to the third type - Smart Poster below.
As you can see, the data from the record is immediately placed in a new object, these are simple objects that I specially created to facilitate the transfer of data to QML.
At the end, a signal is called containing the object with data. In the future, we will catch this signal in QML.
Record
void NfcManager::setDataForWrite(const QString &text, const QString &uri)
{
    m_textForWrite = text;
    m_uriForWrite = uri;
}
This method must be called before attempting to write in order to set new Uri and / or Text values. If you do not call it on the tag, the previous data will be written (this approach is useful if you need to write a lot of tags of the same type)
void NfcManager::writeTarget(QNearFieldTarget *target)
{
    if (m_textForWrite.isEmpty() && m_uriForWrite.isEmpty())
        return;
    m_cachedTarget = target;
    QNdefMessage message;
    if (!m_textForWrite.isEmpty() && !m_uriForWrite.isEmpty()) {
        NdefNfcSmartPosterRecord smartPosterRecord;
        smartPosterRecord.setTitle(m_textForWrite);
        smartPosterRecord.setUri(QUrl(m_uriForWrite));
        message.append(smartPosterRecord);
    } else if (!m_textForWrite.isEmpty()) {
        QNdefNfcTextRecord textRecord;
        textRecord.setText(m_textForWrite);
        message.append(textRecord);
    } else {
        QNdefNfcUriRecord uriRecord;
        uriRecord.setUri(QUrl(m_uriForWrite));
        message.append(uriRecord);
    }
    connect(target, SIGNAL(error(QNearFieldTarget::Error,QNearFieldTarget::RequestId)), this, SLOT(errorHandler(QNearFieldTarget::Error,QNearFieldTarget::RequestId)));
    connect(target, SIGNAL(ndefMessagesWritten()), this, SIGNAL(tagWriteFinished()));
    target->writeNdefMessages(QList() << message);
}
The main writing method is no more complicated than the reading method. In the condition block, we simply select the type of record. If only Uri or Text is present, then the corresponding type is created; if both fields are filled, then a Smart Poster type record is created.
After that, we reconnect the error handler. But, pay attention, since in the backend we do not need any logic for processing the successful completion of reading, we forward the signal to the signal, which we will later catch in QML.
Smart Poster, what is it?
So, Smart Poster is a special type of NFC recording that can contain both a link, a text heading (in several languages), graphic icons in jpeg or png formats, and even an animated icon in mpeg format.
In addition, two more fields may be present:
Action - tells the phone which application and how to open uriRecord
Size for processing — a simple integer that displays the size of the downloaded content by reference.
We write our class for Smart Poster
Below I will tell you how to create your own NDEF record type using the example of creating a type for a Smart Poster record.
Immediately make a reservation that my type is simplified. It supports neither Action nor Size nor even icons, but it allows you to store text and a link at the same time.
This is how the announcement for our Smart Poster class looks:
class NdefNfcSmartPosterRecord : public QNdefRecord
{
public:
    Q_DECLARE_NDEF_RECORD(NdefNfcSmartPosterRecord, QNdefRecord::NfcRtd, "Sp", QByteArray())
    void setTitle(const QString &title, const QString &locale = "en");
    void setUri(const QUrl &uri);
    QString title(const QString &locale = "en") const;
    QUrl uri() const;
    //TODO:  Add icon, action and size fields support
private:
     RecordPart readPart(int &offset) const;
};
Q_DECLARE_ISRECORDTYPE_FOR_NDEF_RECORD(NdefNfcSmartPosterRecord, QNdefRecord::NfcRtd, "Sp")
So, the developers of Qt Mobility have already taken care of making it easier for us to live, and have created two special macros that do all the rough work.
Parameters for macros are: class name, record type (for Smart Poster it is QNdefRecord :: NfcRtd ) and “Type Name” - an abbreviation for recognition in a tag. And also the last parameter in Q_DECLARE_NDEF_RECORD is the data for the initial data initialization, in our case it is an empty byte array.
Now let's look at the implementation of reading and writing methods.
Simple structure for storing the parsed part of the record:
struct RecordPart {
    enum Type {
        Uri,
        Text,
        Action,
        Icon,
        Size,
        Unknown
    };
    Type type;
    QString text;
    QString locale; // For text type
    quint8 prefix; // For Uri type
    RecordPart()
        : type(Unknown), text(QString()), locale(QString()), prefix(0)
    {
    }
};
First, consider the methods for reading:
static const char * const abbreviations[] = {
    0,
    "http://www.",
    "https://www.",
    "http://",
//  пропускаю множество форматов
    "urn:epc:",
    "urn:nfc:",
};
An array of different uri prefixes supported by the spec.
QUrl NdefNfcSmartPosterRecord::uri() const
{
    const QByteArray p = payload();
    if (p.isEmpty())
        return QUrl();
    if (p.isEmpty())
        return QString();
    int offset = 0;
    QString uri;
    while (offset < p.size()) {
        RecordPart part = readPart(offset);
        if (part.type == RecordPart::Uri) {
            if (part.prefix > 0 && part.prefix < (sizeof(abbreviations) / sizeof(*abbreviations)))
                uri = QString(abbreviations[part.prefix]) + part.text;
        }
    }
    if (uri.isEmpty())
        return QUrl();
    return QUrl(uri);
}
The uri reading method is quite simple at first glance - we load all the bytes read from the record into p , and then read the parts in the array until we find the part of the Uri type (according to the specification, there can be only one) We will consider the
“magic” readPart method a little lower.
QString NdefNfcSmartPosterRecord::title(const QString &locale) const
{
    const QByteArray p = payload();
    if (p.isEmpty())
        return QString();
    int offset = 0;
    QMap title;
    while (offset < p.size()) {
        RecordPart part = readPart(offset);
        if (part.type == RecordPart::Text) {
            title.insert(part.locale, part.text);
        }
    }
    if (title.isEmpty())
        return QString();
    if (title.contains(locale))
        return title.value(locale);
    if (title.contains("en"))
        return title.value("en");
    return title.constBegin().value();
}
The method for title differs only in that there can be many titles in different languages. Therefore, we first select them all, and then try to find the right one.
All the magic happens in the readPart method, which turns the internal recording format into a simple and understandable RecordPart structure
RecordPart NdefNfcSmartPosterRecord::readPart(int &offset) const
{
    RecordPart result;
    const QByteArray p = payload();
.....
    //This block has pointer arithmetic, don't edit
    quint8 typeLength = p[++offset];
    quint8 payloadLength = p[++offset];
    QString type = QString(p.mid(++offset, typeLength));
    offset += typeLength - 1;
    if (type == "U") {
        result.type = RecordPart::Uri;
        result.prefix = p[++offset];
        result.text = QString(p.mid(++offset, payloadLength - 1));
        offset += payloadLength - 1;
    }
    if (type == "T") {
        result.type = RecordPart::Text;
        quint8 localeLength = p[++offset];
        result.locale = QString(p.mid(++offset, localeLength)); // 5 bytes of locale string
        offset += localeLength - 1;
        result.text = QString(p.mid(++offset, payloadLength - 1 - localeLength));
        offset += payloadLength - 1 - localeLength;
    }
.....
    //TODO: Add handler for icon
    return result;
}
The header of each block consists of:
1 byte, technical flags, in our simplified class we will not check the integrity, etc., so we just skip this byte;
2 bytes, the length of the string with "Type Name";
3 bytes, the length of the main field with information;
4-n bytes, a string with "Type Name" - a string type identifier, for Text it is 'T', for Uri it is 'U'.
Next comes the main data block.
For Uri, these are just two fields of
1 byte per prefix number from the array above and everything else to the link body.
For Text, these are three fields:
1 byte status field, which contains additional flags and the length of the locale.
Locale string, such as " en " or "ru-RU "
And, in fact, the text itself.
Note that this method accepts offset by a non-constant link, and modifies it, thus allowing us to move from one record to another in a loop.
Now let's talk about recording methods. For simplicity, we only consider setUri The method for the title is relatively identical.
void NdefNfcSmartPosterRecord::setUri(const QUrl &uri)
{
    //Don't edit - pointer arithmetic
    QByteArray p;
    int abbrevs = sizeof(abbreviations) / sizeof(*abbreviations);
    for (int i = 1; i < abbrevs; ++i) {
        if (uri.toString().startsWith(QLatin1String(abbreviations[i]))) {
            p[0] = i;
            p += uri.toString().mid(qstrlen(abbreviations[i])).toUtf8();
        }
    }
    QByteArray oldPayload = payload();
    QByteArray uHeader(4, 0);
    uHeader[0] = 0b01 + 0b00010000;
    uHeader[1] = 1;
    uHeader[2] = p.size();
    uHeader[3] = 'U';
    if (!oldPayload.isEmpty())
    {
        uHeader[0] = uHeader[0] + 0b10000000;
        // change MB flag here
        oldPayload[0] = oldPayload[0] & 0b01111111;
    }
    if (oldPayload.isEmpty())
    {
        uHeader[0] = uHeader[0] + 0b10000000 + 0b01000000;
    }
    p.prepend(uHeader);
    p.append(oldPayload);
    setPayload(p);
}
The complexity of the installation methods is that it is necessary to take into account the case when some part of Smart Poster (for example Text) is already installed, and now you need to install Uri as well. And this means that we must save the old payload and add a new one. It would seem that there can be no problem in concatenating two QByteArray , but here the very first bytes with flags come into play, the fact is that we need to modify the flag of the first part ( MB ) when adding a new one.
This line of code does this:
// change MB flag here
oldPayload[0] = oldPayload[0] & 0b01111111;
As you can see, we add a new part before the old, and not after. This is only because if we added at the end, we would have to run around the old payload to search for the flag of the last part and its modification ( ME )
.
That's all about Smart Poster and about NFC in general.
Program interface
Page and PageStack
The main idea of mobile applications in QML is to switch screens in the queue. In terms of Qt components, screens are called pages, and the main container is a window.
import QtQuick 1.1
import com.nokia.meego 1.0
PageStackWindow {
    id: appWindow
    initialPage: mainPage
    MainPage {
        id: mainPage
    }
}
main.qml creates a container window here and the main page is specified as the initialization page.
Page {
    id: mainPage
.....
    Header {
        id: header
        anchors {
            top: parent.top
            right: parent.right
            left: parent.left
        }
    }
.....
This is the description of the page. By the way, if you noticed, then all standard applications from Nokia have a neat color header. So there is no standard component for this header, despite the fact that they encourage the use of it everywhere in their UI Guidelines .
To navigate between pages, an object of type PageStack is used ; any Page has a pointer to an instance of this class named pageStack . Thus, to go to a new page, we must use the construction
pageStack.push(Qt.resolvedUrl("NewPage.qml"))
and to return to the previous one:
pageStack.pop()
By the way, if you set the identifier of a specific page for the pop method, you can go back not only to the page, but also to any arbitrary one on the stack.
Listview
On the main screen, we can observe a list of actions that can be performed, a similar list is done like this:ListView {
id: actionList
....
delegate: ListDelegate {
anchors {
left : parent.left
leftMargin: 20
}
onClicked: {
pageStack.push(Qt.resolvedUrl(model.source))
}
MoreIndicator {
anchors {
verticalCenter: parent.verticalCenter
right: parent.right
rightMargin: 30
}
}
}
model: ListModel {
ListElement {
title: "Read Tag"
subtitle: ""
source: "ReadPage.qml"
}
......
}
}
The ListView element is the list itself, which has two key
delegate properties - the delegate for rendering one list item and model - the data model for the list.
The com.nokia.extras package contains a ready-made ListDelegate component for creating a simple delegate. The ListModel element allows you to specify a simple data model. And ListElement is nothing more than one record of this model.
Toolbar
For various actions, a mobile application may also have a Toolbar with icons, my application is simple and the toolbar on the internal pages contains only a back buttonPage {
id: readPage
.....
tools: ToolBarLayout {
ToolIcon {
iconId: "toolbar-back"
onClicked: {
pageStack.pop()
}
}
}
.....
In order to connect the toolbar to the page, you need to assign it to the tools property , which by default is null
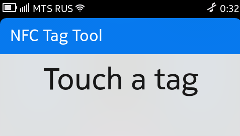
Label and TextField
To display text, you can use the Label component - this is nothing more than a stylized wrapper over a standard Text element.Label {
id: touchLabel
.....
font.pixelSize: 60
text: qsTr("Touch a tag")
}
TextField {
    id: textEdit
.....
    placeholderText: qsTr("Text")
    text: "yandex"
}
Infobanner
If an error occurred while reading / writing a tag, we must somehow inform the user about it and ask to bring the tag to the phone again, you can use the InfoBanner elementInfoBanner{
id: errorBanner
timerEnabled: true
timerShowTime: 3 * 1000
topMargin: header.height + 20
leftMargin: 20
}
Putting it all together
We examined separately all the main QML components that are required for our application, as well as all the necessary program logic. It is time to tie both sides together.
setContextProperty
In order for our QML code to see our class for reading and writing control, we must inform the declarative engine about the existence of an object of this class, so in main.cpp we write:
NfcManager *nfcManager = new NfcManager();
viewer->rootContext()->setContextProperty("NfcManager", nfcManager);
That is, we create an NfcManager object and tell the engine that we should have access to it from QML.
By the way , something broke in the latest QtSDK update , and in order for this code to work correctly, you need to use the workaround described in the bugtracker .
qmlRegisterType
As you, of course, remember, after the label has been read, we emit a signal containing the object with the received data. In order for this object to become available in QML, we must register the class of this object in QML
qmlRegisterType();
qmlRegisterType();
qmlRegisterType();
qmlRegisterType();
Having inserted this code in main.cpp , we register data classes for all types of data we have.
However, we prohibit the creation of such objects directly from QML.
Interaction
When a user lands on a page to write or read a tag, we must execute the following code:
To read
function tagWasRead(container) {
    NfcManager.stopDetection()
    readPage.dataContainer = container
    pageStack.push(Qt.resolvedUrl("ReadResultPage.qml"), {dataContainer: readPage.dataContainer})
}
function readError(string) {
    errorBanner.text = string
    errorBanner.show()
}
Component.onCompleted: {
    NfcManager.tagReadFinished.connect(readPage.tagWasRead)
    NfcManager.accessError.connect(readPage.readError)
    NfcManager.setReadMode()
    NfcManager.startDetection()
}
The Component.onCompleted method is executed when the page is fully created. In this method, we hook handlers for errors and for a successful result to our signals from NfcManager (note the syntax for connecting a C ++ signal to the QML slot)
After, we set the reading mode and inform our manager that we should expect the tag to be applied.
Also note the push call
pageStack.push(Qt.resolvedUrl("ReadResultPage.qml"), {dataContainer: readPage.dataContainer})
the second parameter allows us to pass the container with the data to the next page, which simply processes the
example:
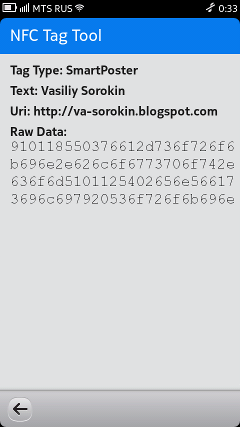
.....
Label {
    id: rawDataLabel
    width: parent.width
    font.pixelSize: 30
    font.family: "Courier New"
    text: readPage.dataContainer.rawHexData()
    wrapMode: Text.WrapAnywhere
}
.....
To record
function tagWasWritten() {
.....
}
function writeError(string) {
.....
}
Component.onCompleted: {
    NfcManager.tagWriteFinished.connect(writePage.tagWasWritten)
    NfcManager.accessError.connect(writePage.writeError)
    NfcManager.setWriteMode()
    NfcManager.setDataForWrite(writePage.text, writePage.uri)
    NfcManager.startDetection()
}
Very similar, isn't it? The only difference is the call to the setDataForWrite method , which passes the data for writing.
Conclusion
Thus, we got a simple but functional application for the MeeGo Harmattan platform. However, with minimal effort you can turn it into an application for Symbian. As far as I know, some Symbian phones ( C7 for example) also have a built-in NFC chip.
I also want to add that formally on the NFC Tag you can write information in any format that will make it understandable only for your application. Thus, you can come up with many more ways to use this technology.
What to read
If you are interested in this topic, I recommend that you familiarize yourself with the official specifications of NFC and NDEF. They can be downloaded on demand absolutely free from this page .
The Qt Connectivity documentation is included in the QtSDK, but sometimes, for example, when developing your own QNdefRecord format, it is not enough, then you are welcome to the Qt Mobility sources - a lot of interesting things can be found there.
According to MeeGo Qt Components, the official documentation in QtSDK also coexists, but sometimes it leaves much to be desired. I recommend that you read the qt-components-examples code that can be found here .
Additionally
I am going to continue to develop the application, and this is probably not the last post on the NFC Tag.
To stay up to date you can watch the project on gitorius
Or subscribe to my blog, a link to which can be found in the profile.
In the near future, I plan to put the application on the Nokia Store , so look for it there.
Now deb package can be downloaded here .
Acknowledgments
I express my gratitude for the proofreading of the text of the article for errors and typos for habrapuserov:
dreary_eyes and tass .