Effective photo processing in Photoshop
When reading articles about Photoshop, I am often surprised at how many authors complicate the solution of essentially simple processing tasks. Many "monumental" writers, for example, Dan Margulis, also suffer from this. But it’s excusable to him - his task is to write about all the subtleties and nuances of the processing process, to consider it from all angles and sides. Although this particular feature of the presentation of material in his books repels many readers.
In fact, the roots of these “sharpen in 40 actions” methods grow out of a very simple thing - people who write these lessons have never worked with large volumes of photographs. That is, as a rule, they have a couple of photos and they are ready to kill an evening or two in the process of processing them. But when you have regular orders, and with each photo shoot you need to seriously process a few dozen frames - you begin to think about simpler and more convenient processing methods.
We’ll talk about them today. I will tell you about five simple, but very effective Photoshop tools that I constantly use in my work.
Before processing photos in Photoshop, I always first work with frames in a RAW converter. It is there that I carry out the basic color correction and primary processing of photographs. In fact, I create a “skeleton” of processing, and in Photoshop I work already with the details of the photo.
So, we have worked with photography in a RAW converter and open it in Photoshop. Photoshop meets us with a huge number of processing tools for all occasions. But we will talk about the simplest and most effective of them.
1. Dodge Tool / Burn Tool

The main function of the Dodge Tool / Burn Tool is to lighten / darken certain parts of the image. In fact, you can “paint” the dimming or vice versa - lighten the picture. It is very simple, try it: I am sure you will appreciate this tool. The Dodge / Burn Tool has only two, but very important settings.
Range - Selecting the application
You can use this tool in the dark (Shadows), light (Highlights) or neutral (Midtones) areas of the photo. For example, you need to lighten the dark areas of the chin (when processing the portrait ), and leave the light untouched. In this case, we put the Shadows mode in the Dodge Tool, and it will lighten only the dark areas of the places where we apply it.
Exposure - Impact Strength
It is very important to correctly set the strength of the impact. Many people experimenting with Photoshop try Dodge / Burn 100%. And, darkening the image, get black "holes", and brightening - continuous overexposure. Of course, getting such a result, they no longer return to this tool. But Dodge / Burn is a subtle tool. If you work in shadows or highlights, try the strength of the application at 7-10%, if with neutral areas - 10-20%. For each case, the force of influence is selected separately, but after a little work with this tool, you will begin to feel what kind of power is needed in each case.
Using
Dodge / Burn has a ton of uses:
- Lighten the iris
- Darken the lines of the shape of the face in a male portrait
- Lighten backlight areas
- Teeth Whiten Your Models
It is using the Dodge Tool that it’s easiest and most effective to whiten teeth in a photograph. A little later I will definitely write a separate lesson on the correct teeth whitening using the Dogde Tool.
2. Clone Stamp

In Photoshop, there are several tools for retouching images, and each of them is good in its own way. But Stamp is the most versatile tool in use.
Its function is to take a specific section of the image and copy it. Thus, we can, for example, retouch wrinkles - simply by “replacing” them with areas of smooth skin. To do this, press Alt and select the area where the picture will be taken from, and then, simply clicking on the desired parts of the image, we will copy it to them.
In the stamp settings, it is important to pay attention to two parameters:
Mode
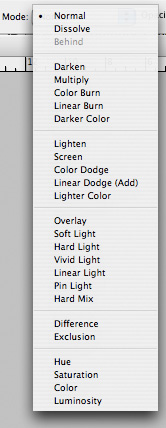
These are the modes in which the stamp will work. For example, in Darken mode, the stamp will “replace” only the lighter areas than the selected area. In fact - you can darken the light areas of the image, that's why the name of the mode is Darken. And, accordingly, in the Lighten mode, the stamp will work only on darker areas of the image, brightening them.
Clone Stamp has many modes of operation - experiment with them, I'm sure you will get interesting results.
In my opinion, it makes no sense to describe the operation of each mode - in Photoshop, for all the tools, essentially the same principles of the modes work, they operate, only slightly changing to the specifics of a particular tool.
Opacity
Opacity means opacity. Simply put, the less you set the percentage in this setting, the more transparent the “work” of the stamp will be. For example, at 100% the stamp will completely replace the selected area, and at 50% it will be translucent. For face retouching, as a rule, 10-30% is used, otherwise the stamp trace will be too clearly visible.
Using Clone Stamp
- Retouch
Retouching in all its manifestations is the main purpose of the stamp. First of all, the stamp is used to retouch the skin - to remove wrinkles, bruises under the eyes, swelling and other beautiful creations of mother nature.
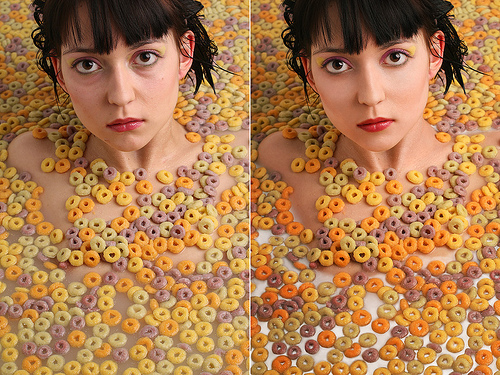
You can also retouch, for example, an unwanted object in the frame. Unless, of course, it does not take half the photograph.
It is very convenient to use a stamp to eliminate small overexposures. For example, your model has a small spot of overexposure on the tip of the nose. We take a stamp, set the Darken mode and darken this spot in a couple of clicks.
3. History Brush
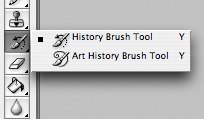
Histori brush is a time machine for processing photos. You can take any stage of processing and use a brush to draw from it according to your image.
History Brush has great potential. I already wrote in detail about the operation of this tool in a separate article . In it you will find a detailed lesson on the use of history brush and learn how to sharpen only in the areas of the image you need.
Of course, sharpening is not the only area of its application. In future articles, I will tell you how to use History Brush to work with color in a photo.
4. Black & White
The Black & White tool is located in the Image -> Adjustments tab. Or you can simply create an Adjustment layer on the photo.

The main function of the Black & White tool is the “correct” translation of a color image into b / w. Correct because you can change the black and white display of each of the colors. Thus, you can get a beautiful and "tasty" b / w picture.
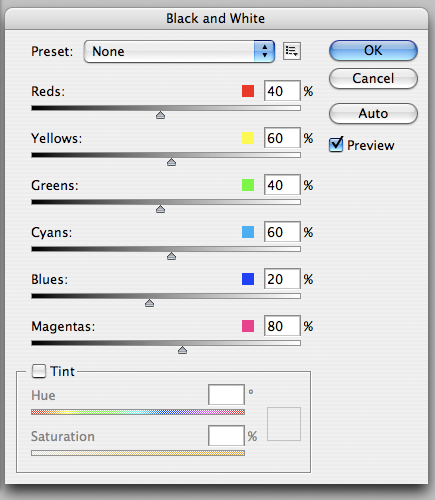
But on this functionality B&W is not limited.
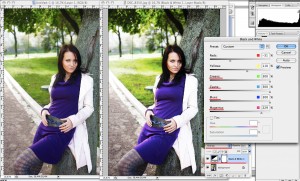
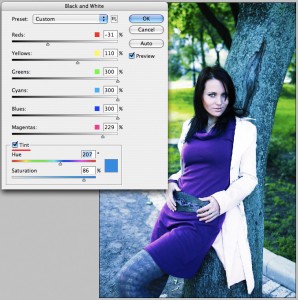
With this tool you can get a very interesting and color picture. Apply B&W to our picture, and then turn on the Overlay layer mode.
Now, by manipulating the B&W control levers and layer transparency, we can get a very interesting picture. For clarity, I set the Opacity of the layer to quite high with B&W - 62% and turned the levers Greens, Cyans, Blues and Magentas to the maximum.
As we can see, the picture immediately became richer and more contrasted (click on the picture to enlarge). Now let's pay attention to the Tint checkbox . Turning it on, we can tint the image in the color we need. Using B&W Use cases for both color and b / w processing - weight. In one of the following articles, on the example of processing several photos, I will talk about all the basic nuances of working with Black & White.
5. Shadow / Highlights
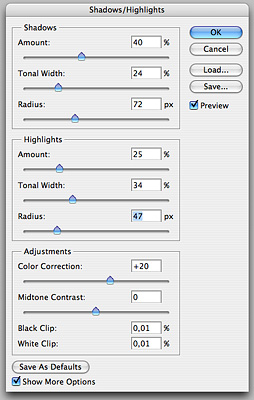
Shadow / Highlights is also located in the Image -> Adjustments tab (there are, by the way, a lot of interesting tools, by the way, I advise you to experiment with everyone).
This tool was created to darken the highlighted areas and draw light from the shadows. In addition to the most obvious application - to eliminate overexposures and gaps, S / H also works great to create a feeling of greater picture depth. We can add dark halftones to light areas, and light to dark areas. Thus, the picture will become more voluminous and deeper.
For example, in this photo using S / H, I added the puppy's hair volume and the picture immediately became more interesting.
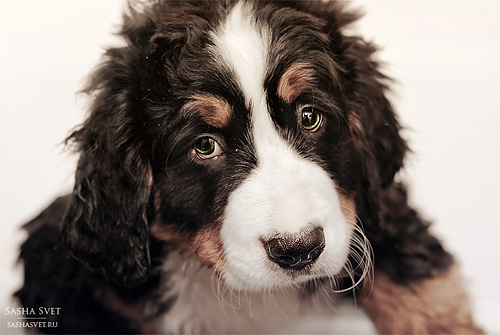
In fact, Shadow / Highlights is an absolutely indispensable tool for any serious processing. Almost any photo can be made better if you correctly apply S / H.
I would like to talk about all the settings of S / H and its functionality, but this is really a topic for a separate article. In the future, I will definitely return to the Shadow / Highlights theme, but for now just try experimenting - try different settings and look at the result. In my experience, this method is the most effective for mastering new things.
As we can see, all these tools are very easy to use, but at the same time they are incredibly effective. Try to experiment with them and you will feel how many opportunities they give during processing.
I think it's worth making a series of articles about simple but very effective tools in Photoshop. And in the next article I will talk about tools for serious work with color in photography.
PS This article was not written by me, but by my good friend and photographer Alexander Svet (SashaSvet). If you have any questions about the article, you can write to the author of the article sashasvet
Thanks LeeMiller for the invite! Alexander is already with us sashasvet
