How I repaired a laptop battery
After my post with a story about my small collection of laptops , thanks to the McStrauth haberman our regiment arrived - a very interesting copy appeared in my collection - the Micron TransPort XKE of 1995, a very charismatic and interesting laptop, I must say, but it had a problem - a completely dead battery. All my attempts to “shake it” were unsuccessful, and it was decided to take it apart and try to repair it. No sooner said
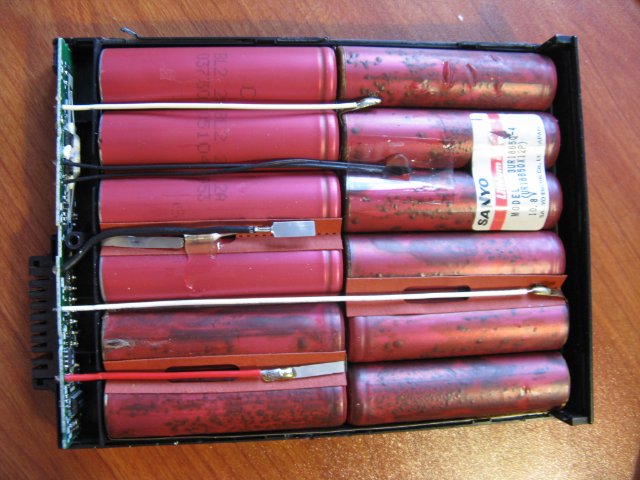
than done, the battery was dismantled, and before my eyes appeared a depressing picture: What happened next? (caution - traffic)
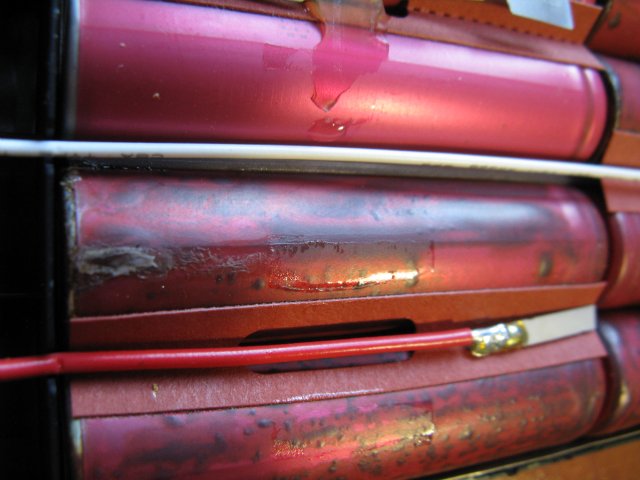
Banks flowed, voltage measurements showed that two-thirds of the banks are dead.
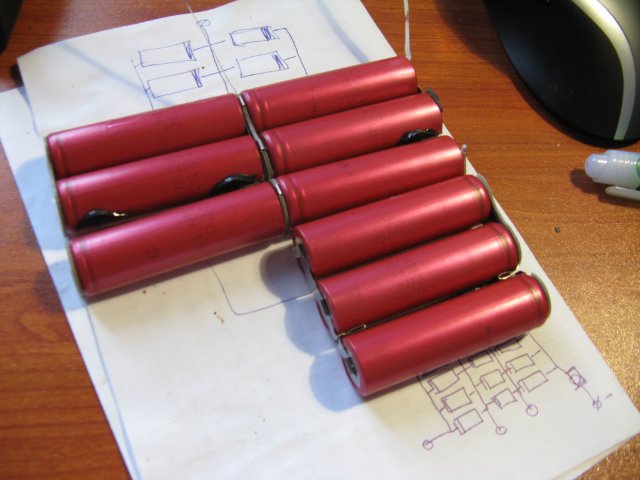
Along the way, I had to solve the puzzle, and draw up a schematic diagram of the connection of the battery cans (I bring a photo of a special draft that always lies under the keyboard for urgent recordings): The
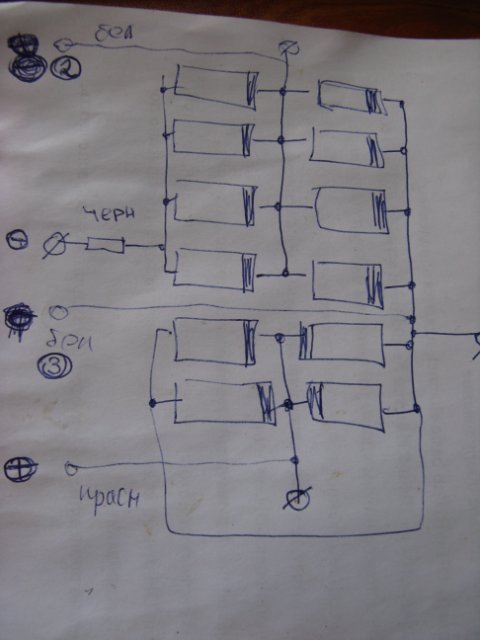
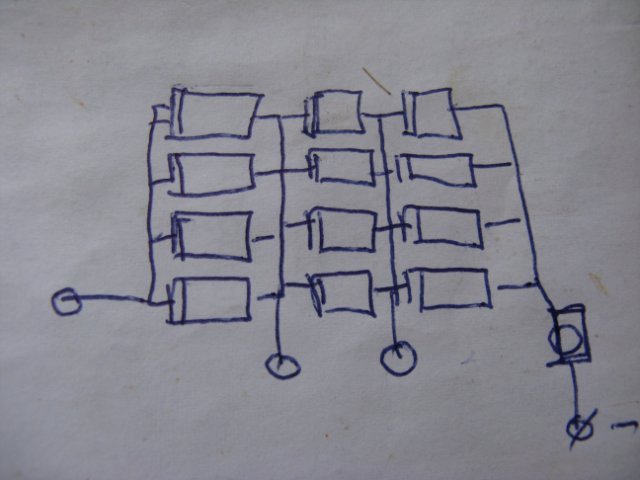
diagram was simplified and it became clear that the battery consists of 3 blocks connected in series of 4 cells each:
But where ours did not disappear! My eyes fell on the ThinkPad t60 battery with a dead controller and quite live elements, an autopsy showed that there are the same 3 blocks of cans, but only 3 elements each, the voltage was similar, the capacity of the IBM battery was larger, which was worse will not. The elements were disassembled and soldered again in the form that would fit in the battery case.
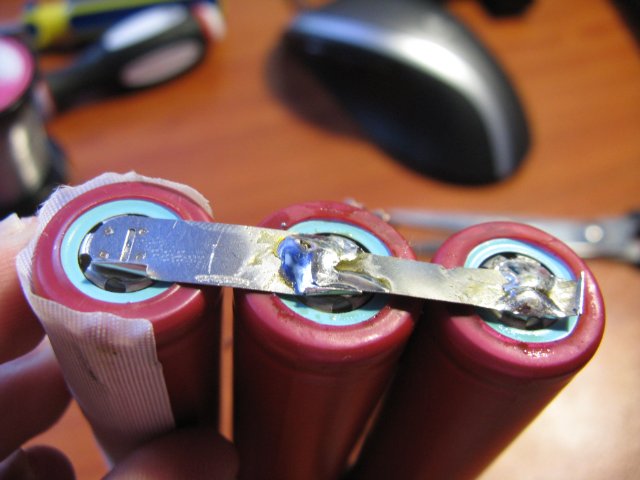
Attention! You need to work with banks very carefully so as not to arrange a short circuit and not to overheat the bank.
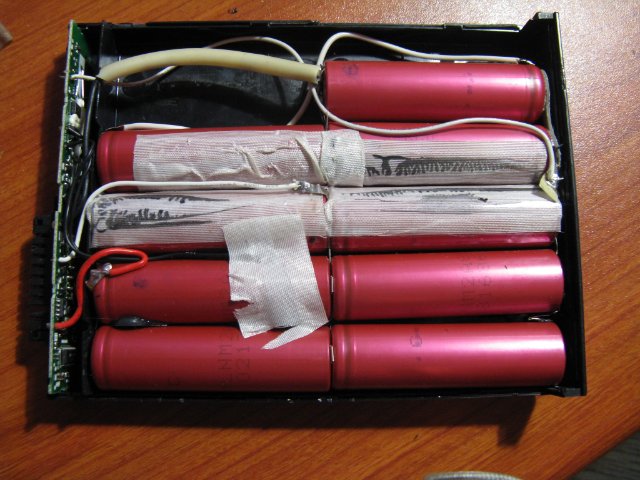
Trial testing showed that the laptop from this design starts. There was no limit to joy, but it was here that the first trouble awaited me, the ThinkPad cans were a little thicker and longer than my relatives, so I had to re-arrange the arrangement of the elements in the case and file the case itself, and with a grief in half the banks fell into place:
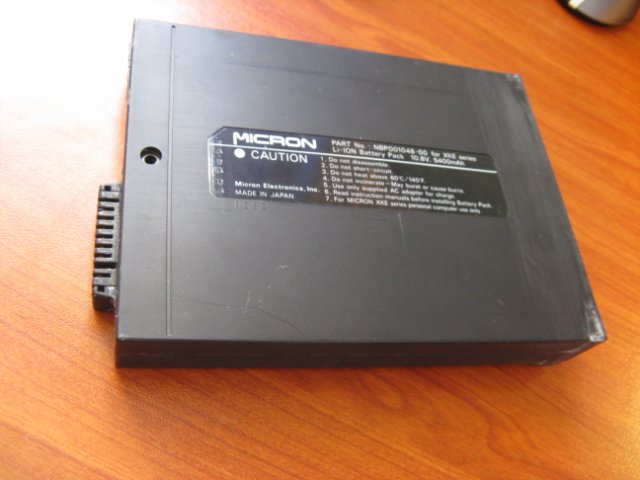
Everything was neat soldered, a battery check showed that the banks are working.
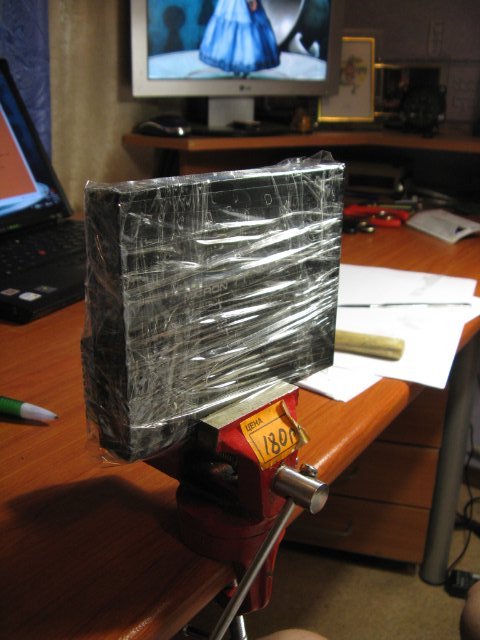
But when it was decided to pack the battery back, the problem of the dimensions of the cans reappeared - the lid was closed only under load, and therefore, for gluing with superglue, such a cocoon was made and left for several hours (perhaps I will omit the story about the hour-long dances around the battery with a file, matyuki and The fact that the lid was closed is important):
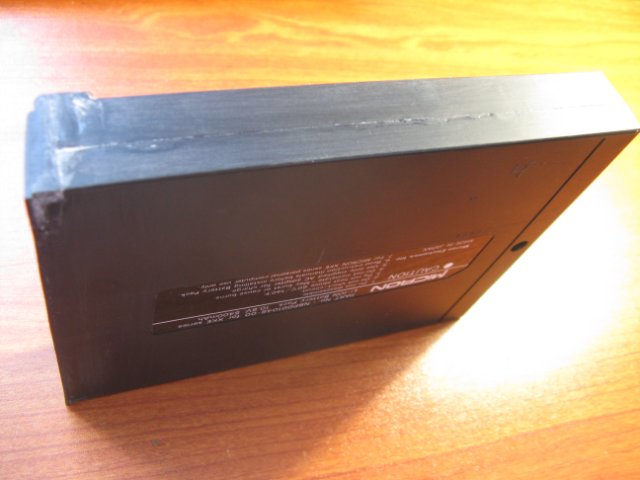
Next, the seams were cleaned with sandpaper, and as a result I got a monolithic design with gluing seams quite good for the firstcoma pancake: The

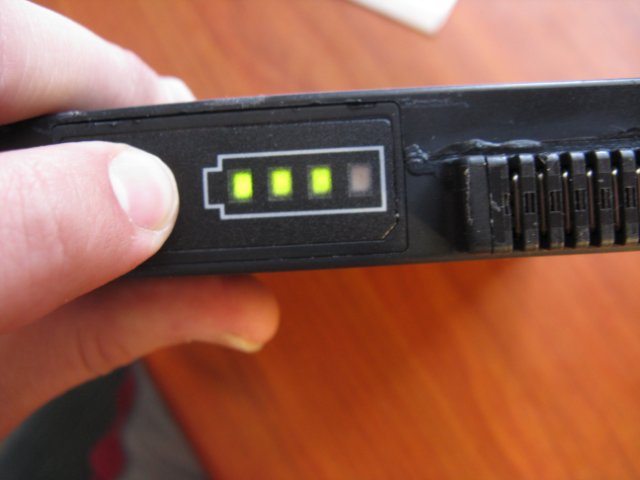
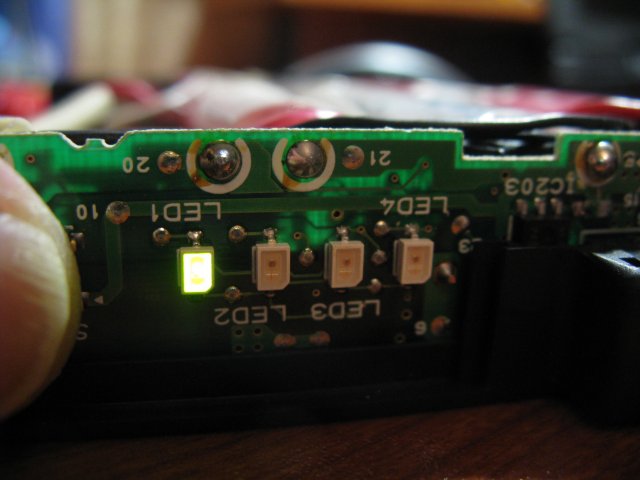
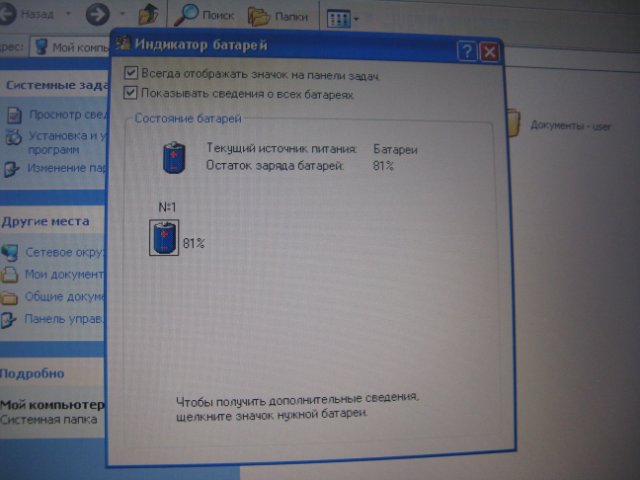
battery fell into place as a glove, the test run went through successfully. Practice has shown that the life time from a recovered battery is about 4 hours (I’ll test it in more detail when I look at the laptop next time)
By the way, the banks for their voltage, capacity, sizeand colorYou can buy new ones. the price will still be cheaper than a new battery.
And once again I repeat - during these works it is necessary to be careful and tb, as well as carefully study the parameters of the cans and the connection diagram, so as not to mess up and burn the controller.
And in the end, a special thank you to McStrauth , thanks to whom this beast lives with me now (I don’t post the general photo on purpose in order to leave the material for the subsequent detailed and interesting review of this device).
than done, the battery was dismantled, and before my eyes appeared a depressing picture: What happened next? (caution - traffic)
Banks flowed, voltage measurements showed that two-thirds of the banks are dead.
Along the way, I had to solve the puzzle, and draw up a schematic diagram of the connection of the battery cans (I bring a photo of a special draft that always lies under the keyboard for urgent recordings): The
diagram was simplified and it became clear that the battery consists of 3 blocks connected in series of 4 cells each:
But where ours did not disappear! My eyes fell on the ThinkPad t60 battery with a dead controller and quite live elements, an autopsy showed that there are the same 3 blocks of cans, but only 3 elements each, the voltage was similar, the capacity of the IBM battery was larger, which was worse will not. The elements were disassembled and soldered again in the form that would fit in the battery case.
Attention! You need to work with banks very carefully so as not to arrange a short circuit and not to overheat the bank.
Trial testing showed that the laptop from this design starts. There was no limit to joy, but it was here that the first trouble awaited me, the ThinkPad cans were a little thicker and longer than my relatives, so I had to re-arrange the arrangement of the elements in the case and file the case itself, and with a grief in half the banks fell into place:
Everything was neat soldered, a battery check showed that the banks are working.
But when it was decided to pack the battery back, the problem of the dimensions of the cans reappeared - the lid was closed only under load, and therefore, for gluing with superglue, such a cocoon was made and left for several hours (perhaps I will omit the story about the hour-long dances around the battery with a file, matyuki and The fact that the lid was closed is important):
Next, the seams were cleaned with sandpaper, and as a result I got a monolithic design with gluing seams quite good for the first
battery fell into place as a glove, the test run went through successfully. Practice has shown that the life time from a recovered battery is about 4 hours (I’ll test it in more detail when I look at the laptop next time)
By the way, the banks for their voltage, capacity, size
And once again I repeat - during these works it is necessary to be careful and tb, as well as carefully study the parameters of the cans and the connection diagram, so as not to mess up and burn the controller.
And in the end, a special thank you to McStrauth , thanks to whom this beast lives with me now (I don’t post the general photo on purpose in order to leave the material for the subsequent detailed and interesting review of this device).