We print over the network on any Windows printer
If you have a printer connected to a Windows machine, then setting it up for network printing on a Mac is quite simple, even if there are no drivers for OSX for this printer.
Three things are needed for this:
Download and install distributions.
For convenience, descriptions and settings - install in the folder C: \ gs
In my example, two printers without OSX drivers - a monochromatic, laser Samsung ML2250 and a color laser Konica 2400W. Let's start with the black and white Samsung.
First, you need to create a configuration file for this printer, C: \ gs \ samsung.rsp , its contents: In the last line, you need to specify the exact name of the real printer installed and configured in the system (you can use spaces). For a monochrome printer, I added the line "-mono". Now you need to configure the virtual printer. To do this, run the standard wizard and add a new local printer: Select “Redirected Port” as the port: Wizard will create a new Redirect-port and offer to rename it, leave everything as it is:


In the next step, you need to select the standard driver for the virtual printer, and the best set of drivers from Apple is best for this. Choosing a black and white laser printer. I selected "Apple LaserWriter 16/600 PS."

We agree with the proposal to save the existing driver:

Specify the name of the printer: You

can immediately “share” the printer:

Now you can specify additional data, for example, explain how to install the printer and which drivers to use for this:

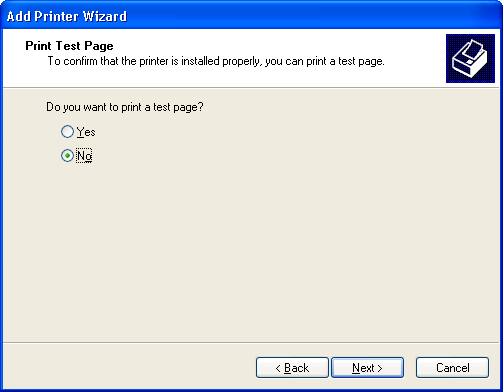
At this step, you do not need to print a test page:
Printer installation is complete :

Go to the settings of the received printer, on the “Ports” tab, select the newly created port “RPT1: Redirected Port”:

Configure the port “RPT1: Redirected Port”:
In the field "Redirect this port to the program" using "Browse" specify the path to gswin32c.exe , in our case it is C: \ gs \ gs8.64 \ bin \ gswin32c.exe
in the line "Arguments for this program are:" specify the path to the printer settings file in the format Ghost: @C: \ gs \ samsung.rsp -
Please note that it is very important not to forget to put a “space” and “-” after the file name.
In the “Output” select, select “Copy temporary file to printer”.
As “Printer” we select a real printer, in my case it is “Samsung ML-2250”.
“Run” - “Hidden” - hide all dialogs and program windows.

Feel free to click "OK"!
This completes the configuration of the printer on the Windows machine, now you can check the redirect by printing a test page from the virtual printer settings panel.
Launch System Preferences and select Print & Fax.

Both printers are already configured on my screenshot :) To configure another one, click “+” and select the connection by “IP”.
“Protocol” - “Line Printer Daemon - LPD”
“Address” - IP address of the Windows machine with the shared printer.
“Name” - write the name for the printer.
“Location” - the value indicated at the stage of setting up the Windows printer in the “Location” field (this is not a prerequisite, but more accurate).
“Print Using” - “Select a driver to use” and using a convenient search, select “Apple LaserWriter 16/600 PS”.

Click "Add." This completes the printer connection in Leopard. Check, rejoice.
The Konica 2400W color laser printer was set up in the same way. “Apple Color LaserWriter 12/600 PS” was selected as the driver, and the -mono option was removed in the printer configuration file .
Three things are needed for this:
- A printer that runs on a Windows machine
- Ghostscript - PostScript printer emulator
- RedMon - Redirection Port Monitor
Download and install distributions.
For convenience, descriptions and settings - install in the folder C: \ gs
Setting up a virtual printer in Windows
In my example, two printers without OSX drivers - a monochromatic, laser Samsung ML2250 and a color laser Konica 2400W. Let's start with the black and white Samsung.
First, you need to create a configuration file for this printer, C: \ gs \ samsung.rsp , its contents: In the last line, you need to specify the exact name of the real printer installed and configured in the system (you can use spaces). For a monochrome printer, I added the line "-mono". Now you need to configure the virtual printer. To do this, run the standard wizard and add a new local printer: Select “Redirected Port” as the port: Wizard will create a new Redirect-port and offer to rename it, leave everything as it is:
 -IC:\gs\gs8.64\lib;C:\gs\fonts


 -sDEVICE=mswinpr2


 -dNOPAUSE


 -dSAFER


 -sPAPERSIZE=a4


 -mono


 -sOutputFile="%printer%Samsung ML-2250"
In the next step, you need to select the standard driver for the virtual printer, and the best set of drivers from Apple is best for this. Choosing a black and white laser printer. I selected "Apple LaserWriter 16/600 PS."
We agree with the proposal to save the existing driver:
Specify the name of the printer: You
can immediately “share” the printer:
Now you can specify additional data, for example, explain how to install the printer and which drivers to use for this:
At this step, you do not need to print a test page:
Printer installation is complete :
Go to the settings of the received printer, on the “Ports” tab, select the newly created port “RPT1: Redirected Port”:
Configure the port “RPT1: Redirected Port”:
In the field "Redirect this port to the program" using "Browse" specify the path to gswin32c.exe , in our case it is C: \ gs \ gs8.64 \ bin \ gswin32c.exe
in the line "Arguments for this program are:" specify the path to the printer settings file in the format Ghost: @C: \ gs \ samsung.rsp -
Please note that it is very important not to forget to put a “space” and “-” after the file name.
In the “Output” select, select “Copy temporary file to printer”.
As “Printer” we select a real printer, in my case it is “Samsung ML-2250”.
“Run” - “Hidden” - hide all dialogs and program windows.
Feel free to click "OK"!
This completes the configuration of the printer on the Windows machine, now you can check the redirect by printing a test page from the virtual printer settings panel.
Printer Setup in Leopard
Launch System Preferences and select Print & Fax.
Both printers are already configured on my screenshot :) To configure another one, click “+” and select the connection by “IP”.
“Protocol” - “Line Printer Daemon - LPD”
“Address” - IP address of the Windows machine with the shared printer.
“Name” - write the name for the printer.
“Location” - the value indicated at the stage of setting up the Windows printer in the “Location” field (this is not a prerequisite, but more accurate).
“Print Using” - “Select a driver to use” and using a convenient search, select “Apple LaserWriter 16/600 PS”.
Click "Add." This completes the printer connection in Leopard. Check, rejoice.
The Konica 2400W color laser printer was set up in the same way. “Apple Color LaserWriter 12/600 PS” was selected as the driver, and the -mono option was removed in the printer configuration file .