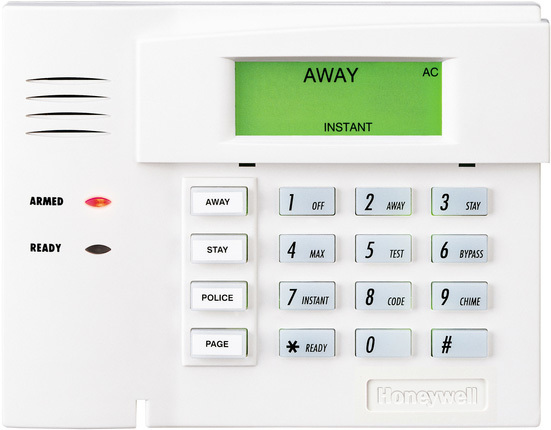
Integrating Honeywell security system (Ademco) VISTA 10 with home automation Fibaro

Honeywell (Ademco) develops popular VISTA security systems, ranging from simple VISTA-10s to those rich in VISTA-250 functionality. Multifunctional security systems VISTA-128/250 contain an RS232 port, which allows integrating them into any other system.
I was given the task: " Integrate the VISTA-10 L security system into the Fibaro home automation system, from one mobile application you need to control both the lighting and the garage doors and set the house to be armed ."
At a cursory study of VISTA-10 L, it turned out that there was no UART and there was no mention of it. Fortunately, the company www.alarmdecoder.com was found on the expanses of the American Internetwhich is engaged in the development of boards simulating the operation of the control panel. The board exists in 3 connection options: USB, RS-232, UART shield for the Raspberry Pi. I chose the AD2Pi shield for the Raspberry Pi.
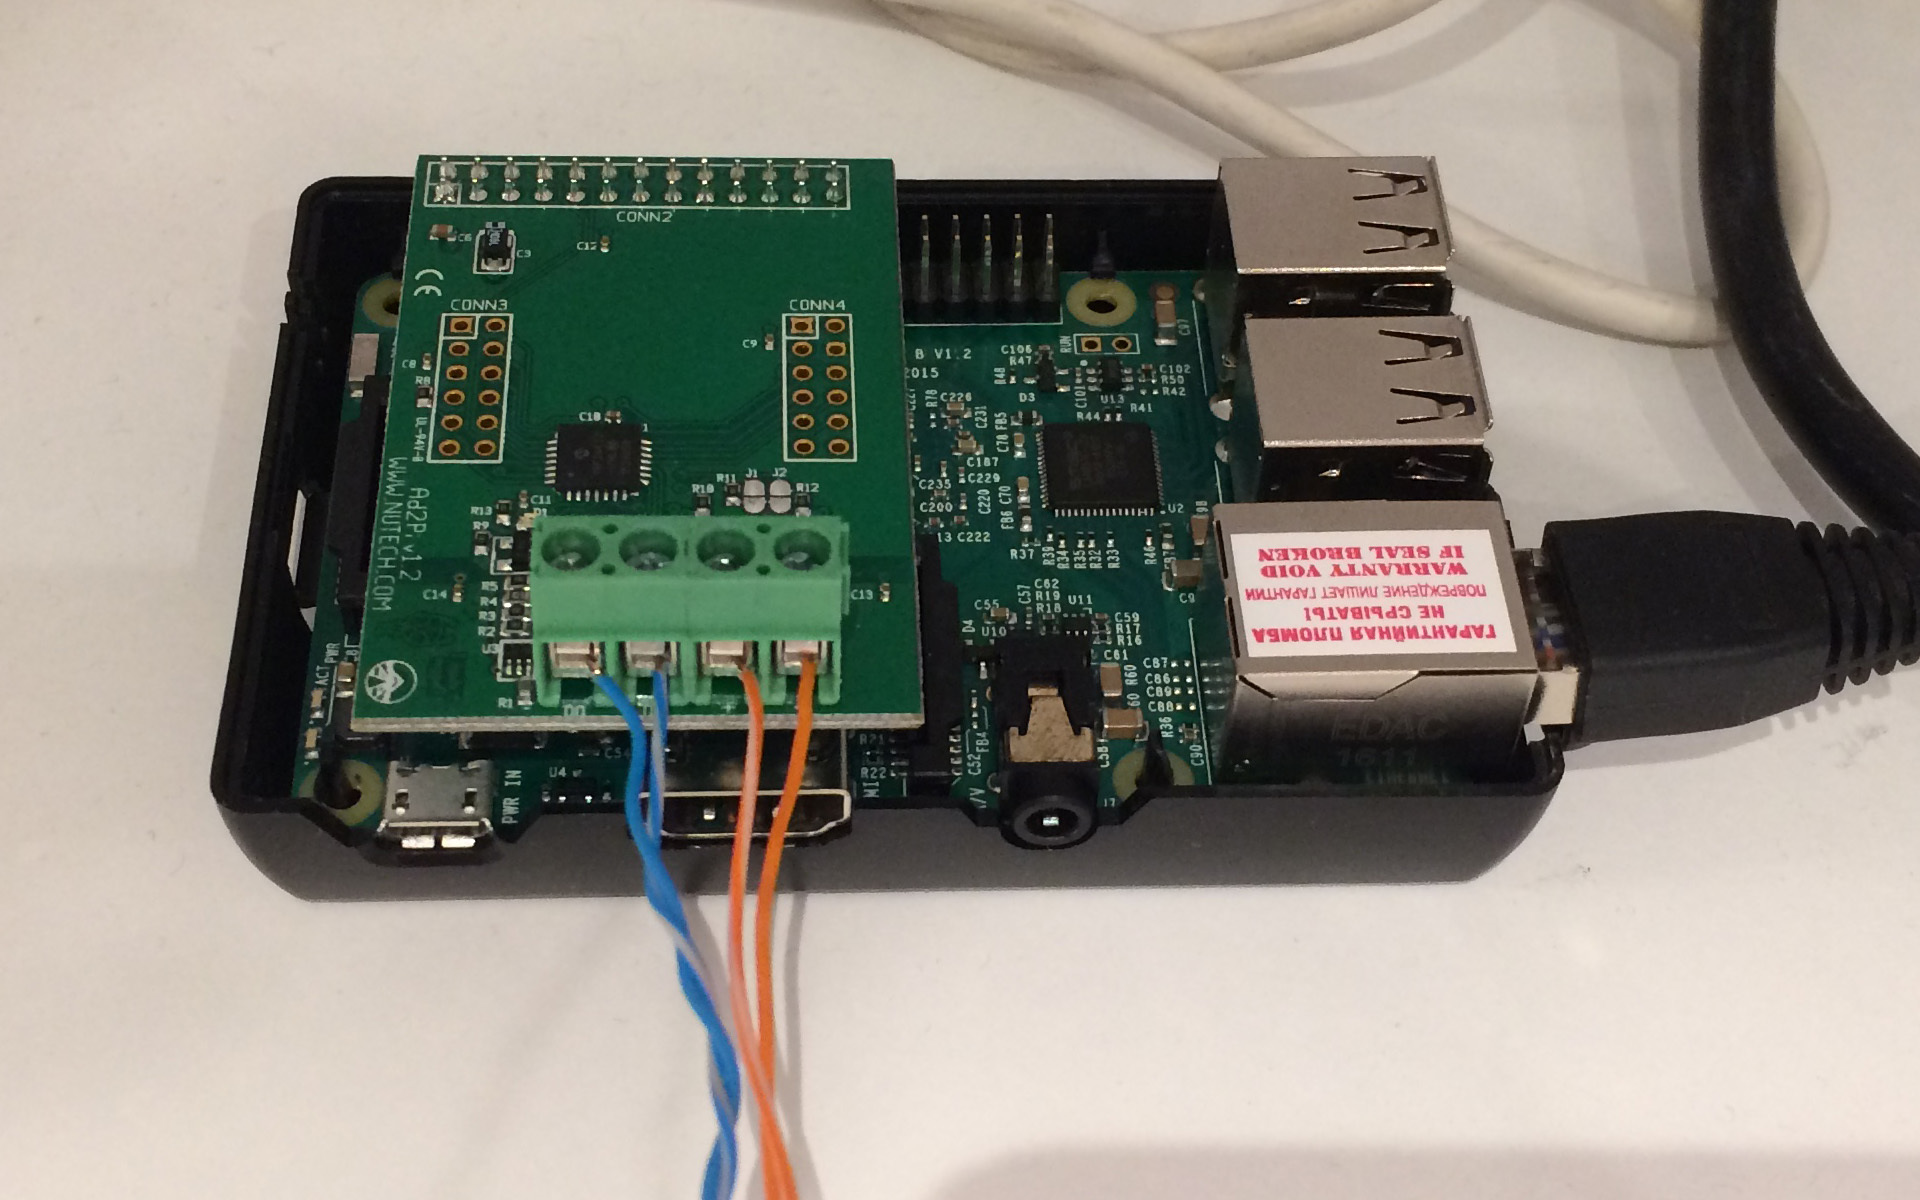
The AD2Pi board is connected to the terminals of the control panel and for the security system it is presented as another control and display panel.
Remote control and display (control panel)
The wiring diagram is simple:
| AD2Pi | VISTA control panel |
| - | 4 - KEYPAD GROUND (-) |
| + | 5 - KEYPAD PWD (+) |
| DI | 6 - DATA IN TO KEYPAD |
| Do | 7 - DATA OUT TO KEYPAD |
After connecting the AD2Pi to the control panel VISTA, go to work with the software. alarmdecoder allows you to fully manage and monitor the security system.
1) Install python library alarmdecoder
alarmdecoder allows you to receive all system messages in parse form, send control commands and settings.
pip install alarmdecoderor from git
git clone https://github.com/nutechsoftware/alarmdecoder.git
cd alarmdecoder
python setup.py install
2) Install ser2sock - Serial to Socket Redirector
ser2sock allows you to connect to the serial port remotely, it is necessary to control the security system not only from the Raspberry Pi, but also from any other computer / device directly.
git clone https://github.com/nutechsoftware/ser2sock.gitInstallation details here: https://github.com/nutechsoftware/ser2sock
3) Configure the AD2Pi board
First of all, you need to configure the AD2Pi board so that it sends us all the events of interest. Connect to the serial port of AD2Pi via minicom and enter "!" To enter setup mode. Note that the address of the virtual control panel should be 31, the LRR should be Y, and the mask at the addresses ffffffff, i.e. receive messages from everyone.
sudo minicom -d /dev/ttyAMA0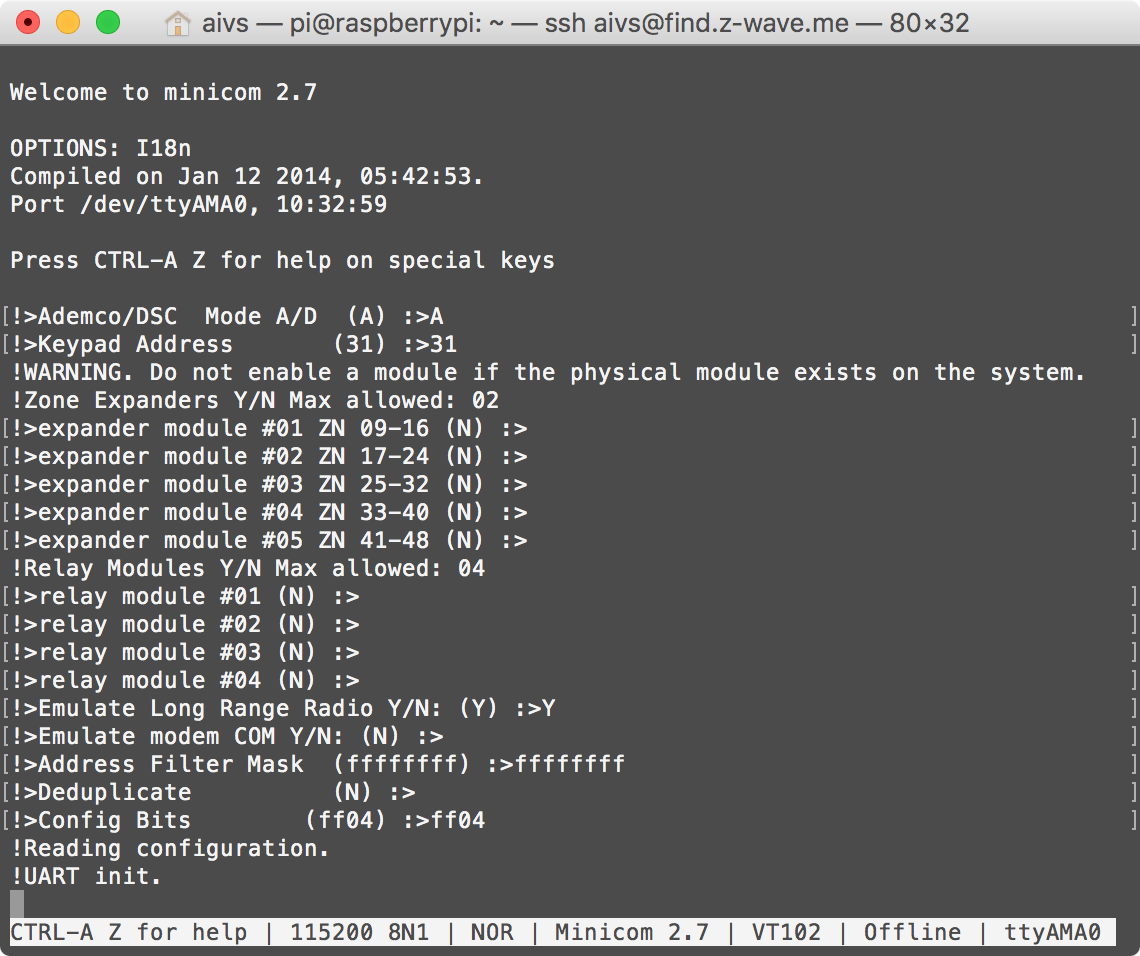
On the control panel, you need to activate the function of sending messages via LRR / GSM, then we will know which user removed and armed.
4) Verifying system performance
Start ser2sock and listen on port 10000:
sudo /etc/init.d/ser2sock start
nc localhost 10000
Must see messages from the system:

5) Processing messages from the security system

Python script to send messages from alarmdecoder to Home Center 2 automation controller
#!/usr/bin/python# -*- coding: utf-8 -*-import json
import base64
import time
from time import gmtime, strftime
import requests
from requests.auth import HTTPBasicAuth
from alarmdecoder import AlarmDecoder
from alarmdecoder.devices import SocketDevice
# Configuration values
HOSTNAME = 'localhost'
PORT = 10000# Fibaro access
username = "admin"
password = "admin"defmain():"""
    Example application that prints messages from the panel to the terminal.
    """try:
        # Retrieve an AD2 device that has been exposed with ser2sock on localhost:10000.
        device = AlarmDecoder(SocketDevice(interface=(HOSTNAME, PORT)))
        # Set up an event handler and open the device
        device.on_message += handle_message
        device.on_lrr_message += handle_lrr_message
        with device.open():
            whileTrue:
                time.sleep(1)
    except Exception, ex:
        print'Exception:', ex
defhandle_message(sender, message):"""
    Handles message events from the AlarmDecoder.
    """print message.text
    jsonData = {"value":message.text}
    requests.put('http://10.0.1.43/api/globalVariables/AlarmStatus', json = jsonData, auth=HTTPBasicAuth(username, password))
defhandle_lrr_message(sender, message):"""
    Handles message events from the AlarmDecoder.
    """
    lrr_message = message.event_data + " " + message.event_type
    print lrr_message
    jsonData = {"value":lrr_message}
    requests.put('http://10.0.1.43/api/globalVariables/AlarmUsers', json = jsonData, auth=HTTPBasicAuth(username, password))
if __name__ == '__main__':
    main()
To process the message, I wrote a small python script that I put in autoload.
The script connects to the ser2sock service, receives messages from it and sends them to the Home Center 2 automation controller. On the controller, I process the messages, display them in the virtual device and send push notification about the status of the security system.
6) Widget for managing Home Center 2 security system
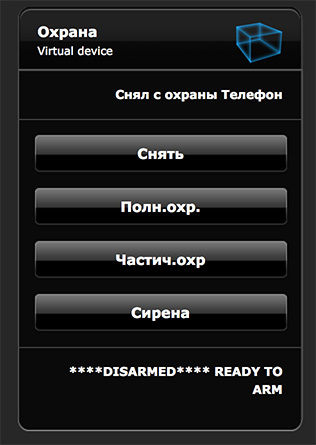
On Home Center 2, I created a virtual device with which you can arm in different modes, disarm and display system status and information about who armed or disarmed.
To arm or disarm, you only need to send a TCP request with an arm / disarm code.
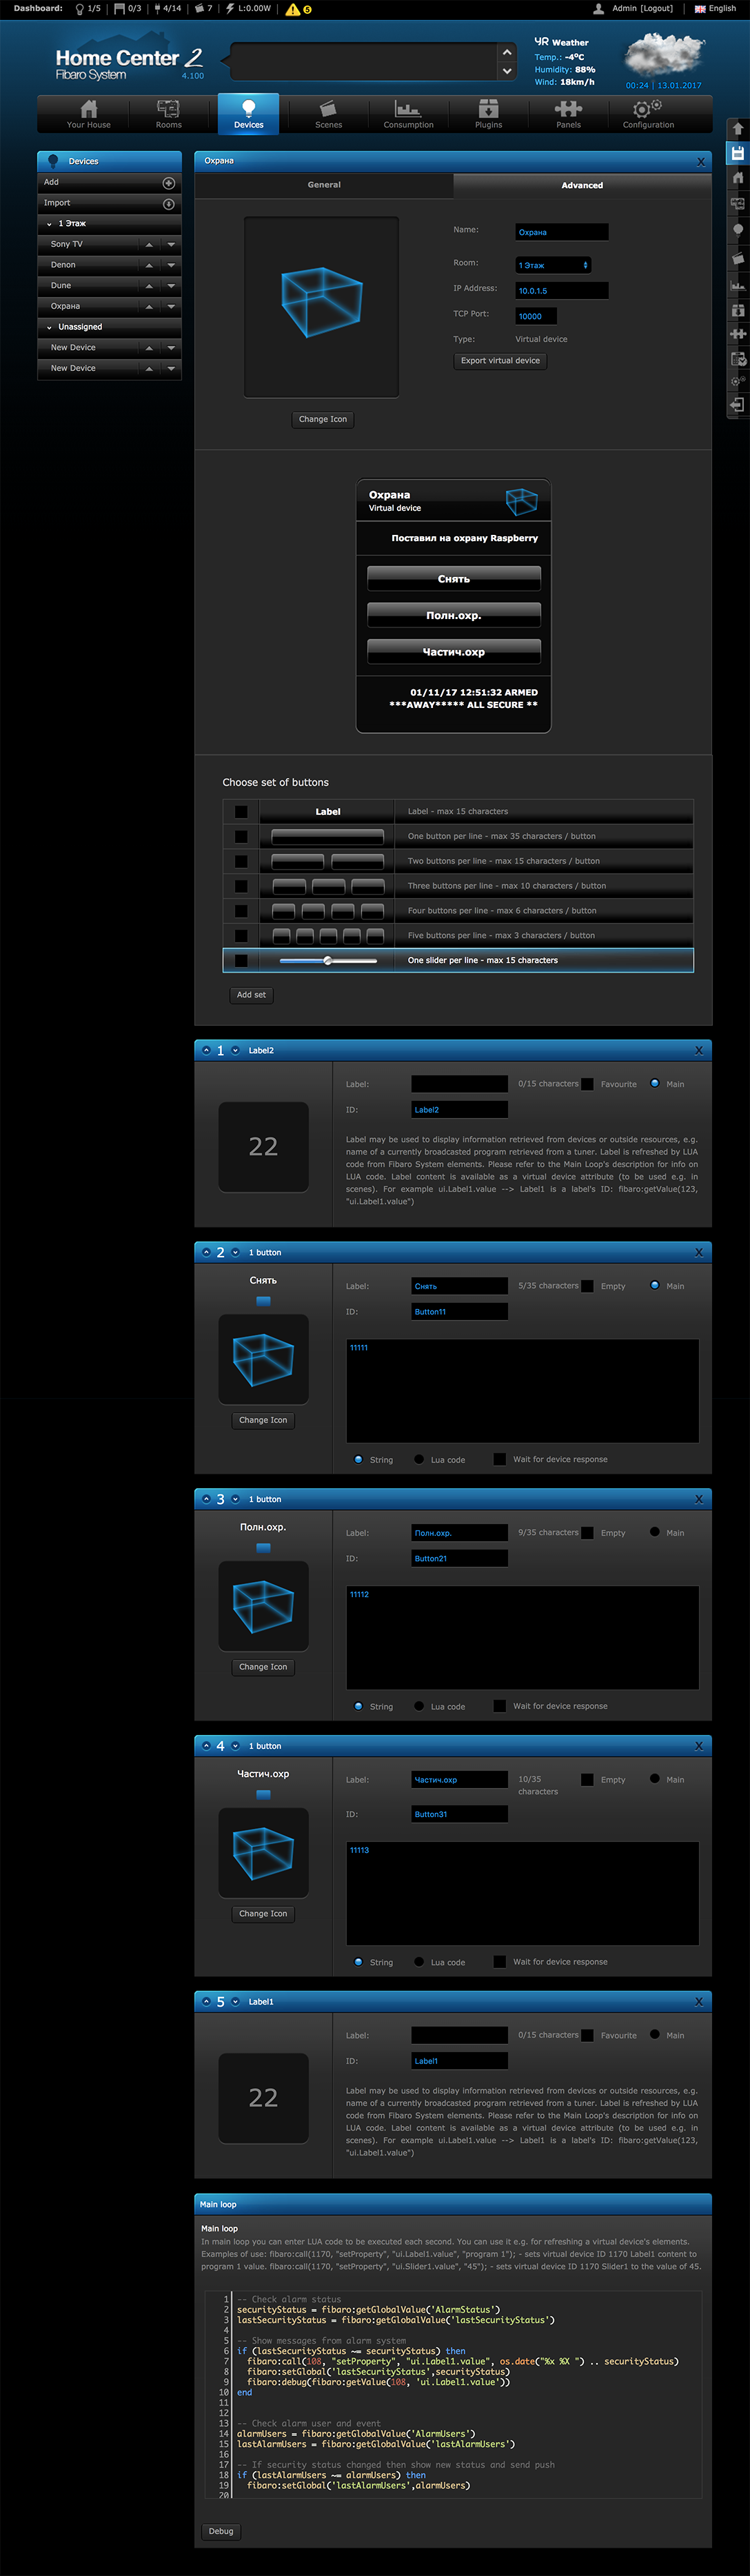
Lua script to process messages from alarmdecoder
-- Check alarm status
securityStatus = fibaro:getGlobalValue('AlarmStatus')
lastSecurityStatus = fibaro:getGlobalValue('lastSecurityStatus')
-- Show messages from alarm systemif (lastSecurityStatus ~= securityStatus) then
fibaro:call(108, "setProperty", "ui.Label1.value", os.date("%x %X ") .. securityStatus)
fibaro:setGlobal('lastSecurityStatus',securityStatus)
fibaro:debug(fibaro:getValue(108, 'ui.Label1.value'))
end-- Check alarm user and event
alarmUsers = fibaro:getGlobalValue('AlarmUsers')
lastAlarmUsers = fibaro:getGlobalValue('lastAlarmUsers')
-- If security status changed then show new status and send pushif (lastAlarmUsers ~= alarmUsers) then
fibaro:setGlobal('lastAlarmUsers',alarmUsers)
userID = string.sub(alarmUsers, 3, 3)
event = string.sub(alarmUsers, 5)
-- set user nameif userID == "4"then
userID = "Raspberry"elseif userID == "3"then
userID = "Жена"elseif userID == "2"then
userID = "Муж"end-- set translated eventif event == "ARM_AWAY"then
event = "Поставил на охрану"elseif event == "ARM_STAY"then
event = "Частично поставил на охрану"elseif event == "OPEN"then
event = "Снял с охраны"end
fibaro:call(108, "setProperty", "ui.Label2.value", event .. " " .. userID)
fibaro:debug(fibaro:getValue(108, 'ui.Label2.value'))
fibaro:call(100, "sendPush", fibaro:getValue(108, 'ui.Label2.value'))
fibaro:call(25, "sendPush", fibaro:getValue(108, 'ui.Label2.value'))
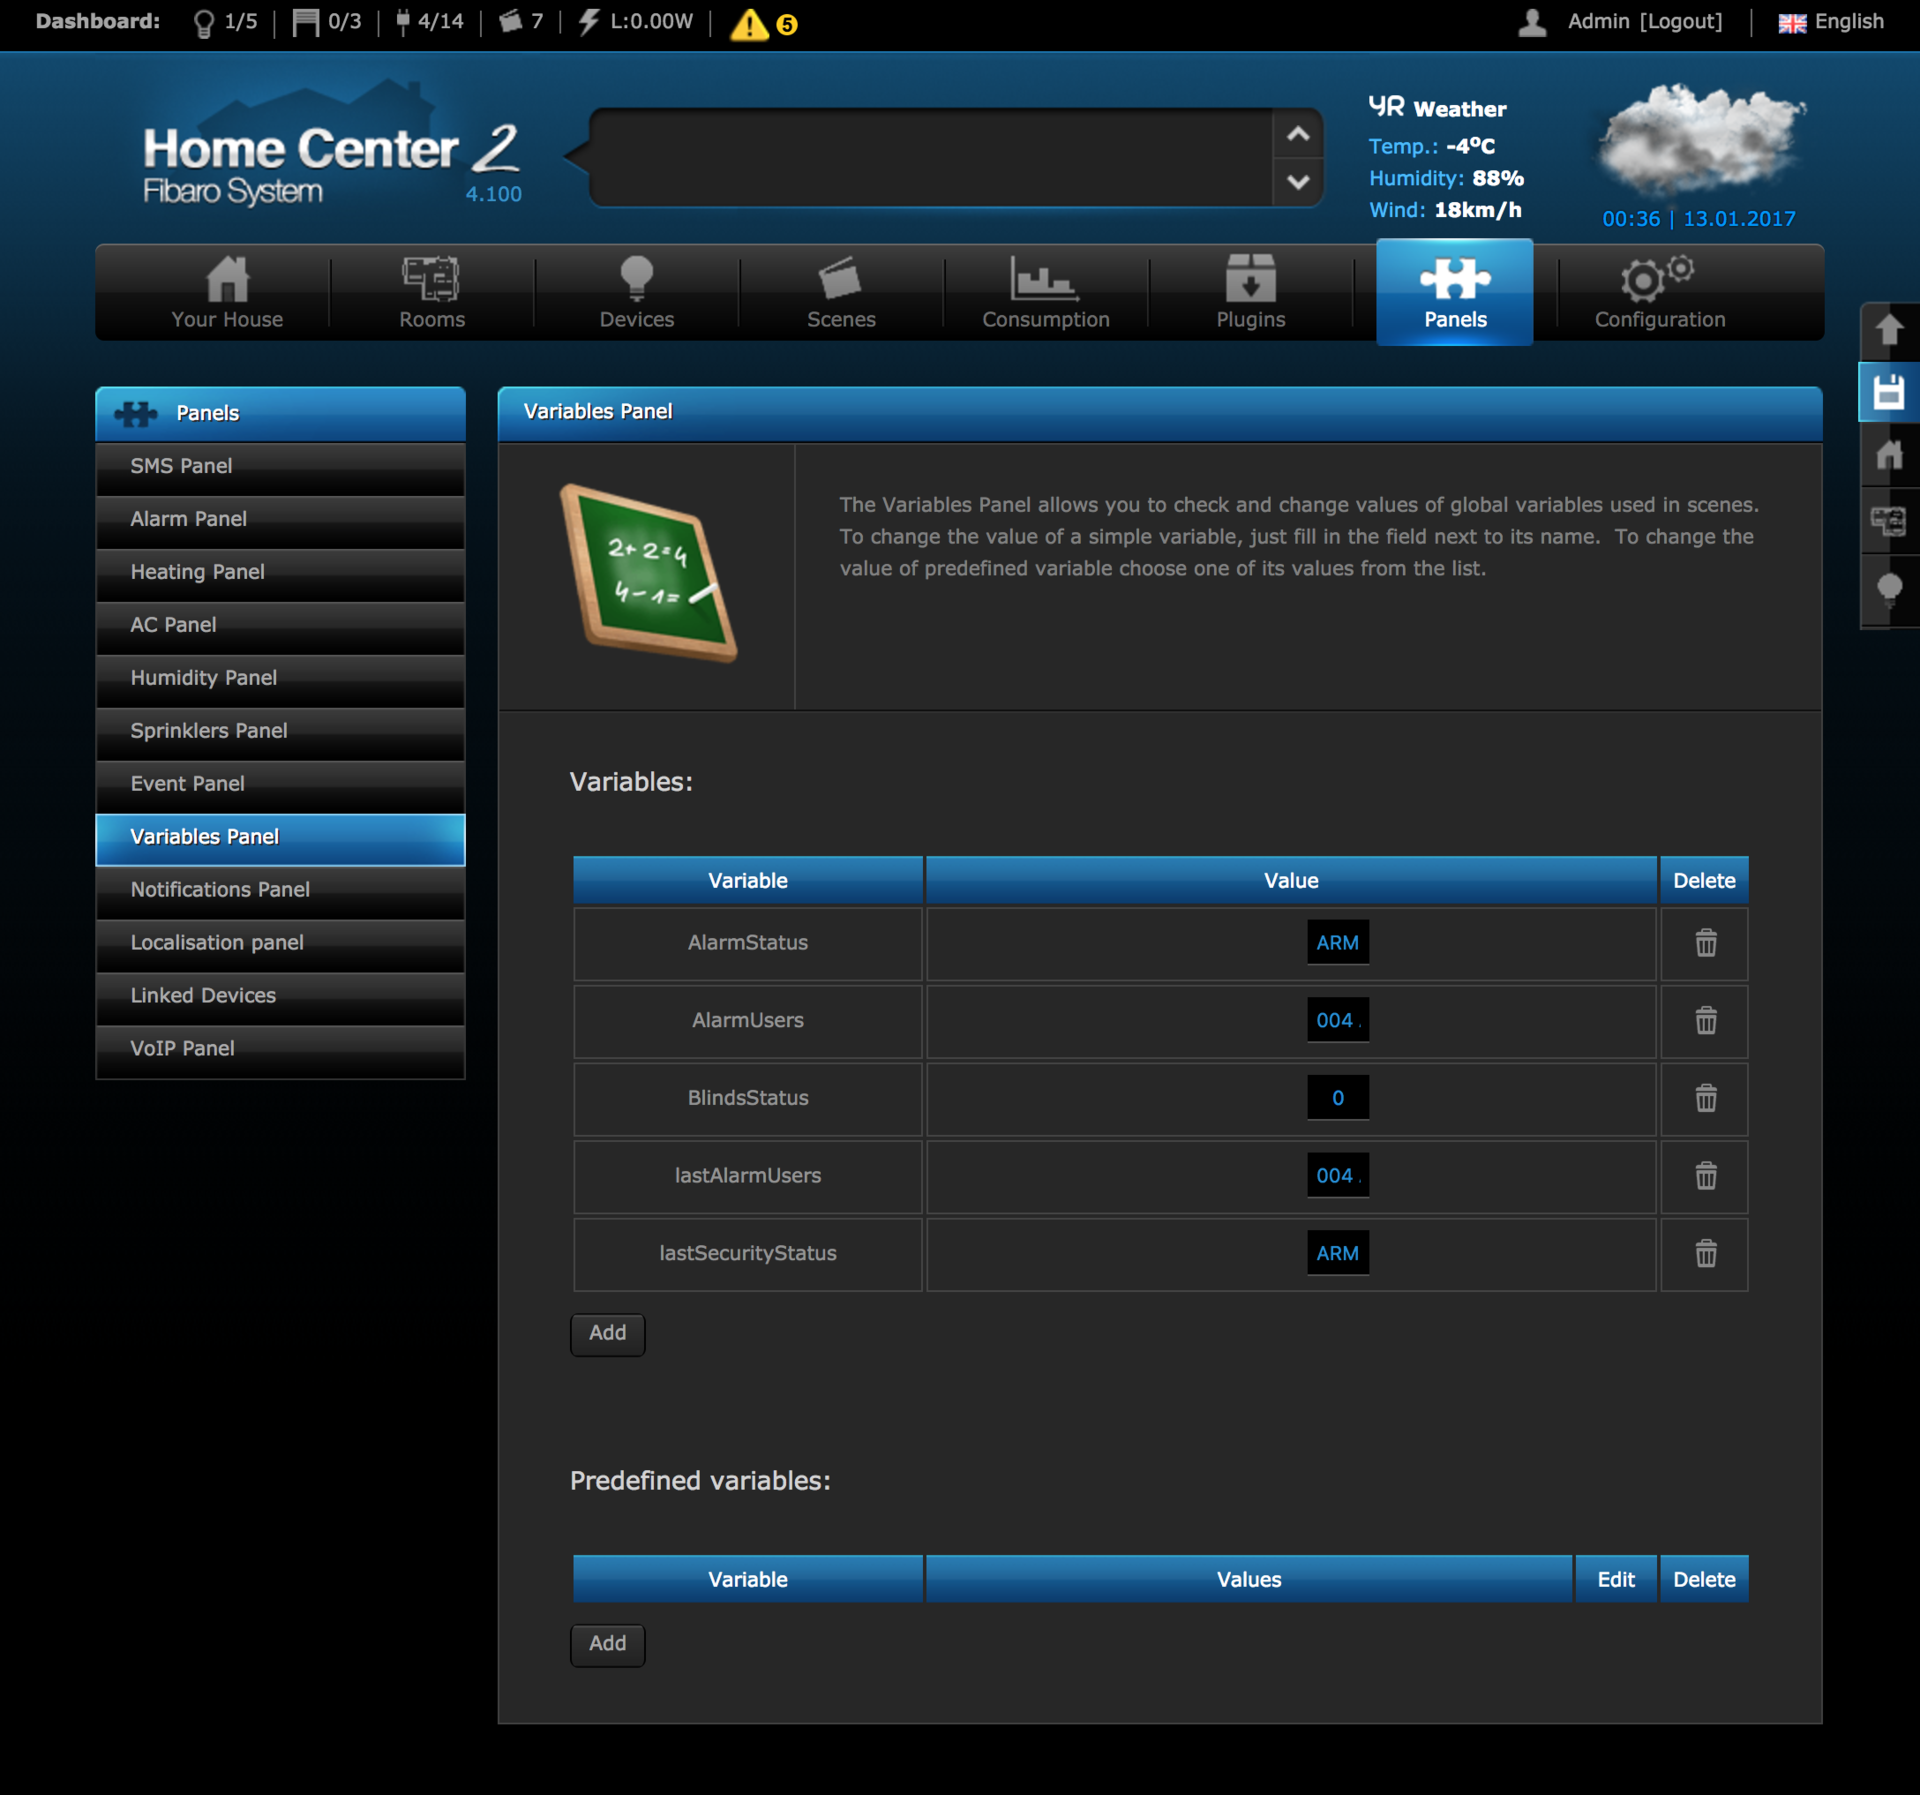
endIt also took several global variables to Home Center 2, which store the current state of the system and users.
All information that is displayed on the control panel: removed / armed, sensor triggering, low sensor battery charge, switching to backup power, etc., can be processed and sent to the automation system for further action.
All Home Center 2 devices are broadcast in the homebridge , which allows you to arm and shoot using the Siri voice assistant.
The alarmdecoder boards can be used with any automation system, detailed documentation and a convenient API allow you to quickly and easily integrate the security system into any smart home!