3 km gigabit link on laser modems
TL; DR The article describes our experience in building a wireless connection at a distance of 3 kilometers using Lantastica TZR laser modems without using a radio. Conclusion: it really works, the real channel width is ~ 950Mbit / s in duplex with delays <1ms.
Usually, classic radio bridges like ubiquiti and mikrotik are used for such tasks, and few imagine that radio is not the only way available. It turns out that laser modems exist in civilian performance, are openly sold and do not even require a license.
In practice, we will go through all the steps to configure the laser link: from installing equipment on the roof to setting up and testing bandwidth and delays.
The main features of the laser modem:
- Does not use radio frequencies - data is transmitted using a laser beam in the invisible range of 780 ~ 850 nm. Does not create radio interference, does not require permission to use radio frequencies
- Low delays - compared to WiFi equipment, laser modems have delays comparable to cable connections.
- Interception is more difficult - radio bridges are easy to listen to without breaking the signal. It is almost impossible to intercept the traffic of the laser bridge without breaking the connection.
- Stealth - the laser link is difficult to detect due to the narrow beam. The radio link is easy to detect even at a considerable distance from the antennas.
Theory
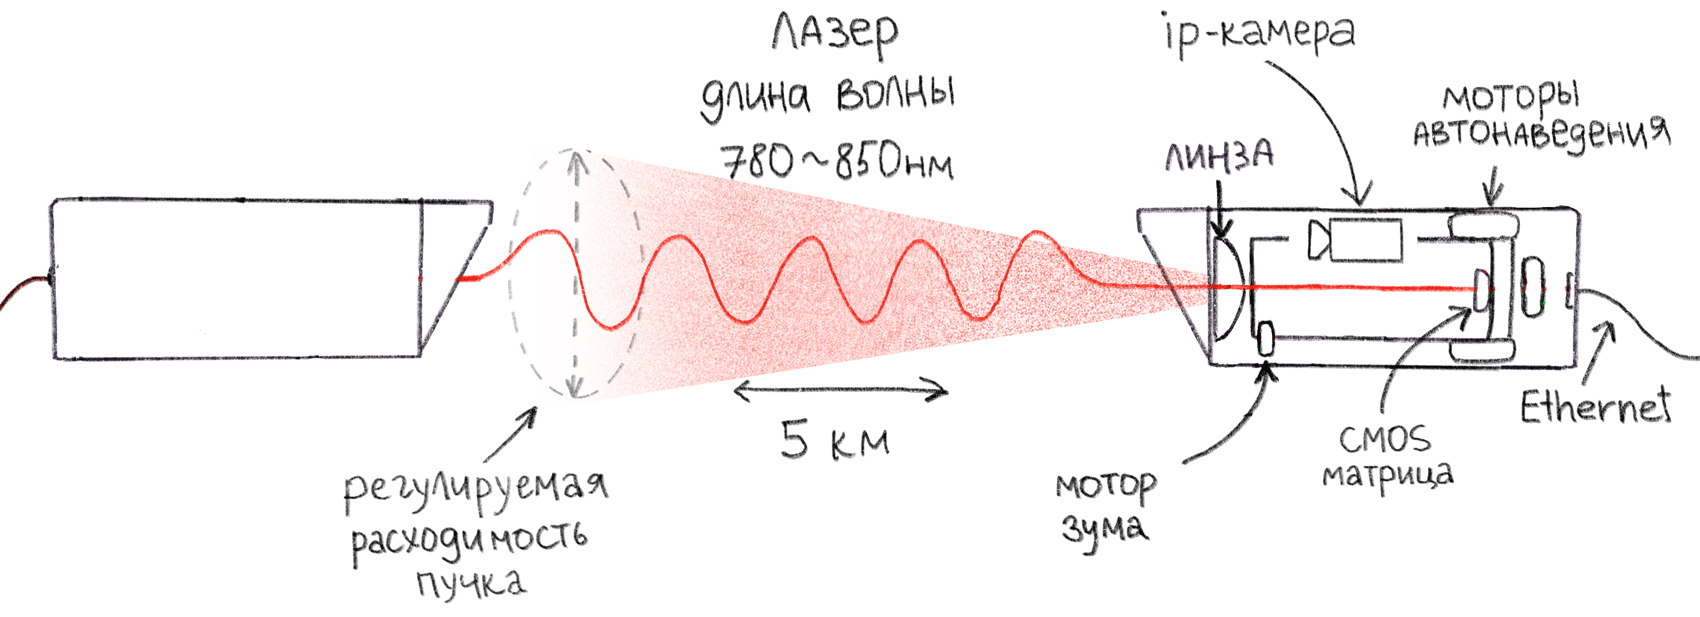
Schematic representation of the principle of operation of the laser modem
How it works in practice: Each modem has a transmitter on a laser diode and a receiver on a photodiode. Modems "shine" into each other with a laser with a wavelength of 780 or 850 nanometers. The laser modem is demanding on the accuracy of aiming, so the built-in motors automatically adjust the position of the transmitter and lenses for the most accurate hit. The laser brightness and beam divergence are also automatically adjusted, depending on weather conditions.
At the output, the device is connected to a regular Ethernet network via twisted pair cable or optics.
Weather restrictions
Since data transmission requires direct visibility, precipitation in the form of snow, rain, fog makes data transmission difficult. In the case of deterioration in visibility, the devices increase brightness and reduce the angular size of the light beam. Also, the device can reduce the data transfer rate, to provide better noise immunity.
The manufacturer claims that the device successfully works up to 99% of the time a year in weather conditions in central Russia. When the weather conditions worsen, the modem switches to a low-speed mode of 200Mbit / s. To increase the reliability of the link, it is proposed to use channel duplication using a radio bridge, which can be automatically turned on by a command from a laser modem in the event of a complete loss of communication on the laser link.
Laser link availability table during the year according to the statement of the modem manufacturer:
| Range | Top speed | Reduced speed | Backup channel |
|---|---|---|---|
| 1km | 99% | 0.9% | 0.1% |
| 3km | 98% | 1.5% | 0.5% |
| 5km | 95% | 3% | 2% |
Specifications
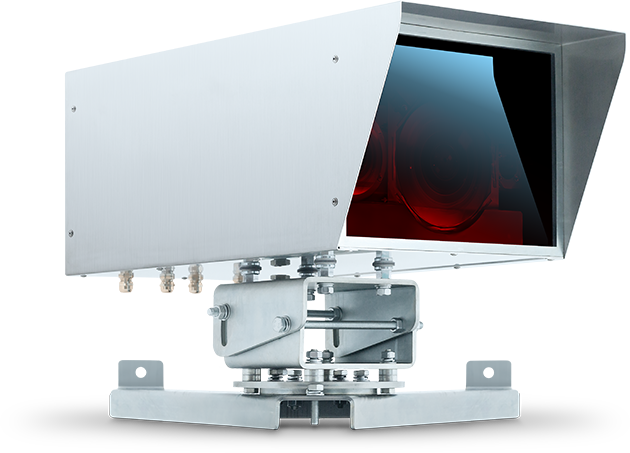 -------------------------------------------------- -------------------------------------------------- -------------------------------------------------- -------------------------------------------------- ----------
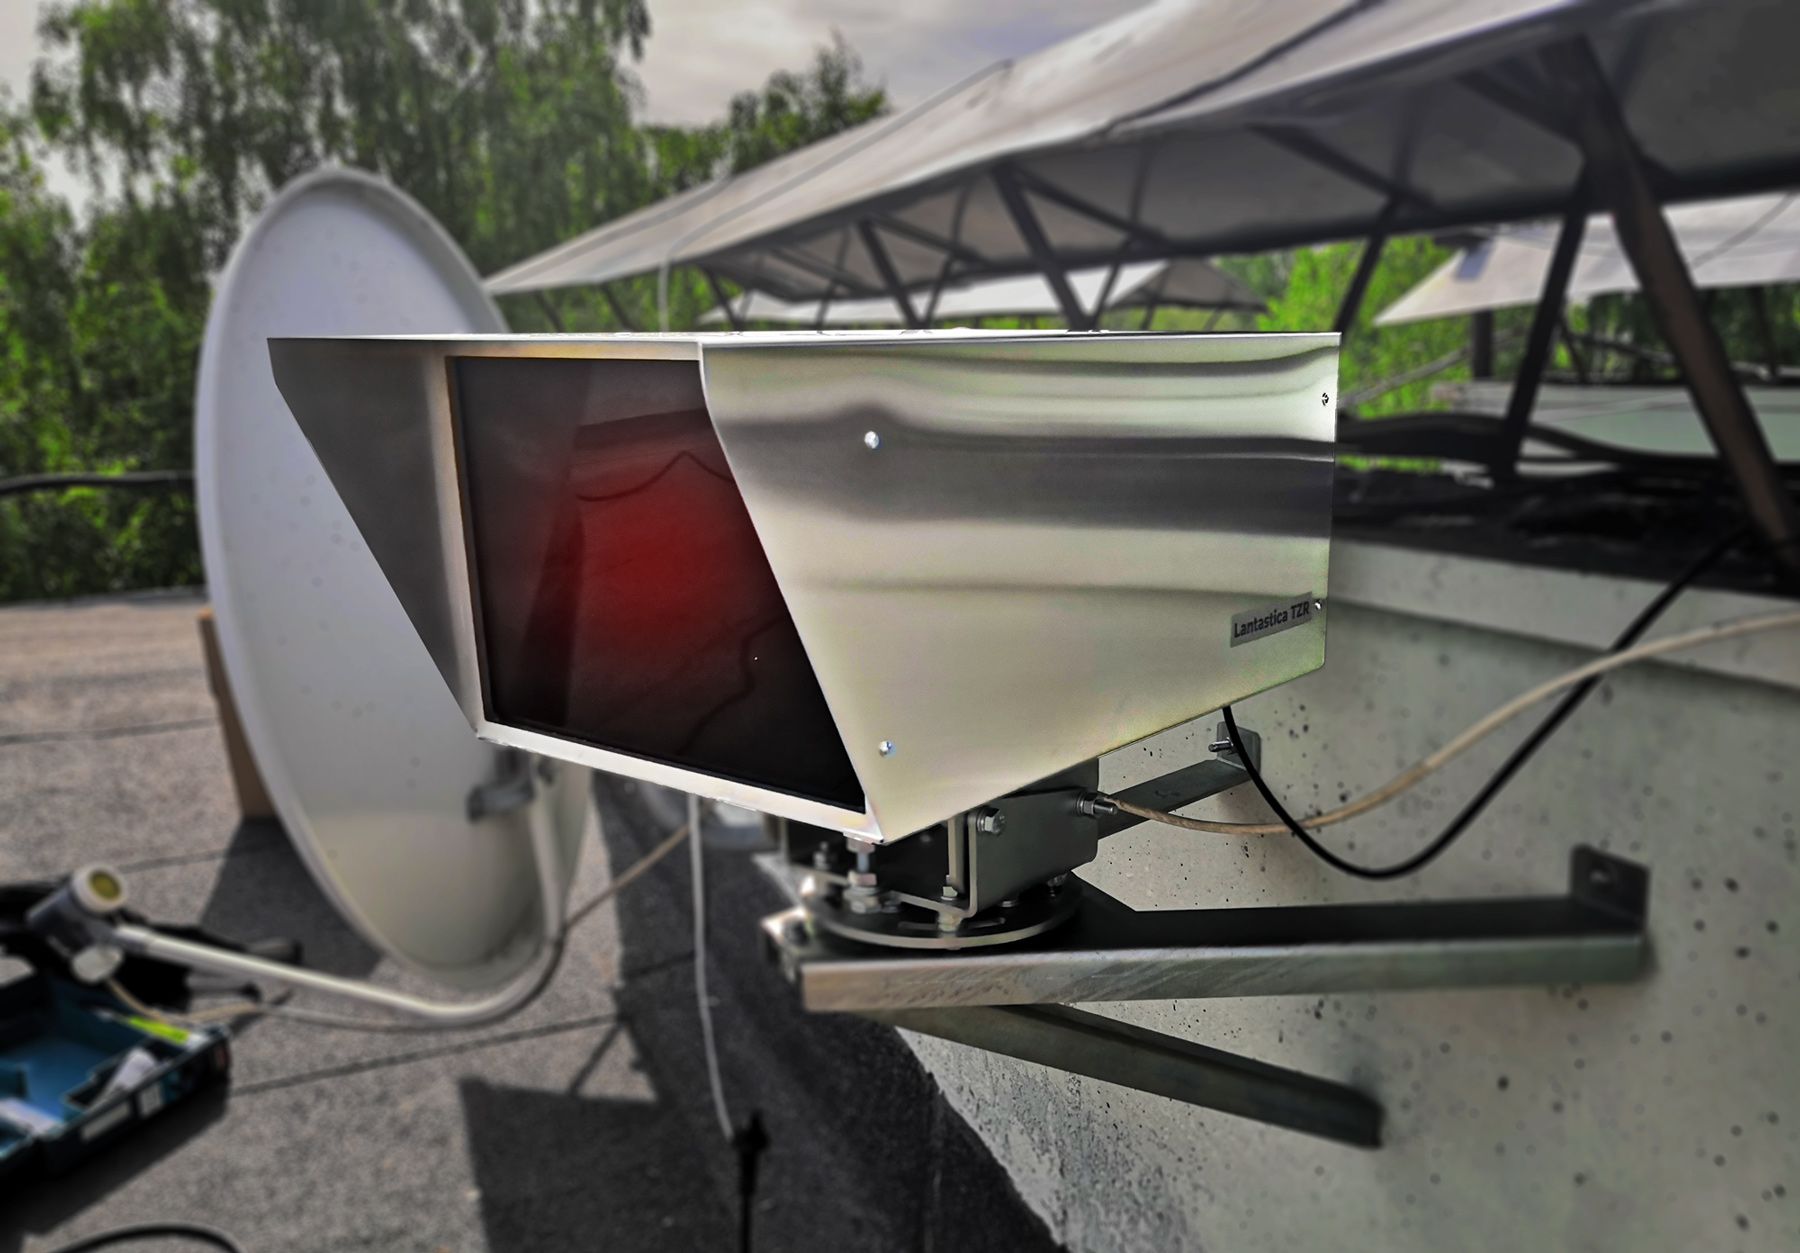
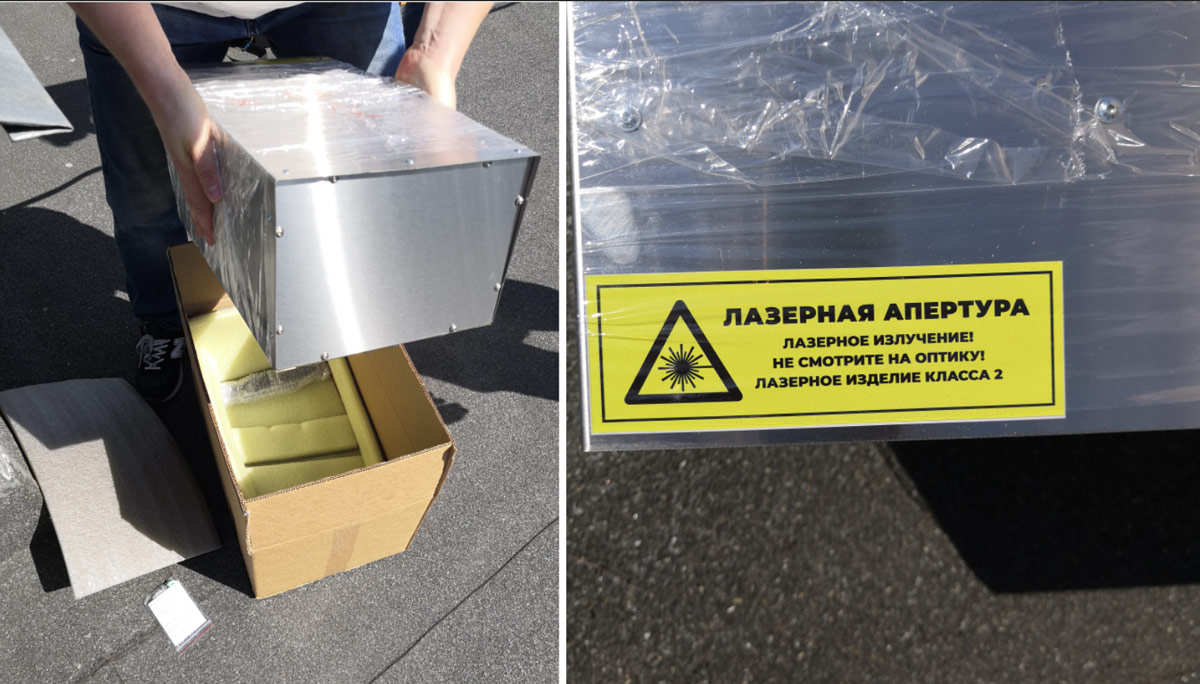
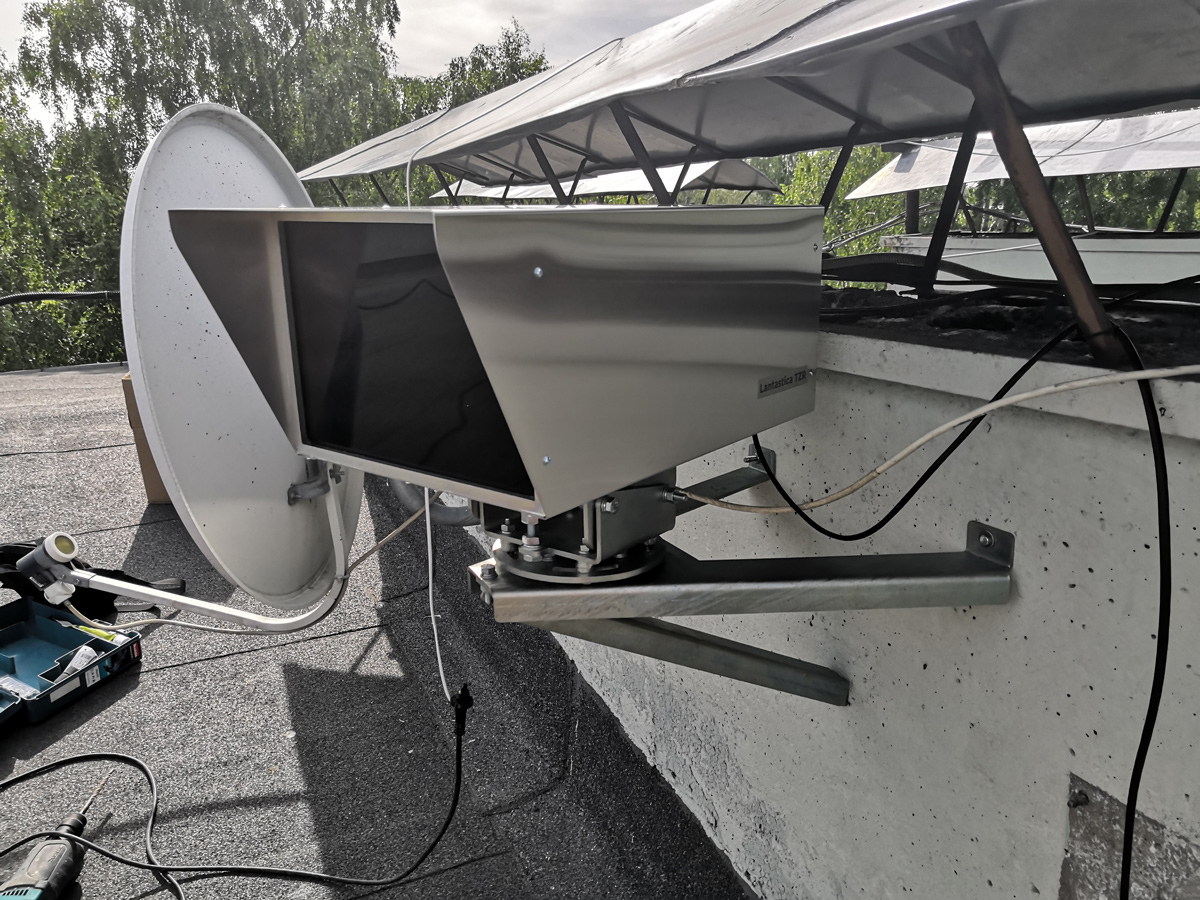
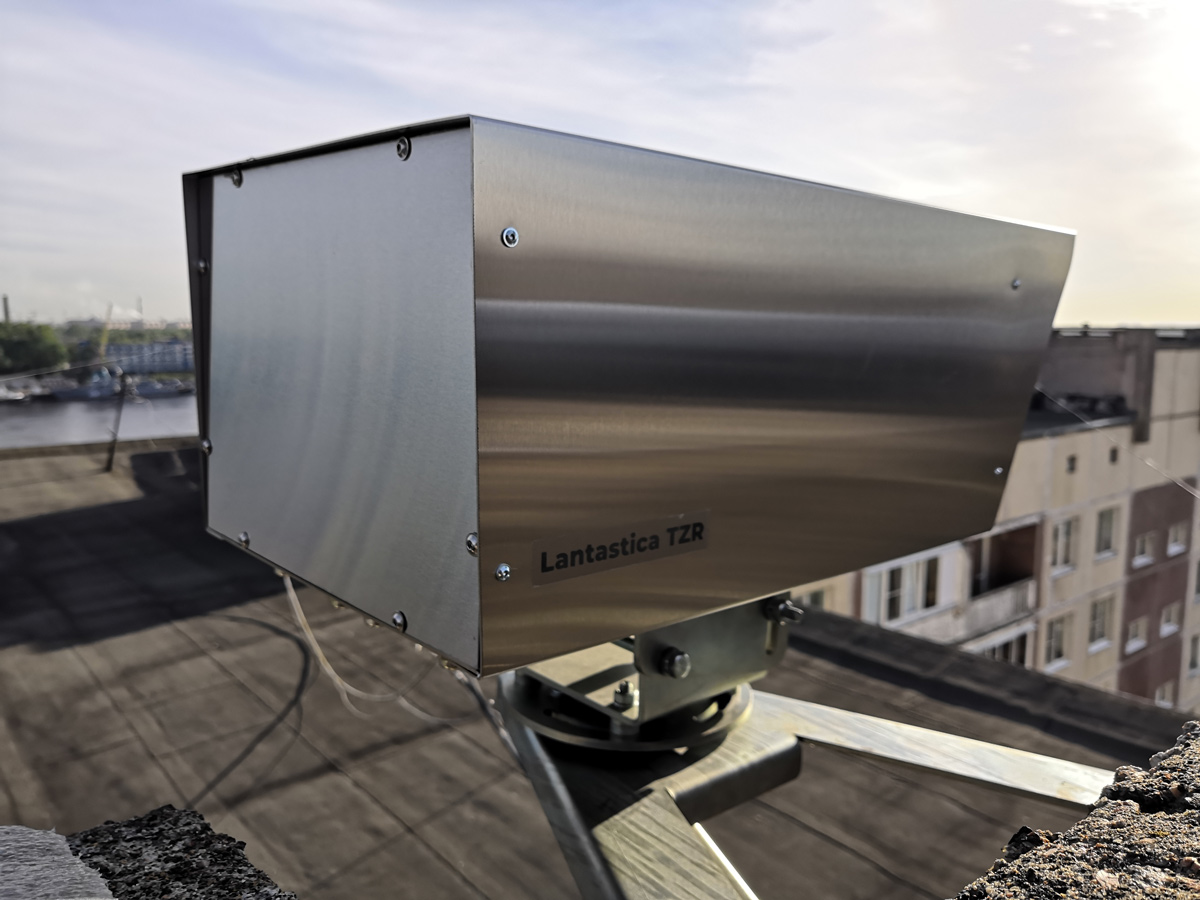
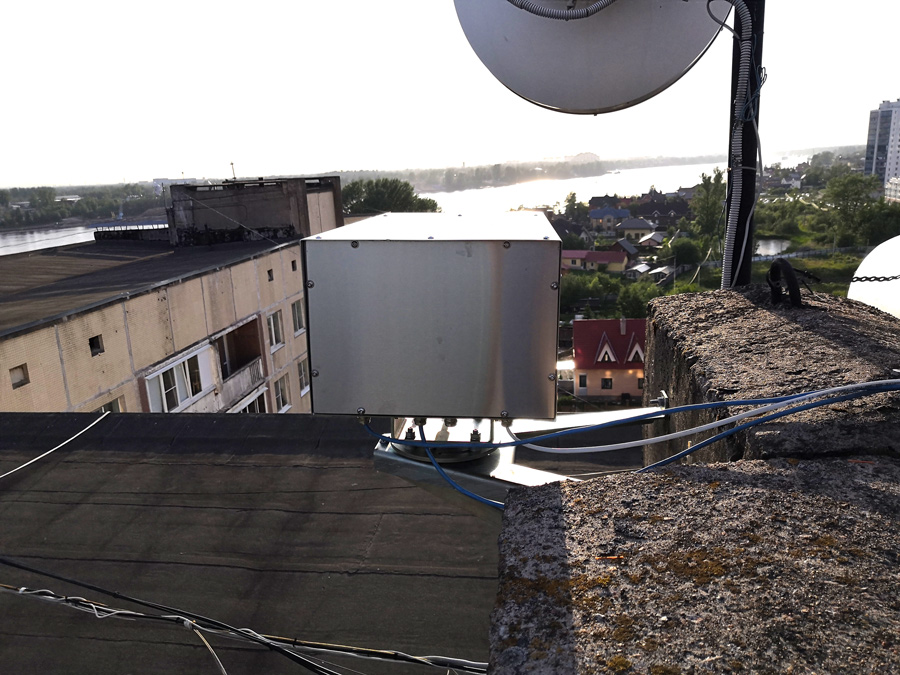
 Modems look like a surveillance camera in a metal case made of stainless steel. Mounted on a tripod with swivel bracket. -------------------------------------------------- -------------------------------------------------- -------------------------------------------------- -------------------------------------------------- -------------------------------------------------- -------------------------------------------------- -------------------------------------------------- -------------------------------------------------- ---------
- Full Duplex speed: at a distance of 3 km - 1 Gbit / s (98% of the time in a year) + 100Mbit / s (1.5%); at 5km - 1 Gbit / s (95%) + 100 Mbit / s (3%).
Often, manufacturers of wireless equipment indicate the total speed in both directions, for example, at TX 50Mbit / s and RX 50Mbit / s, the speed is 100Mbit / s. Therefore, it is important to pay attention to the duplex parameter. - SFP port, two Ethernet ports (one with PoE out)
- Built-in winter heating
- The maximum consumption of 15 watts in the warm season; 65 watts in cold weather
- Operating temperatures: from -50 ° C to + 50 ° C, IP65 protection.
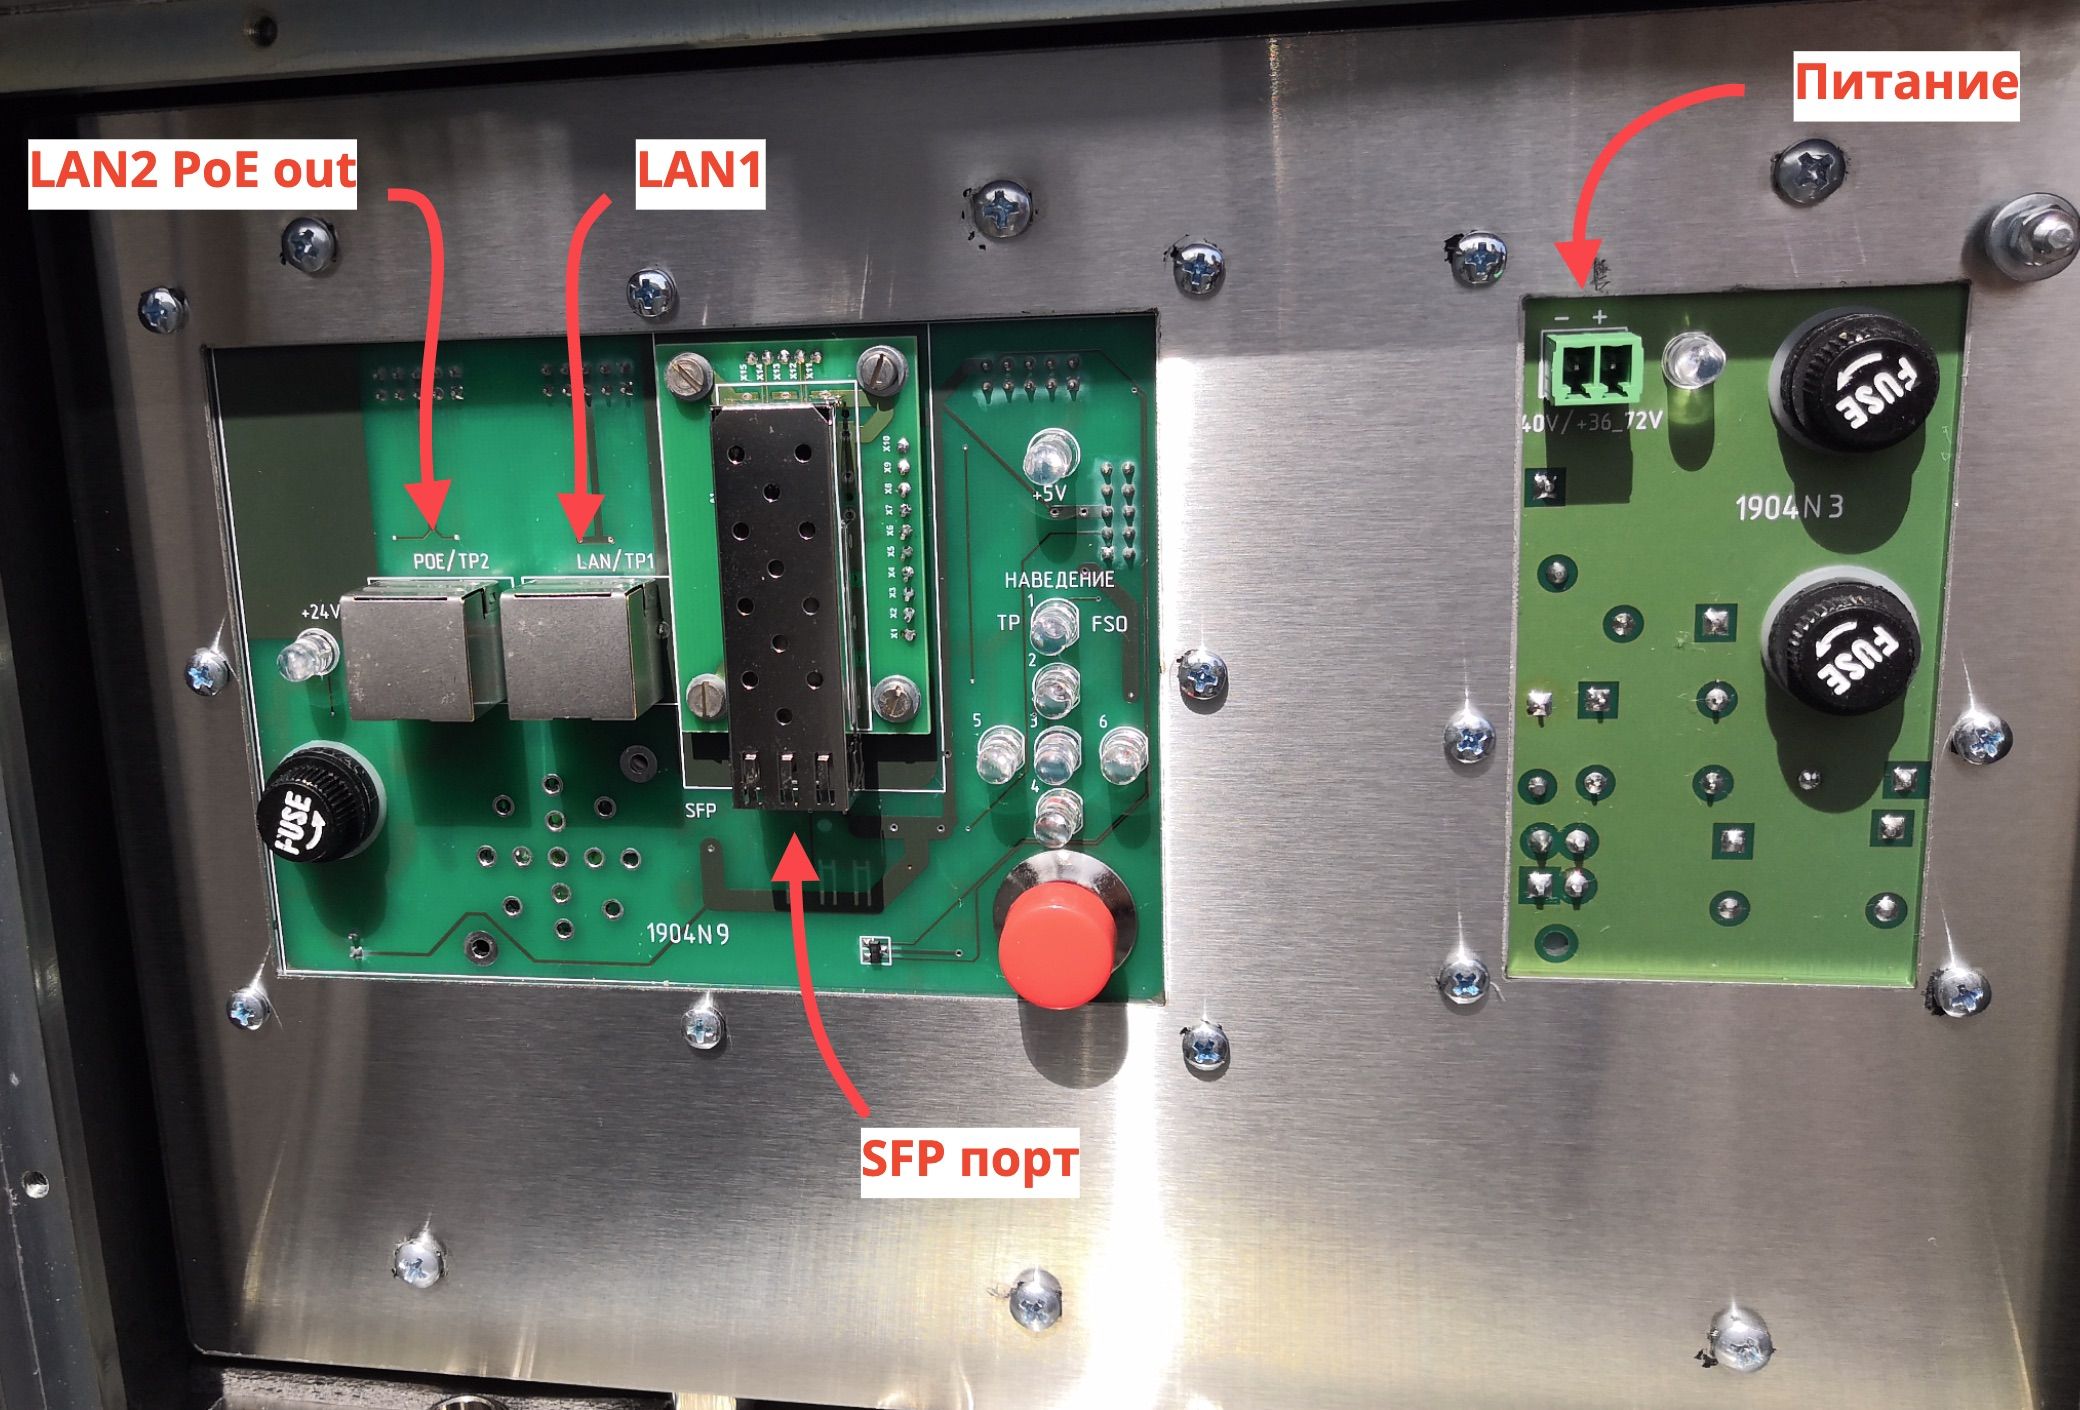
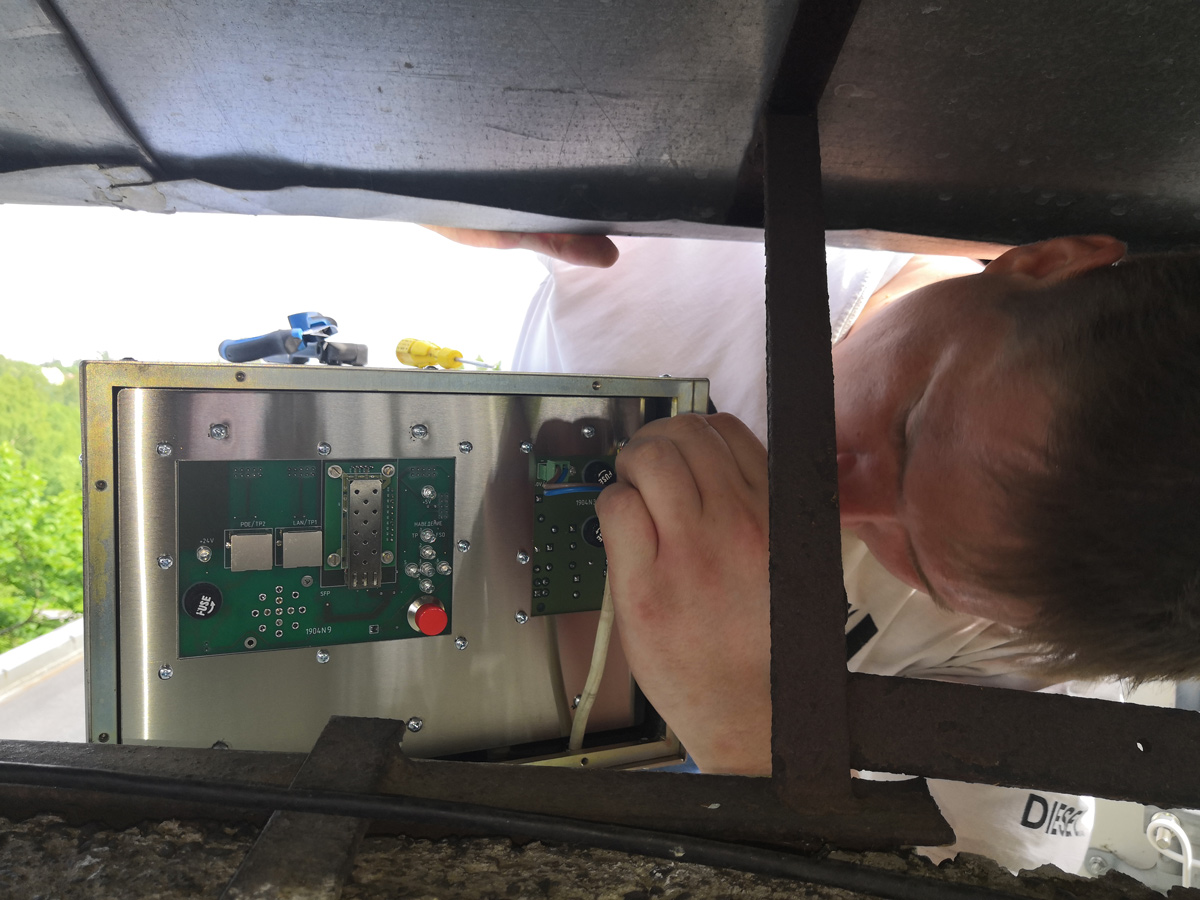
Lantastica TZR modem rear panel
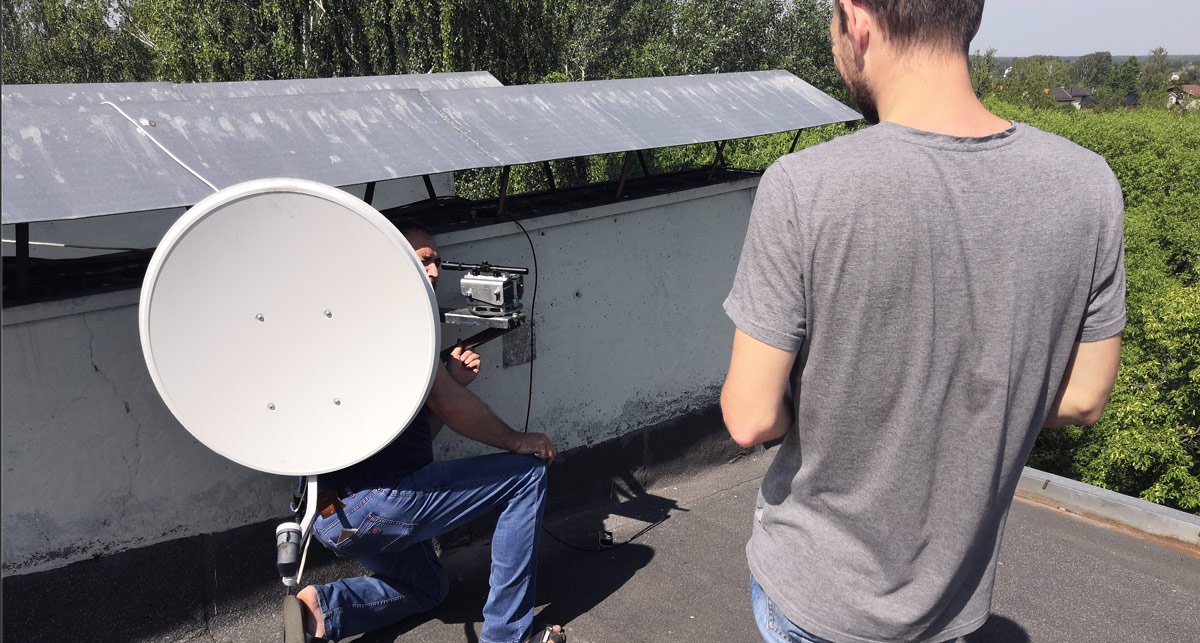
Mounting
We needed to connect two buildings across the river at a distance of about 3km. The case takes place near St. Petersburg. Pulling an optical line through the Neva is a very real task, but the cost of such a project is tens, if not hundreds of times more expensive than any of the wireless bridge options.
First of all, we conduct a reconnaissance of the area, make sure that there is direct visibility between the roofs of the houses, and we consider the approximate distance between the points using a map.
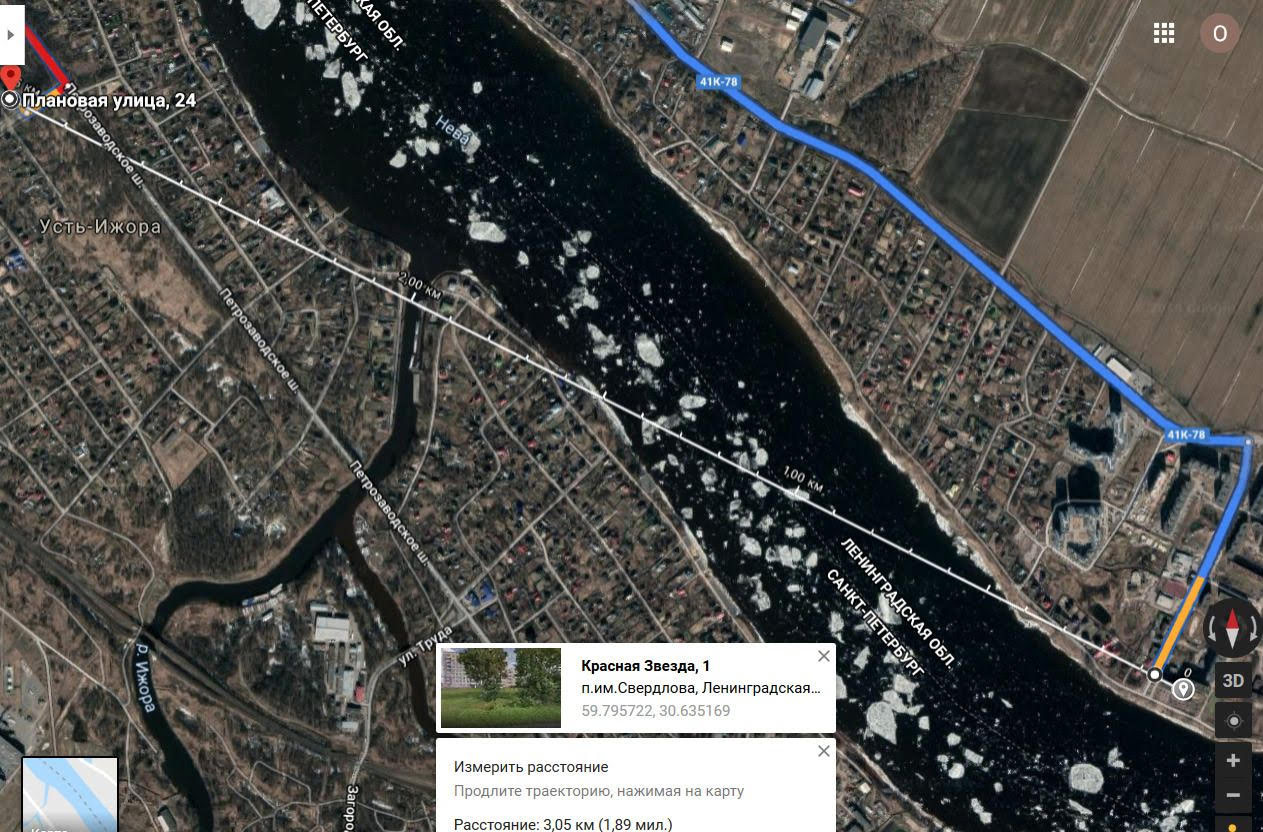
The distance between the two buildings on which modems will be installed.
We see that the desired point is in direct line of sight and is not blocked by trees. It is important to consider that trees can grow in a couple of years.
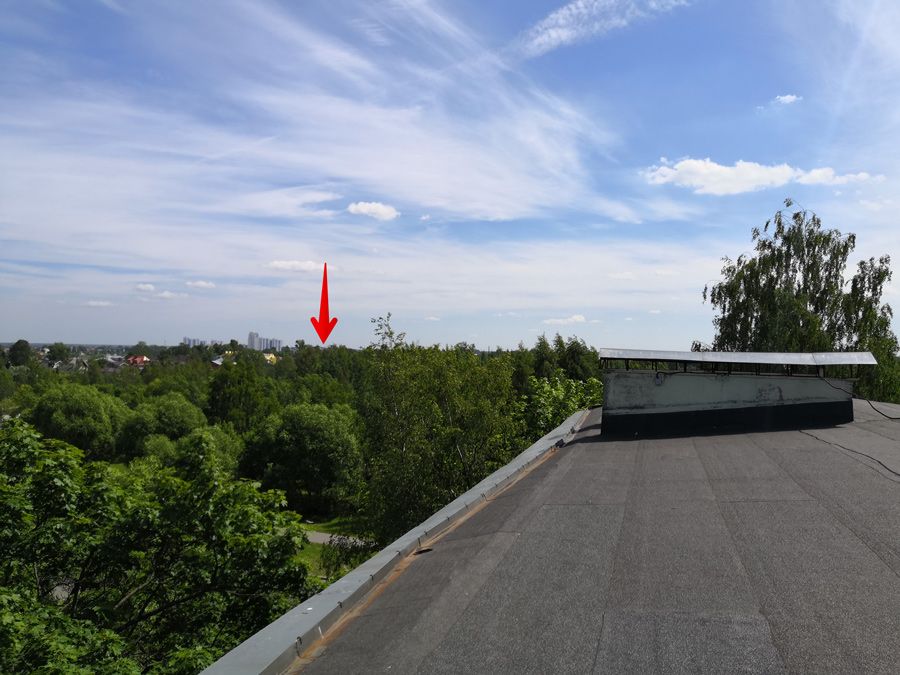
Location of the second modem
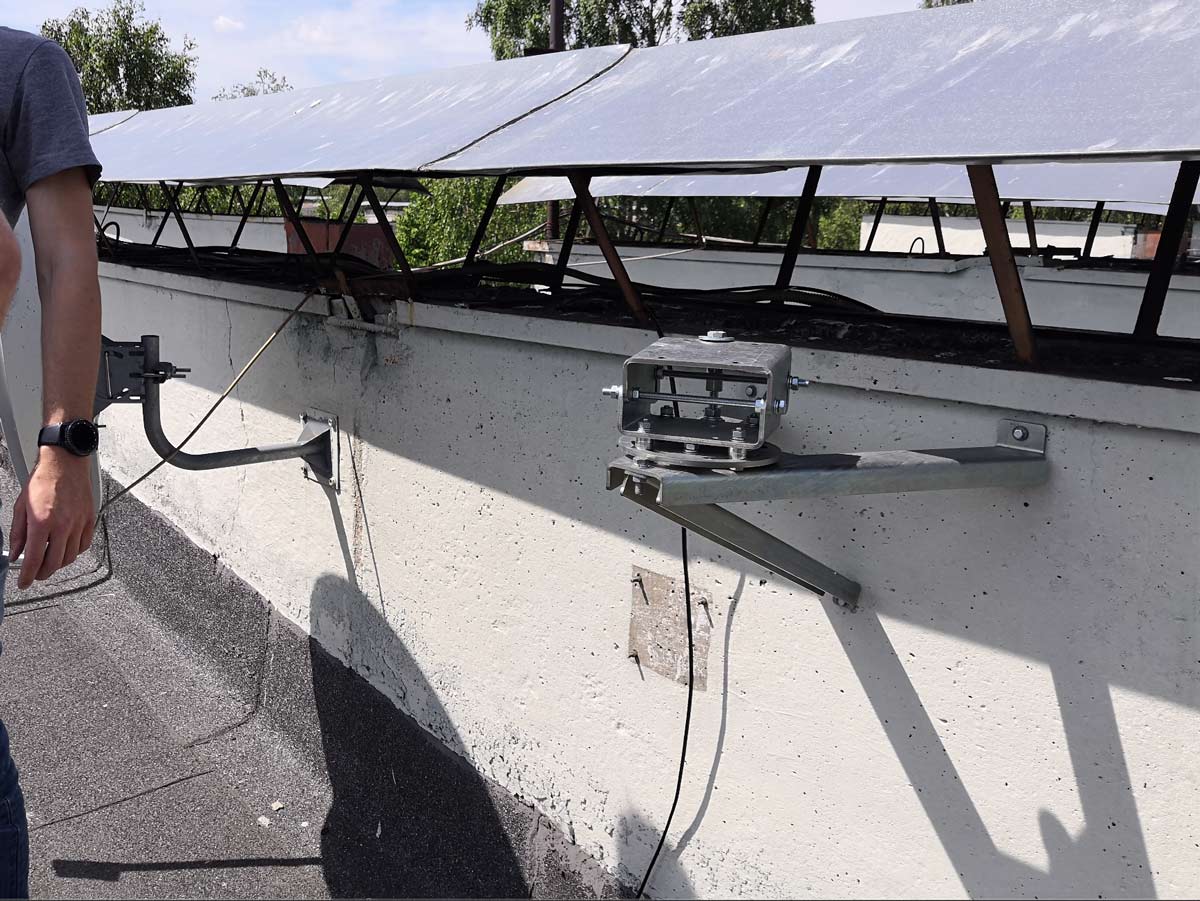
First, the bracket is mounted on the tripod using anchors. It must withstand wind loads and not vibrate.
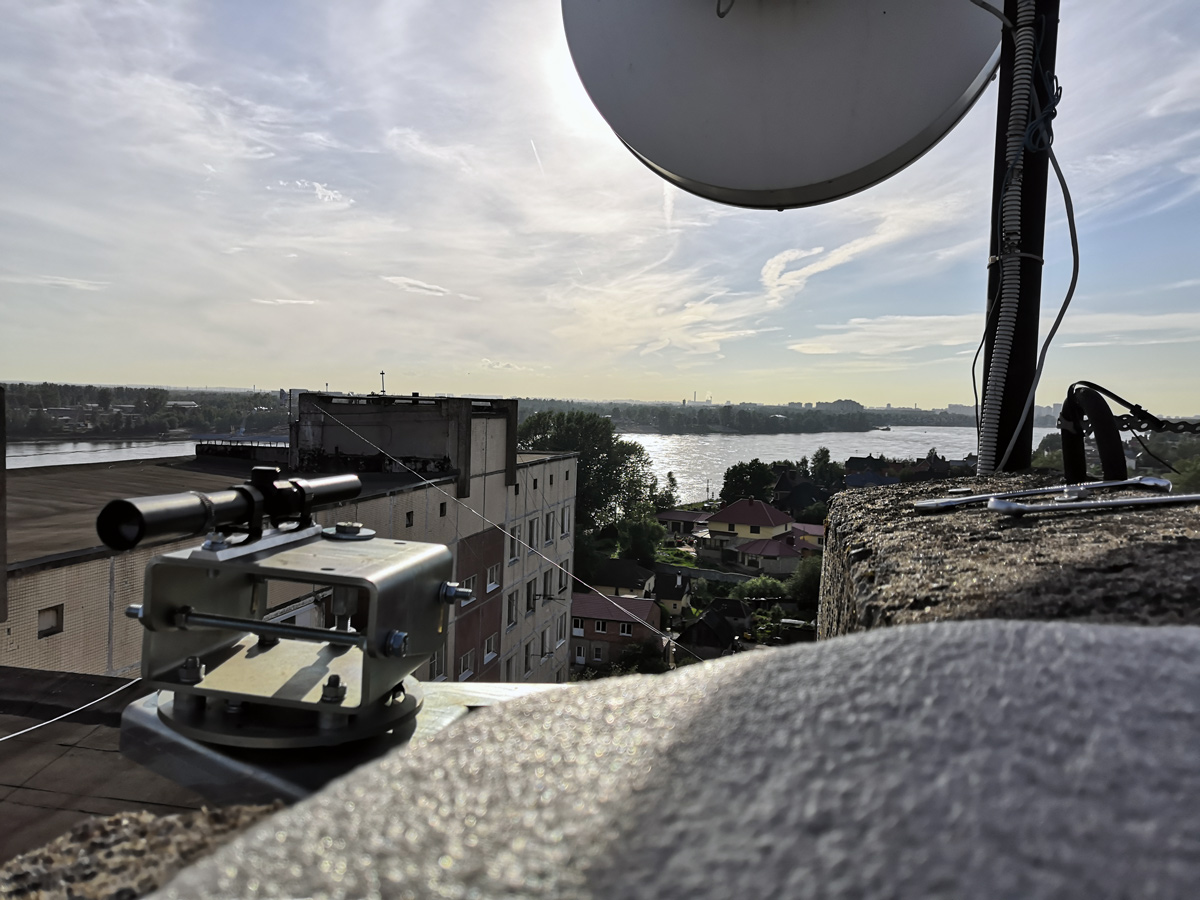
For the initial pointing to the remote modem, an optical sight is used, at some point the installers become like snipers.
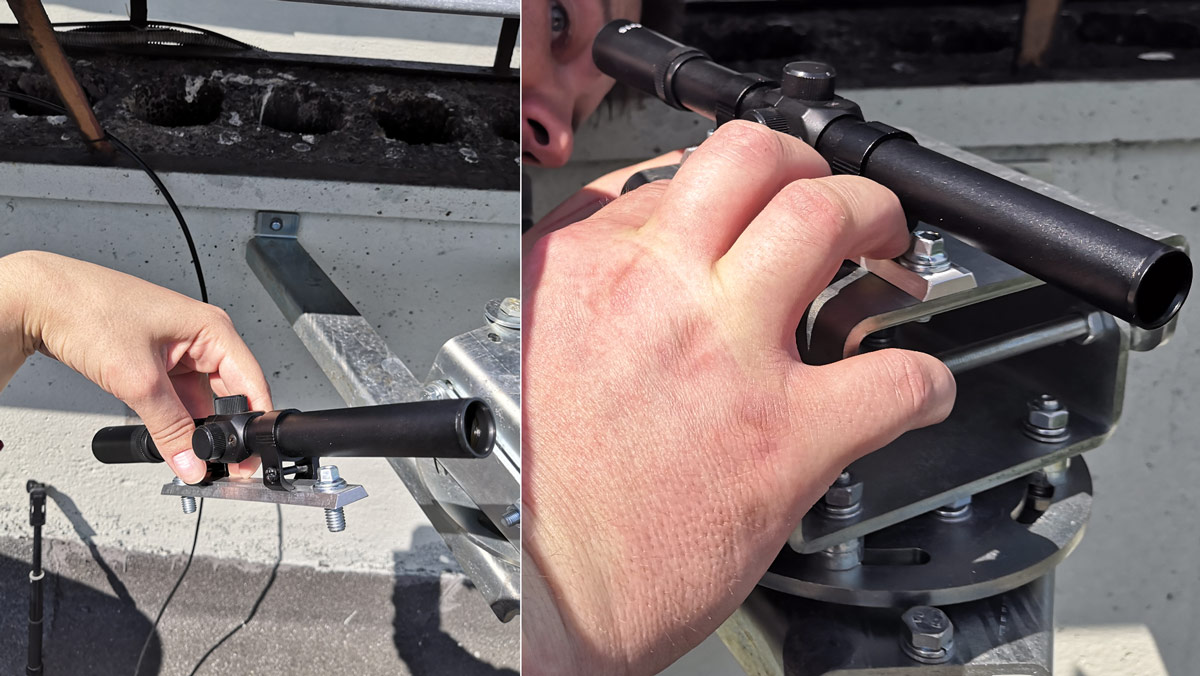
Primary positioning of the bracket using an optical sight
Now you can install the modem. It is important to remember that laser radiation is hazardous to the eyes and follow safety precautions. Do not look into the glass of a working modem.

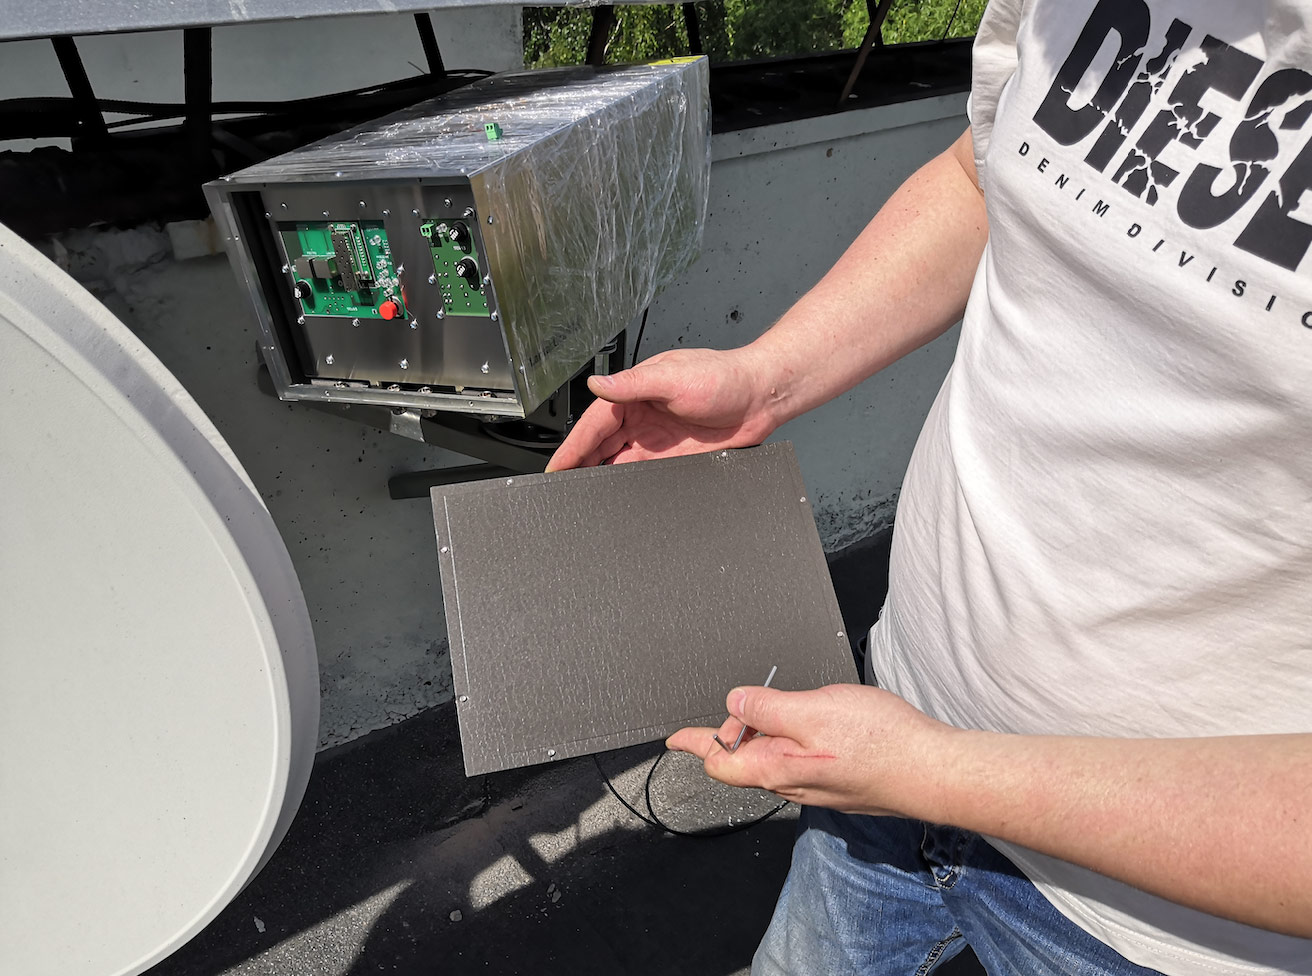
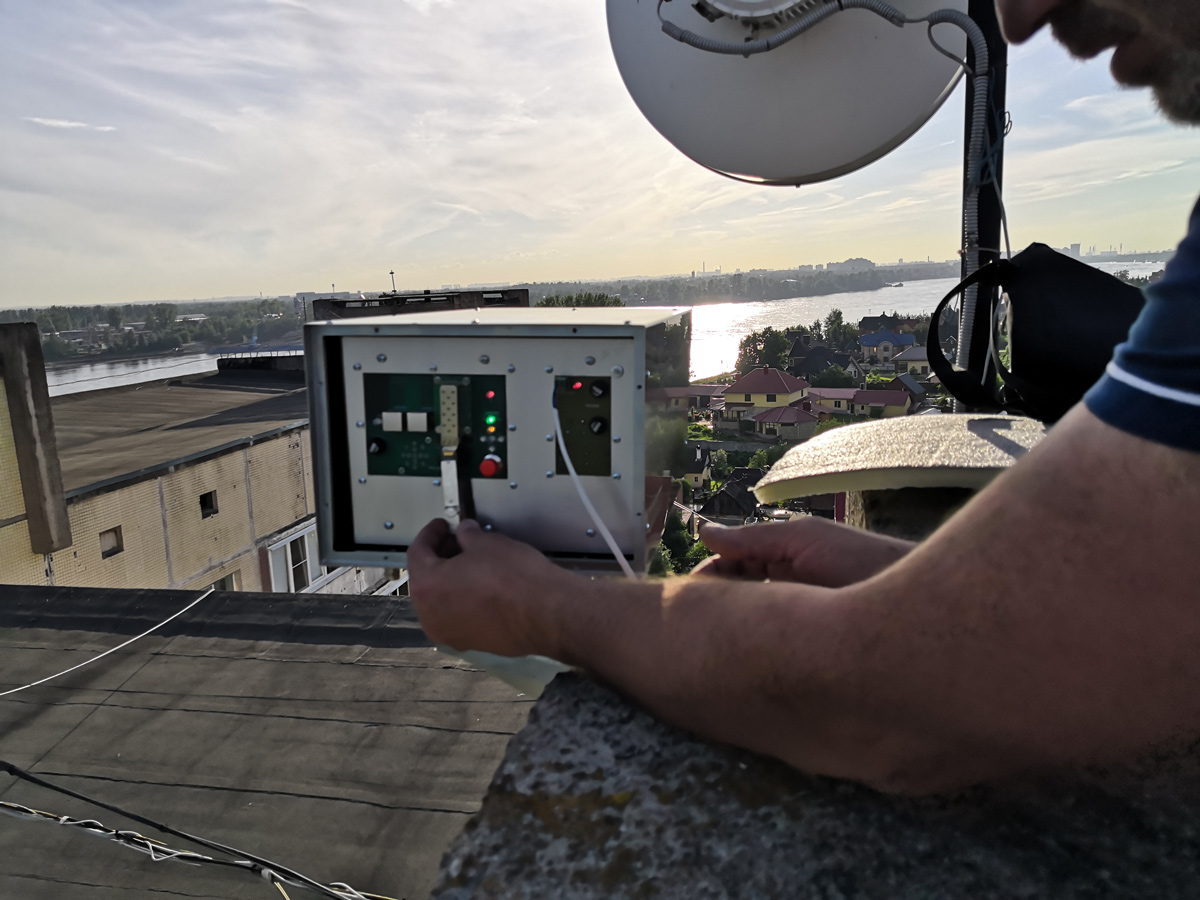
To access the contacts, the back cover of the device is removed.
Power connection
The final view of the modem after installing and removing protective films
Installation of the second point and other photos under the spoiler:
More photos
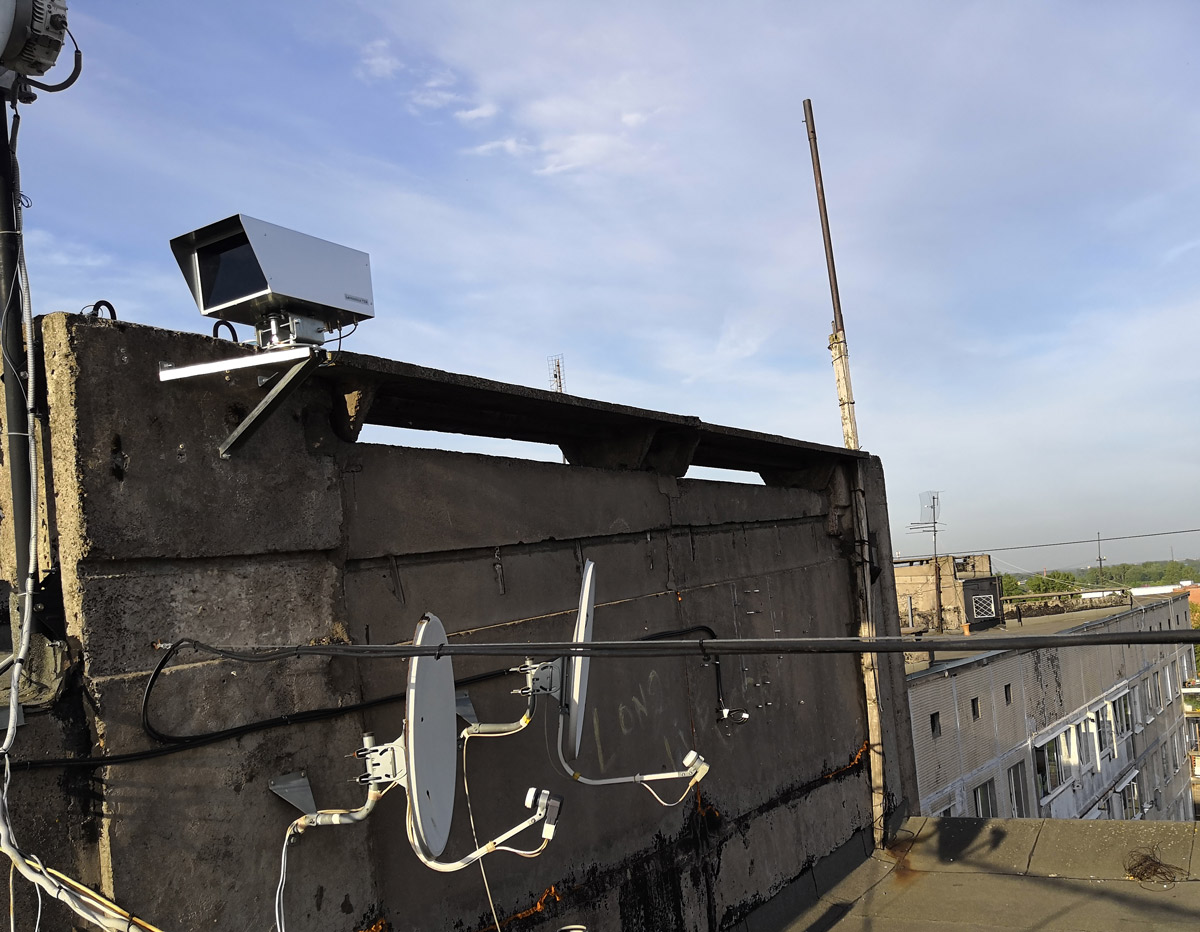
View from the second roof to the first modem
View of the installed modem
Connecting power

Installing the SFP module
View of the installed modem with the cover closed
Side view

View of the installed modem
Connecting power
Installing the SFP module
View of the installed modem with the cover closed
Side view
Customization
Optionally, a camera can be installed in the modem that shoots in the infrared range, it serves to visually assess working conditions, check for glass contamination, etc. The video stream from the camera can be obtained in the usual RTSP format and integrated into the video surveillance system.
This is the image from the camera inside the modem installed on our second point. The beam from the opposite modem is visible in the image as a bright iridescent dot.
Video from the camera inside the modem. The light spot of the opposite modem is visible
Telnet interface
The devices are configured through the console telnet. Consider the steps in the initial setup step by step. To connect to the modem console, you can use the telnet client built-in to Windows, or putty.
The manufacturer uses special terminology for console commands: interactive menus are called scripts , actions inside a script are called commands .
The modems are equipped with motors for automatic guidance, which come from the factory in parking mode. To start the configuration, you need to remove the motors from the parking lot: either using the button on the modem, or by a command in the console.
To do this, run the trk script and execute the .go / z command in it
telnet ip_модема # подключаемся к модему
Do APP>trk # входим в скрипт track
trk>.go /z # снимаем моторы с парковки и устанавливаем их в нулевое положение
After that, we start the automatic configuration in turn on each modem. It takes about ten minutes. During this time, with the help of motors, the modem most accurately points to the opposite.
>setup
setup>.dist 3000 # устанавливаем примерную дальность в метрах
setup> .modem # запускам скрипт автонастройки и ждем
setup> .use # применяем настройки
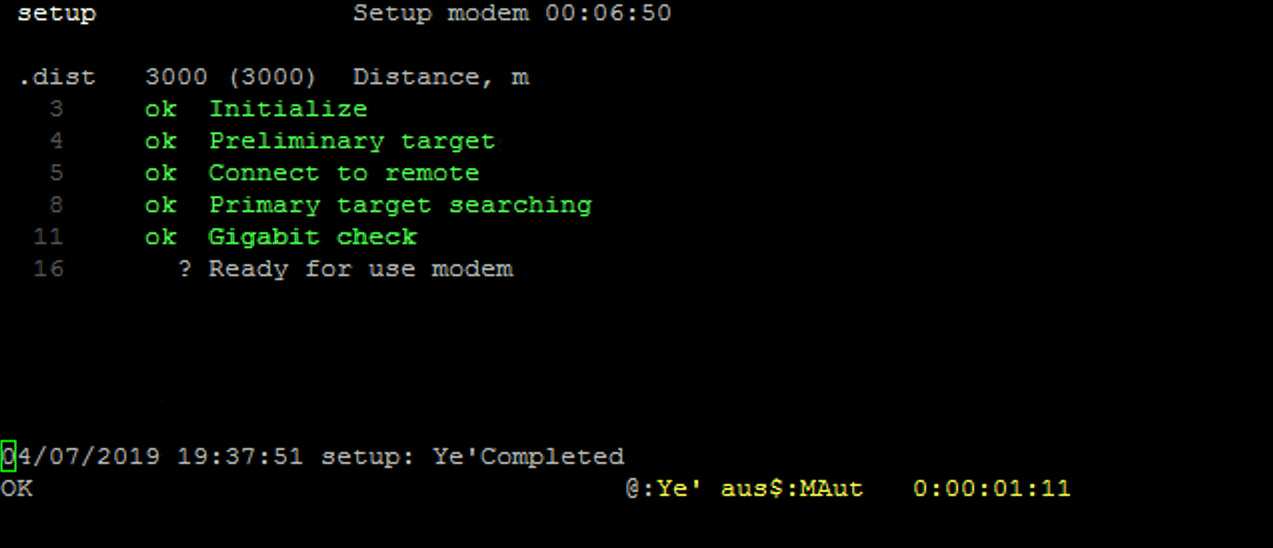
Successful completion of the auto-tuning script
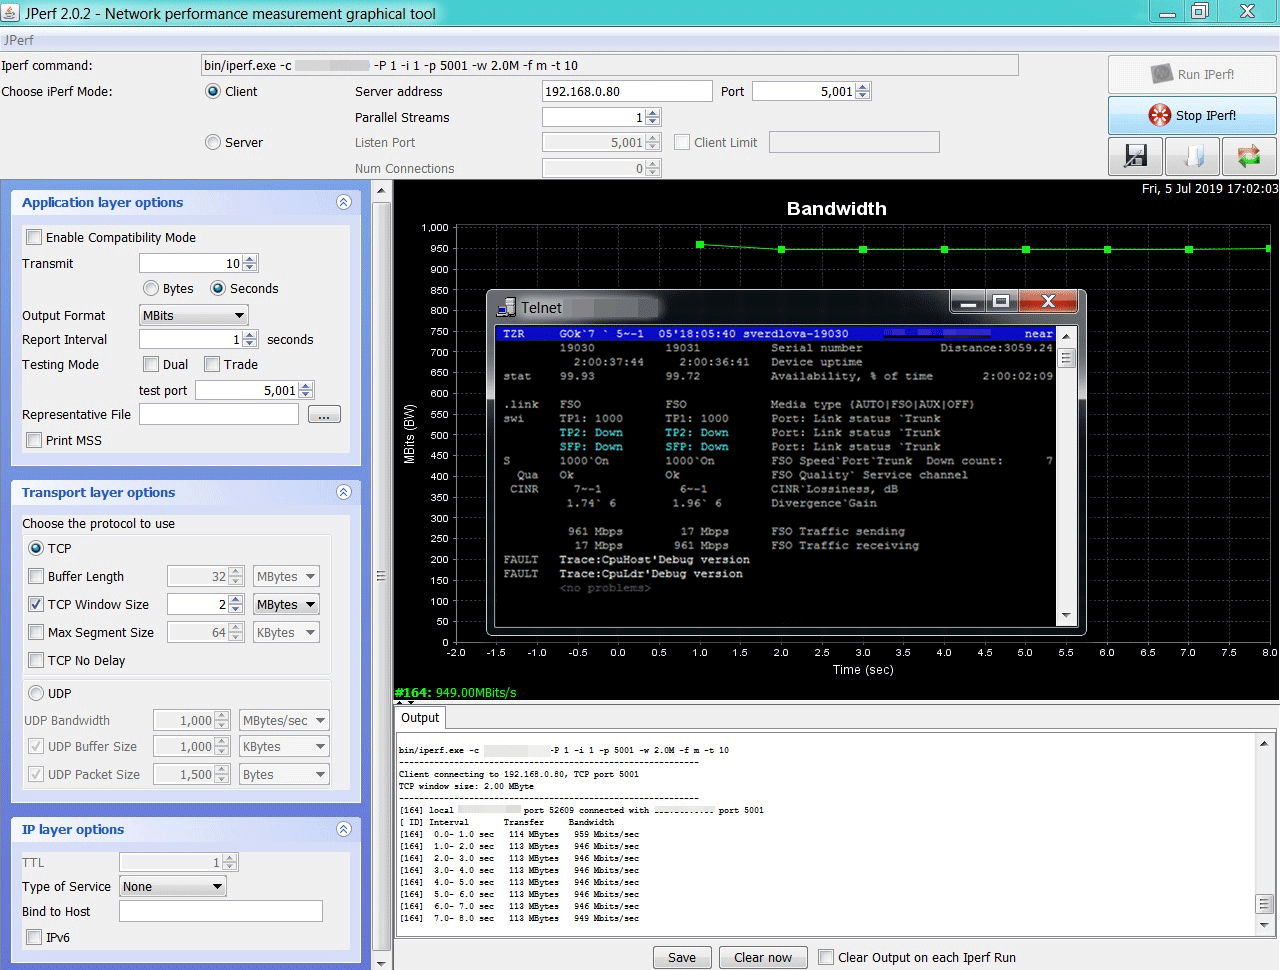
Now that the modems are configured, we can check the settings are correct and the signal quality, for this we enter the monitoring script, which displays the current signal level, current traffic, failure statistics and the exact link range, which we had 3059 meters.
>m # переходим в скрипт мониторинга
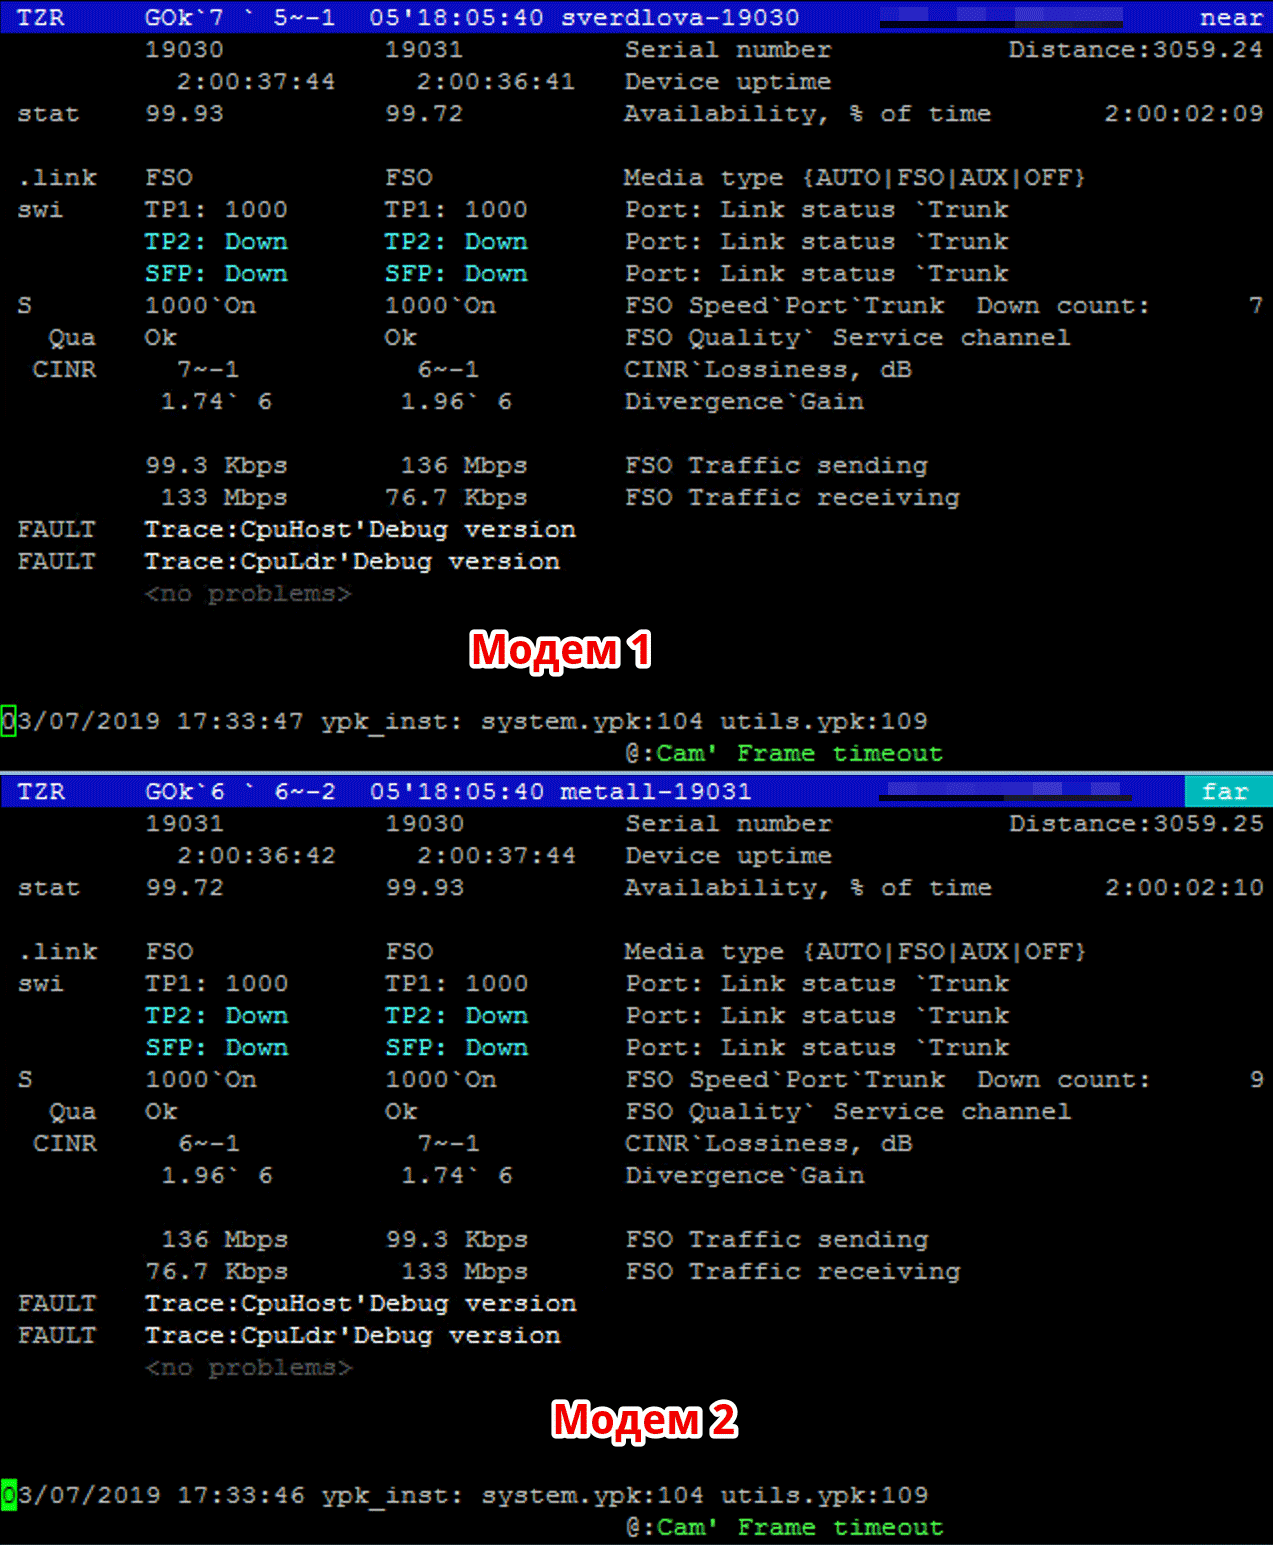
The monitoring script shows the signal level, current traffic and failure statistics.
We are interested in the following metrics:
Divergence - beam divergence in mrad (milliradian), in our case it is 1.96 and 1.74 mrad.
Gain - current laser brightness level.
CINR - (Carrier to Interference + Noise Ratio) ratio of signal level to noise level.
FSO Speed - the speed at which the optical link works, in our case 1000 megabits.
This is how the configured link looks: a video stream and a monitoring script running on two modems simultaneously.
Viedo: image from cameras on modems and connection statistics
Testing
Setup is complete, you can proceed to the real tests. First, we’ll measure the bandwidth using the jperf utility, which is an analog of iperf3 for Windows. The actual available channel width was around 950 megabits symmetrically in both directions, that is, in duplex mode. This is a very good result. (Clickable) Bandwidth measurements. Usually radio bridges built on the WiFi protocol or proprietary analogs like nv2 from Mikrotik introduce a delay of around 2ms. For laser modems, under ideal conditions, the delay was indistinguishable from a cable connection <1ms. Below is a screenshot of the usual ping utility, launched before the remote host located behind the laser link. Delay like a wired connection

Conclusion
In general, the impression is positive, the claimed characteristics correspond to real ones. Particularly pleased with the complete lack of delay. The setup is still difficult, without the help of the manufacturer, I would not understand. I would like to have a web interface, instead of a console. The price of one modem is from 170 thousand rubles, depending on the configuration. Similar characteristics solutions like AirFiber cost around 110k. rubles.
Thanks to NPK Catharsis for the equipment provided and to the company's engineers for their help in setting up.