Point-by-round PKH locks on an OpenWrt router using WireGuard and DNSCrypt
What is different from similar materials?
- Implementing pure OpenWrt
- Using WireGuard
- The configuration of the router is organized using OpenWrt configs, and not a bunch in one script
- There are situations when restarting the network and restarting
- It consumes few resources of the router: blocked subnets are contained in iptables, and not in the routing tables. That allows you to deploy this business even on weak devices
- Automating configuration with Ansible (does not require python on the router)
Video version
Why OpenWrt and WireGuard?
OpenWrt is put on so many models of soho routers, configured and expanded as your heart desires. Now many router firmwares are add-ins over OpenWrt.
Wireguard is used because of its quick and easy setup, and also because of the high transmission speed through the tunnel.
A bit about WireGuard
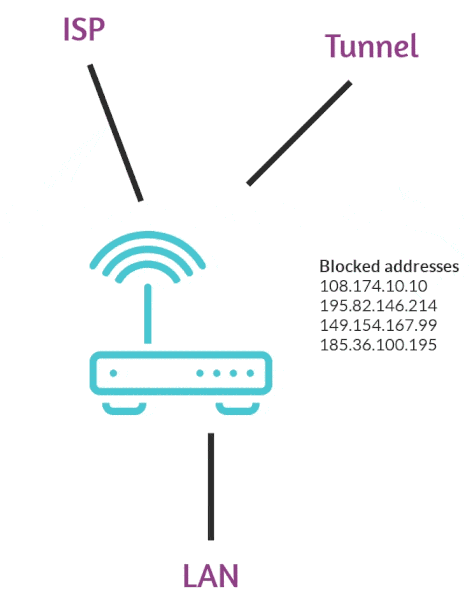
In our case, the server is VPS outside the RKN, the client is the OpenWrt router at home. When you want to go topornolabtelegram, your router will send traffic through the server with WireGuard.
WireGuard raises the site-to-site connection, i.e. Both the server and the client have a server and a client part of the configuration. If it is not clear, it will become clear when you see the configuration.
The server and the client have their own private and public keys.
Configuring WireGuard on the server
I do everything on Ubuntu 18.04, but the official documentation has installation instructions for all known and not very OS.
Installation
sudo add-apt-repository ppa:wireguard/wireguardWhen an error occurssudo: add-apt-repository: command not found
Install software-properties-common - the package provides the ability to add and remove PPAsudo apt install software-properties-common
sudo apt update
sudo apt install wireguard-dkms wireguard-tools
We generate keys for the server. Keys will be saved in the WireGuard directory for convenience
cd /etc/wireguard/
wg genkey | tee privatekey-server | wg pubkey > publickey-server
Accordingly, in the file privatekey-server will be a private key, and in publickey-server - public.
We will also generate the key for the client right away:
wg genkey | tee privatekey-client | wg pubkey > publickey-client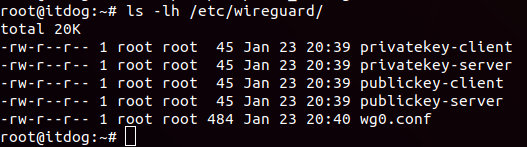
Configuration
The config is stored in /etc/wireguard/wg0.conf. The server part looks like this:
[Interface]
Address = 192.168.100.1
PrivateKey = privatekey-server
ListenPort = 51820
PostUp   = iptables -A FORWARD -i %i -j ACCEPT; iptables -A FORWARD -o %i -j ACCEPT; iptables -t nat -A POSTROUTING -o ens3 -j MASQUERADE
PostDown = iptables -D FORWARD -i %i -j ACCEPT; iptables -D FORWARD -o %i -j ACCEPT; iptables -t nat -D POSTROUTING -o ens3 -j MASQUERADE
Address - address for the wg interface (address inside the tunnel)
PrivateKey - Private key (privatekey-server)
ListenPort - Port on which the service is waiting for a connection
Well, we do masquerading, because we will use this server to access the Internet.
Note that the interface name in your case may differ:
Client part
[Peer]
PublicKey = publickey-client
AllowedIPs = 192.168.100.3/24
PublicKey - the public key of our router (publickey-client)
AllowedIPs - subnets that will be available through this tunnel. The server only needs access to the client's address.
Both parts are stored in the same config.
Enable autorun on reboot:
systemctl enable wg-quick@wg0Making the server a router:
sysctl -w net.ipv4.ip_forward=1Set up a firewall. Suppose that we only have WireGuard and ssh on the server:
sudo iptables -A INPUT -i lo -j ACCEPT
sudo iptables -A INPUT -p udp -m udp --dport 51820 -j ACCEPT
sudo iptables -A INPUT -m state --state RELATED,ESTABLISHED -j ACCEPT
sudo iptables -A INPUT -p icmp -j ACCEPT
sudo iptables -A INPUT -p tcp -m tcp --dport 22 -j ACCEPT
sudo iptables -A INPUT -j DROP
Save the iptables configuration:
sudo apt-get install iptables-persistent
sudo netfilter-persistent save
Raise the wg interface for the first time manually:
wg-quick up wg0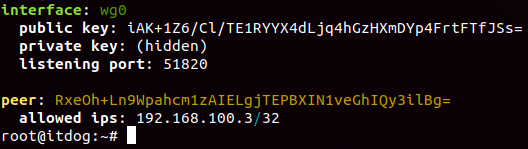
WireGuard server is ready.
Configure the router
I am using OpenWrt version 18.06.1 on Xiaomi mi 3G and Asus RT-N16.
The logic of the router
We load lists, we place them in iptables, all addresses from these lists iptables marks with a 0x1 marker. Further, all packets marked 0x1 go to a separate routing table, all packets that fall into this routing table go through the wg interface.
Package installation
As for the space occupied by the flush, everything will need approximately 0.9MB. If you have a very bad place, replace curl with a wget and you can not install dnscrypt-proxy.
Put the packages. In OpenWrt, this is simply done through the package manager opkg:
opkg update
opkg install ipset wireguard curl
Download lists
Everything that can be done through the standard features of OpenWrt is done through them. Everything else (except hotplug) I put in a small script:
#!/bin/sh

dir=/tmp/lst
mkdir -p $direcho"Run download lists"
curl -z $dir/subnet.lst https://antifilter.download/list/subnet.lst --output $dir/subnet.lst
curl -z $dir/ipsum.lst https://antifilter.download/list/ipsum.lst --output $dir/ipsum.lst
echo"Firewall restart"
/etc/init.d/firewall restart
Lists of prohibited subnets and addresses are received by files. For them we create a directory in / tmp. In / tmp - because it is RAM, such a feature of OpenWrt is quite convenient. On ROM of a router it is not worth writing something once again.
We download lists with antifilter.download with curl, the z flag means that curl will download the file only if the remote file is different from the local one or if it does not exist, as is the case when loading the router.
subnet.lst - list of blocked subnets, does not change often.
ipsum.lst - list of blocked addresses, which is summed up by mask. Instead of 150 thousand records we get 15 thousand - conveniently.
After we have the files - we restart the firewall, this is necessary in order for ipset to work and add lists to iptables, we will have ipset configured in / etc / config / firewall.
We add this script to /etc/init.d/ and we call it hirkn. Let's make it executable
chmod +x /etc/init.d/hirknNow we have not just a script, but a whole service. In order to run it at boot, we make a symlink in /etc/rc.d. We need it to start after all other services, so we make the prefix S99
ln -s /etc/init.d/hirkn /etc/rc.d/S99hirknLists need to be updated from time to time, we add an entry to cron:
crontab -e0 4 * * * /etc/init.d/hirknIt seems to me quite sufficient to update them once a day. Keep in mind that when adding lists to ipset, the network falls off, in my case it is 2 seconds.
Also enable kroner, by default it is disabled:
/etc/init.d/cron enable
/etc/init.d/cron start
Routing Table Configuration
Create a routing table for traffic through the tunnel by simply adding a line:
99 vpnin the / etc / iproute2 / rt_tables file.
To create the default route for the "vpn" table via the wg interface, use the command:
ip route add table vpn default dev wg0But when restarting the network, the route will disappear, so we create a 30-rknroute file in the /etc/hotplug.d/iface/ directory with simple contents:
#!/bin/sh

ip route add table vpn default dev wg0
This means that when you turn on / off interfaces, our route will be added. And accordingly, this route will always be registered.
Network configuration
We need to configure WireGuard and the rule for packets labeled 0x1.
The WireGuard configuration is located in / etc / config / network
"Server" part:
config interface 'wg0'
        option private_key 'privatekey-client'
        list addresses '192.168.100.3/24'
        option listen_port '51820'
        option proto 'wireguard'
private_key is a privatekey-client that we generated when setting up the server
list addresses - the wg address of the interface
listen_port is the port on which WireGuard accepts connections. But the connection will occur through the port on the server, so here we will not open a port for it on the firewall
proto - we specify the protocol so that openwrt would understand that this is the WireGuard configuration
"Client" part:
config wireguard_wg0
        option public_key 'publickey-server'
        option allowed_ips '0.0.0.0/0'
        option route_allowed_ips '0'
        option endpoint_host 'wg-server-ip'
        option persistent_keepalive '25'
        option endpoint_port '51820'
public_key - key publickey-server
allowed_ips - subnets that traffic can go through the tunnel, in our case no restrictions are required, therefore 0.0.0.0/0
route_allowed_ips is a flag that makes a route through the wg interface for the listed networks from the allowed_ips parameter. In our case, this is not necessary, this work is done by iptables
endpoint_host - the ip / url of our wg server
persistent_keepalive is the time interval through which packets are sent to support the
endpoint_port connection - the wireguard port on the server
In the network configuration, add a rule that will send all traffic marked 0x1 to the routing table "vpn":
config rule
        option priority '100'
        option lookup 'vpn'
        option mark '0x1'
Firewall configuration
Add two rules for marking packages, they do not fit into the UCI openwrt syntax, so we add them "as is" in /etc/firewall.user.
iptables -t mangle -A PREROUTING -i br-lan -m set --match-set vpn_subnets dst -j MARK --set-xmark 0x1
iptables -t mangle -A PREROUTING -i br-lan -m set --match-set vpn_ipsum dst -j MARK --set-xmark 0x1
These rules imply that all packets going to the subnets from the vpn_subnets and vpn_ipsum lists should be marked with a 0x1 marker.
Go directly to the firewall configuration in / etc / config / firewall.
Add a zone for wireguard. In openwrt, zones are custom chains in iptables. Thus, a zone with one / several interfaces is created and the rules are already being hung on it. The wg zone looks like this for example:
config zone
        option name 'wg'
        option family 'ipv4'
        option masq '1'
        option output 'ACCEPT'
        option forward 'REJECT'
        option input 'REJECT'
        option mtu_fix '1'
        option network 'wg0'
We allow only the output of traffic from the interface and enable masquerading.
Now you need to allow forwarding from the lan zone to the wg zone:
config forwarding
        option src 'lan'
        option dest 'wg'
And finally - the formation of lists in iptables using ipset:
config ipset
        option name 'vpn_subnets'
        option storage 'hash'
        option loadfile '/tmp/lst/subnet.lst'
        option match 'src_net'
config ipset
        option name 'vpn_ipsum'
        option storage 'hash'
        option loadfile '/tmp/lst/ipsum.lst'
        option match 'src_net'
loadfile - the file from which we take the list
name - the name for our list of
storage , match - here we specify how to store and what type of data. We will keep the type "subnet"
After this we restart the network:
/etc/init.d/network restart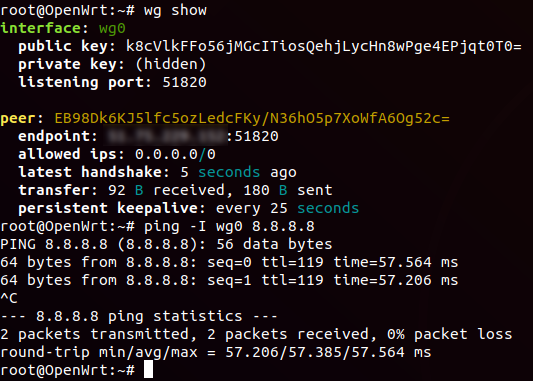
and run the script:
/etc/init.d/hirkn
After working out the script you should earn everything. Check the route on the router client:
mtr/traceroute telegram.org/linkedin.com
Bonus configure DNSCrypt
What for? Your provider can carefully replace the ip-address of the blocked resource, thus redirecting you to your ip with a stub, well, and our ip walk will not help in this case. For substitution it is not always even necessary to use the dns server of the provider, your requests can be intercepted and the answers replaced. Well, by the way, not only the provider can do this.
opkg install dnscrpt-proxyConfiguring the config / etc / config / dnscrypt-proxy like this:
config dnscrypt-proxy ns1
        option address '127.0.0.1'
        option port '5353'
        option resolver 'cpunks-ru'
Thus, we have the dnscrypt service on port 5353 available on localhost.
Resolver is dns, a server that supports encryption. On the router, the file /usr/share/dnscrypt-proxy/dnscrypt-resolvers.csv contains a list of servers available at the time of the release of the installed version of dnscrypt. And here https://dnscrypt.info/public-servers/, in general, all available dnscrypt servers. You can choose a different resolver and / or add servers for fault tolerance. Keep in mind that in order for DNSCrypt to work with the selected resolver, it must be listed in dnscrypt-resolvers.csv.
We configure dnsmasq to work with dnscrypt. In / etc / config / dhcp we comment the line:
option resolvfile '/tmp/resolv.conf.auto'so that dns servers of the provider would not be involved.
And add:
        option noresolv '1'
        list server '/pool.ntp.org/208.67.222.222'
        list server '/antifilter.download/208.67.222.222'
        list server '127.0.0.1#5353'
noresolv '1' disables the processing of the /etc/resolv.conf file
The list server 'domain / ip_dns' entry indicates which dns server to use for resolving the specified domain. Thus, we do not use dnscrypt to synchronize ntp - it is important to have the current time to work with the dnscrypt service.
When loading the router, the hirkn script runs faster than dnscrypt starts, so the antifilter.download domain is not resolved and the lists are not downloaded. You can make a delay or something else to come up with, but so far I do not see the point.
As a result, we get the following insert in the config:
#option resolvfile       '/tmp/resolv.conf.auto'
        option noresolv '1'
        list server '/pool.ntp.org/208.67.222.222'
        list server '/antifilter.download/208.67.222.222'
        list server '127.0.0.1#5353'
Add to autoload and start dnscrypt:
/etc/init.d/dnscrypt-proxy enable
/etc/init.d/dnscrypt-proxy start
Restart dnsmasq:
/etc/init.d/dnsmasq restart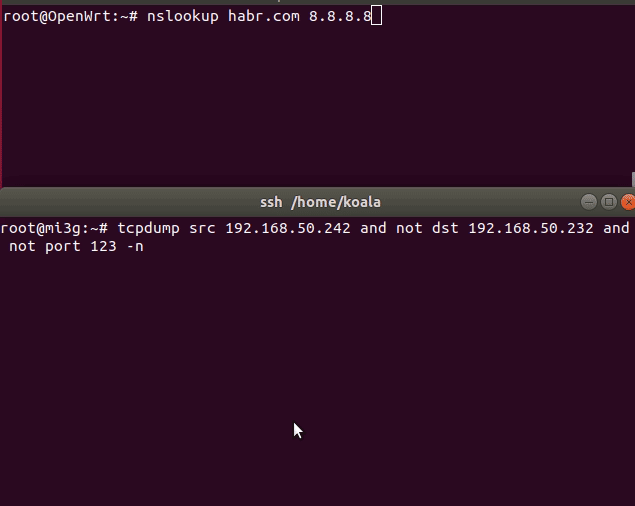
Illustration of operation without DNSCrypt and with DNSCrypt
Automatically deploy with Ansible
Playbook and templates are on github . The module is used , it does not need python on the router and there is support for uci. I tried to make sure that your OpenWrt configuration is left untouched, but still be vigilant.
Install the gekmihesg / ansible-openwrt module:
ansible-galaxy install gekmihesg.openwrtCopy the playbook and the templates:
cd /etc/ansible
git clone https://github.com/itdoginfo/ansible-openwrt-hirkn
mv ansible-openwrt-hirkn/* .
rm -rf ansible-openwrt-hirkn
Add your router to the hosts:
[openwrt]
192.168.1.1
Substitute your variables in hirkn.yml:
  vars:
    ansible_template_dir: /etc/ansible/templates/
    wg_server_address: wg_server_ip/url
    wg_private_key: privatekey-client
    wg_public_key: publickey-server
    wg_listen_port: 51820
    wg_client_port: 51820
    wg_client_address: 192.168.100.3/24
Be sure to set:
wg_server_address - ip / url wireguard server
wg_private_key , wg_public_key - client's private key and public server
The rest can not be changed or changed, depending on how the WireGuard server is configured
Run the playbook
ansible-playbook playbooks/hirkn.ymlAfter the playbook is executed, the router will immediately begin to bypass the locks through your wireguard server.
Why not bgp?
Under openwrt there are two utilities implementing BGP - quagga and bird. I could not get Quagg to get data from an antifilter. Bird made friends with the service with a half-ping, but unfortunately I did not understand how to make the default subnet add the interface. (I will be glad to know how this can be implemented).
In the comments to similar articles, I saw that the routers of people "thought about" for a while, when they pushed the lists into the routing table. With the implementation through ipset, my Xiaomi mi 3G thinks for 2 seconds (Asus rt-n16 for 5 seconds) when you feed him a list of 15 thousand subnets. With further work, the load on the processor did not notice.
All materials are not a call to action and are presented for familiarization with the functionality of Linux OS.