Deploy Kubernetes Cluster on OpenStack with Kubespray
- Transfer

Kubernetes has quickly become the standard for delivering and scaling containerized applications and managing them. This is a very flexible and versatile open source solution. It has extensive documentation, and it is not always easy to find the right section in it. Therefore, Kubernetes is so difficult to master. After planning the cluster, you still need to install it, but here, too, everything is not going smoothly. Therefore, there are deployment tools, such as Kubespray, which simplify the work. I’ll talk about automatically deploying a Kubernetes cluster using Kubespray in an OpenStack cloud (Open Telekom Cloud).
For automatic deployment of Kubernetes, Kubespray uses the Ansible application initialization, configuration, and delivery tool. And Kubespray provides a library for initializing resources on different cloud platforms. To do this, use the "infrastructure as code" tool Terraform. The Kubespray project now supports Terraform for AWS, OpenStack, and Packet clouds. This tool is used in conjunction with the OpenStack library to provide the infrastructure in this scenario.
Requirements
First, let's look at the deployment prerequisites. They are divided into two categories: requirements for Kubespray and requirements for the provider library.
Kubespray needs the following components:
- Python 2.7 (or higher)
- Ansible 2.7 (or higher)
- Jinja 2.9 (or higher)
OpenStack Provider Library Requirements:
- Terraform 0.11 (or higher)
To install Terraform you need to download the appropriate package from the Hashicorp website and unzip it. Then the path to the unpacked file must be saved in the PATH variable. Use the terraform command to check if everything is installed. Find out more here.
Depending on the operating system, Ansible can be installed with a couple of commands. See the Ansible documentation. Here I use Ubuntu and install Ansible as follows.
sudo apt update
sudo apt install ansible
Then you need to install the Kubespray dependencies. This is done by the following command. But first you need to clone the repository.
git clone https://github.com/kubernetes-sigs/kubespray
sudo pip install -r requirements.txt
To use Open Telekom Cloud, configure the access data using .ostackrc in the root directory and load the environment variables.
Cluster planning
Kubernetes is very flexible, so the cluster can be adapted to your needs. Here we will not consider different options for clusters. You can read about this in the Kubernetes documentation in Creating a custom cluster from scratch. For example, we will create a cluster from the wizard with etcd and two work nodes. The cluster will not have a floating IP, so it will be unavailable from the Internet.
We also need to choose CNI (Container Network Interface). There are several options (cilium, calico, flannel, weave net, etc.), but we will take a flannel, which does not need to be configured. Calico will work, but you will need to configure OpenStack Neutron ports for subnets of services and pods.
To manage the clusters in the Kubernetes dashboard after deployment, we need to install this dashboard.
Cluster Configuration
Run the following commands in the repository directory, specifying the desired name in the $ CLUSTER variable.
cp -LRp contrib/terraform/openstack/sample-inventory \
inventory/$CLUSTER
cd inventory/$CLUSTER
ln -s ../../contrib/terraform/openstack/hosts
ln -s ../../contrib
After executing the commands, edit the inventory / $ CLUSTER / cluster.tf file.
# your Kubernetes cluster name here
cluster_name = "k8s-test-cluster"
az_list=["eu-de-01", "eu-de-02"]
dns_nameservers=["100.125.4.25", "8.8.8.8"]
# SSH key to use for access to nodes
public_key_path = "~/.ssh/id_rsa.pub"
# image to use for bastion, masters, standalone etcd instances, and nodes
image = "Standard_CentOS_7_latest"
# user on the node (ex. core on Container Linux, ubuntu on Ubuntu, etc.)
ssh_user = "linux"
# 0|1 bastion nodes
number_of_bastions = 0
flavor_bastion = "s2.xlarge.4"
# standalone etcds
number_of_etcd = 0
flavor_etcd = "s2.xlarge.4"
# masters
number_of_k8s_masters = 0
number_of_k8s_masters_no_etcd = 0
number_of_k8s_masters_no_floating_ip = 1
number_of_k8s_masters_no_floating_ip_no_etcd = 0
flavor_k8s_master = "s2.xlarge.4"
# nodes
number_of_k8s_nodes = 0
number_of_k8s_nodes_no_floating_ip = 2
flavor_k8s_node = "s2.xlarge.4"
# GlusterFS
# either 0 or more than one
#number_of_gfs_nodes_no_floating_ip = 1
#gfs_volume_size_in_gb = 150
# Container Linux does not support GlusterFS
image_gfs = "Standard_CentOS_7_latest"
# May be different from other nodes
#ssh_user_gfs = "linux"
#flavor_gfs_node = "s2.xlarge.4"
# networking
network_name = "k8s-test-network"
external_net = "Externel_Network_ID"
subnet_cidr = "192.168.100.0/24"
floatingip_pool = "admin_external_net"
bastion_allowed_remote_ips = ["0.0.0.0/0"]
Description of variables read here. In this example, we will create a cluster with one master and two Kubernetes work nodes based on the latest version of CentOS 7 and s2.xlarge.4. etcd also install on the wizard.
Infrastructure deployment
Now we are ready to deploy the cluster infrastructure using Terraform. The figure shows what the infrastructure looks like after deployment. Details below.

To start Terraform deployment, go to the inventory / $ CLUSTER / directory and run the following commands. First, install the necessary plugins. To do this, we need the init argument and the path to the plugins.
terraform init ../../contrib/terraform/openstackThis operation is very fast. Terraform is now ready to deploy the infrastructure with the apply argument.
terraform apply -var-file=cluster.tf ../../contrib/terraform/openstackAfter a few seconds, Terraform should show a similar result, and instances will be available for work.
Apply complete! Resources: 3 added, 0 changed, 0 destroyed.To check server availability, run the following Ansible command, and then we will go to the root folder of the repository.
$ ansible -i inventory/$CLUSTER/hosts -m ping all
example-k8s_node-1 | SUCCESS => {
    "changed": false,
    "ping": "pong"
}
example-etcd-1 | SUCCESS => {
    "changed": false,
    "ping": "pong"
}
example-k8s-master-1 | SUCCESS => {
    "changed": false,
    "ping": "pong"
}
Kubernetes Cluster Deployment
The infrastructure is deployed, now you need to install the Kubernetes cluster. First, configure the cluster variables in the file inventory / $ CLUSTER / group_vars / all / all.yml. Here you need to set the value of cloud_provider to openstack, and for bin_dir, the path where the files will be installed. In our example, we use the following configuration.
## Directory where etcd data stored
etcd_data_dir: /var/lib/etcd
## Directory where the binaries will be installed
bin_dir: /usr/local/bin
## The access_ip variable is used to define how other nodes should access
## the node.  This is used in flannel to allow other flannel nodes to see
## this node for example.  The access_ip is really useful AWS and Google
## environments where the nodes are accessed remotely by the "public" ip,
## but don't know about that address themselves.
#access_ip: 1.1.1.1
## External LB example config
## apiserver_loadbalancer_domain_name: "elb.some.domain"
#loadbalancer_apiserver:
#  address: 1.2.3.4
#  port: 1234
## Internal loadbalancers for apiservers
#loadbalancer_apiserver_localhost: true
## Local loadbalancer should use this port instead, if defined.
## Defaults to kube_apiserver_port (6443)
#nginx_kube_apiserver_port: 8443
### OTHER OPTIONAL VARIABLES
## For some things, kubelet needs to load kernel modules.  For example, dynamic kernel services are needed
## for mounting persistent volumes into containers.  These may not be loaded by preinstall kubernetes
## processes.  For example, ceph and rbd backed volumes.  Set to true to allow kubelet to load kernel
## modules.
#kubelet_load_modules: false
## Upstream dns servers used by dnsmasq
#upstream_dns_servers:
#  - 8.8.8.8
#  - 8.8.4.4
## There are some changes specific to the cloud providers
## for instance we need to encapsulate packets with some network plugins
## If set the possible values are either 'gce', 'aws', 'azure', 'openstack', 'vsphere', 'oci', or 'external'
## When openstack is used make sure to source in the openstack credentials
## like you would do when using nova-client before starting the playbook.
## Note: The 'external' cloud provider is not supported.
## TODO(riverzhang): https://kubernetes.io/docs/tasks/administer-cluster/running-cloud-controller/#running-cloud-controller-manager
cloud_provider: openstack
## Set these proxy values in order to update package manager and docker daemon to use proxies
#http_proxy: ""
#https_proxy: ""
## Refer to roles/kubespray-defaults/defaults/main.yml before modifying no_proxy
#no_proxy: ""
## Some problems may occur when downloading files over https proxy due to ansible bug
## https://github.com/ansible/ansible/issues/32750. Set this variable to False to disable
## SSL validation of get_url module. Note that kubespray will still be performing checksum validation.
#download_validate_certs: False
## If you need exclude all cluster nodes from proxy and other resources, add other resources here.
#additional_no_proxy: ""
## Certificate Management
## This setting determines whether certs are generated via scripts.
## Chose 'none' if you provide your own certificates.
## Option is  "script", "none"
## note: vault is removed
#cert_management: script
## Set to true to allow pre-checks to fail and continue deployment
#ignore_assert_errors: false
## The read-only port for the Kubelet to serve on with no authentication/authorization. Uncomment to enable.
#kube_read_only_port: 10255
## Set true to download and cache container
download_container: false
## Deploy container engine
# Set false if you want to deploy container engine manually.
#deploy_container_engine: true
## Set Pypi repo and cert accordingly
#pyrepo_index: https://pypi.example.com/simple
#pyrepo_cert: /etc/ssl/certs/ca-certificates.crt
Now configure the inventory / $ CLUSTER / group_vars / k8s-cluster / k8s-cluster.yml file. For the kube_network_plugin variable, set flannel or calico (you need to configure OpenStack Neutron ports ). We will have this flannel, which does not need to be configured. For the resolvconf_mode variable, set docker_dns. This value tells Kubespray to set the parameters of the Docker daemon. Below you see an example configuration for our cluster.
# Kubernetes configuration dirs and system namespace.
# Those are where all the additional config stuff goes
# the kubernetes normally puts in /srv/kubernetes.
# This puts them in a sane location and namespace.
# Editing those values will almost surely break something.
kube_config_dir: /etc/kubernetes
kube_script_dir: "{{ bin_dir }}/kubernetes-scripts"
kube_manifest_dir: "{{ kube_config_dir }}/manifests"
# This is where all the cert scripts and certs will be located
kube_cert_dir: "{{ kube_config_dir }}/ssl"
# This is where all of the bearer tokens will be stored
kube_token_dir: "{{ kube_config_dir }}/tokens"
# This is where to save basic auth file
kube_users_dir: "{{ kube_config_dir }}/users"
kube_api_anonymous_auth: true
## Change this to use another Kubernetes version, e.g. a current beta release
kube_version: v1.13.3
# kubernetes image repo define
kube_image_repo: "gcr.io/google-containers"
# Where the binaries will be downloaded.
# Note: ensure that you've enough disk space (about 1G)
local_release_dir: "/tmp/releases"
# Random shifts for retrying failed ops like pushing/downloading
retry_stagger: 5
# This is the group that the cert creation scripts chgrp the
# cert files to. Not really changeable...
kube_cert_group: kube-cert
# Cluster Loglevel configuration
kube_log_level: 2
# Directory where credentials will be stored
credentials_dir: "{{ inventory_dir }}/credentials"
# Users to create for basic auth in Kubernetes API via HTTP
# Optionally add groups for user
kube_api_pwd: "{{ lookup('password', credentials_dir + '/kube_user.creds length=15 chars=ascii_letters,digits') }}"
kube_users:
  kube:
    pass: "{{kube_api_pwd}}"
    role: admin
    groups:
      - system:masters
## It is possible to activate / deactivate selected authentication methods (basic auth, static token auth)
#kube_oidc_auth: false
#kube_basic_auth: false
#kube_token_auth: false
## Variables for OpenID Connect Configuration https://kubernetes.io/docs/admin/authentication/
## To use OpenID you have to deploy additional an OpenID Provider (e.g Dex, Keycloak, ...)
# kube_oidc_url: https:// ...
# kube_oidc_client_id: kubernetes
## Optional settings for OIDC
# kube_oidc_ca_file: "{{ kube_cert_dir }}/ca.pem"
# kube_oidc_username_claim: sub
# kube_oidc_username_prefix: oidc:
# kube_oidc_groups_claim: groups
# kube_oidc_groups_prefix: oidc:
# Choose network plugin (cilium, calico, contiv, weave or flannel)
# Can also be set to 'cloud', which lets the cloud provider setup appropriate routing
kube_network_plugin: flannel
# Setting multi_networking to true will install Multus: https://github.com/intel/multus-cni
kube_network_plugin_multus: false
# Kubernetes internal network for services, unused block of space.
kube_service_addresses: 10.233.0.0/18
# internal network. When used, it will assign IP
# addresses from this range to individual pods.
# This network must be unused in your network infrastructure!
kube_pods_subnet: 10.233.64.0/18
# internal network node size allocation (optional). This is the size allocated
# to each node on your network.  With these defaults you should have
# room for 4096 nodes with 254 pods per node.
kube_network_node_prefix: 24
# The port the API Server will be listening on.
kube_apiserver_ip: "{{ kube_service_addresses|ipaddr('net')|ipaddr(1)|ipaddr('address') }}"
kube_apiserver_port: 6443 # (https)
#kube_apiserver_insecure_port: 8080 # (http)
# Set to 0 to disable insecure port - Requires RBAC in authorization_modes and kube_api_anonymous_auth: true
kube_apiserver_insecure_port: 0 # (disabled)
# Kube-proxy proxyMode configuration.
# Can be ipvs, iptables
kube_proxy_mode: ipvs
# A string slice of values which specify the addresses to use for NodePorts.
# Values may be valid IP blocks (e.g. 1.2.3.0/24, 1.2.3.4/32).
# The default empty string slice ([]) means to use all local addresses.
# kube_proxy_nodeport_addresses_cidr is retained for legacy config
kube_proxy_nodeport_addresses: >-
  {%- if kube_proxy_nodeport_addresses_cidr is defined -%}
  [{{ kube_proxy_nodeport_addresses_cidr }}]
  {%- else -%}
  []
  {%- endif -%}
# If non-empty, will use this string as identification instead of the actual hostname
#kube_override_hostname: >-
#  {%- if cloud_provider is defined and cloud_provider in [ 'aws' ] -%}
#  {%- else -%}
#  {{ inventory_hostname }}
#  {%- endif -%}
## Encrypting Secret Data at Rest (experimental)
kube_encrypt_secret_data: false
# DNS configuration.
# Kubernetes cluster name, also will be used as DNS domain
cluster_name: cluster.local
# Subdomains of DNS domain to be resolved via /etc/resolv.conf for hostnet pods
ndots: 2
# Can be dnsmasq_kubedns, kubedns, coredns, coredns_dual, manual or none
dns_mode: coredns
# Set manual server if using a custom cluster DNS server
#manual_dns_server: 10.x.x.x
# Enable nodelocal dns cache
enable_nodelocaldns: False
nodelocaldns_ip: 169.254.25.10
# Can be docker_dns, host_resolvconf or none
resolvconf_mode: docker_dns
# Deploy netchecker app to verify DNS resolve as an HTTP service
deploy_netchecker: false
# Ip address of the kubernetes skydns service
skydns_server: "{{ kube_service_addresses|ipaddr('net')|ipaddr(3)|ipaddr('address') }}"
skydns_server_secondary: "{{ kube_service_addresses|ipaddr('net')|ipaddr(4)|ipaddr('address') }}"
dnsmasq_dns_server: "{{ kube_service_addresses|ipaddr('net')|ipaddr(2)|ipaddr('address') }}"
dns_domain: "{{ cluster_name }}"
## Container runtime
## docker for docker and crio for cri-o.
container_manager: docker
## Settings for containerized control plane (etcd/kubelet/secrets)
etcd_deployment_type: docker
kubelet_deployment_type: host
helm_deployment_type: host
# K8s image pull policy (imagePullPolicy)
k8s_image_pull_policy: IfNotPresent
# audit log for kubernetes
kubernetes_audit: false
# dynamic kubelet configuration
dynamic_kubelet_configuration: false
# define kubelet config dir for dynamic kubelet
#kubelet_config_dir:
default_kubelet_config_dir: "{{ kube_config_dir }}/dynamic_kubelet_dir"
dynamic_kubelet_configuration_dir: "{{ kubelet_config_dir | default(default_kubelet_config_dir) }}"
# pod security policy (RBAC must be enabled either by having 'RBAC' in authorization_modes or kubeadm enabled)
podsecuritypolicy_enabled: false
# Make a copy of kubeconfig on the host that runs Ansible in {{ inventory_dir }}/artifacts
# kubeconfig_localhost: false
# Download kubectl onto the host that runs Ansible in {{ bin_dir }}
# kubectl_localhost: false
# dnsmasq
# dnsmasq_upstream_dns_servers:
#  - /resolvethiszone.with/10.0.4.250
#  - 8.8.8.8
#  Enable creation of QoS cgroup hierarchy, if true top level QoS and pod cgroups are created. (default true)
# kubelet_cgroups_per_qos: true
# A comma separated list of levels of node allocatable enforcement to be enforced by kubelet.
# Acceptable options are 'pods', 'system-reserved', 'kube-reserved' and ''. Default is "".
# kubelet_enforce_node_allocatable: pods
## Supplementary addresses that can be added in kubernetes ssl keys.
## That can be useful for example to setup a keepalived virtual IP
# supplementary_addresses_in_ssl_keys: [10.0.0.1, 10.0.0.2, 10.0.0.3]
## Running on top of openstack vms with cinder enabled may lead to unschedulable pods due to NoVolumeZoneConflict restriction in kube-scheduler.
## See https://github.com/kubernetes-sigs/kubespray/issues/2141
## Set this variable to true to get rid of this issue
volume_cross_zone_attachment: false
# Add Persistent Volumes Storage Class for corresponding cloud provider ( OpenStack is only supported now )
persistent_volumes_enabled: false
## Container Engine Acceleration
## Enable container acceleration feature, for example use gpu acceleration in containers
# nvidia_accelerator_enabled: true
## Nvidia GPU driver install. Install will by done by a (init) pod running as a daemonset.
## Important: if you use Ubuntu then you should set in all.yml 'docker_storage_options: -s overlay2'
## Array with nvida_gpu_nodes, leave empty or comment if you dont't want to install drivers.
## Labels and taints won't be set to nodes if they are not in the array.
# nvidia_gpu_nodes:
#   - kube-gpu-001
# nvidia_driver_version: "384.111"
## flavor can be tesla or gtx
# nvidia_gpu_flavor: gtx
Finally, edit the inventory / $ CLUSTER / group_vars / k8s-cluster / addons.yml file and set dashboard_enabled to true to set up the dashboard. Configuration Example:
# Kubernetes dashboard
# RBAC required. see docs/getting-started.md for access details.
dashboard_enabled: true
# Helm deployment
helm_enabled: false
# Registry deployment
registry_enabled: false
# registry_namespace: kube-system
# registry_storage_class: ""
# registry_disk_size: "10Gi"
# Metrics Server deployment
metrics_server_enabled: false
# metrics_server_kubelet_insecure_tls: true
# metrics_server_metric_resolution: 60s
# metrics_server_kubelet_preferred_address_types: "InternalIP"
# Local volume provisioner deployment
local_volume_provisioner_enabled: false
# local_volume_provisioner_namespace: kube-system
# local_volume_provisioner_storage_classes:
#   local-storage:
#     host_dir: /mnt/disks
#     mount_dir: /mnt/disks
#   fast-disks:
#     host_dir: /mnt/fast-disks
#     mount_dir: /mnt/fast-disks
#     block_cleaner_command:
#       - "/scripts/shred.sh"
#       - "2"
#     volume_mode: Filesystem
#     fs_type: ext4
# CephFS provisioner deployment
cephfs_provisioner_enabled: false
# cephfs_provisioner_namespace: "cephfs-provisioner"
# cephfs_provisioner_cluster: ceph
# cephfs_provisioner_monitors: "172.24.0.1:6789,172.24.0.2:6789,172.24.0.3:6789"
# cephfs_provisioner_admin_id: admin
# cephfs_provisioner_secret: secret
# cephfs_provisioner_storage_class: cephfs
# cephfs_provisioner_reclaim_policy: Delete
# cephfs_provisioner_claim_root: /volumes
# cephfs_provisioner_deterministic_names: true
# Nginx ingress controller deployment
ingress_nginx_enabled: false
# ingress_nginx_host_network: false
# ingress_nginx_nodeselector:
#   node.kubernetes.io/node: ""
# ingress_nginx_tolerations:
#   - key: "node.kubernetes.io/master"
#     operator: "Equal"
#     value: ""
#     effect: "NoSchedule"
# ingress_nginx_namespace: "ingress-nginx"
# ingress_nginx_insecure_port: 80
# ingress_nginx_secure_port: 443
# ingress_nginx_configmap:
#   map-hash-bucket-size: "128"
#   ssl-protocols: "SSLv2"
# ingress_nginx_configmap_tcp_services:
#   9000: "default/example-go:8080"
# ingress_nginx_configmap_udp_services:
#   53: "kube-system/kube-dns:53"
# Cert manager deployment
cert_manager_enabled: false
# cert_manager_namespace: "cert-manager"
After changing the configuration, run ansible-playbook with our configuration by running the following command.
ansible-playbook --become -i inventory/$CLUSTER/hosts cluster.ymlAnsible выполняет несколько операций, и если все они завершаются успешно, кластер будет выглядеть, как на этом рисунке.

Тестирование
Для тестирования кластера войдите в мастер, переключитесь на root-пользователя и в kubectl выполните команду kubectl cluster-info, чтобы получить сведения о кластере. Вы увидите сведения о конечной точке мастера и сервисов в кластере. Если с кластером все нормально, создайте пользователя панели мониторинга Kubernetes с помощью следующих команд.
# Create service account
kubectl create serviceaccount cluster-admin-dashboard-sa
# Bind ClusterAdmin role to the service account
kubectl create clusterrolebinding cluster-admin-dashboard-sa \
--clusterrole=cluster-admin \
--serviceaccount=default:cluster-admin-dashboard-sa
# Parse the token
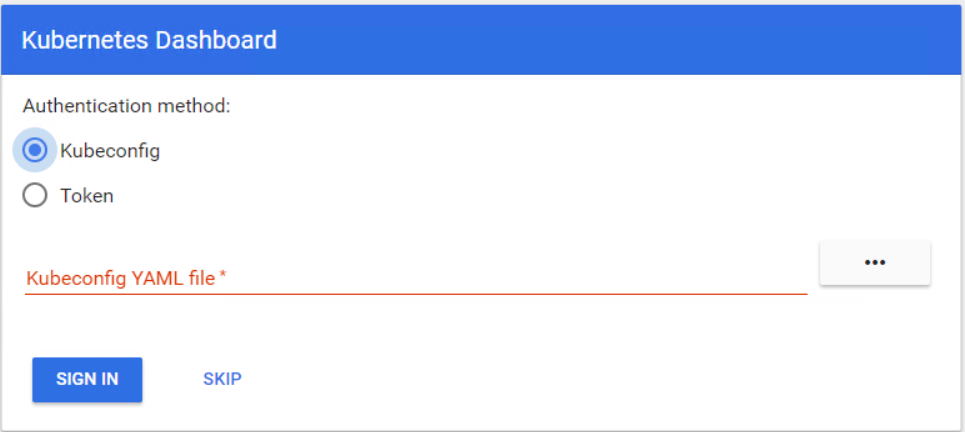
kubectl describe secret $(kubectl -n kube-system get secret | awk '/^cluster-admin-dashboard-sa-token-/{print $1}') | awk '$1=="token:"{print $2}'Теперь можно войти на панель мониторинга с помощью токена. Сначала нужно создать туннель к мастеру Kubernetes, потому что панель мониторинга все еще открыта для localhost на порте 8001. После этого можно получить доступ к панели по URL localhost:8001. Теперь выберите Token, введите токен и войдите.
You are ready to start working in the Kubernetes cluster. In this article, you saw how easy it is to deploy and configure a Kubernetes cluster in the OpenStack cloud.